Page 57 of 141
External devices57
Fast forwarding or rewindingTap and hold t or v to rewind or
fast forward.
Video menu To display the video menu, select
MENU in the interaction selector bar.
For a detailed description of the menu
3 54.
Page 58 of 141

58NavigationNavigationGeneral information.....................58
Usage .......................................... 60
Destination input ..........................66
Guidance ..................................... 71General information
The navigation system will reliably guide you to your destination. There
will be no need to read maps, even if
you have no local knowledge
whatsoever.
The current traffic situation is taken
into account in the route calculation.
For this purpose, the Infotainment
system receives traffic
announcements in the current
reception area via RDS-TMC.
The navigation system cannot,
however, take into account traffic
incidents, traffic regulations changed at short notice and hazards or
problems that arise suddenly (e.g.
road works).Caution
The usage of the navigation
system does not release the driver
from the responsibility for a
correct, vigilant attitude in road
traffic. The relevant traffic
regulations must always be
followed. If a navigation instruction contradicts traffic regulations, the
traffic regulations always apply.
Functioning of the navigation
system
The position and movement of the
vehicle are detected by the navigation
system using sensors. The travelled
distance is determined by the
vehicle's speedometer signal, turning movements on bends by a gyro
sensor. The position is determined by
the GPS satellites (Global Positioning System).
By comparing the sensor signals with the digital maps on the map SD card,
it is possible to determine the position with an accuracy of approx.
10 metres.
The system will also work with poor
GPS reception. However, the
accuracy of the determination of the
position will be reduced.
Page 59 of 141
, the route is
calculated from the current location to the destination selected.
Route")
Navigation59
After the entry of the destination
address or point of interest (nearest
petrol station, hotel, etc.), the route is
calculated from the current location to the destination selected.
Route guidance is provided by voice
output and an arrow, as well as with
the aid of a multi-colour map display.
Important information
Input order for destination addresses
The order in which the parts of an
address need to be entered is
dependent on the country where the
destination is located.
■ Albania, Andorra:
■ Austria, Belarus, Belgium, Bosnia- Herzegovina, Bulgaria, Croatia,
Czech Republic, Denmark,
Estonia, Finland, Greece, Hungary,
Italy, Liechtenstein, Lithuania,
Luxembourg, Macedonia,
Moldova, Monaco, Netherlands, Norway, Poland, Portugal,
Romania, Russia, San Marino,Serbia, Slovakia, Slovenia, Spain,
Sweden, Switzerland, Turkey,
Vatican City:
code>
■ France:
code>
■ Germany:
code>
or
■ Gibraltar, Ireland:
■ Great Britain:
or
■ Latvia, Ukraine:
■ Montenegro:
code>
TMC traffic information system and
dynamic route guidance
The TMC traffic information system
receives all current traffic information from TMC radio stations. This
information is included in the
calculation of the overall route. During this process, the route is planned sothat traffic problems related to pre-
selected criteria are avoided.
If there is a traffic problem during
active route guidance, depending on
the pre-settings, a message appears
as to whether the route should be
changed.
TMC traffic information is displayed in
the map display as symbols or as
detailed text on the TMC messages
menu.
Page 60 of 141
60Navigation
To be able to use TMC traffic
information, the system has to receive TMC stations in the relevant region.
The TMC traffic stations can be
selected in the navigation menu
3 60.
Map data
All required map data is stored within
the Infotainment system. To update
your map software via an SD card,
contact your Vauxhall Authorised
Repairer.
Usage Information on the map display
To display the navigation map,
press ; and then select the NAV
icon.Route guidance not active
The current location is indicated by a
vehicle icon.
After a timeout of approx.
15 seconds, the application tray and
the interaction selector bar disappear
to show a full screen view of the map.
To redisplay the application tray and
the interaction selector bar, tap
anywhere on the screen.
Route guidance active
Centre display:
Page 61 of 141

Navigation61
■ The map view is displayed.
■ The active route is indicated by a coloured line.
■ The moving vehicle is marked by a circle.
■ The next turning manoeuvre is indicated by an arrow symbol on
the right side of the screen.
■ Lane guidance is provided on the left side of the screen.
■ The arrival time is shown above the
arrow symbol.
■ The distance to the next turning manoeuvre is shown below the
arrow symbol.
Driver Information Centre, Sport
theme:
■ The name of the route you are currently on is displayed.
■ The next turning manoeuvre is indicated by an arrow symbol.
■ The distance to the next turning manoeuvre is displayed.
Map manipulation
Scrolling
To scroll the map, you may optionally:
■ Place your finger anywhere on the screen and move it up, down, left orright depending on the direction in
which you want to scroll.
■ Place two fingers on the touch pad and move them up, down, left or
right depending on the direction in
which you want to scroll.
The map moves accordingly
displaying a new section.
To return to the current location,
select RESET in the interaction
selector bar.
Centring
Tap on a desired location on the
screen. The map centres around this
location.
A red v is displayed at the respective
location and the corresponding
address is shown on a label.
Page 62 of 141

62Navigation
To return to the current location,
select RESET in the interaction
selector bar.
Zooming
To zoom in on a selected map
location, select ZOOM IN.
To zoom back out and display a larger area around the selected location,
select ZOOM OUT .
Overview button
During active route guidance, an
OVERVIEW screen button is
displayed in the interaction selector
bar.
To display an overview of the route
currently active on the map, select OVERVIEW .
The screen button changes to
RESET .
To return to the normal view, select
RESET .
Changing the map view
To toggle between the different map
views ( 3D View , Heading Up View ,
North Up View ), repeatedly select x
in the application tray.
Notice
The map view may also be adapted
via the navigation menu (see below).
Information on the current location Select MENU in the interaction
selector bar to display the navigation
menu.
Select Current Location to display the
respective submenu indicating details on the nearest address, the
coordinates, and Points of interest
( 3 66) around the current location.
Page 63 of 141

Navigation63
Nearest address
From this submenu, you may store
the nearest address to the system.
Select Nearest Address to display the
destination details view.
For a detailed description on how to
save an address
■ as or to a contact 3 31
■ as a favourite 3 27
Points of interest
From this submenu, you may start route guidance to one of the nearest
points of interest.
Select the desired point of interest.
The destination details view is
displayed.
Select Go.
For a detailed description on how to enter a destination 3 66.
Map view View
Select MENU in the interaction
selector bar and then select Map
View to display the respective
submenu.
Select the desired map view ( 3D
View , Heading Up View , North Up
View ).
Audio information
If Audio Information is activated,
audio control screen buttons are displayed in the interaction selector
bar of the map view.
Select MENU in the interaction
selector bar and then select Map
View to display the respective
submenu.
Set Audio Information to On or Off.Display mode
Select MENU in the interaction
selector bar and then select Map
View to display the respective
submenu.
Select Day / Night Mode to display the
respective submenu.
Depending on the external lighting
conditions, activate Day or Night .
If you wish the screen to adjust
automatically, activate Auto.
POI icons
Select MENU in the interaction
selector bar and then select Display
"Points of Interest" Icons to display
the respective submenu.
If POI Icons is activated, points of
interest around the current location or
along the route are displayed on the
map.
Set POI Icons to On or Off.
If POI Icons is set to On, select the
POI categories you wish to be
displayed.
Select Clear All to unselect all
categories.
Page 64 of 141

64Navigation
Navigation data management
Select MENU in the interaction
selector bar and then select Personal
Data .
A list of different data storage
locations of the navigation application is displayed.
Contacts list
Select Contacts to display the
respective submenu.Deleting all entries
To delete all entries in the contacts
list, select Delete All Entries . You are
prompted with a message.
Confirm the message to delete the entire contacts list.Editing the contacts list
Select Edit Contacts List to display
the contacts list.
For a detailed description on editing the contacts list 3 31.
Recent destinations list
Select Recent Destinations to display
the respective submenu.
Deleting all destinations
To delete all entries in the recent
destinations list, select Delete All
Destinations . You are prompted with
a message.
Confirm the message to delete the entire recent destinations list.Deleting individual destinations
Select Delete Individual Destinations
to display the recent destinations list.
To delete a destination, select ─ next
to the respective destination. You are prompted with a message.
Confirm the message to delete the
destination.
Downloaded POIs
Select My POIs to display the
respective submenu.
POIs which were previously
downloaded to the system may be
deleted. The other POIs remain within
the system.
Deleting all downloaded POIs
To delete all entries in the contacts
list, select Delete All My POIs . You
are prompted with a message.Confirm the message to delete the
entire POIs list.Deleting categories
Select Delete Individual Categories to
display a list of POI categories.
To delete a category, select ─ next to
the respective category. You are
prompted with a message.
Confirm the message to delete the
category.
Uploading destination data to a USB
device
For later use, e.g. in other cars, you
can store the vehicle contacts list and
POIs previously downloaded (see
"Creating and downloading user
defined POIs" below) on a USB
device:
Select Upload Saved Locations .
The contacts list and POI data is stored on the connected USB device
in the folders "F:\myContacts"
respective "F:\myPOIs", where "F:\" is
the root folder of the USB device.
 1
1 2
2 3
3 4
4 5
5 6
6 7
7 8
8 9
9 10
10 11
11 12
12 13
13 14
14 15
15 16
16 17
17 18
18 19
19 20
20 21
21 22
22 23
23 24
24 25
25 26
26 27
27 28
28 29
29 30
30 31
31 32
32 33
33 34
34 35
35 36
36 37
37 38
38 39
39 40
40 41
41 42
42 43
43 44
44 45
45 46
46 47
47 48
48 49
49 50
50 51
51 52
52 53
53 54
54 55
55 56
56 57
57 58
58 59
59 60
60 61
61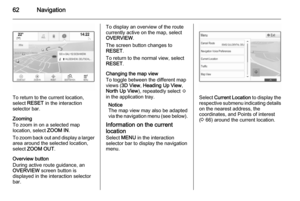 62
62 63
63 64
64 65
65 66
66 67
67 68
68 69
69 70
70 71
71 72
72 73
73 74
74 75
75 76
76 77
77 78
78 79
79 80
80 81
81 82
82 83
83 84
84 85
85 86
86 87
87 88
88 89
89 90
90 91
91 92
92 93
93 94
94 95
95 96
96 97
97 98
98 99
99 100
100 101
101 102
102 103
103 104
104 105
105 106
106 107
107 108
108 109
109 110
110 111
111 112
112 113
113 114
114 115
115 116
116 117
117 118
118 119
119 120
120 121
121 122
122 123
123 124
124 125
125 126
126 127
127 128
128 129
129 130
130 131
131 132
132 133
133 134
134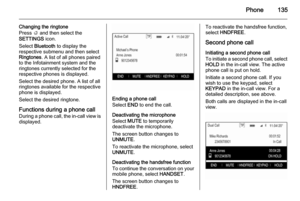 135
135 136
136 137
137 138
138 139
139 140
140
