Page 145 of 442

05 Loading and storage
05
143
Loading - long load
To simplify loading (p. 142) in the cargo area, the rear seat backrest can be folded down.The passenger seat backrest can also be folded for an extra long load2
.
Lowering the rear seat backrestTo simplify loading in the cargo area, the rear seat backrest can be folded down, see Seats,rear (p. 74).
Roof load
The load carriers recommended for roof loads are the ones developed by Volvo. This is inorder to avoid damage to the car and in orderto achieve the maximum possible safety dur-ing a journey. Carefully follow the installation instructions supplied with the carriers.
• Check periodically that the load carriers and load are properly secured. Lash theload securely with retaining straps.
• Distribute the load evenly over the loadcarriers. Put the heaviest objects at thebottom.
• The size of the area exposed to the wind,and therefore fuel consumption, increasewith the size of the load.
• Drive gently. Avoid quick acceleration,heavy braking and hard cornering.
WARNING
The car's centre of gravity and driving cha- racteristics are altered by roof loads. Forinformation about the maximum allowableload on the roof, including load carriersand any space box, Weights (p. 390).
Related information
•
Loading (p. 142)
Load retaining eyelets
The folding load retaining eyelets are used to fasten straps in order to anchor items in thecargo area.
WARNING
Hard, sharp and/or heavy objects which protrude may cause injury under violentbraking. Always secure large and heavy objects with a seatbelt or cargo retaining straps.
Related information
• Loading (p. 142)
2
Only applies to comfort seats.
ProCarManuals.co’
Page 146 of 442

05 Loading and storage
05
144* Option/accessory, for more information, see Introduction.
Loading - bag holder
The bag holder keeps carrier bags in place and prevents them from overturning andspreading their contents across the cargoarea.
Bag holder under folding hatch in the floor.
1. Fold up the holder, which is part of the floor hatch.
2. Fasten the bags with strap and secure the carrying handle in the hooks.
Related information
• Loading (p. 142)
12 V electrical socket - cargo area*
The electrical socket can be used for various accessories designed for 12 V, e.g. displayscreens, music players and mobile phones.
Lower the cover to access the electrical socket. •The socket also provides voltage when the remote control key is not in the igni-tion switch.
IMPORTANT
Max. power takeoff is 10 A (120 W).
NOTE
Remember that using the electrical socket with the engine switched off involves therisk of discharging the car's battery.
NOTE
The compressor for temporary emergency puncture repair has been tested andapproved by Volvo. For information on theuse of Volvo's recommended temporaryemergency puncture repair (TMK), Emer-gency puncture repair (p. 333).
Related information
• Tunnel console - 12 V-sockets (p. 141)
ProCarManuals.co’
Page 147 of 442

05 Loading and storage
05
}}
* Option/accessory, for more information, see Introduction.145
Safety net*
A safety net prevents loads from being thrown forward in the passenger compartment in theevent of sudden braking.
Storage space, safety net cassettes.
A rollable safety net comprising two cassettes has a storage space under the cargo areafloor hatch.
Securing the net cassettesA rollable safety net comprising two cassetteshas a storage space under the cargo areafloor hatch.
The two-part safety net cassette is secured on the rear of the backrest. The narrowestcassette is secured on the left-hand side (seen from the tailgate).
1. Fold the rear seat's backrest forward, see Seats, rear (p. 74).
2. Align the cassette's anchor rails in front of the backrest attachment lugs
.
3. Slide the cassette into the attachment lugs
.
4. Fold back and lock the backrests.
• Removing the cassette takes place in reverse order.
Using the safety net
Pull the net up from the cassettes. The net is self-locking after about 1 minute if the rearseat's backrests are raised.
Pull up the right-hand section of the net using its strap.
Insert the rod in the mounting on the right-hand side and then press it forward– the rod locks in with a click.
Pull out the rod's telescope section and click it in on the other side.
Pull up the left-hand safety net and hook it into the rod.
• Folding up takes place in reverse order.
The net can also be used when the rearseat's backrests are folded forward.
ProCarManuals.co’
Page 148 of 442

||
05 Loading and storage
05
146* Option/accessory, for more information, see Introduction.
Removing the net cassettes1. Roll the safety nets into the cassettes in
accordance with the procedure in the section entitled "Using the safety net",but in reverse.
2. Fold the whole backrest forward.
3. Slide the cassettes out until they loosen from the anchor rails.
Store the cassettes in their compartment under the cargo area floor hatch.
WARNING
Loads in the luggage compartment must be anchored well, and also using a cor-rectly fitted safety net.
Related information
• Loading (p. 142)
• Safety grille (p. 146)
Safety net* combined with cargo cover
A safety net prevents loads from being thrown
forward in the passenger compartment in the event of sudden braking.
Puller-straps for raising the net.
The safety net can also be raised from the rear seat when the cargo cover is extended. Follow the procedure described in the section "Using the safety net" (p. 145). The straps forfolding up are located by the arrows.
Related information
• Safety net* (p. 145)
• Loading (p. 142)
• Load retaining eyelets (p. 143)
Safety grille
A safety grille prevents loads or pets from being thrown forward in the passenger com-partment in the event of sudden braking.
Folding upTake hold of the bottom of the safety grille and pull back/up.
IMPORTANT
The protective grille cannot be folded up or down when a cargo cover is fitted.
Fitting/removalThe safety grille is normally permanently installed in the car because it can easily befolded up in the roof and so be out of the wayif a longer cargo area is required. However, if
ProCarManuals.co’
Page 149 of 442

05 Loading and storage
05
* Option/accessory, for more information, see Introduction.147
desired, the safety grille can be dismantled and removed from the car. For information about the tools required and methods for fitting/removal, see the installa- tion instructions
3
that were included with the
initial purchase. For safety reasons, the safety grille must always be correctly fastened and securedwhen being refitted.
Related information
• Safety net* (p. 145)
• Loading (p. 142)
• Load retaining eyelets (p. 143)
Cargo cover
Pull the cargo cover over the load and hook it into the recesses at the cargo area's rearposts.
IMPORTANT
The protective grille cannot be folded up or down when the cargo cover is fitted.
Attaching the cargo coverMove one end piece of the cover into the recess on the side panel.
Move the other end piece into the corres- ponding recess.
Press both sides in. A "click" should be audible and the red marking should dis-appear.
> Check that both end pieces are
locked.
Removing the cargo cover1. Press in one end piece button and lift it out.
2. Carefully angle the cover up/out and the other end piece loosens automatically.
Lowering the cargo cover's rear sealing disc
In its rolled-in position, the cargo cover's rear sealing disc protrudes horizontally into thecargo area when it is fitted.
–Pull the sealing disc back gently, free from its support shelves, and lower.
Related information
• Loading (p. 142)
• Loading - long load (p. 143)
3
Installation instructions no. 30756681.
ProCarManuals.co’
Page 150 of 442
L O C K S A N D A L A R M
ProCarManuals.co’
Page 151 of 442

06 Locks and alarm
06
* Option/accessory, for more information, see Introduction.149
Remote control key with key blade
The remote control key is used to start the car and for locking and unlocking. It contains adetachable key blade (p. 155) made of metal.The visible section is available in two versionsso that it is possible to distinguish betweenthe remote control keys. The car is supplied with 2 remote control keys or PCCs* (Personal Car Communicator). Additional remote control keys can be ordered - up to 6 can be programmed andused for the same car.
WARNING
If there are children in the car: Remember to switch off the supply to the power windows and sunroof by removingthe remote control key if the driver leavesthe car.
Remote control key with PCC (p. 153) has increased functionality compared with theremote control key, see PCC* - unique func-tions (p. 153).
Related information
• Remote control key - functions (p. 151)
Remote control key - losing
If you lose a remote control key then a new one can be ordered at a workshop - anauthorised Volvo workshop is recommended. The remaining remote control keys must be taken to the Volvo workshop. The code of themissing remote control key must be erasedfrom the system as a theft prevention meas-ure. The current number of keys registered tothe car can be checked in the menu systemMY CAR
. For a description of the menu sys-
tem, see MY CAR (p. 103).
Related information
• Remote control key - functions (p. 151)
Key memory*
The key memory in the remote control key (p. 149) means that certain settings in the car canbe individually adapted for different people. The key memory function is available in com- bination with power seat and power rearviewand door mirrors. Settings for door mirrors,driver's seat and steering force can be savedin the key memory.
Key memory – door mirrors and driver's
seat
The settings are automatically connected toeach respective remote control key, see Keymemory* in remote control key (p. 74) andAdjustable steering force* (p. 257). Afterlocking with the remote control key the set-ting of the combined instrument panel'stheme is also saved in the key, see MY CAR(p. 103). The function can be activated/deactivated in the menu system MY CAR. For a description
of the menu system, see MY CAR (p. 103). For cars with the Keyless drive function, see Keyless drive* (p. 159).
ProCarManuals.co’
Page 152 of 442

06 Locks and alarm
06
150* Option/accessory, for more information, see Introduction.
Indication locking/unlocking - adjusting
When the car is locked or unlocked using the remote control key (p. 149) the direction indi-cators confirm that locking/unlocking wascorrectly performed.
• Locking - one flash and the door mirrors are folded 1
in.
• Unlocking - two flashes and the door mir-rors are folded 1
out.
After locking the indication is only given if all locks are activated once the doors have beenclosed.
Selecting the functionDifferent options for indicating locking/unlocking with light can be set in the car'smenu system MY CAR. For a description of
the menu system, see MY CAR (p. 103).
Related information
• Keyless drive* (p. 159)
• Lock indicator (p. 150)
• Alarm indicator (p. 172)
Lock indicator
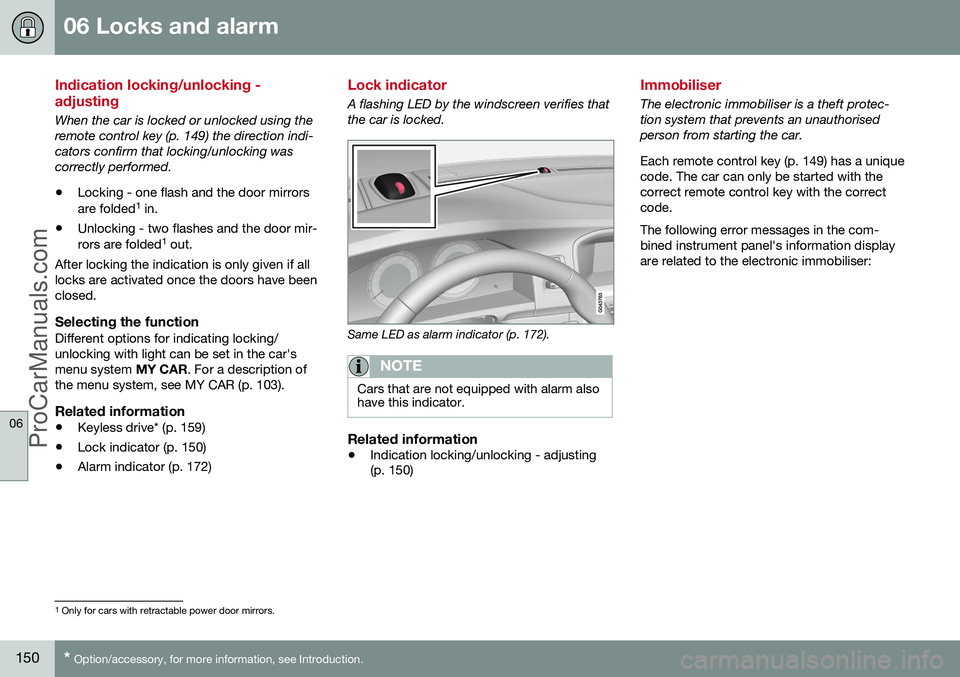
A flashing LED by the windscreen verifies that the car is locked.
Same LED as alarm indicator (p. 172).
NOTE
Cars that are not equipped with alarm also have this indicator.
Related information
•Indication locking/unlocking - adjusting (p. 150)
Immobiliser
The electronic immobiliser is a theft protec- tion system that prevents an unauthorisedperson from starting the car. Each remote control key (p. 149) has a unique code. The car can only be started with thecorrect remote control key with the correctcode. The following error messages in the com- bined instrument panel's information displayare related to the electronic immobiliser:
1
Only for cars with retractable power door mirrors.
ProCarManuals.co’