2014 SUBARU TRIBECA automatic transmission fluid
[x] Cancel search: automatic transmission fluidPage 8 of 426
&Abbreviation list
You will find several abbreviations in thismanual. The meanings of the abbrevia-tions are shown in the following list.
Abbreviation Meaning
A/C Air conditioner
A/ELRAutomatic/Emergency lockingretractor
ABSAnti-lock brake system
AKI Anti knock index
ALR Automatic locking retractor
AT Automatic transmission
ATF Automatic transmission fluid
AWD All-wheel drive
DRL Daytime running light
EBDElectronicbrake force distri-bution
ELR Emergency locking retractor
GAW Gross axle weight
GAWR Gross axle weight rating
GVW Gross vehicle weight
GVWRGross vehicle weight rating
HID Highintensity discharge
INT Intermittent
LATCHLower anchors and tethers forchildren
Abbreviation Meaning
LED Light emitting diode
MIL Malfunction indicator light
MMTMethylcyclopentadienyl man-ganese tricarbonyl
OBD On-board diagnostics
RON Research octane number
SRSSupplemental restraint sys-tem
TIN Tire identification number
TPMSTire pressure monitoring sys-tem
VDCVehicle dynamics control
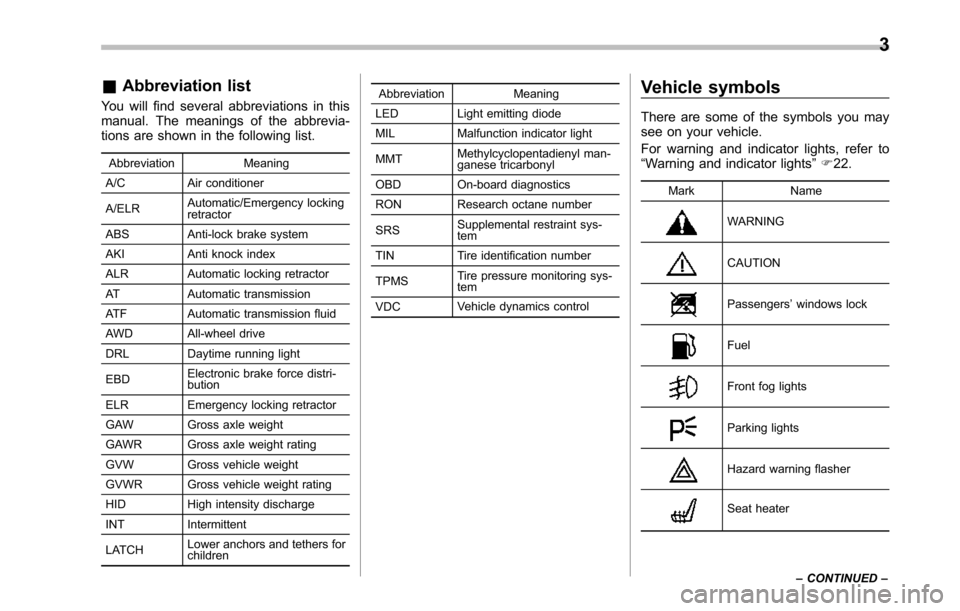
Vehicle symbols
There are some of the symbols you maysee on your vehicle.
For warning and indicator lights, refer to“Warning and indicator lights”F22.
Mark Name
WARNING
CAUTION
Passengers’windows lock
Fuel
Front fog lights
Parking lights
Hazard warning flasher
Seat heater
3
–CONTINUED–
Page 146 of 426
!If the light is blinking
If the light is blinking while driving, anengine misfire condition has been de-tected which may damage the emissioncontrol system.
To prevent serious damage to the emis-sion control system, you should do thefollowing.
.Reduce vehicle speed.
.Avoid hard acceleration.
.Avoid steepuphill grades.
.Reduce the amount of cargo, if possi-ble.
.Stop towing a trailer as soon aspossible.
The CHECK ENGINE warning light maystop blinking and illuminate steadily afterseveral drivingtrips. You should have yourvehicle checked by an authorizedSUBARU dealer immediately.
&Charge warning light
If this light illuminates when the engine isrunning, it may indicate that the chargingsystem is not working properly.
If the light illuminates while driving or doesnot turn off after the engine starts, stop theengine at the first safe opportunity andcheck the alternator belt. If the belt isloose, broken or if the belt is in good
condition but the light remains illuminated,contact your nearest SUBARU dealerimmediately.
&Oil pressure warning
light
CAUTION
Do not operate the engine with theoil pressure warning light illumi-nated. This may cause serious en-gine damage.
If this light illuminates when the engine isrunning, it may indicate that the engine oilpressureis low and the lubricating systemis not working properly.
If the light illuminates while driving or doesnot turnoff after the engine starts, stop theengine at the first safe opportunity andcheck the engine oil level. If the oil level islow, add oil immediately. If the engine oil isat the proper level but the light remainsilluminated, contact your nearestSUBARU dealer immediately.
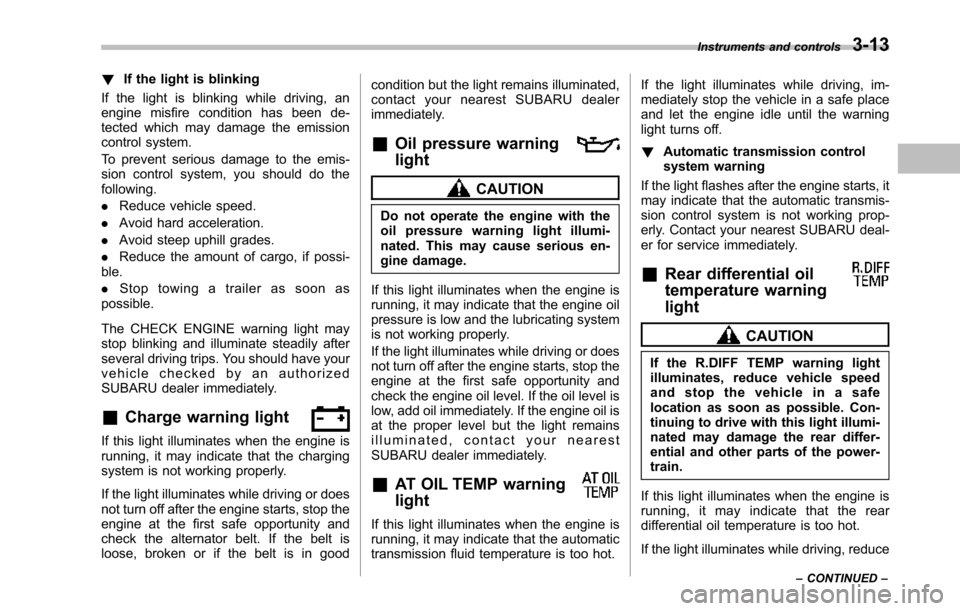
&AT OIL TEMP warning
light
If this light illuminates when the engine isrunning, it may indicate that the automatictransmission fluid temperature is too hot.
If the light illuminates while driving, im-mediately stop the vehicle in a safe placeand let the engine idle until the warninglight turns off.
!Automatic transmission controlsystem warning
If the light flashes after the engine starts, itmay indicate that the automatic transmis-sion control system is not working prop-erly. Contact your nearest SUBARU deal-er for service immediately.
&Rear differential oil
temperature warning
light
CAUTION
If the R.DIFF TEMP warning lightilluminates, reduce vehicle speedand stop the vehicle in a safelocation as soon as possible. Con-tinuing to drive with this light illumi-nated may damage the rear differ-ential and other parts of the power-train.
If this light illuminates when the engine isrunning, it may indicate that the reardifferential oil temperature is too hot.
If the light illuminates while driving, reduce
Instruments and controls3-13
–CONTINUED–
Page 169 of 426
3-36Instruments and controls
speed is low; shorter when the vehiclespeed is high).
When you subsequently move the selectlever of the automatic transmission to the“R”position, the rear wiper will switch tocontinuous operation. When you move theselect lever from the“R”position to someother position, the rear wiper will return tointermittent operation.
!Washer
To wash the rear window while the rearwiperis operating, turn the knob on theend of the wiper control lever upward tothe“”position. The washer fluid spraysuntil you release the knob.
To wash the rear window when the rearwiper is not in use, turn the knob on theend of the wiper control lever downward tothe“”position. The washer fluid spraysand the wiper operates until you releasetheknob.
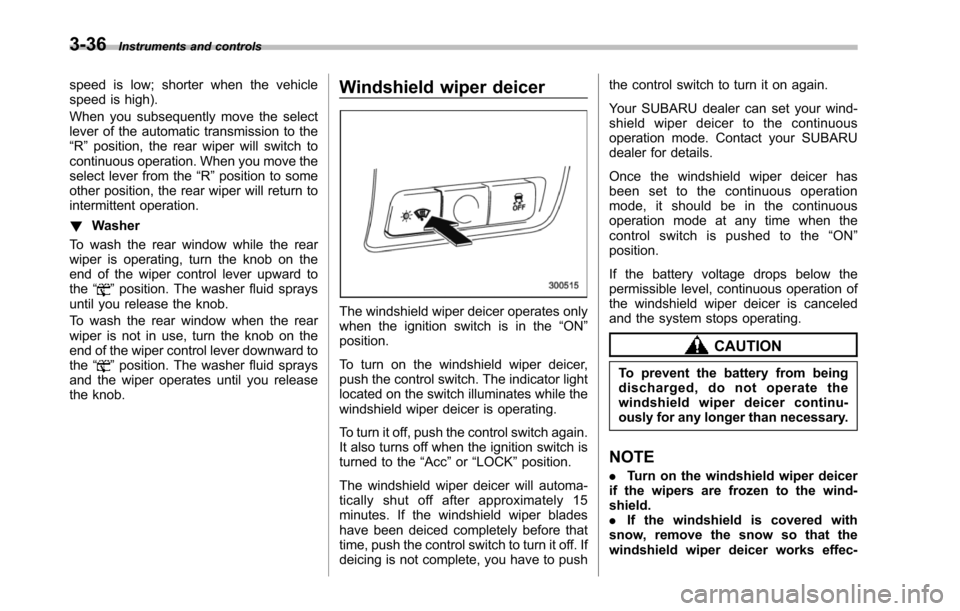
Windshield wiper deicer
The windshield wiper deicer operates onlywhen the ignition switch is in the“ON”position.
To turn on the windshield wiper deicer,push the control switch. The indicator lightlocated on the switch illuminates while thewindshield wiper deicer is operating.
To turn it off, push the control switch again.It also turns off when the ignition switch isturned to the“Acc”or“LOCK”position.
The windshield wiper deicer will automa-tically shut off after approximately 15minutes. If the windshield wiper bladeshave been deiced completely before thattime, push the control switch to turn it off. Ifdeicing is not complete, you have to push
the control switch to turn it on again.
Your SUBARU dealer can set your wind-shield wiper deicer to the continuousoperation mode. Contact your SUBARUdealer for details.
Once the windshield wiper deicer hasbeen set to the continuous operationmode, it should be in the continuousoperation mode at any time when thecontrol switch is pushed to the“ON”position.
If the battery voltage drops below thepermissible level, continuous operation ofthe windshield wiper deicer is canceledand the system stops operating.
CAUTION
To prevent the battery from beingdischarged, do not operate thewindshield wiper deicer continu-ously for any longer than necessary.
NOTE
.Turn on the windshield wiper deicerif the wipers are frozen to the wind-shield..If the windshield is covered withsnow, remove the snow so that thewindshield wiper deicer works effec-
Page 259 of 426
7-12Starting and operating
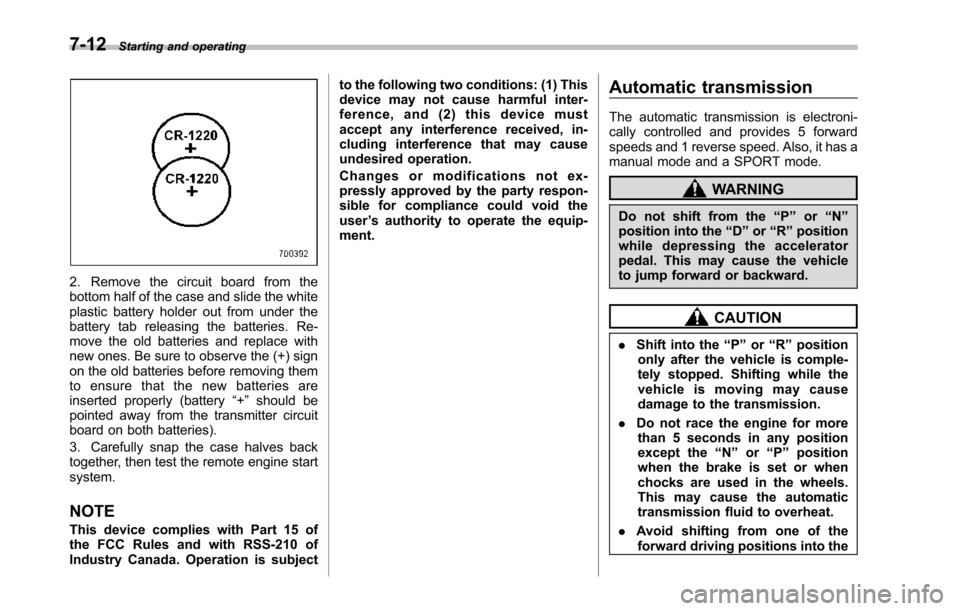
2. Remove the circuit board from thebottom half of the case and slide the whiteplastic battery holder out from under thebattery tab releasing the batteries. Re-move the old batteries and replace withnew ones. Be sure to observe the (+) signon the old batteries before removing themto ensure that the new batteries areinserted properly (battery“+”should bepointed away from the transmitter circuitboard on both batteries).
3. Carefully snap the case halves backtogether, then test the remote engine startsystem.
NOTE
This device complies with Part 15 ofthe FCC Rules and with RSS-210 ofIndustry Canada. Operation is subject
to the following two conditions: (1) Thisdevice may not cause harmful inter-ference, and (2) this device mustaccept any interference received, in-cluding interference that may causeundesired operation.
Changes or modifications not ex-pressly approved by the party respon-sible for compliance could void theuser’s authority to operate the equip-ment.
Automatic transmission
The automatic transmission is electroni-cally controlled and provides 5 forwardspeeds and 1 reverse speed. Also, it has amanual mode and a SPORT mode.
WARNING
Do not shift from the“P”or“N”position into the“D”or“R”positionwhile depressing the acceleratorpedal.This may cause the vehicleto jump forward or backward.
CAUTION
.Shift into the“P”or“R”positiononly after the vehicle is comple-tely stopped. Shifting while thevehicle is moving may causedamage to the transmission.
.Do not race the engine for morethan 5 seconds in any positionexcept the“N”or“P”positionwhen the brake is set or whenchocks are used in the wheels.This may cause the automatictransmission fluid to overheat.
.Avoid shifting from one of theforward driving positions into the
Page 260 of 426
“R”position or vice versa untilthe vehicle has completelystopped. Such shifting maycause damage to the transmis-sion.
.When parking the vehicle, firstsecurely apply the parking brakeand then place the select lever inthe“P”position. Avoid parkingfor a long time with the selectlever in any other position asdoing so could result in a deadbattery.
NOTE
.When the engine coolant tempera-ture is still low, the automatic transmis-sion will upshift to higher enginespeeds than when the coolant tempera-ture is sufficiently high in order toshorten the warm-up time and improvedriveability. The gearshift timing willautomatically shift to the normal timingafter the engine has warmed up..Immediately after ATF (automatictransmission fluid) is replaced, youmay feel that the automatic transmis-sion operation is somewhat unusual.This results from invalidation of datawhich the on-board computer hascollected and stored in memory to
allow the transmission to shift at themost appropriate times for the currentcondition of your vehicle. Optimizedshifting will be restored as the vehiclecontinues to be driven for a while.
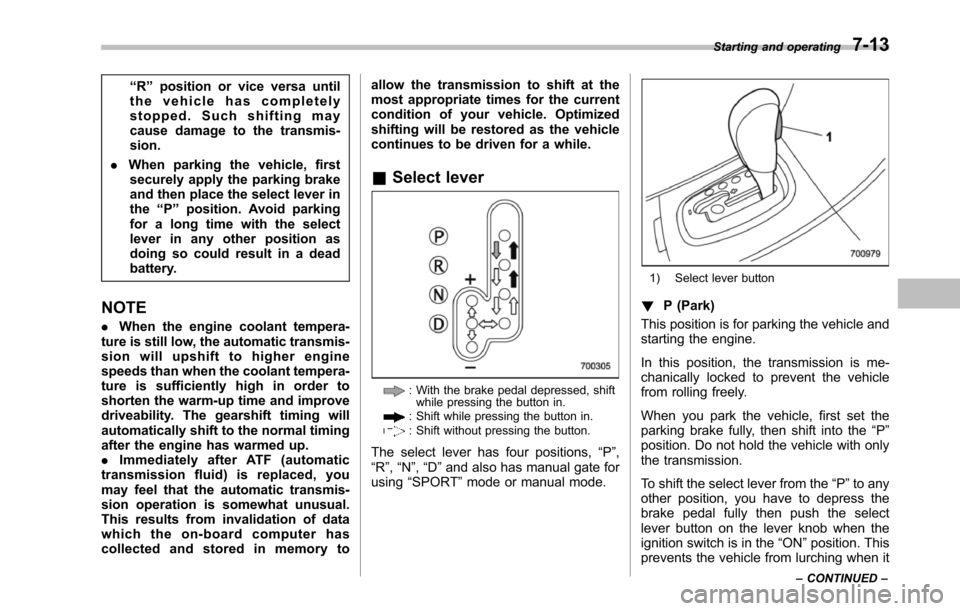
&Select lever
: With the brake pedal depressed, shiftwhile pressingthe button in.: Shift while pressing the button in.: Shift without pressing the button.
The select lever has four positions,“P”,“R”,“N”,“D”and also has manual gate forusing“SPORT”mode or manual mode.
1) Select lever button
!P (Park)
This position is for parking the vehicle andstarting the engine.
In this position, the transmission is me-chanically locked to prevent the vehiclefrom rolling freely.
When you park the vehicle, first set theparking brake fully, then shift into the“P”position. Do not hold the vehicle with onlythe transmission.
To shift the select lever from the“P”to anyother position, you have to depress thebrake pedal fully then push the selectlever button on the lever knob when theignition switch is in the“ON”position. Thisprevents the vehicle from lurching when it
Starting and operating7-13
–CONTINUED–
Page 264 of 426
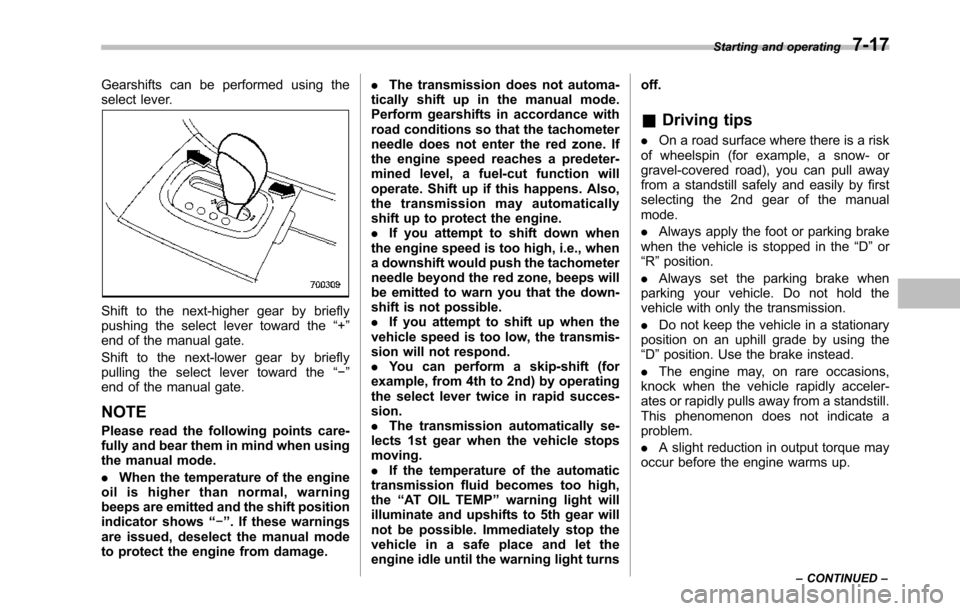
Gearshifts can be performed using theselect lever.
Shift to the next-higher gear by brieflypushing the select lever toward the“+”end of the manual gate.
Shift to the next-lower gear by brieflypulling the select lever toward the“!”end of the manual gate.
NOTE
Pleaseread the following points care-fully and bear them in mind when usingthe manual mode.
.When the temperature of the engineoil is higher than normal, warningbeeps are emitted and the shift positionindicator shows“!”. If these warningsare issued, deselect the manual modeto protect the engine from damage.
.The transmission does not automa-tically shift up in the manual mode.Perform gearshifts in accordance withroad conditions so that the tachometerneedle does not enter the red zone. Ifthe engine speed reaches a predeter-mined level, a fuel-cut function willoperate. Shift up if this happens. Also,the transmission may automaticallyshift up to protect the engine..If you attempt to shift down whenthe engine speed is too high, i.e., whena downshift would push the tachometerneedle beyond the red zone, beeps willbe emitted to warn you that the down-shift is not possible..If you attempt to shift up when thevehicle speed is too low, the transmis-sion will not respond..You can perform a skip-shift (forexample, from 4th to 2nd) by operatingthe select lever twice in rapid succes-sion..The transmission automatically se-lects 1st gear when the vehicle stopsmoving..If the temperature of the automatictransmission fluid becomes too high,the“AT OIL TEMP”warning light willilluminate and upshifts to 5th gear willnot be possible. Immediately stop thevehicle in a safe place and let theengineidle until the warning light turns
off.
&Driving tips
.On a road surface where there is a riskof wheelspin (for example, a snow- orgravel-covered road), you can pull awayfrom a standstill safely and easily by firstselecting the 2nd gear of the manualmode.
.Always apply the foot or parking brakewhen thevehicle is stopped in the“D”or“R”position.
.Always set the parking brake whenparking your vehicle. Do not hold thevehicle withonly the transmission.
.Do not keep the vehicle in a stationaryposition on an uphill grade by using the“D”position. Usethe brake instead.
.The engine may, on rare occasions,knock when the vehicle rapidly acceler-ates or rapidly pulls away from a standstill.This phenomenon does not indicate aproblem.
.A slight reduction in output torque mayoccur before the engine warms up.
Starting and operating7-17
–CONTINUED–
Page 334 of 426

Maintenance schedule....................................... 11-3
Maintenance precautions................................... 11-3Before checking or servicing in the enginecompartment.................................................... 11-4When you do checking or servicing in the enginecompartment while the engine is running.......... 11-4
Engine hood....................................................... 11-4
Engine compartment overview.......................... 11-6
Engine oil............................................................ 11-7Checking the oil level......................................... 11-7Changing the oil and oil filter.............................. 11-8Recommendedgrade and viscosity.................... 11-9Synthetic oil....................................................... 11-9
Cooling system................................................ 11-10Hose and connections...................................... 11-10Engine coolant................................................. 11-11
Air cleaner element.......................................... 11-12Replacing the air cleaner element..................... 11-12
Spark plugs...................................................... 11-13Recommended spark plugs.............................. 11-13
Drive belts........................................................ 11-13
Automatic transmission fluid.......................... 11-14Checking the fluid level.................................... 11-14Recommended fluid......................................... 11-15
Front differential gear oil................................. 11-15Checking the oil level....................................... 11-15Recommended grade and viscosity.................. 11-16
Rear differential gear oil.................................. 11-16Recommended grade and viscosity.................. 11-16
Power steering fluid........................................ 11-16Checking the fluid level.................................... 11-16Recommended fluid......................................... 11-17
Brake fluid........................................................ 11-17Checking the fluid level.................................... 11-17Recommended brake fluid............................... 11-18
Brakebooster.................................................. 11-18
Brake pedal...................................................... 11-19Checking the brake pedal free play.................. 11-19Checking the brake pedal reserve distance....... 11-19
Replacement of brake pad and lining............ 11-19Breaking-in of new brake pads and linings....... 11-20
Parking brake stroke....................................... 11-20
Tires and wheels.............................................. 11-21Types of tires................................................... 11-21Tire pressure monitoring system (TPMS).......... 11-21Tire inspection................................................. 11-22Tire pressuresand wear.................................. 11-23Wheel balance................................................. 11-25Wear indicators............................................... 11-25Tire rotation direction mark.............................. 11-25Tire rotation..................................................... 11-26Tire replacement.............................................. 11-26Wheel replacement.......................................... 11-27
Aluminum wheels............................................ 11-27
Windshield washer fluid.................................. 11-28
Replacement of wiper blades......................... 11-29Windshield wiper blade assembly..................... 11-30Windshield wiper blade rubber ......................... 11-30Rear window wiper blade assembly.................. 11-31
Maintenance and service
11
Page 339 of 426
11-6Maintenance and service
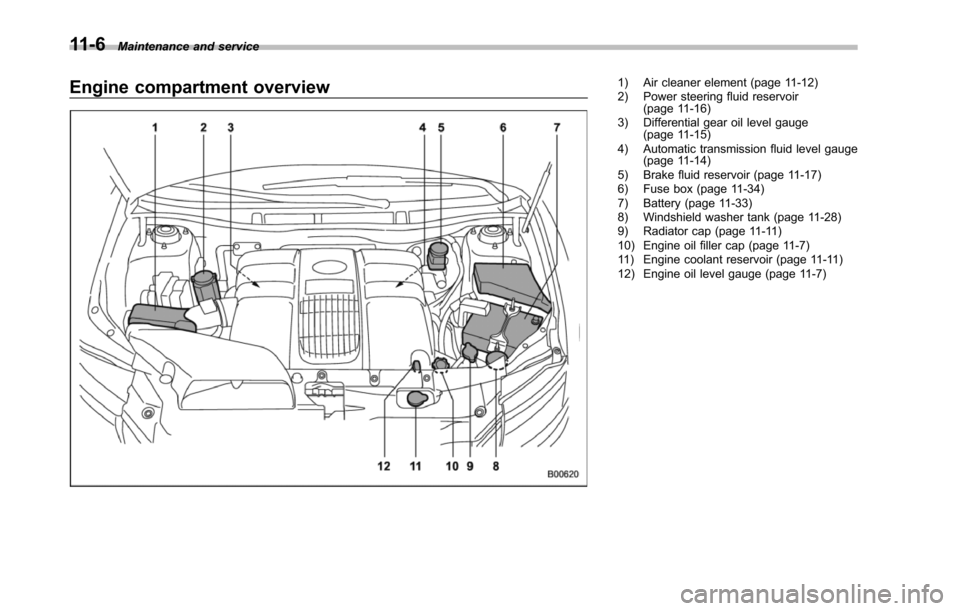
Engine compartment overview1) Air cleaner element (page 11-12)2) Power steering fluid reservoir(page 11-16)3) Differential gear oil level gauge(page 11-15)4) Automatic transmission fluid level gauge(page 11-14)5) Brake fluid reservoir (page 11-17)6) Fuse box (page 11-34)7) Battery (page 11-33)8) Windshield washer tank (page 11-28)9) Radiator cap (page 11-11)10) Engine oil filler cap (page 11-7)11) Engine coolant reservoir (page 11-11)12) Engineoil level gauge (page 11-7)