2014 SUBARU TRIBECA stop start
[x] Cancel search: stop startPage 270 of 426
warning light illuminate simultaneously,take the following steps.
1. Stop the vehicle in the nearest safe,flat location.
2. Shut down the engine, apply theparking brake, and then restart it.
3. Release the parking brake. If bothwarning lights turn off, the EBD systemmay be malfunctioning.
Drive carefully to the nearest SUBARUdealer and have the system inspected.
4. If both warning lights illuminate againand remain illuminated after the enginehas been restarted, shut down the engineagain, apply the parking brake, and checkthe brake fluid level. Refer to“Brake fluid”F11-17.
5. If the brake fluid level is not below the“MIN”mark, the EBD system may bemalfunctioning. Drive carefully to thenearest SUBARU dealer and have thesystem inspected.
6. If the brake fluid level is below the“MIN”mark, DO NOT drive the vehicle.Instead, have the vehicle towed to thenearest SUBARU dealer for repair.
WARNING
.Driving with the brake systemwarning light illuminated is dan-
gerous. This indicates your brakesystem may not be workingproperly. If the light remainsilluminated, have the brakes in-spected by a SUBARU dealerimmediately.
.If at all in doubt about whetherthe brakes are operating prop-erly, do not drive the vehicle.Have your vehicle towed to thenearest SUBARU dealer for re-pair.
Vehicle Dynamics Control
system
WARNING
Always use the utmost care indriving–overconfidence becauseyou are driving with a Vehicle Dy-namics Control system equippedvehicle could easily lead to a ser-ious accident.
CAUTION
.Even if your vehicle is equippedwith Vehicle Dynamics Controlsystem, winter tires should beused when driving on snow-cov-ered or icy roads; in addition,vehicle speed should be reducedconsiderably. Simply having aVehicle Dynamics Control sys-tem does not guarantee that thevehicle will be able to avoidaccidents in any situation.
.Activation of the Vehicle Dy-namics Control system is anindication that the road beingtravelled on has a slippery sur-face; since having Vehicle Dy-namics Control is no guarantee
Starting and operating7-23
–CONTINUED–
Page 275 of 426
7-28Starting and operating
CAUTION
Do not place metal film or any metalparts under the driver’s seat. Thismay cause poor reception of thesignals from the tire pressure sen-sors, and the tire pressure monitor-ing system will not function prop-erly.
NOTE
This device complies with Part 15 ofthe FCC Rules and with RSS-210 ofIndustry Canada. Operation is subjectto the following two conditions: (1) Thisdevice may not cause harmful inter-ference, and (2) this device mustaccept any interference received, in-cluding interference that may causeundesired operation.
Changes or modifications not ex-pressly approved by the party respon-sible for compliance could void theuser’s authority to operate the equip-ment.
Parking your vehicle
WARNING
.Never leave unattended childrenor pets in the vehicle. They couldaccidentally injure themselves orothersthrough inadvertent op-eration of the vehicle. Also, onhot or sunny days, the tempera-ture in a closed vehicle couldquickly become high enough tocausesevere or possibly fatalinjuries to them.
.Do not park the vehicle overflammable materials such as drygrass, waste paper or rags, asthey mayburn easily if they comenear hot engine or exhaust sys-tem parts.
.Be sure to stop the engine if youtake a nap in the vehicle. Ifengine exhaust gas enters thepassenger compartment, occu-pants in the vehicle could diefromcarbon monoxide (CO) con-tained in the exhaust gas.
&Parking brake
CAUTION
.Never drive while the parkingbrake is set because this willcause unnecessary wear on thebrake linings. Before starting todrive, always make sure that theparking brake has been fullyreleased.
.Never drive with your foot on theparking brake pedal.
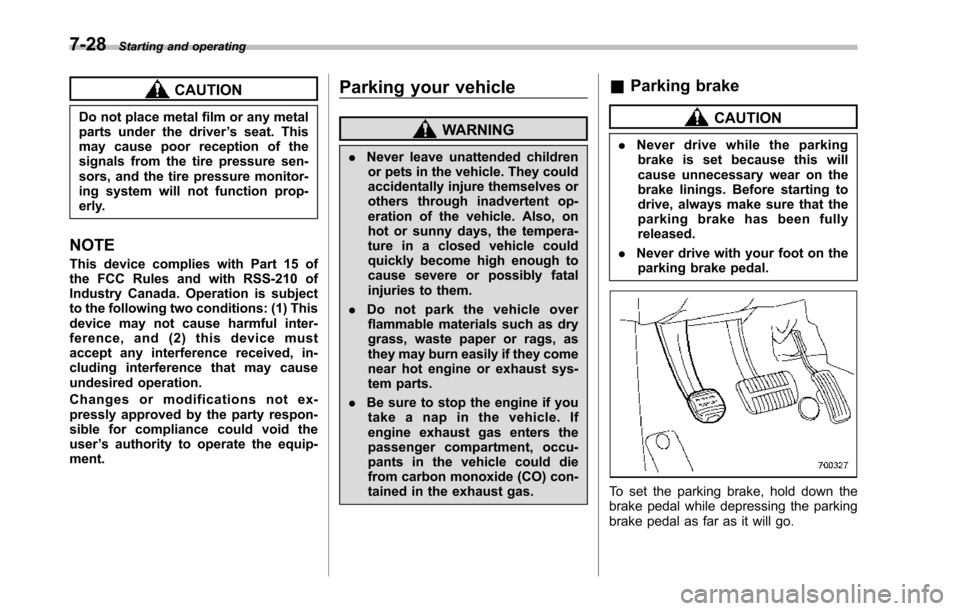
To set the parking brake, hold down thebrake pedal while depressing the parkingbrake pedal as far as it will go.
Page 278 of 426
&To temporarily cancel the
cruise control
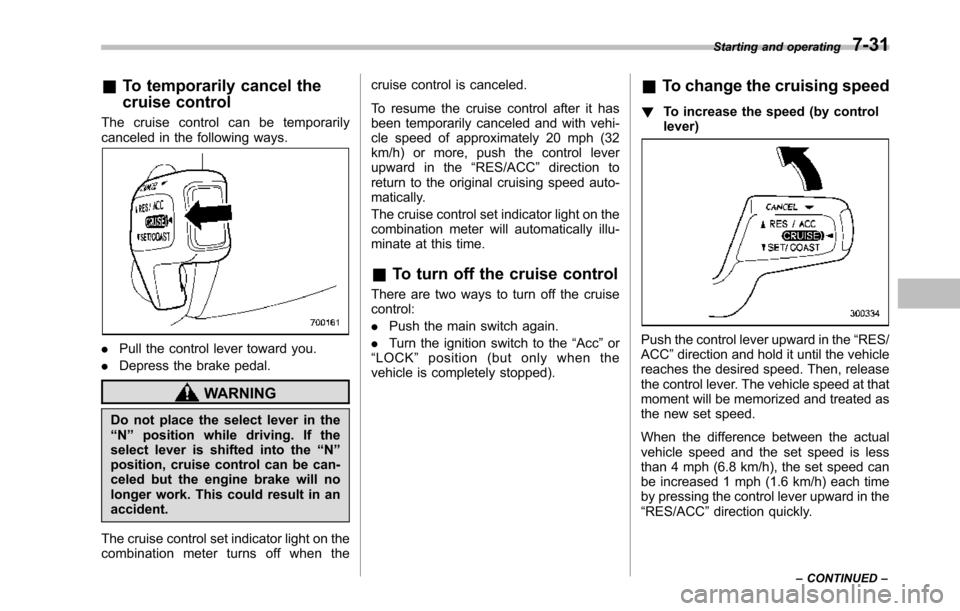
The cruise control can be temporarilycanceled in the following ways.
.Pull the control lever toward you.
.Depressthe brake pedal.
WARNING
Do not place the select lever in the“N”position while driving. If theselect lever is shifted into the“N”position, cruise control can be can-celed but the engine brake will nolonger work. This could result in anaccident.
The cruise control set indicator light on thecombination meter turns off when the
cruise control is canceled.
To resume the cruise control after it hasbeen temporarily canceled and with vehi-cle speed of approximately 20 mph (32km/h) or more, push the control leverupward in the“RES/ACC”direction toreturn to the original cruising speed auto-matically.
The cruise control set indicator light on thecombination meter will automatically illu-minate at this time.
&To turn off the cruise control
There are two ways to turn off the cruisecontrol:
.Push the main switch again.
.Turn the ignition switch to the“Acc”or“LOCK”position (but only when thevehicle is completely stopped).
&To change the cruising speed
!To increase the speed (by controllever)
Push the control lever upward in the“RES/ACC”direction and hold it until the vehiclereaches the desired speed. Then, releasethe control lever. The vehicle speed at thatmoment will be memorized and treated asthe new set speed.
When the difference between the actualvehicle speed and the set speed is lessthan 4 mph (6.8 km/h), the set speed canbe increased 1 mph (1.6 km/h) each timeby pressing the control lever upward in the“RES/ACC”direction quickly.
Starting and operating7-31
–CONTINUED–
Page 286 of 426
depth of the water and the bottom of thestream bed for firmness and ensure thatthe bed of the stream is flat. Drive slowlyand completely through the stream. Thewater should be shallow enough that itdoes not reach the vehicle’s undercar-riage. Water entering the engine air intakeor the exhaust pipe or water splashingonto electrical parts may damage yourvehicle and may cause it to stall. Neverattempt to drive through rushing water;regardless of its depth, it can wash awaythe ground from under your tires, resultingin possible loss of traction and evenvehicle rollover.
.Always check your brakes for effec-tiveness immediately after driving in sand,mud or water. Do this by driving slowlyand stepping on the brake pedal. Repeatthat process several times to dry out thebrake discsand brake pads.
.Do not drive or park over or nearflammable materials such as dry grass orfallen leaves,as they may burn easily. Theexhaust system is very hot while theengine is running and right after enginestops. This could create a fire hazard.
.After driving through tall grass, mud,rocks, sand, rivers, etc., check that thereis no grass, bush, paper, rags, stones,sand, etc. adhering to or trapped on theunderbody. Clear off any such matter from
the underbody. If the vehicle is used withthese materials trapped or adhering to theunderbody, a mechanical breakdown orfire could occur.
.Secure all cargo carried inside thevehicle and make certain that it is notpiled higher than the seatbacks. Duringsudden stops or jolts, unsecured cargocould be thrown around in the vehicle andcause injury. Do not pile heavy loads onthe roof. Those loads raise the vehicle’scenter of gravity and make it more proneto tip over.
.If you must rock the vehicle to free itfrom sand or mud, depress the acceleratorpedal slightly andmove the select leverback and forth between“D”and“R”repeatedly. Do not race the engine. Forthe best possible traction, avoid spinningthe wheels when trying to free the vehicle.
.When the road surface is extremelyslippery, you can obtain better traction bystarting the vehicle with the transmissionin 2nd than 1st.
.Never equip your vehicle with tireslarger than thosespecified in this manual.
.Wash the vehicle’s underbody after off-road driving. Suspension components areparticularly prone to dirt buildup, so theyneed to be washed thoroughly.
.Frequent driving of an AWD modelunder hard-driving conditions such as
rough roads or off roads will necessitatemore frequent replacement of engine oil,brake fluid and transmission oil than thatspecified in the maintenance scheduledescribed in the“Warranty and Mainte-nance Booklet”.
Remember that damage done to yourSUBARU while operating it off-road andnot using common sense precautionssuch as those listed above is not eligiblefor warranty coverage.
Driving tips8-7
Page 289 of 426
8-10Driving tips
vior can cause the wheels to lock, possiblyleading to loss of vehicle control.
An anti-lock brake system (ABS) en-hances your vehicle’sbrakingperfor-mance on snowy and icy roads. Forinformation about braking on slipperysurfaces, refer to“ABS (Anti-lock BrakeSystem)”F7-20 and“Vehicle DynamicsControl system”F7-23.
!Wiper operation when snowing
Before driving in cold weather, make surethe wiper blades are not frozen to thewindshield or rear window. If the wiperblades are frozen to the windshield or rearwindow, use the defroster with the airflowcontrol button in the“”position and thetemperature control dial set for maximumwarmth until the wiper blades are com-pletely thawed out. The wiper deicer ishelpful to thaw the windshield wiperblades. To thaw out the rear wiper blade,use the rear window defogger.
When driving in snow, if frozen snow startsto stick on the surface of the windshielddespite wiper operation, use the defrosterwith the airflow control button in“”andthe temperature control dial set for max-imum warmth. After the windshield getswarmed enoughto melt the frozen snowon it, wash it away using the windshieldwasher.
Snow stuck on the wiper arm prevents thewiper from working effectively. If snow isstuck on the wiper arm, pull off the road toa safe place, then remove it. If you stopthe vehicle at road side, use the hazardwarning flasher to alert other drivers.
We recommend use of non-freezing typewiper blades (winter blades) during theseasons in which you could have snowand freezing temperatures. Blades of thistype givesuperior wiping performance insnowy conditions. Be sure to use bladesthat are suitable for your vehicle.
CAUTION
During high-speed driving, non-freezing type wiper blades may notperformas well as standard wiperblades. If this happens, reduce thevehicle speed.
NOTE
When the season requiring non-freez-ing type wiper blades is over, replacethem with standard wiper blades.
&Corrosion protection
Refer to“Corrosion protection”F10-4.
&Snow tires
WARNING
.When replacing original tires withwinter (snow) tires, make sureyou use only tires of the samesize, circumference, speed sym-bol and load index as the originaltires listed on the tire placard.Using tires of other sizes orconstructions may affect speed-ometer/odometer calibration andclearance between the body andtires. It also may be dangerousand lead to loss of vehicle con-trol.
.You must install four winter tiresthat are of the same size, circum-ferences,construction, manufac-turer, brand (tread pattern), de-gree of wear, speed symbol andload index. Mixing tires of othersizes, circumferences or con-structions may result in severemechanical damage to the drivetrain of your vehicle and mayaffect ride, handling, braking andspeedometer/odometer calibra-tion. It also may be dangerousand lead to loss of vehicle con-trol.
Page 293 of 426
8-14Driving tips
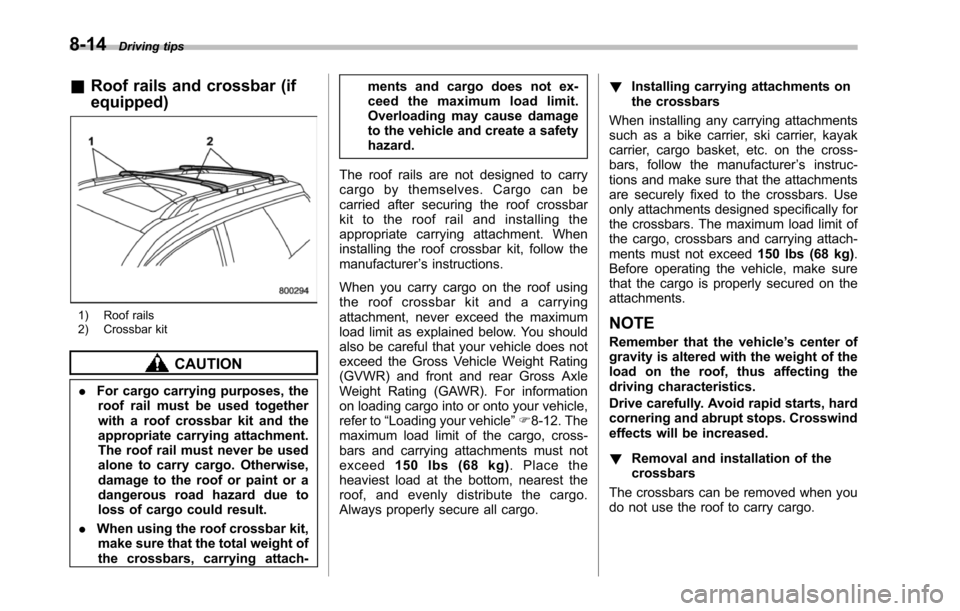
&Roof rails and crossbar (if
equipped)
1) Roof rails2) Crossbar kit
CAUTION
.For cargo carrying purposes, theroof rail must be used togetherwith a roof crossbar kit and theappropriate carrying attachment.The roof rail must never be usedalone to carry cargo. Otherwise,damageto the roof or paint or adangerous road hazard due toloss of cargo could result.
.When using the roof crossbar kit,make sure that the total weight ofthe crossbars,carrying attach-
ments and cargo does not ex-ceed the maximum load limit.Overloading may cause damageto the vehicle and create a safetyhazard.
The roof rails are not designed to carrycargo by themselves. Cargo can becarried after securing the roof crossbarkit to the roof rail and installing theappropriate carrying attachment. Wheninstalling the roof crossbar kit, follow themanufacturer’s instructions.
When you carry cargo on the roof usingthe roof crossbar kit and a carryingattachment, never exceed the maximumload limit as explained below. You shouldalso be careful that your vehicle does notexceed the Gross Vehicle Weight Rating(GVWR) and front and rear Gross AxleWeight Rating (GAWR). For informationon loading cargo into or onto your vehicle,refer to“Loading your vehicle”F8-12. Themaximum load limit of the cargo, cross-bars and carrying attachments must notexceed150 lbs (68 kg).Placetheheaviestload at the bottom, nearest theroof, and evenly distribute the cargo.Always properly secure all cargo.
!Installing carrying attachments onthe crossbars
When installing any carrying attachmentssuch as a bike carrier, ski carrier, kayakcarrier, cargo basket, etc. on the cross-bars, follow the manufacturer’s instruc-tions and make sure that the attachmentsare securely fixed to the crossbars. Useonly attachments designed specifically forthe crossbars. The maximum load limit ofthe cargo, crossbars and carrying attach-ments must not exceed150 lbs (68 kg).Before operating the vehicle, make surethat the cargo is properly secured on theattachments.
NOTE
Remember that the vehicle’s center ofgravity is altered with the weight of theload on the roof, thus affecting thedriving characteristics.
Drive carefully. Avoid rapid starts, hardcornering and abrupt stops. Crosswindeffects will be increased.
!Removal and installation of thecrossbars
The crossbars can be removed when youdo not use the roof to carry cargo.
Page 297 of 426
8-18Driving tips
secure all cargo.
!Installing carrying attachments onthe crossbars
When installing any carrying attachmentssuch as a bike carrier, ski carrier, kayakcarrier, cargo basket, etc. on the cross-bars, follow the manufacturer’s instruc-tions and make sure that the attachmentsare securely fixed to the crossbars. Useonly attachments designed specifically forthe crossbars. The maximum load limit ofthe cargo,crossbars and carrying attach-ments must not exceed150 lbs (68 kg).Before operating the vehicle, make surethat the cargo is properly secured on theattachments.
NOTE
Remember that the vehicle’s center ofgravity is altered with the weight of theload on the roof, thus affecting thedriving characteristics.
Drive carefully. Avoid rapid starts, hardcornering and abrupt stops. Crosswindeffects will be increased.
!Removal and installation of thecrossbars
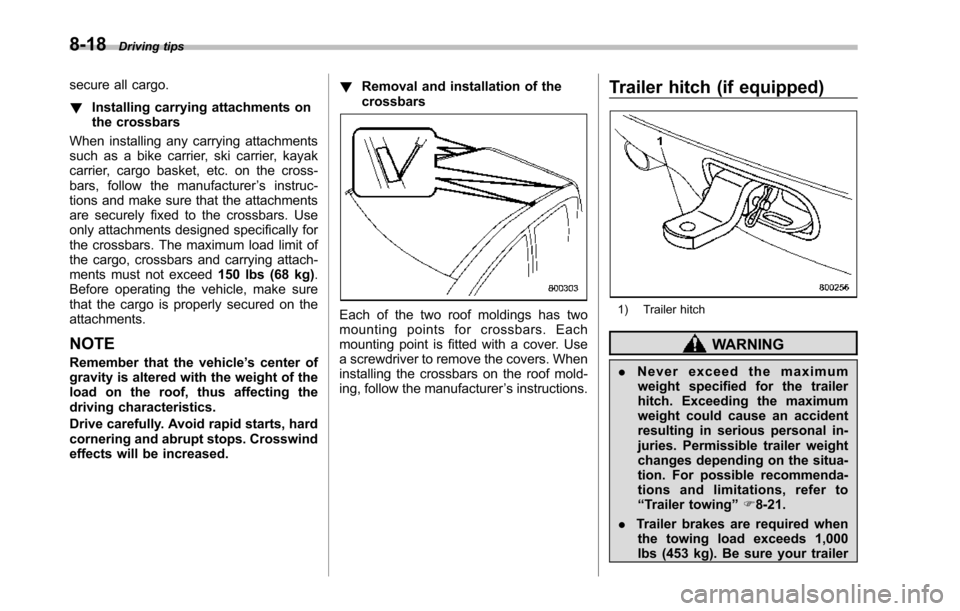
Each of the two roof moldings has twomounting points for crossbars. Eachmounting point is fitted with a cover. Usea screwdriver to remove the covers. Wheninstallingthe crossbars on the roof mold-ing, follow the manufacturer’s instructions.
Trailer hitch (if equipped)
1) Trailer hitch
WARNING
.Never exceed the maximumweight specified for the trailerhitch. Exceedingthe maximumweight could cause an accidentresulting in serious personal in-juries. Permissible trailer weightchanges depending on the situa-tion. For possible recommenda-tions and limitations, refer to“Trailer towing”F8-21.
.Trailer brakes are required whenthe towing load exceeds 1,000lbs (453 kg). Be sure your trailer
Page 305 of 426
8-26Driving tips
blind spots occur with the vehicle’s stan-dard side mirrors, use towing mirrors thatconform with Federal, state/province and/or other applicable regulations.
!Trailer lights
CAUTION
Direct splicing or other improperconnection of trailer lights maydamage your vehicle’selectricalsystem and cause a malfunction ofyour vehicle’s lighting system.
Connection of trailer lights to your vehi-cle’s electrical system requires modifica-tions to the vehicle’s lighting circuit toincrease its capacity and accommodatewiring changes. To ensure the trailer lightsare connected properly, please consultyour SUBARU dealer. Check for properoperation of the turn signals, stop lightsand parking lights each time you hitch up.
!Tires
WARNING
Never tow a trailer when the tem-porary spare tire is used. The tem-porary spare tire is not designed tosustain the towing load. Use of thetemporary spare tire when towing
can result in failure of the spare tireand/or less stability of the vehicle.
Make sure that all the tires on your vehicleare properly inflated. Refer to“Tires”F12-8.
Trailer tire condition, size, load rating andproper inflation pressure should be inaccordance with the trailer manufacturer’sspecifications.
In the event your vehicle gets a flat tirewhen towing a trailer, ask a commercialroad service to repair the flat tire.
If you carry a regular size spare tire in yourvehicle or trailer as a precaution againstgetting a flat tire, be sure that the sparetire is firmly secured.
&Trailer towing tips
CAUTION
.Never exceed 45 mph (72 km/h)when towing a trailer in hillycountry on hot days.
.When towing a trailer, steering,stability, stopping distance andbraking performance will be dif-ferent from normal operation. Forsafety’s sake, you should employ
extra caution when towing atrailer and you should neverspeed. You should also keep thefollowing tips in mind:
!Before starting out on a trip
.Check that the vehicle and vehicle-to-hitch mounting are in good condition. Ifany problems are apparent, do not tow thetrailer.
.Check that the vehicle sits horizontallywith the trailer attached. If the vehicle istippedsharply up at the front and down atthe rear, check the total trailer weight,GVW, GAWs and tongue load again, thenconfirm that the load and its distributionare acceptable.
.Check that the tire pressures arecorrect.
.Checkthat the vehicle and trailer areconnected properly. Confirm that–the trailer tongue is connectedproperly to the hitch ball.–the trailer lights connector is con-nected properly and trailer’s stop lightsilluminate when the vehicle’s brakepedal is pressed, and that the trailer’sturn signal lights flash when thevehicle’s turn signal lever is operated.–the safety chains are connectedproperly.