Page 25 of 45

Telephone calls and functions during a call
Calls can be received even if the device is switched off.
If you have started the process of connecting to a telephone number or accepted a call, the TELEPHONE main menu will change to the Phone conversation display.
Incoming phone conversation
■
- accept call
■ - reject call
During the phone conversation
› Press the function key
during a phone conversation to switch the current
conversation to “mute” (Display: “ Call being held”). This means that the connec-
tion remains intact, however the conversation is not transmitted.
› Press again the function key
to continue the conversation.
› If you press the function key
during a phone conversation, the connection to
the current telephone number will be terminated and the unit will change to
the TELEPHONE main menu.
Dial other phone numbers during a phone conversation › Press the function key
during a phone conversation to put the current con-
versation on “Hold”, as described above.
› Select another phone number or a stored phone number.
› If you established an additional phone call, you can “toggle” between the two
calls, as described below.
“Call waiting” and toggling between two calls
› If you are called while you are engaged in a conversation, the number and the
name of the caller will appear below the current conversation on the display
(function: “Call waiting”).
› Press the function key
in the line “
Incoming call ” to reject the second call.
› Press the function key
in the line “
Incoming call ” to accept the second call.
The connection to the first party will be interrupted but not broken (Display: “ Call being held ”).
› If you press the function key
in the line “
Call being held ”, the conversation
with this caller will continue and the other caller will be put “on hold”. You can
toggle between the two calls.
› Press the function key
to break the connection to the call number displayed
in this line.
Conference call
A conference call allows all callers to communication together in dialled and re-
ceived phone conversations. All participants in the conference call can hear and
talk to all other participants.
+
- the caller, person called takes part in the conference call
-
- the caller, person called is removed from the conference call
DTMF key tones
Each key of a telephone is assigned a particular DTMF key tone. DTMF key tones
are used, for example, for the input of a password via the phone or for choosing a colleague in a “Call center”.
If a DTMF key tone has to be entered during a conversation, open the keypad
field by pressing the function key at the bottom left and follow the instructions
(for example: “For a private conversation with one of our co-workers, please press 3
”).
A longer DTMF key tone also be stored on the mobile phone. If, during a conversa- tion, you have to enter this DTMF key tone, call up the corresponding entry from
the telephone book as described.
If you press the function key DTMF
on the input screen, the character string dis-
played in the entry line will be played as a DTMF key tone sequence.
Please note that in a DTMF key tone sequence, the character “+” must not appear,
as it interrupts the playing of a DTMF key tone.
SMS menu
The SMS menu can only be used when your vehicle has been equipped with the
GSM III telephone preinstallation and the mobile phone is paired with the radio
navigation system via the rSAP profile – refer to the Owner's Manual of your vehi-
cle.
Inbox
In the main menu TELEPHONE, press the function key SMS
followed by the menu
item Inbox to call up a list of received text messages. Read text messages are la-
belled with the symbol
; unread text messages with the symbol
.
To open a received text message, press the field containing the particular mes-
sage. The following options are displayed as well as the message text:
23PHONE mode
Page 26 of 45

■Answer - reply to the text messsage
■ New text - create a new text message
■ Edit text - edit text message
■ Delete - deletes text message
■ Options - select options
■ Read out text - radio the navigation system reads out the text message
■ Return call - calls the sender of the text message
■ Copy - copies the text message to the mobile phone
■ Forward - forwards the text message
Next to each text message in the inbox is the function key
. Pressing this key
calls up the following options:
■ Copy
- copies the text message to the mobile phone
■ Forward - forwards the text message
■ Delete entry - deletes text message
■ Delete list - deletes all text messages in the list
Writing and sending text messages In the menu TELEPHONE, press the function key SMS
and select the option Write.
An input screen appears.
If the message has more than 160 characters, it will be split into two or more sep- arate messages.
To send the text message, press the function key
; a screen for entering the
telephone number of the recipient will appear.
The recipient can also be selected in one of the following menus:
■ Call list
- Call list
■ Missed calls - list of missed calls
■ Dialled numbers - list of dialled numbers
■ Received calls - list of received calls
■ Telephone book - Phonebook
After entering a recipient, send the text message using the function key
.
The sent text message is not displayed in either the device or the mobile phone.
Note
The SMS
menu only displays the received text messages which were received
during the time the mobile phone was paired with the device.
24PHONE mode
Page 27 of 45
, (f")
TONE mode
Tone settings
Fig. 10
Tone settings
Press the button TONE
.
■ Treble - Mid - Bass
- Setting of bass, mid and treble
■ Balance - Fader - sets the sound focus (left-right = balance), (front-rear = fader,
touch the target on the display and move it into the required position » Fig. 10)
■ Volume settings
- sets the volume
■ Switch-on volume - Volume after switching on
■ Traffic announcements - sets the volume of incoming traffic announcements (TP)
■ Navigation and voice control - sets the volume for the navigation announcements
and voice control
■ Voice volume
- sets the voice volume during voice control
■ Nav. announcements - sets the navigation announcements » page 10, Setup
Navigation
■ Reduce entertainm. vol.
- reduces the volume of playing audio sources while
navigation announcements are made ■ Low
- weak reduction
■ Medium - medium input sensitivity
■ High - strong reduction
■ Telephone volume - Volume of the mobile phone calls;
■ PDC: Reduce audio vol. - Setting the reduction of the volume when the park dis-
tance control is active
■ Off
- switches off
■ Low - weak reduction
■
Medium - medium input sensitivity
■ High - strong reduction
■ Speed dependent Volume adaptation - speed-dependent volume adaptation
■ AV-Output - Activating an external DVD source;
■ DVD - DVD
■ Off - switches off
■ Confirmation tone - activates/deactivates confirmation tone when a function key
is pressed ■ On
- switches on
■ Off - switches off
■ EQ settings - Setting the equalizer (linear, voice, rock, classical, dance)
■ Surround - Setting of the surround tone
25TONE mode
Page 28 of 45

MAP mode
Map display
Fig. 11
Maps display with split-screen
for compass display
Press the button MAP.
■
- maps goes to full-screen display
■ Change the display type
■ -2D
- 2D display
■ -3D - 3D display
■ -Topograph. - Plan view of 2D map display with coloured display of various
terrains (Mountains, Valleys etc.)
■ Function key “Navigation” - the menu is dependent on the operating type of the
route guidance » page 27, Function key “Navigation”
■ A
- indicates which source medium is currently active
■ choose another radio station from the memory
■
- pressing briefly changes to the beginning of the current title, repeated
pressing changes to the beginning of the previous title.
■
- brief pressing changes over to the beginning of the next title.
■ - the play function is stopped in the current position and the symbol
changes to - after pressing the play function continues in this position.
■ In the menu Systems Setup if the time display is activated » page 9, Setup Sys-
tem , at position
A
the current time is displayed.
■ Extras
■Destination view - shows the currently selected travel destination in the map
display in the main menu Navigation. Use the function key on the right under
the compass display to center the map again on the vehicle position.
■ Split-screen
- the menu is dependent on the operating type of the route guid-
ance » page 28 , Function key “Split-screen”
■ Day/night
- changes between day and night design.
■
POI selection - selects points of interest category, which is displayed on the
map using symbols » page 9, Setup Map
■ Lane guidance
- during route guidance, when driving and turning on roads
with more than one lane, a small split-screen with lane guidance will be inser-
ted in the map display.
■ Switch off display
- it is possible to switch the display to energy saving mode –
the display goes black and the current information about the audio source is
shown in the bottom row. The display can be switched on again by touching
the screen or any key other than the setting-up button
1
» Fig. 1 on page 3.
Change the map scale and display
Pressing the function key with the display of the currently selected map scale at
the bottom right will show further function keys for changing the map detail and
the map scale. If not used, these function keys fade out again after a few sec-
onds.
- briefly switches the map display to the overview display (small scale). It re-
turns again to the last display (large scale) after a few seconds.
+
or - - to zoom in or out of the map, i.e.changing the map scale. The map scale
can also be changed by moving the slider
along the scale.
- changes to the overview map with start and finish point during route guid-
ance.
- Autozoom during route guidance. If Autozoom is active, the map scale will
change automatically depending on the route driven (motorway trip: large map
scale - city: small map scale). The switched-on Autozoom is indicated in the scale
display by
. Autozoom is switched off again by pressing the scale again, or it can
be turned off manually using the menu button
15
» Fig. 1 on page 3.
Moving the map section using the vehicle position or destination
Move displayed map section by pressing and holding a finger on the screen and dragging it across the screen without lifting the finger.
Function keys and symbols during route guidance
- current vehicle position
- centres the map section using the vehicle position
- centres the map section using the destination
26MAP mode
Page 29 of 45

Function key “Navigation”Fig. 12
3D map display during route
guidance
Depending on the type of route guidance, various function keys appear at posi- tion
A
.
Operating mode: Route guidance switched off Navigation
■
Start route guidance - starts route guidance or continues route guidance to the
travel destination selected in the main menu Navigation.
■ Enter new destination
- calls up the menu New dest. to change the travel destina-
tion selected in the main menu Navigation » page 31 , Function key “New
dest.” .
■ Route options
- changes the defaults for the route calculation » page 31, Func-
tion key “Options”
■
- saves current vehicle position to the destination memory as a flagged desti-
nation
Operating mode: Route guidance with the destination
... /
...
- distance to the destination
- expected time of arrival in the destination or driving time
■ Stop route guidance
- stops route guidance at the current position. The route guid-
ance can be continued at any time by pressing the function key Navigation and
Start route guidance.
■ Enter stopover destination - calls up the menu New dest. in order to enter a stop-
over to be approached during current route guidance » page 31, Function key
“New dest.” .
■ Congestion ahead
- used for the manual entry of a congestion ahead and the rec-
ommendation of the next available route » page 35, Manually excluding
stretches of the journey
■ Route options - changes the defaults for the route calculation » page 31, Func-
tion key “Options”
■
- saves current vehicle position to the destination memory as a flagged desti-
nation
Operating mode: Route guidance with stopover destinations
.../
...
,
.../
... - distance to the destination
- distance to the stopover destination
- expected time of arrival in the destination or driving time
■ Stop route guidance
- stops route guidance at the current position. The route guid-
ance can be continued at any time by pressing the function key Navigation and
Start route guidance.
■ Enter stopover destination - calls up the menu New dest. in order to enter a stop-
over to be approached during current route guidance » page 34, Function keys
“Extras” .
■ Congestion ahead
- used for the manual entry of a congestion ahead and the rec-
ommendation of the next available route » page 35, Manually excluding
stretches of the journey
■ Route options
- changes the defaults for the route calculation » page 31, Func-
tion key “Options”
■ save
- saves current vehicle position to the destination memory as a flagged
destination
■ Tour plan
- displays tour plan
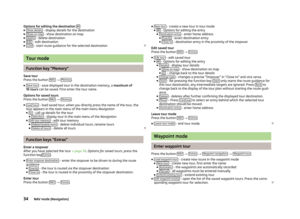
Waypoint navigation Waypoint navigation
■
Waypoint tour - Enter the starting point of the waypoint navigation
■ Turn around waypt tour - travel route in the reverse direction
■ From the closest - Waypoint navigation from the nearest waypoint
■ Select waypoint - waypoint navigation from the selected waypoint
■ From the first - Waypoint navigation from the first waypoint
■ Enter new destination - enter destination in a street – waypoint navigation is quit
27MAP mode
Page 30 of 45
Function key “Split-screen”Fig. 13
Split-screen displaying the navigation information/split-screen dis-
playing the information list
Various function keys are displayed in the separate navigation types here.
■ Compass
- displays compass display with current direction of travel
■ Pos. map - displays map display with the vehicle position. Press once on the map
in the split-screen to change the map display.
■ GPS Viewer
- shows the coordinates of the current vehicle position. The number
of satellites received will also be displayed. At least five satellites must be re-
ceived simultaneously to enable the absolute height above sea level to be dis-played behind the mountain symbol (Display: “ 3D Fix”).
■ Dest. guidan. symbol
- displays the symbol of the next destination guidance ma-
noeuvre
■ Manoeuvre list
- displays the manoeuvre list
■ Overview - displays map display with the removal between the vehicle position
and destination
■ Tour plan
- displays tour plan
28MAP mode
Page 31 of 45

Introductory information
The route is recalculated each time if you ignore driving recommendations or
change the route. This process takes only a few seconds. Driving recommenda-")
NAV mode (Navigation)
Introductory information
The route is recalculated each time if you ignore driving recommendations or
change the route. This process takes only a few seconds. Driving recommenda-
tions can only then be re-transmitted.
In regions that are not or only partially digitised and are therefore not included in the navigation data, the device will continue to try to provide guidance to the
destination. Please note that under these circumstances the route guidance may
not be completely correct if, for example, one-way streets and road categories
(motorway, country road, etc.) are not or only partially included in the navigation data used.
When entering an address (city, street), only those letters or symbols which make
up a logical entry will be presented. A list of possible names will be shown. Do not
forget to enter the blank space in names made up of more than one word, such
as High Wycombe.
The last voice prompt can be repeated by pressing the menu button
15
» Fig. 1 on
page 3. The volume can be changed while you listen to the travel recommenda-
tion.
The GPS satellites will not be able to reach the aerial once you are in a tunnel or
underground garage. In these cases, the unit uses only the vehicle's sensors and
an internal gyroscope for navigation.
WARNING■ Please concentrate fully at all times on your driving! Driver inattention can
lead to accidents and injuries. As the driver you are fully responsible for road
safety. Only use the functions of the device in such a way that you are always
in full control of your vehicle in all traffic situations!■
The following must always have priority over the driving recommendations: ■ the road traffic legislation, even if the driving recommendations contradict
the StVO,
■ the actual acknowledgement of traffic signs, light signals or signs placed
by the police at the relevant location,
■ the facts and circumstances prevailing at the relevant location.
WARNING (Continued)■Please observe the respective traffic regulations when driving.■Traffic signs and traffic regulations always have priority over the driving rec-
ommendations provided by the navigation system.■
Route guidance is subject to constant changes, particularly to information
relating to one-way streets, pedestrian zones etc. stored in the navigation da-
ta. Information on traffic lights, stop and right of way signs, parking and stop-
ping restrictions as well as lane constrictions and speed restrictions is not tak-
en into account by the device.
■
Always adjust the driving speed to the road, traffic and weather conditions.
Do not let the device to tempt you to drive too fast in the fog, for example –
risk of accident!
■
The device and its various functions should only be used when traffic condi-
tions permit safe use.
■
The driving recommendations provided may vary from current situations,
e.g. due to road works or out of date navigation data. In such a case, always
observe the traffic regulations and ignore the driving recommendations.
■
Adjust the volume to ensure that acoustic signals from outside the vehicle,
e.g. sirens from vehicles to give way to, such as the police, ambulance and fire
brigade, can be heard at all times.
Note
■ It is not necessary to enter the destinations (country, city, road, point of interest
names) including all country-specific (or language-specific for points of interest)
special characters.■
Depending on the country, some functions of the device can no longer be selec-
ted on the screen at certain speeds. This is not a malfunction, but corresponds to
the legal requirements of the particular country.
Navigation data and the navigation DVD
The navigation data are already available after the memory of the radio naviga- tion system is switched on first and can be used directly for route guidance.
Storing the updated navigation data can take up to one hour. Route guidance will
start via the navigation DVD while the navigation data is being stored. Please
note that route guidance will be interrupted if the navigation DVD is removed. Route guidance must then be restarted with details supplied from the device
memory.
29NAV mode (Navigation)
Page 32 of 45

Using a new navigation DVD/Updating the navigation data in the system›Insert the navigation DVD into the CD/DVD slot with the printed side facing upuntil it is automatically drawn in. The device compares the data on the naviga-
tion DVD with the data in the device memory. If the data in the device memory
is identical to the data on the navigation DVD, no message will appear.›
If the data on the navigation DVD is not identical to the data in the device
memory, a corresponding message will appear. Press the function key Continue
to used the data on the navigation DVD.
›
Press the function key Save to overwrite the data in the device memory with
the data on the navigation DVD. During the copy or update process, the old
navigation data will be irretrievably deleted and cannot be restored.
›
Press the button
→ Notify to get a notification when the storage process has
finished.
Use data of a navigation DVD for a short period of time
›
If you leave the stored area map in the device memory for only a short period of
time, insert the navigation DVD for the area you will be driving in.
›
Press the function key Continue
→ Temporarily. The unit uses only the data from
the navigation DVD for the navigation.
›
If you are once again in the area of the map material stored in the device memo-
ry, press the key to remove the navigation DVD.
Up to date navigation data and new navigation DVD
Road guidance is subject to constant changes (e.g. new streets, changes of street names and house numbers). A navigation DVD is a huge data store, which un-
fortunately will not be up to date after a certain time. This could cause problems
during route guidance.
It is for this reason that you must regularly update the navigation data on your unit with a current navigation DVD.
Version of the navigation data
Keep pressing the button SETUP
→ Version info
→ Map version DVD until you see a
4-digit code number which is the version of the navigation data. Further informa-
tion is available from a ŠKODA Partner.
Input screen for route guidance
Selecting a destination from the list
›
If function key is pressed after the input screen has been opened, a list will
appear of all destinations that can still be selected from the device memory in line with the requirements (e.g. for country
and city).
›If necessary, move the slider at the right edge of the touch-screen for all entries
in the list to be displayed.›
Press the desired entry in the list to take it over for the address.
Limit destination and select from the list
›
You can open a list of the selectable destinations any time by pressing the func-
tion key ** while entering a destination in the entry line. The list only displays
the destinations that match the requirements, that match the character se-
quence in the entry line and that are saved in the device memory.
›
The number of selectable destinations will be displayed in the function key ** if
fewer than one hundred destinations can be selected.
›
If fewer than six destinations are selectable, the input screen will close auto- matically and a list of possible destinations will be displayed.
Main menu Navigation
Introductory information
Fig. 14
Main menu Navigation with ad-
dress.
Press the button NAV.
■ Options
- opens the menu for defining the route options » page 31, Function
key “Options”
■ Curr. pos.
- split-screen with the coordinates of the position where you are cur-
rently located
■
- stores the current position as “Flagdest.” in the destination memory.
■ New dest. - used for the entry of a new destination.
■ Address - enter an address in the input screen to specify the destination ad-
dress » page 31 , Function key “
Address”
■ POI
- open the search screen for searching for a point of interest from a
specific category or by entering a name or a telephone number » page 32,
Function key “ POI”
30NAV mode (Navigation)