2014 SKODA FABIA audio
[x] Cancel search: audioPage 4 of 60
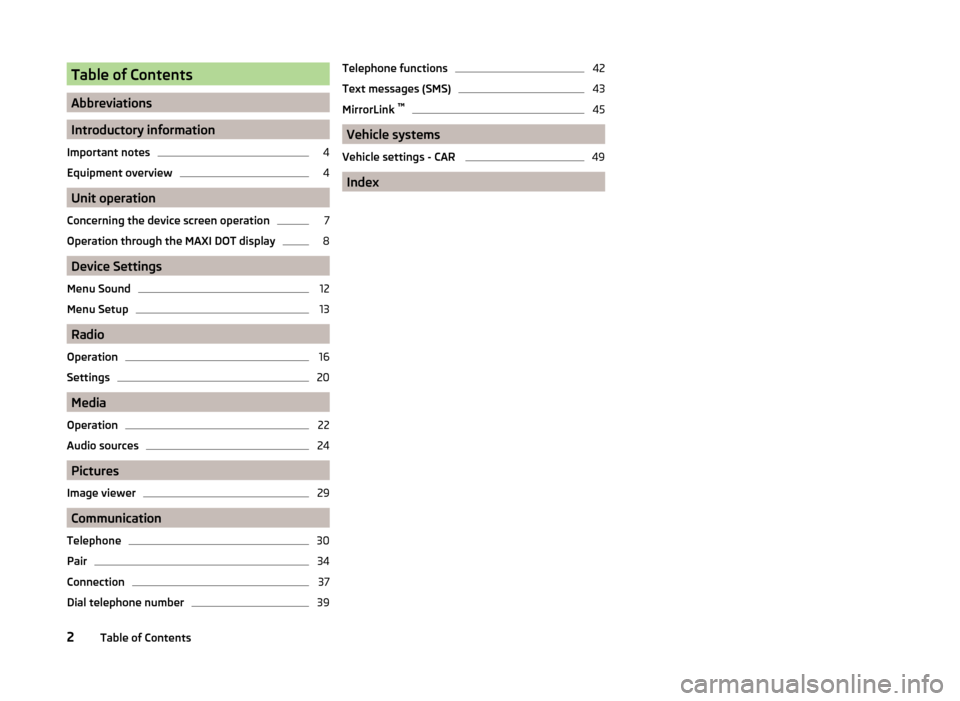
Table of Contents
Abbreviations
Introductory information
Important notes
4
Equipment overview
4
Unit operation
Concerning the device screen operation
7
Operation through the MAXI DOT display
8
Device Settings
Menu Sound
12
Menu Setup
13
Radio
Operation
16
Settings
20
Media
Operation
22
Audio sources
24
Pictures
Image viewer
29
Communication
Telephone
30
Pair
34
Connection
37
Dial telephone number
39Telephone functions42
Text messages (SMS)
43
MirrorLink ™
45
Vehicle systems
Vehicle settings - CAR
49
Index
2Table of Contents
Page 5 of 60
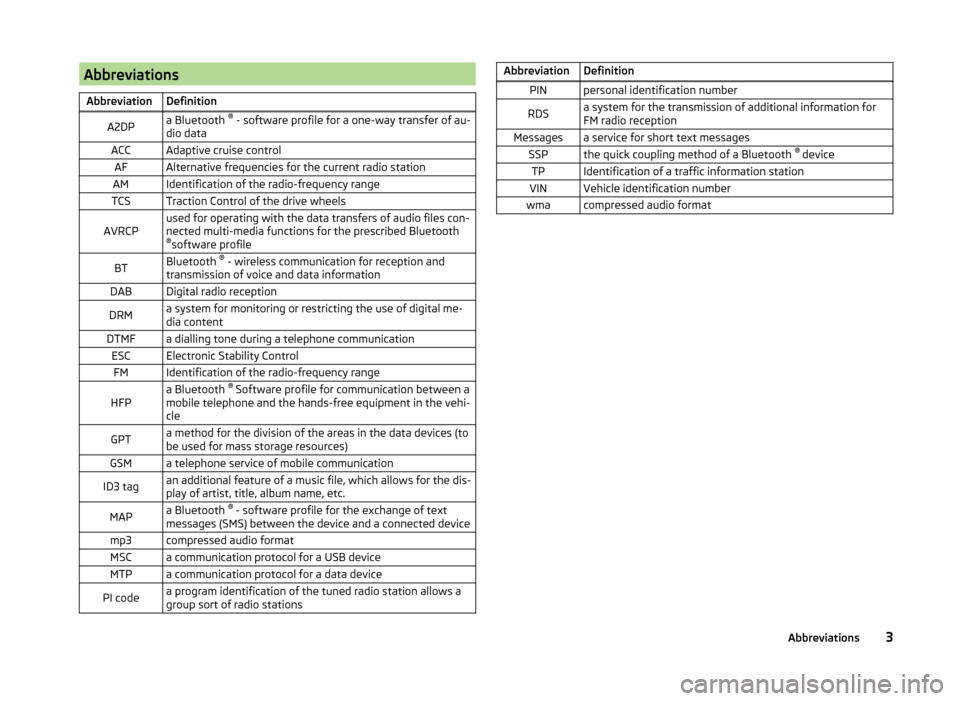
AbbreviationsAbbreviationDefinitionA2DPa Bluetooth ®
- software profile for a one-way transfer of au-
dio dataACCAdaptive cruise controlAFAlternative frequencies for the current radio stationAMIdentification of the radio-frequency rangeTCSTraction Control of the drive wheelsAVRCPused for operating with the data transfers of audio files con-
nected multi-media functions for the prescribed Bluetooth ® software profileBTBluetooth ®
- wireless communication for reception and
transmission of voice and data informationDABDigital radio receptionDRMa system for monitoring or restricting the use of digital me-
dia contentDTMFa dialling tone during a telephone communicationESCElectronic Stability ControlFMIdentification of the radio-frequency rangeHFPa Bluetooth ®
Software profile for communication between a
mobile telephone and the hands-free equipment in the vehi-
cleGPTa method for the division of the areas in the data devices (to
be used for mass storage resources)GSMa telephone service of mobile communicationID3 tagan additional feature of a music file, which allows for the dis-
play of artist, title, album name, etc.MAPa Bluetooth ®
- software profile for the exchange of text
messages (SMS) between the device and a connected devicemp3compressed audio formatMSCa communication protocol for a USB deviceMTPa communication protocol for a data devicePI codea program identification of the tuned radio station allows a
group sort of radio stationsAbbreviationDefinitionPINpersonal identification numberRDSa system for the transmission of additional information for
FM radio receptionMessagesa service for short text messagesSSPthe quick coupling method of a Bluetooth ®
deviceTPIdentification of a traffic information stationVINVehicle identification numberwmacompressed audio format3Abbreviations
Page 10 of 60
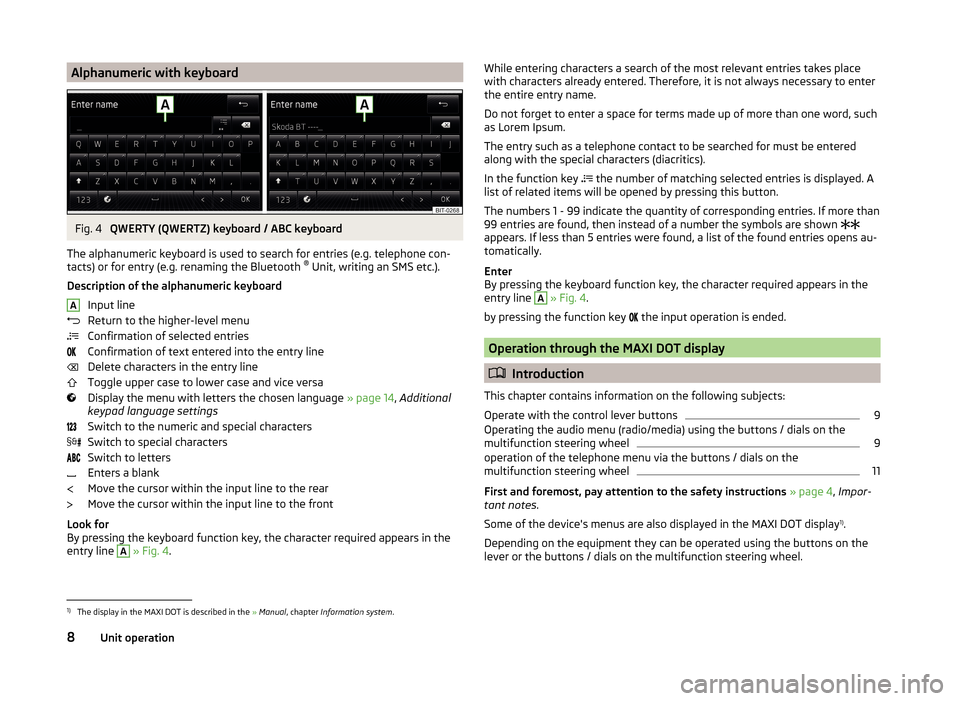
Alphanumeric with keyboardFig. 4
QWERTY (QWERTZ) keyboard / ABC keyboard
The alphanumeric keyboard is used to search for entries (e.g. telephone con-
tacts) or for entry (e.g. renaming the Bluetooth ®
Unit, writing an SMS etc.).
Description of the alphanumeric keyboard Input line
Return to the higher-level menu
Confirmation of selected entries
Confirmation of text entered into the entry line
Delete characters in the entry line
Toggle upper case to lower case and vice versa
Display the menu with letters the chosen language » page 14, Additional
keypad language settings
Switch to the numeric and special characters
Switch to special characters
Switch to letters
Enters a blank
Move the cursor within the input line to the rear
Move the cursor within the input line to the front
Look for
By pressing the keyboard function key, the character required appears in the
entry line
A
» Fig. 4 .
AWhile entering characters a search of the most relevant entries takes place
with characters already entered. Therefore, it is not always necessary to enter
the entire entry name.
Do not forget to enter a space for terms made up of more than one word, such
as Lorem Ipsum.
The entry such as a telephone contact to be searched for must be entered
along with the special characters (diacritics).
In the function key
the number of matching selected entries is displayed. A
list of related items will be opened by pressing this button.
The numbers 1 - 99 indicate the quantity of corresponding entries. If more than 99 entries are found, then instead of a number the symbols are shown
appears. If less than 5 entries were found, a list of the found entries opens au-
tomatically.
Enter
By pressing the keyboard function key, the character required appears in the
entry line A
» Fig. 4 .
by pressing the function key the input operation is ended.
Operation through the MAXI DOT display
Introduction
This chapter contains information on the following subjects:
Operate with the control lever buttons
9
Operating the audio menu (radio/media) using the buttons / dials on the
multifunction steering wheel
9
operation of the telephone menu via the buttons / dials on the
multifunction steering wheel
11
First and foremost, pay attention to the safety instructions » page 4 , Impor-
tant notes .
Some of the device's menus are also displayed in the MAXI DOT display 1)
.
Depending on the equipment they can be operated using the buttons on the
lever or the buttons / dials on the multifunction steering wheel.
1)
The display in the MAXI DOT is described in the » Manual , chapter Information system .
8Unit operation
Page 11 of 60

Operate with the control lever buttonsFig. 5
Buttons on the control lever
The separate menus and menu items displayed in the MAXI DOT display can beoperated as follows with the buttons on the control lever.
Functions of the buttons on the control leverBut- ton
» Fig. 5ActionOperation
APress and hold buttonDisplay main menuABriefly push up or downswitch between menu items and menusBPress brieflyConfirm menu item or menuOperating the audio menu (radio/media) using the buttons / dials on the multifunction steering wheel
Fig. 6
Multifunction steering wheel - Audio menu
›In the main menu of the MAXI DOT display select the menu item
Audio .
The information displayed in MAXI DOT display
■ Radio - Menu Radio
■ current radio station frequency band.
■ Name of the currently playing channel (if less than 5 are receivable).
■ List of receivable radio stations with choice (if more than 5 are receivable).
■ TP traffic announcements.
■ Media - Menu Media
■ Title.Buttons and wheels of the audio menu - Radio/MediaButton/
wheel » Fig. 6ActionOperationRadioMedia1Press brieflyChange source (change frequency bands and connected audio sources)1Press and hold buttonSwitch between the Radio and Media menus and open the last context status (e.g. the last radio station
or track to be played)2Press brieflySwitch off/on soundStart/stop playback2Turn upwardsIncrease volume2Turn downwardsDecrease volume 9Unit operation
Page 15 of 60
■iPod volume - Volume control of the connected Apple device connected via
USB
■ Quiet - Low volume
■ Medium - Medium volume
■ Loud - High volume
■ Bluetooth audio - Volume settings of the Bluetooth ®
Audio profile connec-
ted device ■ Quiet - Low volume
■ Medium - Medium volume
■ Loud - High volume
■ Lowering entertainment - Lowers the audio volume (e.g. radio volume)
with activated parking aid » page 50
■ Off - switches off
■ Weak - weak reduction
■ Medium - medium input sensitivity
■ Strong - strong reduction
■ Bass - Mid - Treble - Equalizer settings (bass, mid and treble)
■ Return - Basic setting of the sound centre
■ Balance - Fader - Sets the balance between left and right, front and rear
■ ŠKODA Surround - Switching the surround sound
■ Virtual Subwoofer - Switching the virtual subwoofer (deepening of bass ef-
fects)
■ Confirmation tone - Switch on/off confirmation tone when touching the
screen
Menu Setup
Introduction
This chapter contains information on the following subjects:
Main Menu
13
Screen settings
13
Time and date settings
14
Keyboard settings
14
Additional keypad language settings
14
Unit settings
14
Data transmission of mobile devices
14Safe removal of the audio source15Restore factory settings15
Bluetooth ®
settings
15
System Information
15
First and foremost, pay attention to the safety instructions » page 4 , Impor-
tant notes .
This chapter covers the device settings.
Main Menu
The basic parameters for the unit can be set from the Main menu.
Call up the main menu
›
Press the button.
■ Screen - Screen settings » page 13
■ Time and date - Time and date settings » page 14
■ Language - Set the unit language 1)
■ Keypad: - Keypad display for text entry » page 14
■ More keypad languages - Enables you to enter characters other than those
available for the selected language » page 14
■ Units - Unit settings » page 14
■ Data transfer mobile devices - Setting the data transmission to connected
external devices » page 14
■ Remove safely - safe removal of the connected audio source or data me-
dia » page 15
■ Factory settings - Restore to factory settings » page 15
■ Bluetooth - Settings for the Bluetooth ®
function » page 15
■ System information - Displays system information » page 15
■ Copyright - Information on licences and copyrights are only available in the
English language
Screen settings
›
Press the button
→ Screen .
1)
The correct display of country-specific characters (e.g. ID3 tag information) cannot always be guaran-
teed.
13Device Settings
Page 17 of 60
Safe removal of the audio source›
Press the button
→ Remove safely .
■ SD card - Safe removal of the SD storage card
■ USB - Safe removal of the USB source
Restore factory settings
›
Press the button
→ Factory settings .
■ Reset all settings and data - menu to restore all settings
■ Restore factory settings - Reset all factory settings
■ Reset individual settings/data - menu for the recovery of individual settings
■ Sound - Reset default settings for sound
■ Radio - Reset default settings for radio
■ Vehicle - Reset default settings for the vehicle systems
■ Telephone - Reset default settings for phone
■ Media - Reset default settings for media
■ System - Reset the system default settings
■ MirrorLink ™
- Reset settings on the MirrorLink ™
- function
Bluetooth ®
settings
›
Press the button
→ Bluetooth .
■ Bluetooth - Switch on/off Bluetooth ®
function
■ Visibility: - Switch on/off the visibility of the Bluetooth ®
device for other de-
vices
■ Visible - Visibility is always on
■ Hidden - Visibility is off
■ Name: - Open the input screen with keyboard - Change the device name
■ Paired devices - Display the list of paired Bluetooth ®
devices; connect or de-
lete a paired device; delete the list of paired devices ■ Delete all - Delete all paired Bluetooth ®
devices
■ - Delete the paired Bluetooth ®
device
■ Find devices - Searches for available external devices with enabled Blue-
tooth ®
functions and activated visibility
■ Bluetooth audio (A2DP/AVRCP) - Switch on/off the connection option for
Bluetooth ®
profiles A2DP or AVRCP 1)
System Information›
Press the button
→ System information .
■ Device part number: ... - Part number of the unit
■ Hardware: ... - Version of the hardware used
■ Software: ... - Version of the software used
■ Media Codec: ... - Media codec version
■ Update software - the function key for the software update
The information about available software updates can be found on the ŠKODA
Internet pages www.infotainment.skoda-auto.com .
1)
A2DP or AVRCP are Bluetooth®
profiles that support multimedia functions.
15Device Settings
Page 24 of 60
Media
Operation
Introduction
This chapter contains information on the following subjects:
Main menu
22
Playback
22
Folder / track list - Browser
23
Multimedia database
23
Settings
24
First and foremost, pay attention to the safety instructions » page 4 , Impor-
tant notes .
The device allows you to play audio files from different media and connected
devices (hereinafter referred to only as “audio sources)” » page 24.
Main menu
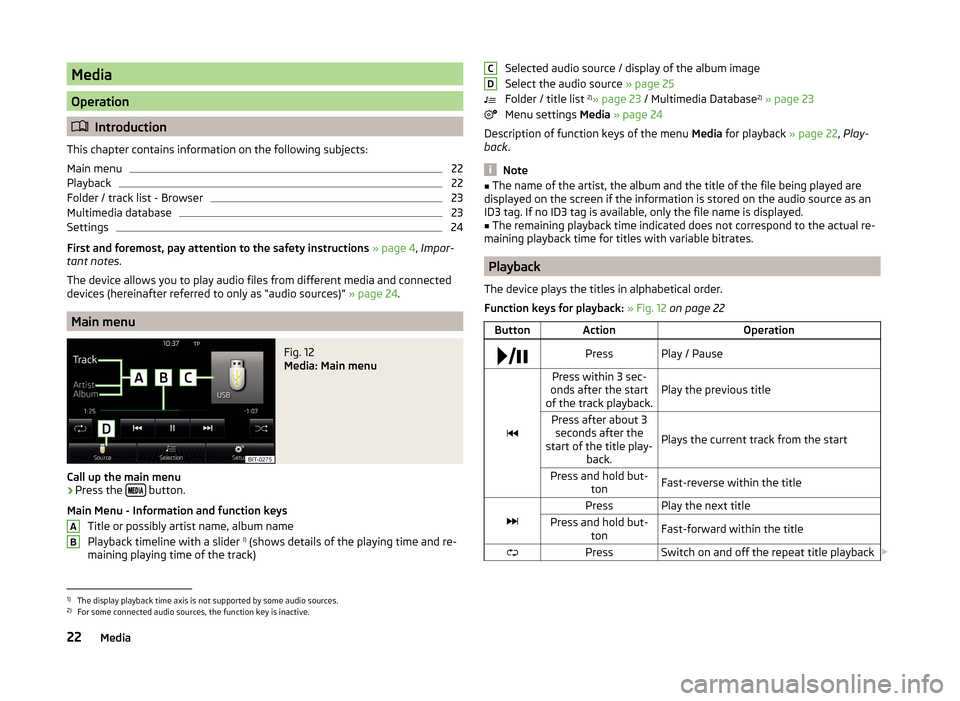
Fig. 12
Media: Main menu
Call up the main menu
›
Press the button.
Main Menu - Information and function keys Title or possibly artist name, album name
Playback timeline with a slider 1)
(shows details of the playing time and re-
maining playing time of the track)
ABSelected audio source / display of the album image
Select the audio source » page 25
Folder / title list 2)
» page 23 / Multimedia Database 2)
» page 23
Menu settings Media » page 24
Description of function keys of the menu Media for playback » page 22, Play-
back .
Note
■
The name of the artist, the album and the title of the file being played are
displayed on the screen if the information is stored on the audio source as an
ID3 tag. If no ID3 tag is available, only the file name is displayed.■
The remaining playback time indicated does not correspond to the actual re-
maining playback time for titles with variable bitrates.
Playback
The device plays the titles in alphabetical order.
Function keys for playback: » Fig. 12 on page 22
ButtonActionOperation PressPlay / Pause
Press within 3 sec-
onds after the start
of the track playback.Play the previous titlePress after about 3 seconds after the
start of the title play- back.
Plays the current track from the start
Press and hold but-tonFast-reverse within the title
PressPlay the next titlePress and hold but-tonFast-forward within the titlePressSwitch on and off the repeat title playback CD1)
The display playback time axis is not supported by some audio sources.
2)
For some connected audio sources, the function key is inactive.
22Media
Page 25 of 60

ButtonActionOperationPressSwitch on/off the repeat title playbackPressSwitch on and off the repeat title playback
from the current album or folder
The movement within the track is possible by touching the timeline 1)
B
» Fig. 12
on page 22 .
Changing to the previous or next track is possible by touching and moving the
finger to the left or right of the screen area
A
» Fig. 12 on page 22 .
Note
Some function keys for playback may not be available.
Folder / track list - Browser
Fig. 13
Folder / Title list
The content of an audio source is displayed in alphabetical order in the folder /
track list.
The device allows you to browse the folder / track list without changing the
playing track. For some audio sources the display of the folder / track list is not
available.
See a list
›
Press the function key in the menu Media
.
The folder / track list is displayed (not for connected Apple devices).
Folders and title lists - information and function keys » Fig. 13
Name of the selected audio source / the selected folder
Playback Options 2)
» table on page 22
Display the multimedia database 3)
» page 23
Folder
Playlist
Title playback
Stop the title playback
Appears on the title icon
, then this cannot be played. By pressing the func-
tion key, the cause is displayed (e.g., DRM protection, unsupported format,
etc.).
In the area A
the display shows the selected audio source, and possibly the
audio source folder. Movement within the folder is done by pressing the func-
tion key for the folder.
By pressing one of the function keys for playback
B
the playback starts and at
the same time the menu Media » Fig. 13 is displayed.
Note
■
In the folders and title lists a directory max. of 1000 entries is displayed de-
pending on the date of creation. The entries are arranged alphabetically.■
The scanning speed of the folder / track list depends on the connection
speed and volume of data.
Multimedia database
Fig. 14
Multimedia database
ABC1)
The display playback time axis is not supported by some audio sources.
2)
For some audio sources, the function keys are not available.
3)
The function is only available for the display of the entire source content and only for some audio sour-
ces.
23Media