Page 65 of 164

Note■The cigarette lighter operates only if the ignition is switched on.■The cigarette lighter socket can also be used as a 12- volt socket for electrical
appliances » page 62, 12-Volt power outlet .■
Further notes » page 93, Modifications, adjustments and technical altera-
tions .
Ashtray
Fig. 56
Opening ashtray
Read and observe on page 60 first.
The ashtray can be used for discarding ash, cigarettes, cigars and the like » .
Open/close
›
Lift the ashtray cover in direction of arrow » Fig. 56.
Closing takes place in reverse order.
Removing
›
Pull out the ashtray upwards » .
Installing
›
Insert the ashtray vertically.
WARNINGNever place flammable objects in the ashtray – risk of fire!
CAUTION
When removing, do not hold the ashtray at the cover – risk of breakage.12-Volt power outletFig. 57
12-Volt power socket
Read and observe on page 60 first.
The 12-volt electrical outlet (hereinafter referred to only as a power socket) is
located in the storage compartment in the front centre console » Fig. 57.
Use
›
Open the power socket cap » Fig. 57.
›
Connect the plug for the electrical appliance to the socket.
The power socket and the connected devices can only be used when the igni-
tion is switched on.
WARNING■ Improper use of the power sockets and the electrical accessories can
cause fires, burns and other serious injuries. Therefore, when leaving the
vehicle, never leave people who are not completely independent, such as
children, unattended in the vehicle.■
If the connected electric device becomes too hot, switch it off and discon-
nect it from the power supply immediately.
CAUTION
■ The power socket can only be used for connecting approved electrical acces-
sories with a total power uptake of up to 120 watt.■
Never exceed the maximum power consumption, otherwise the vehicle's
electrical system can be damaged.
■
Connecting appliances when the engine is not running will drain the battery
of the vehicle!
■
Only use matching plugs to avoid damaging the power sockets.
■
Only use accessories that have been tested for electromagnetic compatibility
in accordance with the applicable directives.
62Using the system
Page 66 of 164

■Switch off the devices connected to the power sockets before you switch
the ignition on or off and before starting the engine, to avoid damage from
voltage fluctuations.■
Observe the operating instructions for the connected devices!
Multimedia holder
Fig. 58
Multimedia holder
Read and observe on page 60 first.
You can use this multimedia holder » Fig. 58 to store e.g. a mobile phone, MP3
player or similar devices.
The holder can be found in the stowage compartment of the front centre con-
sole » Fig. 58 .
WARNINGNever use the multimedia holder as an ashtray - risk of fire!
Photo holder
Fig. 59
Photo holder
Read and observe on page 60 first.
The photo holder can be used for attachment of, for example, photos, sticky
notes and such like.
The holder is located in the middle part of the panel » Fig. 59.
Storage compartment on the front passenger side - version 1
Fig. 60
Storage compartment on the
front passenger side
Read and observe on page 60 first.
The open stowage compartment can be found underneath the dash panel on
the front passenger's side » Fig. 60.
There is a bag hook
A
at the open stowage compartment which is used to
hang smaller items of luggage, e.g. bags, or similar.
CAUTION
The maximum permissible load of the hook is 1.5 kg.63Transporting and practical equipment
Page 67 of 164

Storage compartment on the passenger side - version 2Fig. 61
Storage compartment on the front passenger side
Read and observe
on page 60 first.
Storage compartment » Fig. 61
Opening lever
Glasses storage box
Notepad holder
Pen holder
Coin holder
Card holder
Open/close
›
Pull on the opening lever
1
» Fig. 61 .
Please read the following information if there is a foldable hook in the opening
lever » page 64,
in section Foldable hook .
›
To close, push the cover upwards.
The cover must engage firmly.
WARNINGThe storage compartment must always be closed when driving for safety
reasons.123456Foldable hookFig. 62
Foldable hooks
Read and observe on page 60 first.
The foldable hook can be used to hang small items of luggage, such as bags and the like.
The foldable hook is located in the opening levers of the storage compartment
cover on the passenger side » Fig. 62.
CAUTION
■
The maximum permissible load of the hook is 1.5 kg.■Remove suspended luggage from the hook before opening the storage com-
partment lid - there is a risk of damage to hook.
Note
When the hook is folded forward, it folds back automatically when the storage
compartment is opened.
Clothes hook
Read and observe
on page 60 first.
The clothes hooks are located at the centre door bars of the vehicle.
WARNING■Only hang light items of clothing on the hooks. Never leave any heavy or
sharp-edged objects in the pockets of the items of clothing.■
Do not use clothes hangers for hanging up items of clothing otherwise
this may reduce the effectiveness of head airbags.
■
Ensure that any clothes hanging from the hooks do not impair your vision
to the rear.
64Using the system
Page 68 of 164

CAUTIONThe maximum permissible load of the hooks is 2 kg.
Net pockets on the front seat rest
Fig. 63
Meshed pocket
Read and observe
on page 60 first.
The net pockets are used for storage of small and light objects, such as mobile phones and the like.
The net pockets are located on the inner sides of the front seat backr-
ests » Fig. 63 .
WARNINGDo not exceed the maximum permissible load of the meshed pockets.
Heavy objects are not secured sufficiently – risk of injury!
CAUTION
■ The maximum permissible load of the meshed pockets is 150 g.■Never place large objects, e.g. bottles or objects with sharp edges into the
map pockets - risk of damaging the pockets and seat coverings.Stowage compartments in front of the rear seatsFig. 64
Storage compartment
Read and observe on page 60 first.
The open storage compartments » Fig. 64are located in front of the rear seats.
Luggage compartment
Introduction
This chapter contains information on the following subjects:
Lashing eyes
66
Bag hooks
66
Fixing nets
67
Luggage compartment cover
67
Variable loading floor
68
Class N1 vehicles
68
Please observe the following for the purpose of maintaining good handling
characteristics of your vehicle:
›
Distribute loads as evenly as possible.
›
Place heavy objects as far forward as possible.
›
Attach the items of luggage to the lashing eyes or by using the fixing
nets » page 66 .
In the event of an accident, even small and light objects gain so much kinetic
energy that they can cause severe injuries.
The magnitude of the kinetic energy is dependent on the speed at which the
vehicle is travelling and the weight of the object.
65Transporting and practical equipment
Page 69 of 164

Example: In the event of a frontal collision at a speed of 50 km/h, an object
with a weight of 4.5 kg produces an energy, which corresponds to 20 times its
own weight. This means that it results in a weight of approx. 90 kg “ ”.WARNING■ Always store transported objects in the boot and attach them to the lash-
ing eyes.■
Loose objects can be thrown forward during a sudden manoeuvre or in
case of an accident and can injure the occupants or other road users.
■
Loose objects could hit a deployed airbag and injure occupants – danger
of death!
■
Please note that transporting heavy objects alters the handling proper-
ties of the vehicle due to the displacement of the centre of gravity – risk of
accident! The speed and style of driving must be adjusted accordingly.
■
If the items of luggage or objects are attached to the lashing eyes with
unsuitable or damaged lashing straps, injuries can occur in the event of
braking manoeuvres or accidents. To prevent items of luggage from moving
around, always use suitable lashing straps which must be firmly attached
to the lashing eyes.
■
The transported items must be stowed in such a way that no objects are
able to slip forward on sudden driving or braking manoeuvres – risk of in-
jury!
■
When transporting objects in the luggage compartment that has been en-
larged by folding the rear seats forward, ensure the safety of the passen-
gers transported on the other rear seats » page 10, Correct seated position
for the passengers in the rear seats .
■
If the rear seat next to the folded forward seat is occupied, ensure maxi-
mum safety, e.g. by placing the goods to be transported in such a way that
the seat is prevented from folding back in case of a rear collision.
■
Do not drive with the luggage compartment lid fully opened or slightly
ajar otherwise exhaust gases may get into the interior of the vehicle – risk
of poisoning!
■
Do not exceed the permissible axle loads and permissible gross weight of
the vehicle – risk of accident!
■
Do not transport people in the boot!
CAUTION
■ Please ensure that the heating elements for the rear window heater are not
damaged as a result of abrasive objects.■
Tyre pressure must be adjusted to the load » page 118.
Lashing eyesFig. 65
Lashing eyes
Read and observe and on page 66 first.
Fixing eyes are located on the sides of the loading area for lashing the goods
to be loaded » Fig. 65.
CAUTION
The maximum permissible static load of the individual lashing eyes is 3.5 kN
(350 kg).
Bag hooks
Fig. 66
Bag hooks
Read and observe and on page 66 first.
The luggage compartment has bag hooks used to secure smaller items of lug- gage, e.g. bags, etc. » Fig. 66.
WARNINGNever use the bag hooks for lashing loaded goods. The bag hooks may tear
off during sudden braking manoeuvres or in the event of an accident. 66Using the system
Page 70 of 164

CAUTIONThe bag hooks may be loaded up to a maximum of 1.5 kg.
Fixing nets
Fig. 67
Fixing nets/fastening details in the rear area of the luggage com-
partment
Fig. 68
Details of the fastening behind the rear seats
Read and observe
and on page 66 first.
Securing of the nets » Fig. 67 and » Fig. 68
Horizontal pocket
Fastening details in the rear area of the luggage compartment
Details of the fastening to the upper lashing eyes behind the foldable rear
seat rest
Details of the fastening to the lashing eyes on the luggage compartment
floor behind the rear seats
CAUTION■ The maximum permissible load of the fixing nets is 1.5 kg.■Do not place any sharp objects in the nets – risk of net damage.
Luggage compartment cover
Fig. 69
Removing/installing the luggage
compartment cover
Read and observe and on page 66 first.
The luggage compartment cover can be removed if you wish to transport bulky
goods.
Folding up/folding down
›
To fold up, raise the luggage compartment cover and press into the side
holders
A
» Fig. 69 .
›
To fold down, pull the raised part of the luggage compartment cover to the
rear.
Removing/installing
›
To remove, move the luggage compartment downwards from the side hold-
ers
B
» Fig. 69 .
›
To re-install it, place the luggage compartment cover on the side holders
B
and press on them from above into the holders
B
.
WARNING■
No objects should be placed on the luggage compartment cover, the vehi-
cle occupants could be endangered if there is sudden braking or the vehicle
collides with something.■
Never drive while the luggage compartment cover is raised. Always fold it
down before your journey, or remove it.
67Transporting and practical equipment
Page 71 of 164

CAUTIONMake sure that the luggage compartment cover is correctly engaged in the
side holders B » Fig. 69 - risk of damage to luggage compartment cover/lug-
gage compartment.
Variable loading floor
Fig. 70
Variable loading floor: open / fold up
Fig. 71
Enlarge the luggage compartment: downward / forward
Read and observe
and on page 66 first.
Open/close
›
Grasp the load floor at handle
1
and raise to the stop in the direction of the
arrow » Fig. 70 -
.
›
Close the load floor against the direction of the arrow.
Expanding luggage compartment downwards
›
Lift the load floor and push into the grooves » Fig. 71 -
.
›
Place the load floor on the base of the luggage compartment.
Expanding luggage compartment forwards›Remove the boot cover
» page 67.›
Remove the rear head restraints » page 56.
›
Fold the rear seat backrests forward » page 59.
Class N1 vehicles
Read and observe
and on page 66 first.
In class N1 vehicles that are not fitted with a protective grille, a lashing set that
complies with the EN 12195 standard (1-4) must be used for fastening the load.
For safe vehicle operation, the proper functioning of the electrical installation
is essential. It is important to ensure that it is not damaged in adaptation as
well as the loading and unloading of the cargo space.
Roof rack
Introduction
This chapter contains information on the following subjects:
fixing points for base support
69
Roof load
69WARNING■ The transported items on the roof rack must be securely attached – risk
of accident!■
Always secure the load with appropriate and undamaged lashing straps
or tensioning straps.
■
Distribute the load evenly over the roof rack system.
■
When transporting heavy objects or objects which take up a large area on
the roof rack system, the handling of the car may change as a result of the
displacement of the centre of gravity. The style of driving and speed must
therefore be adapted to the current circumstances.
■
Avoid abrupt and sudden driving/braking manoeuvres.
■
The permissible roof load, permissible axle loads and permissible total ve-
hicle weight must not be exceeded under any circumstances – risk of acci-
dent!
68Using the system
Page 72 of 164

CAUTION■Only roof racks from the ŠKODA Original Accessories range should be used.■When dealing with roof racks, the installation instructions supplied with the
roof luggage rack system must be observed.■
On vehicles with a panoramic sunroof, make sure that the tilted panorama
roof does not strike any items which are transported.
■
Ensure that the luggage compartment lid does not hit the roof load when
opened.
■
The height of the vehicle changes after mounting a roof luggage rack system
and the load that is secured to it. Compare the vehicle height with available
clearances, such as underpasses and garage doors.
■
Always remove the roof luggage rack system before entering an automated
car wash.
■
Ensure the roof aerial is not impaired by the secured load.
For the sake of the environment
The increased aerodynamic drag results in a higher fuel consumption.
fixing points for base support
Fig. 72
Attachment points
Read and observe
and on page 68 first.
Perform the assembly and disassembly according to the enclosed instructions.
CAUTION
Observe the information regarding the assembly and disassembly in the en-
closed instructions.Roof load
Read and observe
and on page 68 first.
The maximum permissible roof load (including roof rack system) of 50 kg and
the maximum permissible total weight of the vehicle should not be exceeded.
The full permissible roof load cannot be used if a roof rack system with a lower
load carrying capacity is used. In this case, the roof rack system must only be
loaded up to the maximum weight limit specified in the fitting instructions.
69Transporting and practical equipment
 1
1 2
2 3
3 4
4 5
5 6
6 7
7 8
8 9
9 10
10 11
11 12
12 13
13 14
14 15
15 16
16 17
17 18
18 19
19 20
20 21
21 22
22 23
23 24
24 25
25 26
26 27
27 28
28 29
29 30
30 31
31 32
32 33
33 34
34 35
35 36
36 37
37 38
38 39
39 40
40 41
41 42
42 43
43 44
44 45
45 46
46 47
47 48
48 49
49 50
50 51
51 52
52 53
53 54
54 55
55 56
56 57
57 58
58 59
59 60
60 61
61 62
62 63
63 64
64 65
65 66
66 67
67 68
68 69
69 70
70 71
71 72
72 73
73 74
74 75
75 76
76 77
77 78
78 79
79 80
80 81
81 82
82 83
83 84
84 85
85 86
86 87
87 88
88 89
89 90
90 91
91 92
92 93
93 94
94 95
95 96
96 97
97 98
98 99
99 100
100 101
101 102
102 103
103 104
104 105
105 106
106 107
107 108
108 109
109 110
110 111
111 112
112 113
113 114
114 115
115 116
116 117
117 118
118 119
119 120
120 121
121 122
122 123
123 124
124 125
125 126
126 127
127 128
128 129
129 130
130 131
131 132
132 133
133 134
134 135
135 136
136 137
137 138
138 139
139 140
140 141
141 142
142 143
143 144
144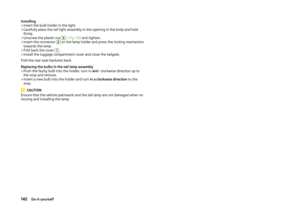 145
145 146
146 147
147 148
148 149
149 150
150 151
151 152
152 153
153 154
154 155
155 156
156 157
157 158
158 159
159 160
160 161
161 162
162 163
163