Page 121 of 240

Air conditioning
Note
Please consider the general notes. Vehicle interior heating or cooling system
Fig. 129
Air conditioning controls on the dash
panel. Interior heating
– Turn off the cooling system using the
››› Fig. 129 A/C button (the button light
turns off).
– Turn the temperature selector A to set the
desired temperature inside the vehicle.
– Turn the blower switch to any of the set-
tings 1-4.
– Set the air distribution control C to the air
flow configuration desired: (towards the
windscreen), (towards the chest),
(towards the footwell) and
(towards the
windscreen and footwell areas).
Interior cooling
– Turn on the cooling system using the A/C button (the button light
should light up).
– Turn the t
emperature control switch until
the desired interior temperature is reached.
– Turn the blower switch to any of the set-
tings 1-4. –
Set the air distribution control to the air
flow configuration desired: (towards the
windscreen), (towards the chest),
(towards the footwell) and
(towards the
windscreen and footwell areas).
Heating
Maximum heat output, which is needed to
defrost the windows quickly, is only available
when the engine has reached its operating
temperature. »
119
Technical specifications
Advice
Operation
Safety
The essentials
Page 122 of 240

Operation
Coolant system
When the air conditioning is switched on, the
temperature and the air humidity go down.
This way, if the outside humidity is extreme,
the air conditioning prevents the misting of
the windows and therefore, comfort is im-
proved.
If the air conditioning does not work, this
may be due to the following reasons:
● The engine is stationary.
● The fan blower is switched off.
● The outside temperature is lower than ap-
proximately +3 °C (+37 °F).
● The air conditioning system compressor
has been temporarily switched off because of
an increased engine coolant temperature.
● The air conditioner fuse is faulty.
● Another fault in the vehicle. Have the air
conditioning checked by a specialised work-
shop.
Air recirculation Air recirculation mode on
›››
Fig. 129 (a
lamp lights up on the button) prevents strong
odours or contaminated air from the outside air from entering in the vehicle, for example
when passing through a tunnel or in a traffic
jam.
When the outside temperature is low, air re-
circulation mode improves heating perform-
ance by heating air from the interior instead
of cold air from the outside.
When the outside temperature is high, air re-
circulation mode improves cooling perform-
ance by cooling air from the interior instead
of warm air from outside.
For safety reasons, the air recirculation
should not be switched on
when the air dis-
tribution control is set to the windscreen set-
ting . WARNING
In air recirculation mode, no cold air from the
outside enters the vehicle interior. If the air
conditioner is switched off, the windows can
quickly mist over. Therefore, never leave the
air recirculation mode switched on for a long
time (risk of accident). Note
● When engaging reverse gear, the air recir-
culation is connected automatically to pre-
vent the entrance of exhaust gases in the ve-
hicle on travelling backwards. The control
lamp on the button does not light up.
● If the temperature control is turned to the
coldest setting (blue point) and the A/C but- ton is on, the “Air recirculation” function is
automatically activated in order to cool the
vehicle faster using less energy, and its func-
tion control lamp will light up.
● If the function is not deactivated by press-
ing the button, it will deactivate after approx-
imately 20 minutes. Economic use of the air conditioning
When the air conditioning is switched on, the
compressor consumes engine power and has
influence on fuel consumption. Consider the
following points in order to have the system
operating in the minimum possible time.
● If the vehicle interior has overheated due to
an excessive solar radiation, it is best to
open the windows or doors to allow the hot
air to escape.
● While in motion, the air conditioning
should not be switched on if the windows or
the sunroof* are open.
120
Page 123 of 240

Air conditioning
Climatronic* Controls Fig. 130
Climatronic controls on the dash panel. Read the additional information carefully
››› page 21
The air conditioner only works when the en-
gine is running and the blower is on.
The functions will be switched on when its
buttons are pressed, turning on the air condi-
tioner if it was switched off, with the excep-
tion of button 17 (recirculation) When the
function is activated, a symbol is displayed
on the screen. Press the button again to
switch off the function.
To switch off the climatronic, press button 9until the segments in column
1 go off. After1 second has passed, press the button again
to switch off the display. WARNING
For your safety, the windows should never be
fogged up or covered with snow or ice. This is
essential to ensure good visibility. Please fa-
miliarise yourself with the correct operation
of the heating and ventilation system, includ-
ing the demist/defrost functions for the win-
dows. Note
Please consider the general notes. Automatic mode
In this mode, air temperature, air flow and
distribution are automatically adjusted so
that a comfortable temperature is attained as
quickly as possible, and then maintained.
Switching on automatic mode
– Press the AUTO button. It displays the indi-
cation ››› Fig. 130 3 .
– Press keys ››› Fig. 130 10 and
11 to adjust
the desired temperature inside the vehicle.
We recommend +22 °C (+72 °F). »
121Technical specifications
Advice
Operation
Safety
The essentials
Page 124 of 240
 is set in automatic mode. Therefore,
we recommend you not to change this adjust-
ment, except as nec")
Operation
A comfortable interior climate is quickly
reached when a temperature of +22 °C
(+72 °F) is set in automatic mode. Therefore,
we recommend you not to change this adjust-
ment, except as necessary to suit individual
preferences or particular circumstances. It is
possible to select interior temperatures from
+18 °C (+64 °F) to +29 °C (+86 °F). If a lower
or higher temperature is selected, LO or
HI
ar
e respectively displayed on the screen.
These are approximate temperatures which
may slightly vary depending on the outside
conditions.
Climatronic maintains an excellent, comforta-
ble temperature by automatically adjusting
the supplied air temperature, the blower
speed and the air distribution. The system al-
so considers the sunlight radiation, so there
is no need for manual readjustment. There-
fore, automatic mode alwa
ys provides the
best comfort for the vehicle occupants
throughout the year.
Automatic mode is switched off whenever an
adjustment is made using the buttons for air
distribution or blower. The temperature con-
tinues to self-regulate.
To switch off Climatronic, press the –
9 button repeatedly until the display switches
off. Manual mode In manual mode the air temperature, flow,
and the desired air distribution can be adjus-
ted.
Switching on manual mode
– Press one of the buttons ››› Fig. 130 14 to
16 or press the blower control
8 and
9 .
The indicator is switched off 3 .
Temperature
It is possible to select interior temperatures
from +18 °C (+64 °F) to +29 °C (+86 °F).
These are approximate temperatures which
may slightly vary depending on the outside
conditions.
If you select temperatures below +18 ℃
(+17.78 ℃), the indication: L O
will appear on
the screen. In this setting the system runs at
maximum cooling output and the tempera-
ture is not regulated.
If a temperature above +29 °C (+86 °F) is se-
lected, the screen will show HI
. In this setting
the system runs at maximum heating output
and the temperature is not controlled.
Blower
The blower can be adjusted using buttons
››› Fig. 130 8 and
9 . If the blower is off
(level 1 is not shown on the screen) andbutton
9 is pressed after 1 second, the Cli-
matronic switches off.
Air distribution
The air distribution is adjusted using the but-
tons ,
and
. It is also possible to
open and close some of the air outlets sepa-
rately.
Switching the air conditioning on and off
By pressing the A/C button, the air cooling
system can be switched off in order to save
fuel. The temperature continues to self-regu-
late. The set temperature can then only be
reached if it is higher than the outside tem-
perature.
In rain or high humidity, we recommend
switching the A/C on so that the evaporator
does not allow the windscreen to steam up.
Air recirculation mode –
Press the button to switch air recircula-
tion mode on or off. This is ON if the sym-
bol ›››
Fig. 130 is displayed on the
s c
reen.
Air recirculation mode prevents strong
odours or contaminated air from the outside
air from entering in the vehicle, for example
when passing through a tunnel or in a traffic
jam.
122
Page 125 of 240

Driving
When the outside temperature is low, air re-
circulation mode improves heating perform-
ance by heating air from the interior instead
of cold air from the outside.
When the outside temperature is high, air re-
circulation mode improves cooling perform-
ance by cooling air from the interior instead
of warm air from outside.
For safety reasons, the air recirculation
should not be switched on when the air dis-
tribution control is set to the windscreen set-
ting . WARNING
In air recirculation mode, no cold air from the
outside enters the vehicle interior. If the air
conditioner is switched off, the windows can
quickly mist over. Therefore, never leave the
air recirculation mode switched on for a long
time (risk of accident). Note
When engaging reverse gear, the air recircu-
lation is connected automatically to prevent
the entrance of exhaust gases into the vehi-
cle upon travelling backwards. In this case
the symbol for air recirculation is not dis-
played. Driving
Starting and stopping the
engine Ignition key positions Fig. 131
Ignition key positions. Ignition switched off, steering lock
1 In this position
››› Fig. 131, the ignition and
the engine are OFF and the steering may be
locked.
For the Steering lock
to operate without the
ignition k
ey, turn the steering wheel until it
locks with an audible sound. You should al-
ways lock the steering wheel when you leave
your vehicle. This will help prevent vehicle
theft ››› .Switching the ignition or the glow plug
system on
2 Turn the ignition key to this position and re-
lease it. If the key cannot be turned or it is
difficult to turn from position
1 to position
2 , move the steering wheel from one side to
the other; this will release it.
Starting 3 The engine is started when the key is in this
position. Electrical devices with high power
consumption are switched off temporarily at
the same time.
Each time that the vehicle is restarted, the ig-
nition key must be turned to position
1 . The
repetitive start prevention lock of the igni-
tion prevents possible damage to the starter
motor if the engine is already running. WARNING
● The ignition key must NOT be removed from
the lock until the vehicle comes to a stand-
still. Otherwise, the steering could be imme-
diately blocked- Risk of accident!
● Always remove the key from the ignition
when leaving the vehicle, even if only for a
short period. This is especially important if
children or disabled people are left alone in
the vehicle. They could accidentally start the
engine or work electrical equipment such as
the electric windows, resulting in an acci-
dent. » 123
Technical specifications
Advice
Operation
Safety
The essentials
Page 126 of 240

Operation
●
Unsupervised use of the key could start the
engine or any electrical system, such as the
electric windows. This could result in serious
injury. CAUTION
The starter motor will only work when the en-
gine is stopped (ignition key position 3 ).
Electronic immobiliser
The electronic immobiliser prevents unau-
thorised persons from driving the vehicle.
Inside the key there is a chip that deactivates
the electronic immobiliser automatically
when the key is inserted into the ignition.
The electronic immobiliser will be activated
again automatically as soon as you pull the
key out of the ignition lock.
The engine can only be started using a genu-
ine SEAT key with its correct code.
Note
A perfect operation of the vehicle is ensured
if genuine SEAT keys are used. Starting petrol engines
The engine can only be started using a genu-
ine SEAT key with its correct code.
– Move the gearbox lever to the neutral posi-
tion and depress the clutch pedal thor-
oughly and hold it in this position for the
starter to turn the engine on.
– Turn the ignition key to the starting posi-
tion ››› page 123.
– Let
go of the ignition key as soon as the en-
gine starts; the starter motor must not run
on with the engine.
After starting a very hot engine, you may
need to slightly press down the accelerator.
When starting a cold engine, it may be a little
noisy for the first few seconds until oil pres-
sure has built up in the hydraulic valve com-
pensators. This is quite normal, and no cause
for concern.
If the engine does not start immediately,
switch the starter off after 10 seconds and try
again after half a minute. If the engine still
does not start, the fuel pump fuse should be
checked ›››
page 195, Fuses. WARNING
● Never start or run the engine in unventila-
ted or closed rooms. The exhaust gases con-
tain carbon monoxide, an odourless and col-
ourless poisonous gas. Risk of fatal acci- dents. Carbon monoxide can cause loss of
consciousness and result in death.
●
Never leave the vehicle unattended if the
engine is running.
● Never use “cold start sprays”, they could
explode or cause the engine to run at high
revs. Risk of injury. CAUTION
● When the engine is cold, you should avoid
high engine speeds, driving at full throttle
and over-loading the engine. Risk of engine
damage.
● The vehicle should not be pushed or towed
more than 50 metres to start the engine. Un-
burnt fuel could enter the catalytic converter
and damage it.
● Before attempting to push-start or tow a ve-
hicle in order to start it, you should first try to
start it using the battery of another vehicle.
Please observe and follow the notes on the
››› page 188, Jump-starting
. For the sake of the environment
Do not warm-up the engine by running the
engine with the vehicle stationary. Start off
immediately, driving gently. This helps the
engine reach operating temperature faster
and reduces emissions. 124
Page 127 of 240

Driving
Starting diesel engines The engine can only be started using a genu-
ine SEAT key with its correct code.
– Move the gearbox lever to the neutral posi-
tion and depress the clutch pedal thor-
oughly and hold it in this position for the
starter to turn the engine on.
– Turn the ignition key to position ››› Fig. 131
2 . The warning lamp
will light for en-
gine pr e-he
ating.
– When the lamp turns off, turn the ignition
key to position 3 to start the engine. Do
not press the accelerator.
– Release the ignition key as soon as the en-
gine starts. The starter motor should not
turn at the same time.
When starting a cold engine, it may be a little
noisy for the first few seconds until oil pres-
sure has built up in the hydraulic valve com-
pensators. This is quite normal, and no cause
for concern.
If there are problems starting the engine, see
the ›››
page 188 .
Glo w p
lug system for the diesel engine
To avoid unnecessary discharging of the bat-
tery, do not use any other major electrical
equipment while the glow plugs are pre-heat-
ing. Start the engine as soon as the glow plug
warning lamp goes out.
Starting a diesel engine after the fuel tank
has been completely run dry
If the fuel tank has been completely run dry,
it may take longer than normal (up to one mi-
nute) to start a diesel engine after refuelling.
This is because the fuel system must elimi-
nate air first.
WARNING
Observe the safety warnings ››› in Starting
petrol engines on page 124. CAUTION
● When the engine is cold, you should avoid
high engine speeds, driving at full throttle
and over-loading the engine. Risk of engine
damage.
● The vehicle should not be pushed or towed
more than 50 metres to start the engine. Un-
burnt fuel could enter the catalytic converter
and damage it.
● Before attempting to push-start or tow a ve-
hicle in order to start it, you should first try to
start it using the battery of another vehicle.
Please observe and follow the notes on the
››› page 188, Jump-starting. For the sake of the environment
Do not warm-up the engine by running the
engine with the vehicle stationary. You
should drive off as soon as you start the en-
gine. This helps the engine reach operating
temperature faster and reduces emissions. Switching off the engine
–
Stop the vehicle.
– Turn the ignition key to position ›››
Fig. 131
1 .
After switching the engine off, the radiator
fan may run on for up to 10 minutes. The fan
may also turn on again if coolant temperature
increases from accumulated heat in the en-
gine compartment or due to its prolonged ex-
posure to solar radiation. WARNING
● Never switch the engine off until the vehi-
cle is completely stationary.
● The brake servo works only when the en-
gine is running. With the engine switched off,
more strength is needed to brake. As normal
brake operation cannot be performed, risk of
accidents and serious injury may exist.
● The steering lock can be immediately
blocked once the key is removed from the ig-
nition. The vehicle cannot be steered. Risk of
accident. » 125
Technical specifications
Advice
Operation
Safety
The essentials
Page 128 of 240

Operation
CAUTION
When the engine has been running under a
heavy load for a long period, heat can accu-
mulate in the engine compartment and cause
engine damage. For this reason, idle the en-
gine for approximately 2 minutes before
switching it off. Braking and parking
Braking capacity and braking distance The efficiency of the brakes depends directly
on the
brake pad
wear. This wear depends to
a gr
eat extent on the conditions under which
the vehicle is operated and the way the vehi-
cle is driven. If you often drive in town, drive
short distances or have a sporty driving style,
we recommend that you have the thickness
of your brake pads checked by technical serv-
ices more frequently than recommended in
the Maintenance Programme.
If you drive with wet brakes, for example, af-
ter crossing areas of water, on days of heavy
rainfall or even after washing the car, the ef-
fect of the brakes is reduced as the brake
discs are wet or even frozen (in winter): in
this case, the brakes should be “dried” by
pressing the brake pedal several times. WARNING
Longer braking distances and faults in the
brake system increase the risk of accidents.
● New brake pads must be run in and do not
have the correct friction during the first
200 km. This reduced braking capacity may
be compensated for by pressing on the brake
pedal a little harder, which also applies when
the brake pads have to be changed further
on.
● If brakes are wet or frozen, or if you are
driving on roads which have been salted,
braking power may be lower than normal.
● On steep slopes, if brakes are excessively
used, they will overheat. Before driving down
a long steep slope, it is advisable to reduce
speed and change down into a lower gear or
range (depending on the type of transmis-
sion). Thus, make use of engine braking and
relieve the brakes.
● Never let the brakes “drag” by applying
light pressure. Continuous braking will cause
the brakes to overheat and the braking dis-
tance will increase. Apply and then release
the brakes alternately.
● Never let the vehicle run with the engine
switched off. The braking distance is in-
creased considerably when the brake servo is
not active.
● If the brake fluid loses its viscosity and is
subjected to heavy use, vapour bubbles can
form in the brake system. This reduces the ef-
ficiency of the brakes. ●
Non-standard or damaged front spoilers
could restrict the airflow to the brakes and
cause them to overheat. Before purchasing
accessories please observe the relevant in-
structions ››› page 155, Technical modifica-
tions.
● If a br
ake system circuit fails, the braking
distance will be increased considerably. Con-
tact a specialised workshop immediately and
avoid unnecessary journeys. Handbrake
Fig. 132
Handbrake between the front seats. The handbrake should be applied firmly to
prevent the vehicle from accidentally rolling
away. Always apply the handbrake when you
leave your vehicle and when you park.
126
 1
1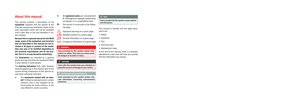 2
2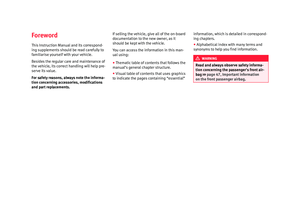 3
3 4
4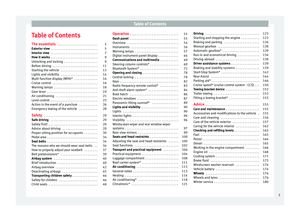 5
5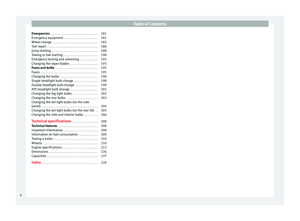 6
6 7
7 8
8 9
9 10
10 11
11 12
12 13
13 14
14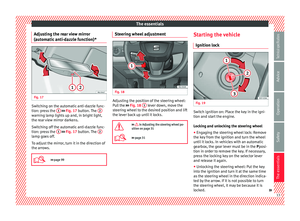 15
15 16
16 17
17 18
18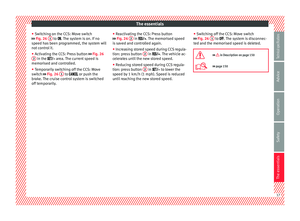 19
19 20
20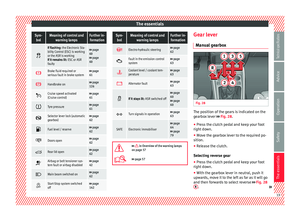 21
21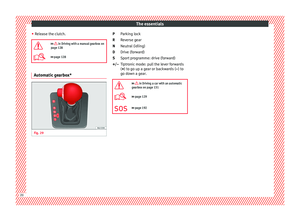 22
22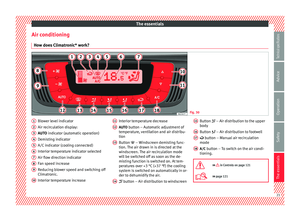 23
23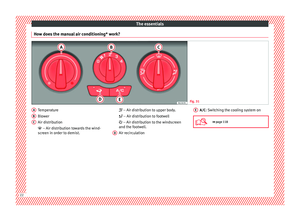 24
24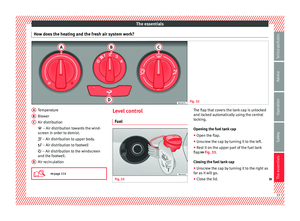 25
25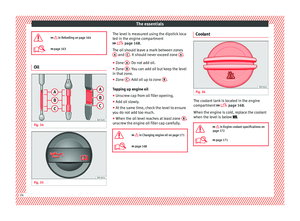 26
26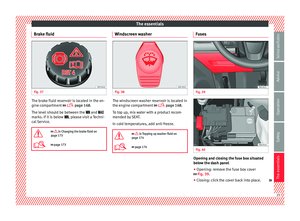 27
27 28
28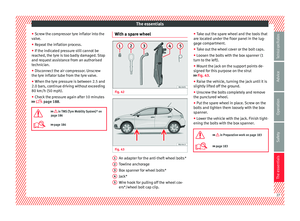 29
29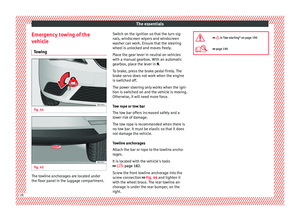 30
30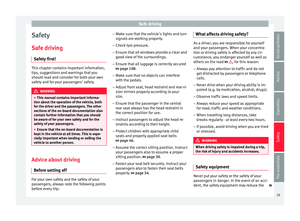 31
31 32
32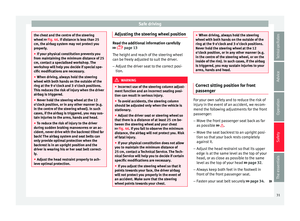 33
33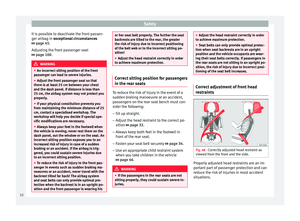 34
34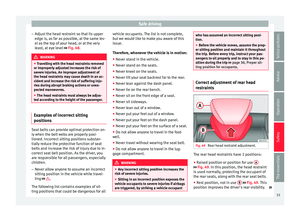 35
35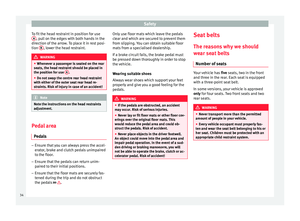 36
36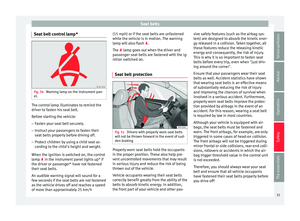 37
37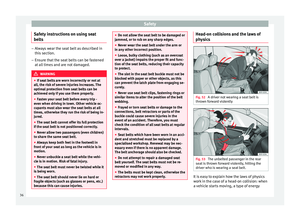 38
38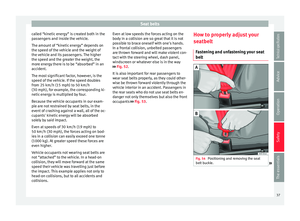 39
39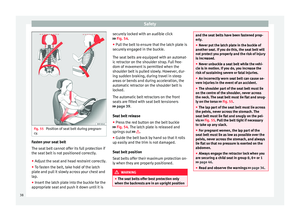 40
40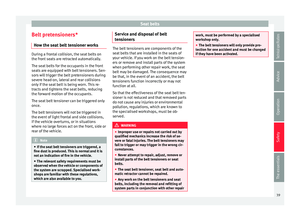 41
41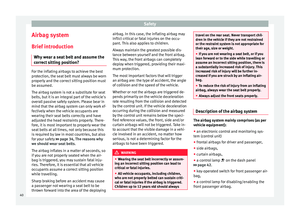 42
42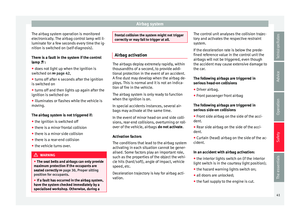 43
43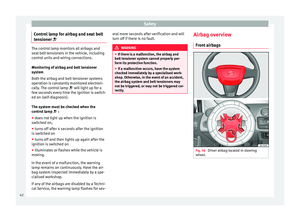 44
44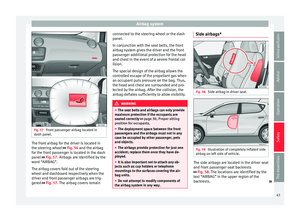 45
45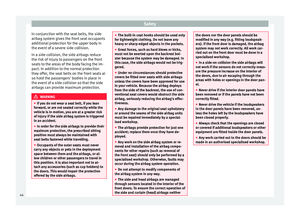 46
46 47
47 48
48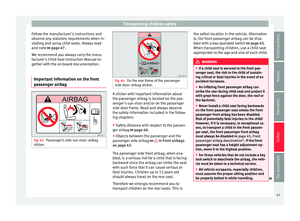 49
49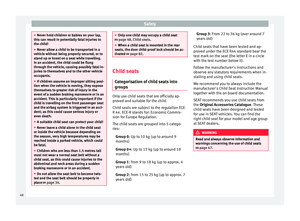 50
50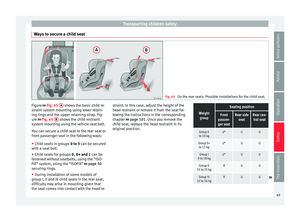 51
51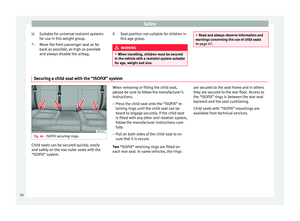 52
52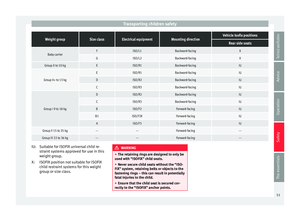 53
53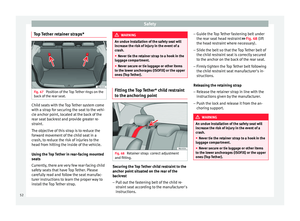 54
54 55
55 56
56 57
57 58
58 59
59 60
60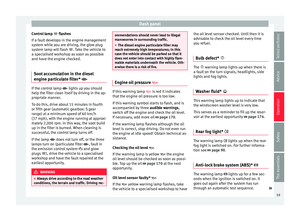 61
61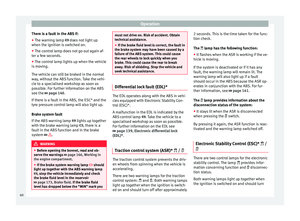 62
62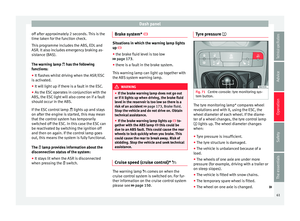 63
63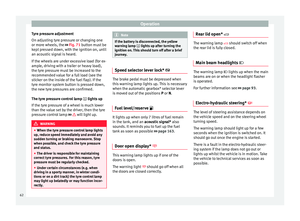 64
64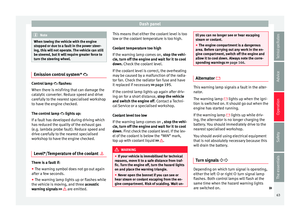 65
65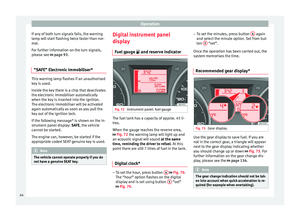 66
66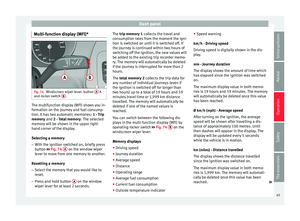 67
67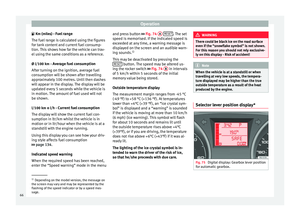 68
68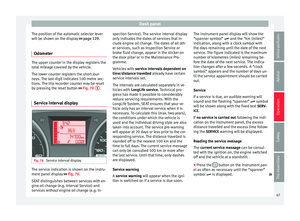 69
69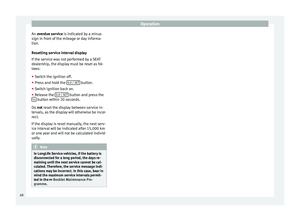 70
70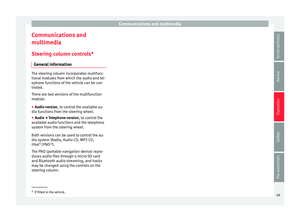 71
71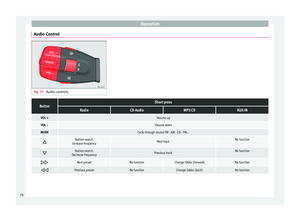 72
72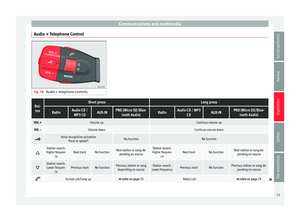 73
73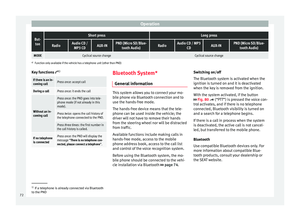 74
74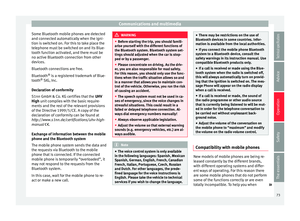 75
75 76
76 77
77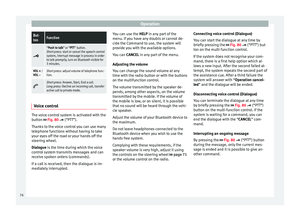 78
78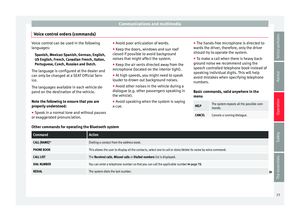 79
79 80
80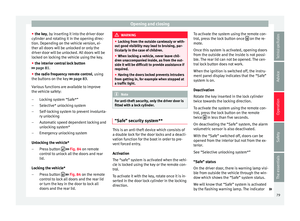 81
81 82
82 83
83 84
84 85
85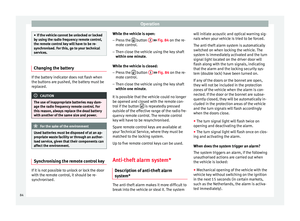 86
86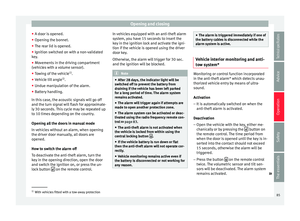 87
87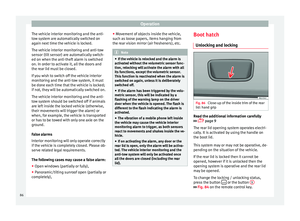 88
88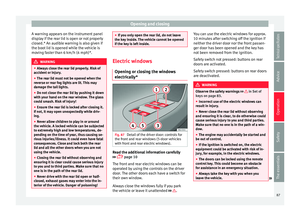 89
89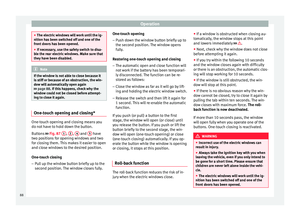 90
90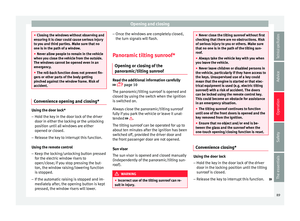 91
91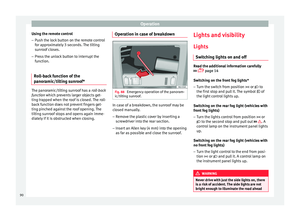 92
92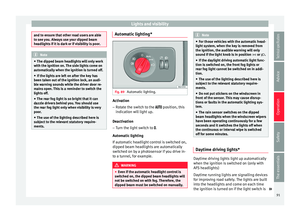 93
93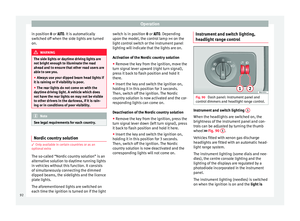 94
94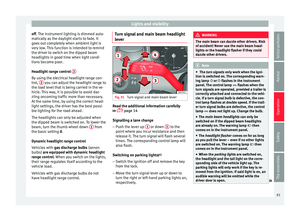 95
95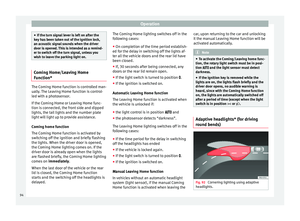 96
96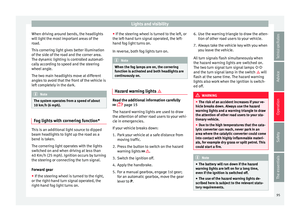 97
97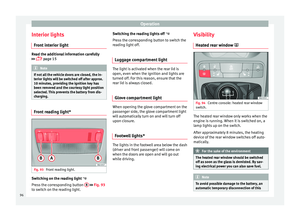 98
98 99
99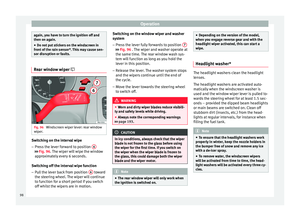 100
100 101
101 102
102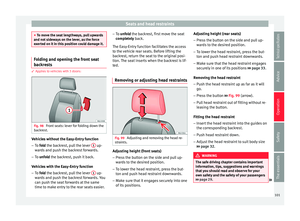 103
103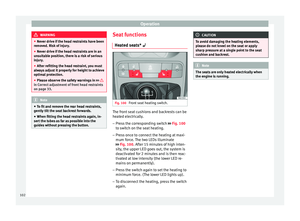 104
104 105
105 106
106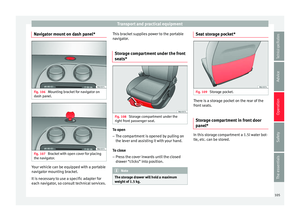 107
107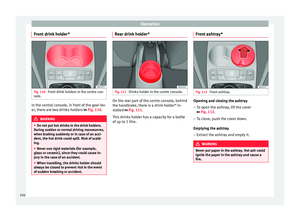 108
108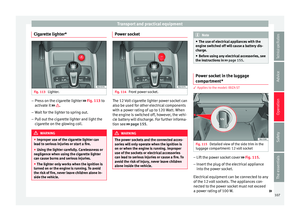 109
109 110
110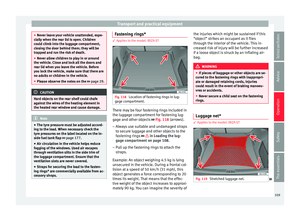 111
111 112
112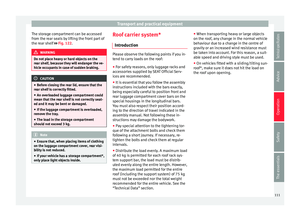 113
113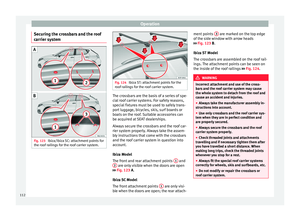 114
114 115
115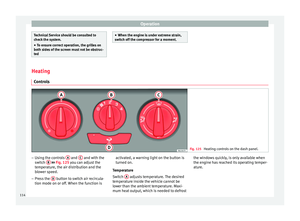 116
116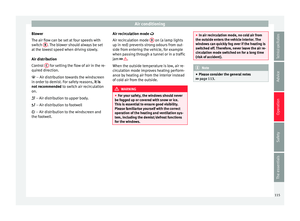 117
117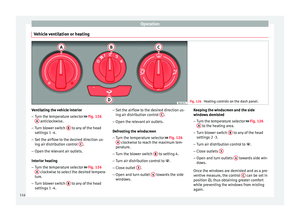 118
118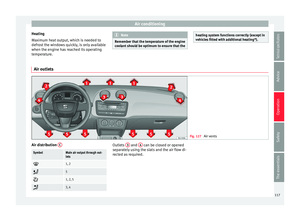 119
119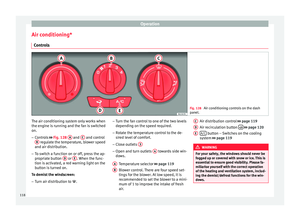 120
120 121
121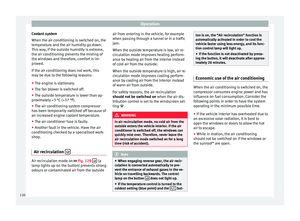 122
122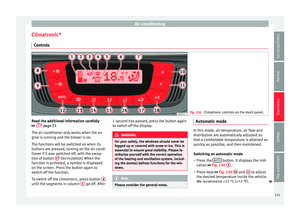 123
123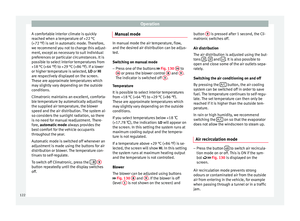 124
124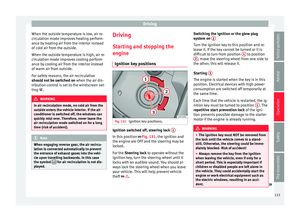 125
125 126
126 127
127 128
128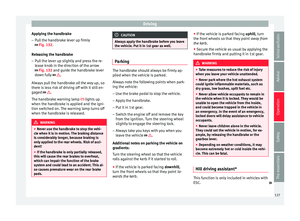 129
129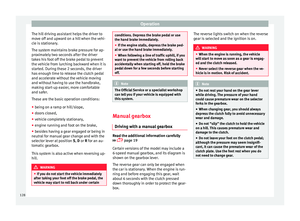 130
130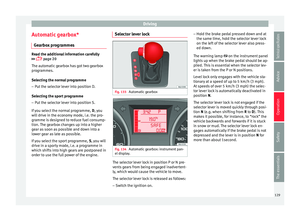 131
131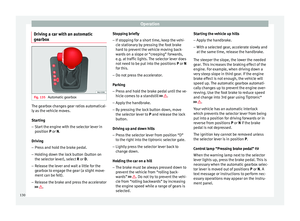 132
132 133
133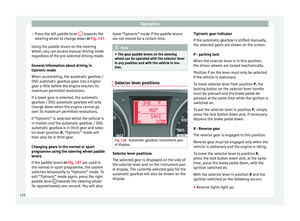 134
134 135
135 136
136 137
137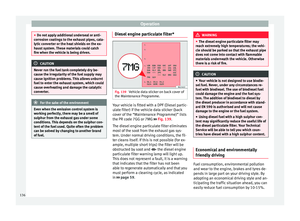 138
138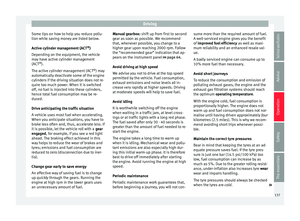 139
139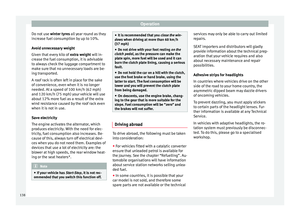 140
140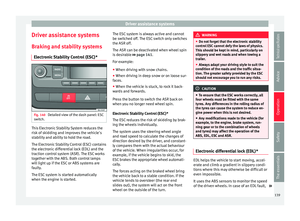 141
141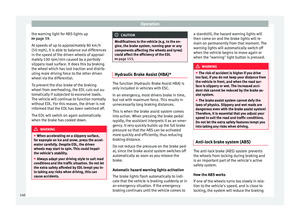 142
142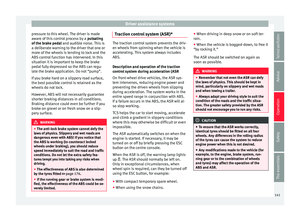 143
143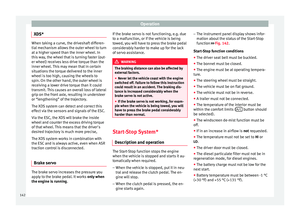 144
144 145
145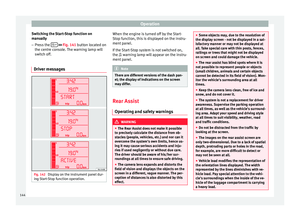 146
146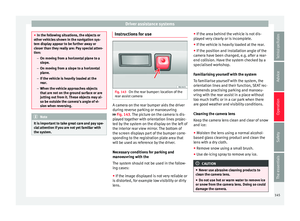 147
147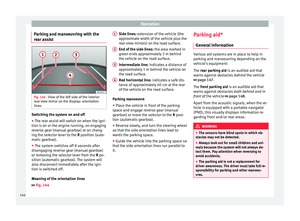 148
148 149
149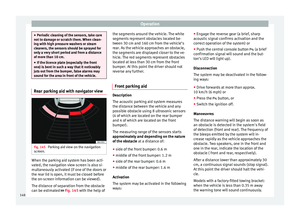 150
150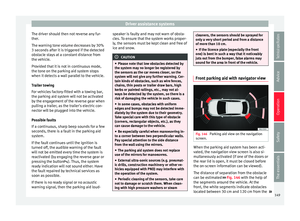 151
151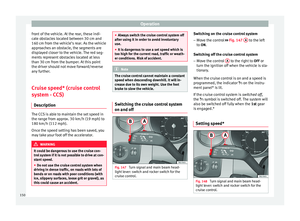 152
152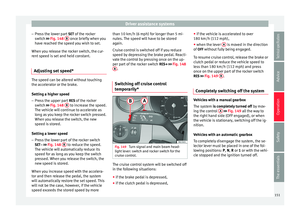 153
153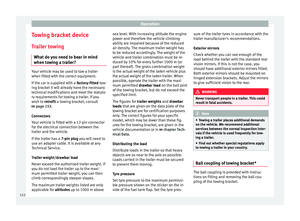 154
154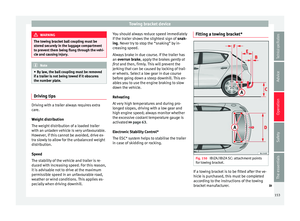 155
155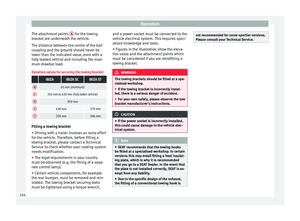 156
156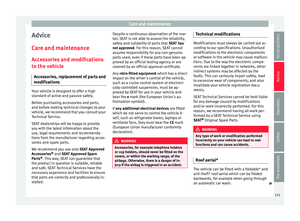 157
157 158
158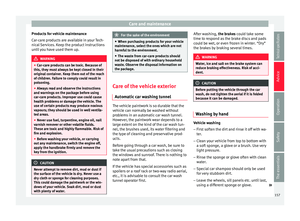 159
159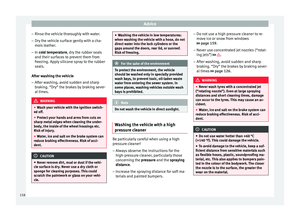 160
160 161
161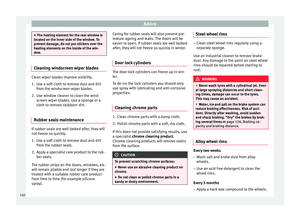 162
162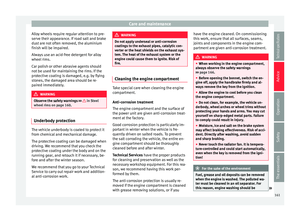 163
163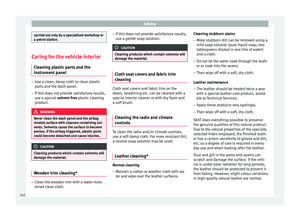 164
164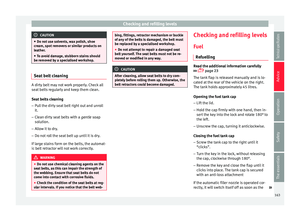 165
165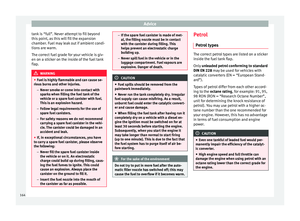 166
166 167
167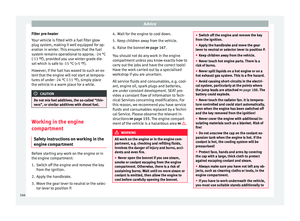 168
168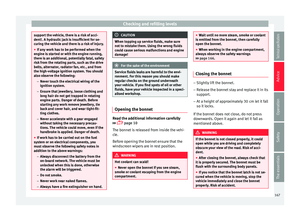 169
169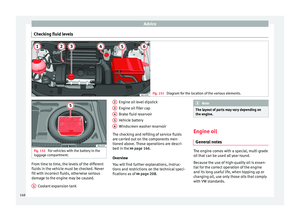 170
170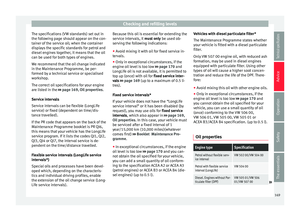 171
171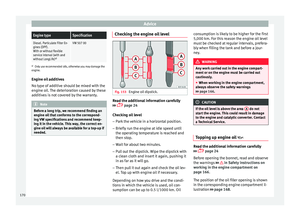 172
172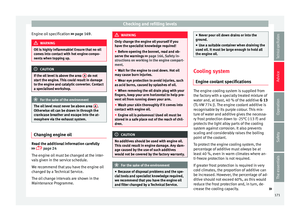 173
173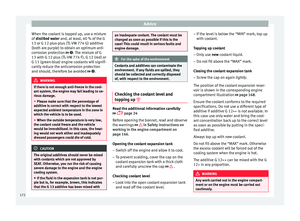 174
174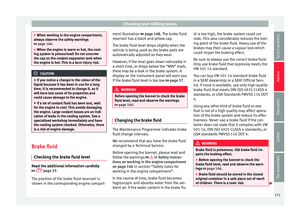 175
175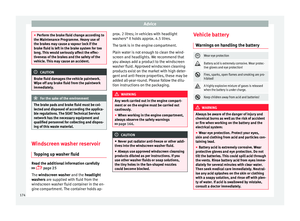 176
176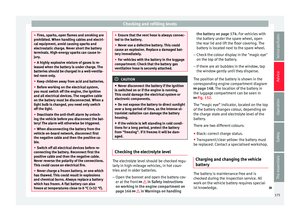 177
177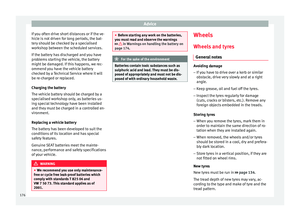 178
178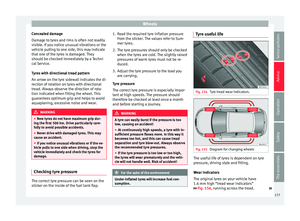 179
179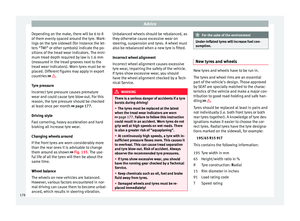 180
180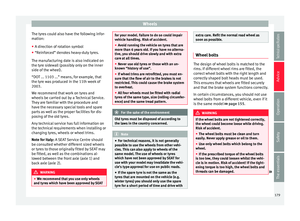 181
181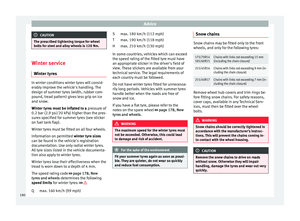 182
182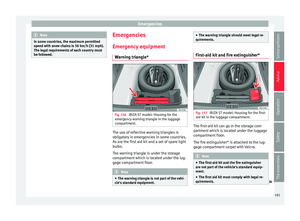 183
183 184
184 185
185 186
186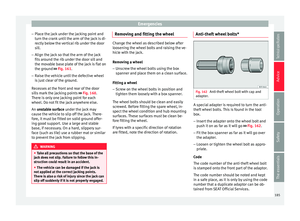 187
187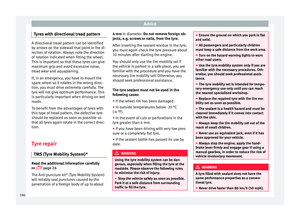 188
188 189
189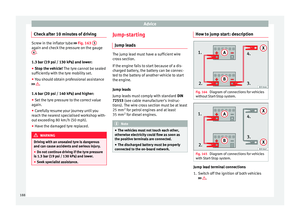 190
190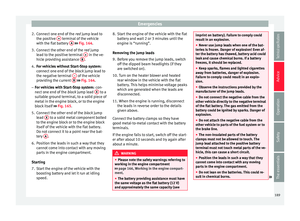 191
191 192
192 193
193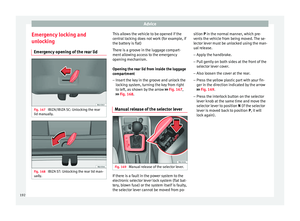 194
194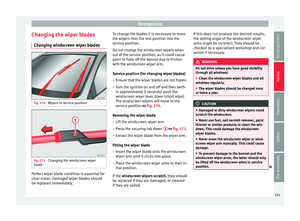 195
195 196
196 197
197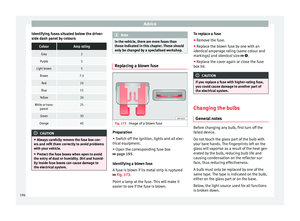 198
198 199
199 200
200 201
201 202
202 203
203 204
204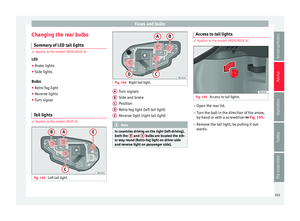 205
205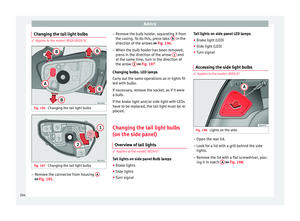 206
206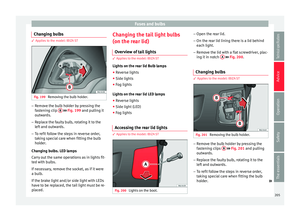 207
207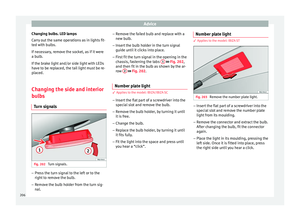 208
208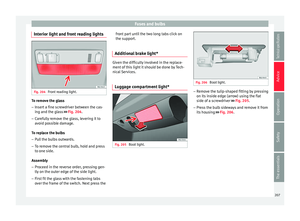 209
209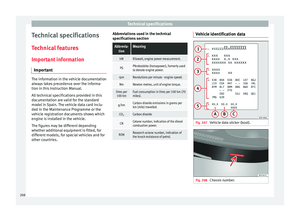 210
210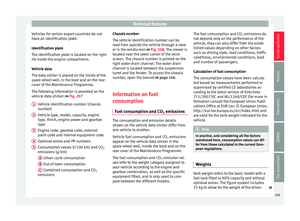 211
211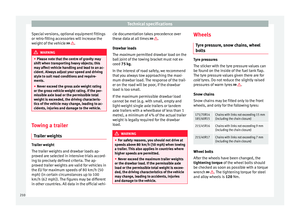 212
212 213
213 214
214 215
215 216
216 217
217 218
218 219
219 220
220 221
221 222
222 223
223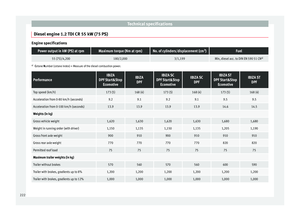 224
224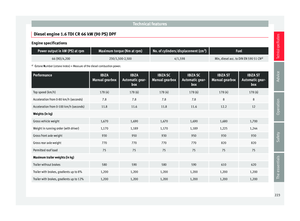 225
225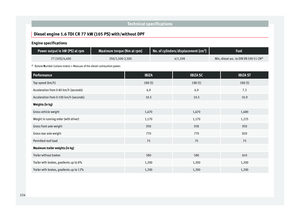 226
226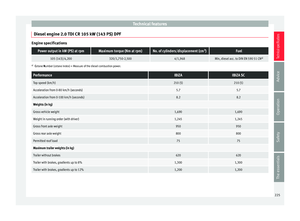 227
227 228
228 229
229 230
230 231
231 232
232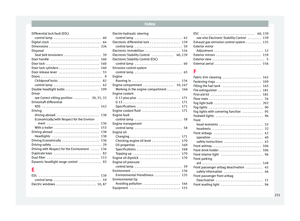 233
233 234
234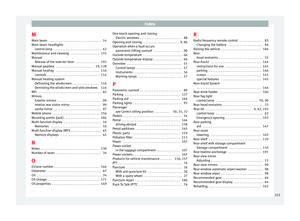 235
235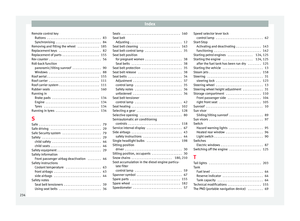 236
236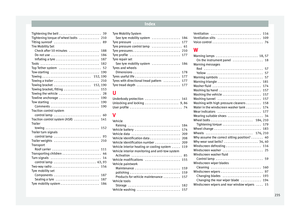 237
237 238
238 239
239