Page 53 of 256
51
Mirrors
Manual door mirrors
F Operate the lever in four directions to adjust the mirror.
Electric door mirrors
Adjustment
F Move control A to the right or to the left to select the corresponding mirror.
F
M
ove control B in all four directions to
adjust.
F
R
eturn control A to the central position.
th
e objects observed are, in reality,
closer than they appear.
ta
ke this into account in order to
correctly judge the distance of vehicles
approaching from behind.
Demisting - Defrosting
use the heated rear window switch.
Refer to the "Rear screen demist - defrost"
section.
Folding / Unfolding
When parking, the mirrors can be folded
manually.
th
e initial adjustments are retained
when unfolding.
3
Comfort
Page 61 of 256
59
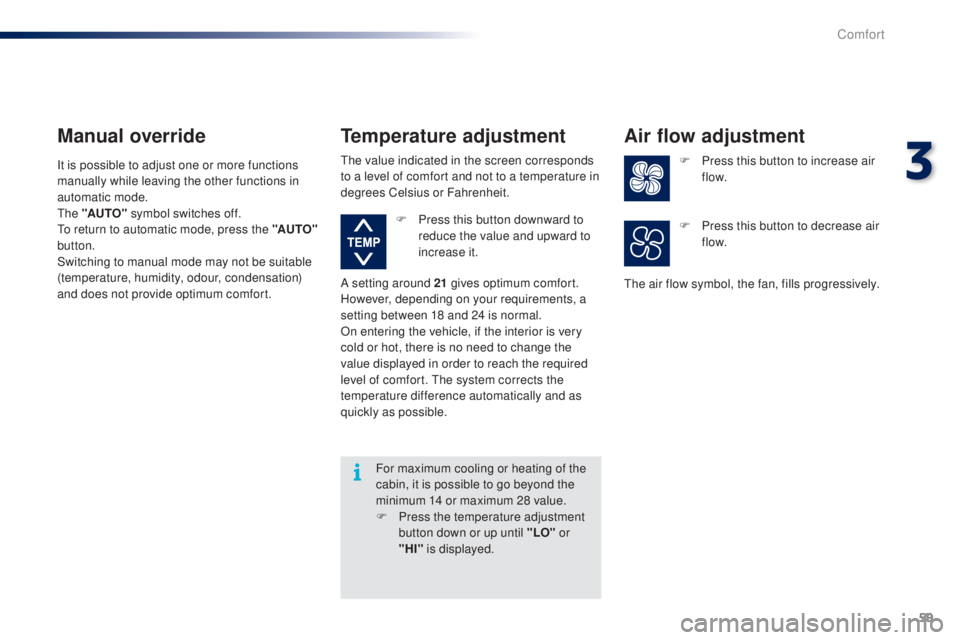
For maximum cooling or heating of the
cabin, it is possible to go beyond the
minimum 14 or maximum 28 value.
F
P
ress the temperature adjustment
button down or up until "LO" or
"HI" is displayed.
A setting around 21
gives optimum comfort.
However, depending on your requirements, a
setting between 18 and 24 is normal.
On entering the vehicle, if the interior is very
cold or hot, there is no need to change the
value displayed in order to reach the required
level of comfort. t
h
e system corrects the
temperature difference automatically and as
quickly as possible.
Temperature adjustment
F Press this button downward to reduce the value and upward to
increase it.
Manual override
It is possible to adjust one or more functions
manually while leaving the other functions in
automatic mode.
th
e "AUTO" symbol switches off.
to r
eturn to automatic mode, press the "AUTO"
button.
Switching to manual mode may not be suitable
(temperature, humidity, odour, condensation)
and does not provide optimum comfort.th e value indicated in the screen corresponds
to a level of comfort and not to a temperature in
degrees Celsius or Fahrenheit.
Air flow adjustment
F Press this button to increase air f low.
th
e air flow symbol, the fan, fills progressively. F
P
ress this button to decrease air
f low.
3
Comfort
Page 83 of 256

81
System which reduces fuel consumption by recommending the most appropriate gear.
gear shift indicator
Operation
example:
- Y ou are in third gear.
-
Y
ou press the accelerator pedal.
-
t
h
e system may suggest that you engage
a higher gear.
Depending on the driving situation and your
vehicle's equipment, the system may advise
you to change gear.
the
gear engagement recommendations must
not be considered compulsory. In fact, the
configuration of the road, the amount of traffic
and safety remain determining factors when
choosing the best gear.
t
her
efore, the driver
remains responsible for deciding whether or not
to follow the advice given by the system.
th
is function cannot be deactivated.
th
e information appears in the
instrument panel in the form of an
ar row.
th
e system adapts its gear change
recommendation according to the
driving conditions (slope, load,
...) and
the demands of the driver (power,
acceleration, braking,
...).
th
e system never suggests:
-
e
ngaging first gear,
-
enga
ging reverse gear.
With an
etg
electronic gearbox, the
system is only active in manual mode. With the V
ti 8
2 engine, the system only
suggests when to change up.
5
Driving
Page 96 of 256
94
Model without AUTO lighting
Model with AUTO lightingSelection ring for main lighting
mode
turn the ring to position the symbol required
facing the mark.
Lighting off / Daytime running lamps.
Sidelamps only.
Dipped or main beam headlamps.
Automatic illumination of
headlamps.
Dipping the headlamps
With dipped beam on, push the control stalk
away from you to change to main beam. Pull
the stalk toward you change back to dipped
beam.
In the lighting off and sidelamps modes, the
driver can switch on the main beam headlamps
temporarily ("headlamp flash") by maintaining a
pull on the stalk.
Displays
Illumination of the corresponding indicator lamp
in the instrument panel confirms the lighting
switched on.
Visibility
Page 97 of 256
95
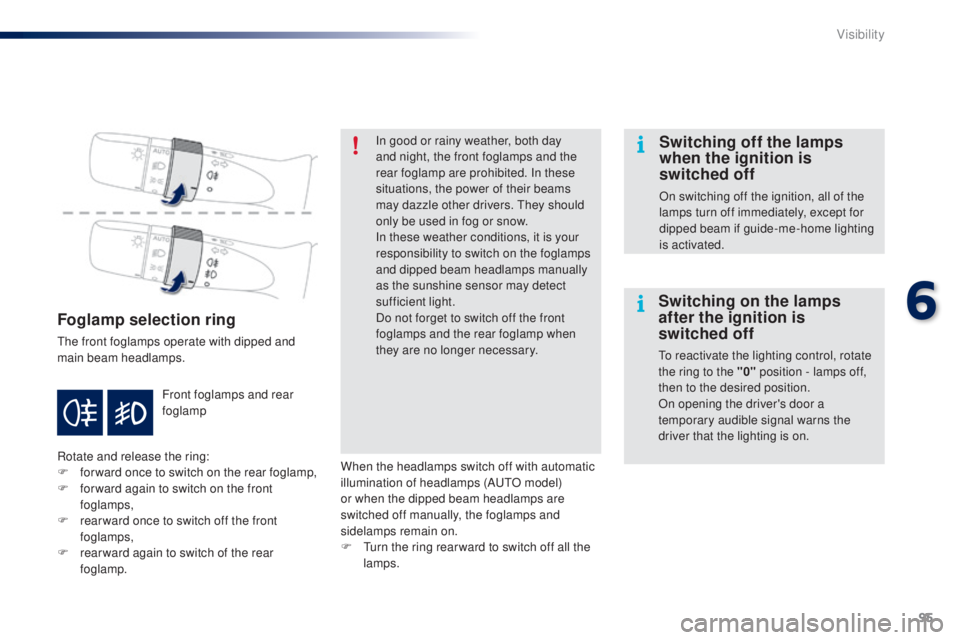
Foglamp selection ring
the front foglamps operate with dipped and
main beam headlamps.
Rotate and release the ring:
F
fo
rward once to switch on the rear foglamp,
F
f
or ward again to switch on the front
foglamps,
F
r
ear ward once to switch off the front
foglamps,
F
r
ear ward again to switch of the rear
foglamp. Front foglamps and rear
foglamp In good or rainy weather, both day
and night, the front foglamps and the
rear foglamp are prohibited. In these
situations, the power of their beams
may dazzle other drivers.
t
he
y should
only be used in fog or snow.
In these weather conditions, it is your
responsibility to switch on the foglamps
and dipped beam headlamps manually
as the sunshine sensor may detect
sufficient light.
Do not forget to switch off the front
foglamps and the rear foglamp when
they are no longer necessary.
Switching off the lamps
when the ignition is
switched off
On switching off the ignition, all of the
lamps turn off immediately, except for
dipped beam if guide-me-home lighting
is activated.
Switching on the lamps
after the ignition is
switched off
to reactivate the lighting control, rotate
the ring to the "0" position - lamps off,
then to the desired position.
On opening the driver's door a
temporary audible signal warns the
driver that the lighting is on.
When the headlamps switch off with automatic
illumination of headlamps (A
u
t
O m
odel)
or when the dipped beam headlamps are
switched off manually, the foglamps and
sidelamps remain on.
F
t
u
rn the ring rear ward to switch off all the
lamps.
6
Visibility
Page 105 of 256
103
Under-inflation detection
the system monitors the pressures in the four
tyres, once the vehicle is moving.
It compares the information given by the four
wheel speed sensors with reference values,
which must be reinitialised ever y time the
tyre pressures are adjusted or a wheel
changed.
th
e system triggers an alert as soon as it
detects a drop in the inflation pressure of one
or more tyres.
th
e under-inflation detection system
does not replace the vigilance or the
responsibility of the driver.
th
is system does not avoid the need to
check the tyre pressures (including the
spare wheel) every month as well as
before a long journey.
Driving with under-inflated tyres impairs
road holding, extends braking distances
and causes premature tyre wear,
particularly under arduous condition
(high loading, high speed, long journey).
System which automatically checks the pressures of the tyres while driving.
th
e inflation pressures defined for
your vehicle can be found on the tyre
pressure label.
See the "Identification markings"
section.
ty
re pressures should be checked
when the tyres are "cold" (vehicle
stopped for 1 hour or after a journey of
less than 6 miles (10 km) at moderate
speeds).
Other wise (when hot), add 0.3 bar to
the pressures shown on the label. Driving with under-inflated tyres
increases fuel consumption.
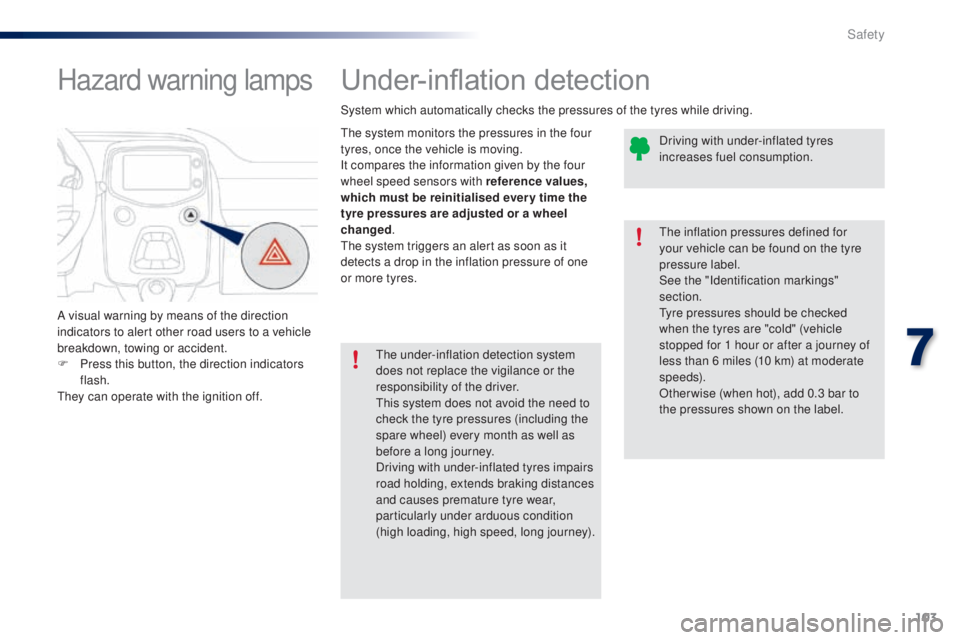
Hazard warning lamps
A visual warning by means of the direction
indicators to alert other road users to a vehicle
breakdown, towing or accident.
F
P
ress this button, the direction indicators
flash.
th
ey can operate with the ignition off.
7
Safety
Page 117 of 256
115
Lateral airbags
Deployment
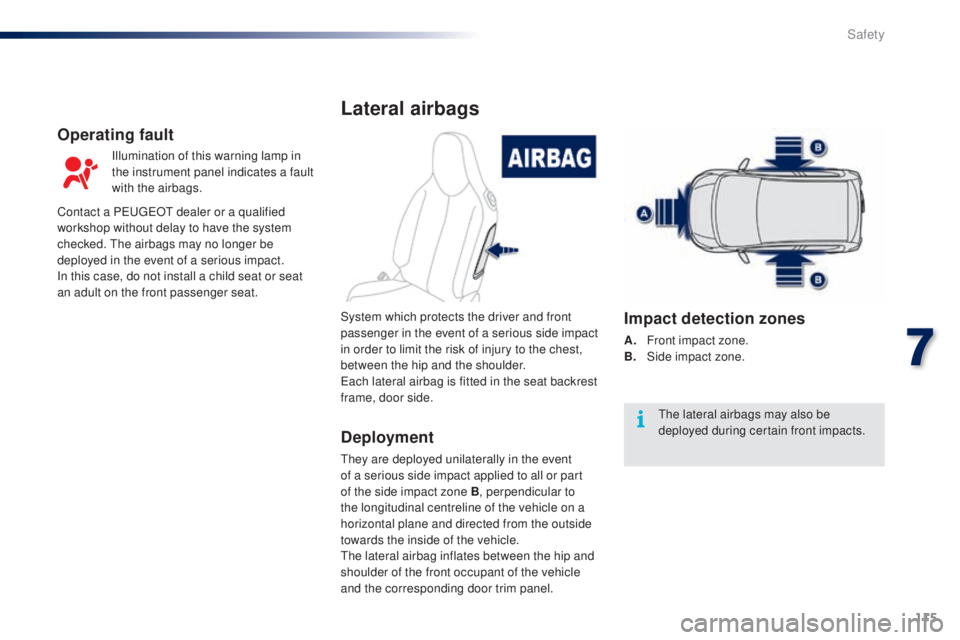
they are deployed unilaterally in the event
of a serious side impact applied to all or part
of the side impact zone B, perpendicular to
the longitudinal centreline of the vehicle on a
horizontal plane and directed from the outside
towards the inside of the vehicle.
th
e lateral airbag inflates between the hip and
shoulder of the front occupant of the vehicle
and the corresponding door trim panel. System which protects the driver and front
passenger in the event of a serious side impact
in order to limit the risk of injury to the chest,
between the hip and the shoulder.
ea
ch lateral airbag is fitted in the seat backrest
frame, door side.
Impact detection zones
A. Front impact zone.
B. S ide impact zone.
Operating fault
Illumination of this warning lamp in
the instrument panel indicates a fault
with the airbags.
Contact a P
e
uge
Ot
dealer or a qualified
workshop without delay to have the system
checked.
t
h
e airbags may no longer be
deployed in the event of a serious impact.
In this case, do not install a child seat or seat
an adult on the front passenger seat.
th
e lateral airbags may also be
deployed during certain front impacts.
7
Safety
Page 118 of 256
116
In the event of a minor impact or bump
on the side of the vehicle or if the
vehicle rolls over, the airbags may not
be deployed.
In the event of a rear or front collision,
none of the lateral airbags is deployed.
System which contributed towards the
improved protection of the driver and
passengers in the event of a serious side
impact in order to limit the risk of injury to the
side of the head.
ea
ch curtain airbag is built into the pillars and
the upper passenger compartment area.
Curtain airbags
Deployment
It is deployed at the same time as the
corresponding lateral airbag in the event of
a serious side impact applied to all or part
of the side impact zone B , perpendicular to
the longitudinal centreline of the vehicle on a
horizontal plane and directed from the outside
towards the inside of the vehicle.
th
e curtain airbag inflates between the front or
rear occupant of the vehicle and the windows. If this warning lamp comes on in the
instrument panel, contact a Pe
ugeOt
d
ealer or a qualified workshop to have
the system checked.
t
h
e airbags may
no longer be deployed in the event of a
serious impact.
Operating fault
Safety