Page 73 of 217

Storage71Roof rack system
Roof rack For safety reasons and to avoiddamage to the roof, the vehicle
approved roof rack system is
recommended. For further
information contact a workshop.
Fasten the roof rack to the roof rails following the instructions that
accompany the system, ensuring that
the roof load is evenly distributed over the side or cross rails.
Loads must not be placed on the roof
surface. To prevent damage or loss,
check frequently that roof loads are
securely fastened.
Driving with a roof load affects the
vehicle centre of gravity; drive
carefully in crosswinds and do not
drive at high speeds.
Remove the roof rack when not in use.Loading information
■ Heavy objects in the load compartment should be evenly
distributed and placed as far
forward as possible. Ensure the
backrests are securely engaged. If
objects can be stacked, the heavier
objects should be placed at the bottom.
With rear seats in the folded
position, objects must not be
stacked higher than the seat
backrests.
■ Secure objects with lashing straps attached to lashing eyes 3 70.
■ Secure loose objects in the load compartment, e.g. with a luggage
floor net, to prevent sliding.
■ When transporting objects in the load compartment, the backrests ofthe rear seats must not be angled
forward.
■ Do not allow the load to protrude above the upper edge of the
backrests.■ Do not place any objects on the load compartment cover or the
instrument panel, and do not cover
the sensor on top of the instrument
panel.
■ The load must not obstruct the operation of the pedals, electrical
parking brake and gear selector, or hinder the freedom of movement ofthe driver. Do not place any
unsecured objects in the interior.
■ Do not drive with an open load compartment.9 Warning
Always make sure that the load in
the vehicle is securely stowed.
Otherwise objects can be thrown
around inside the vehicle and
cause personal injury or damage
to the load or car.
■ The payload is the difference between the permitted gross
vehicle weight (see identification
plate 3 198) and the EC kerb
weight.
Page 74 of 217
72Storage
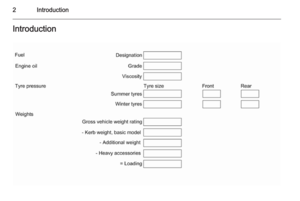
To calculate the EC kerb weight,
enter the data for your vehicle in the
Weights table at the front of this
manual.
The EC kerb weight includes
weights for the driver (68 kg),
luggage (7 kg) and all fluids (tank
90 % full).
Optional equipment and
accessories increase the kerb
weight.
■ Driving with a roof load increases the sensitivity of the vehicle to
cross-winds and has a detrimental
effect on vehicle handling due to the vehicle's higher centre of
gravity. Distribute the load evenly
and secure it properly with retaining
straps. Adjust the tyre pressure and
vehicle speed according to the load conditions. Check and retighten the
straps frequently.
Do not drive faster than 120 km/h.
The permissible roof load is
100 kg. The roof load is the
combined weight of the roof rack
and the load.
Page 75 of 217
Instruments and controls73Instruments and
controlsControls ....................................... 73
Warning lights, gauges and indi‐ cators ........................................... 80
Information displays .....................92
Vehicle messages ........................ 99
Trip computer ............................. 101Controls
Steering wheel adjustment
Unlock lever, adjust steering wheel,
then engage lever and ensure it is fully locked.
Do not adjust steering wheel unless
vehicle is stationary and steering
wheel lock has been released.
Steering wheel controls
The Infotainment system and a
connected mobile phone can be
operated via the controls on the
steering wheel.
Further information is available in the
Infotainment system instruction
manual.
Page 76 of 217
74Instruments and controlsHorn
Press j.
Windscreen wiper/washer
Windscreen wiper&=fast%=slow$=timed interval wiping or
automatic wiping with rain
sensor§=off
For a single wipe when the
windscreen wiper is off, press the
lever down.
Do not use if the windscreen is frozen.
Switch off in car washes.
Adjustable wiper interval
To set the wiping interval to a value
between 1 and 10 seconds:
■ Switch on ignition.
■ Push lever down from position §.
■ Wait until wiping frequency reaches
the desired interval.
■ Set lever to position $.
The interval remains stored until the
next change or until the ignition is
switched off. Switching the ignition on
and moving the lever to $ sets the
interval to 3.5 seconds.
Page 77 of 217

Instruments and controls75
In this mode, wiping frequency is alsoaffected by vehicle speed. As vehicle
speed increases, wiping will become
more frequent.
Automatic wiping with rain sensor$=automatic wiping with rain
sensor
The rain sensor detects the amount of water on the windscreen and
automatically regulates the frequency
of the windscreen wiper.
The wiper operates for one cycle to
check the system when the key is
turned to ignition switch position
ACC .
To turn wiper off, move lever to
position §.
Keep the rain sensor area clean by
activating the windscreen washer
system.
Windscreen and headlight
washer
Pull lever. Washer fluid is sprayed
onto the windscreen.
If the lever is held longer, the wiper
operates for two cycles after the lever has been released and once more
after a 3 second delay.
If the headlights are on, washer fluid
is also sprayed onto the headlights.
The headlight washer system can
only be operated again after a short
delay. If washer fluid level is low then
this delay is increased.
Page 78 of 217

76Instruments and controls
Control indicator G illuminates in the
instrument cluster when the washer
fluid level is low.
Wiper activated lighting
With light switch in the AUTO
position, when the windscreen wiper
is operated for 8 cycles or more the
exterior lights illuminate
automatically.
Rear window wiper/washerMove lever to activate the rear
window wiper:Push lever=wiper onPull lever=wiper off
To activate rear window washer
system, press and hold button on end
of lever. Washer fluid is sprayed onto rear window and the wiper wipes a
few times when the button is
released.
Do not use if the windscreen is frozen.
Switch off in car washes.
Outside temperature
A drop in temperature is indicated
immediately and a rise in temperature
after a time delay.
If outside temperature drops to 3 °C, the symbol : illuminates in the
Board-Info-Display as a warning for
icy road conditions. : remains
illuminated until outside temperature
reaches at least 5 °C.
In vehicles with Graphic-Info-Display
or Colour-Info-Display, a message
appears on the display as a warning for icy road conditions. There is no
message below -5 °C.
Page 79 of 217
Instruments and controls779Warning
The road surface may already be
icy even though the display
indicates a few degrees above
0 °C.
Clock
Date and time are shown in the
Info-Display.
Board-Info-Display 3 92.
Graphic-Info-Display,
Colour-Info-Display 3 94.
Automatic time synchronisation
Board-Info-Display
The RDS (Radio Data System) signal of most VHF transmitters
automatically sets the time, identified
by } in the display.
Some RDS transmitters do not send
a correct time signal. In such cases,
switch off automatic time
synchronisation and set the time
manually.
Page 80 of 217

78Instruments and controls
Deactivate (Clock Sync.Off ) or
activate ( Clock Sync.On ) automatic
time synchronisation with the arrow buttons on the Infotainment system.
To set date and time manually, select
the menu item for time and date
setting from the Settings menu and
make the desired setting. The value
ready for modification is marked with
arrows. Use the arrow buttons to
make the required setting. The setting
is saved when the menu item is
exited.
To correct time with the help of RDS,
select the menu item for time
synchronisation from the Settings
menu and make the desired setting.
Board-Info-Display 3 92.Graphic-Info-Display, Colour-Info-
Display
With the navigation system, date and
time are set automatically upon
receipt of a GPS satellite signal. If the
displayed time does not match local
time, it can be corrected manually or
automatically by receiving an RDS
time signal.
Some RDS transmitters do not send a correct time signal. In such cases,
switch off automatic time
synchronisation and set the time
manually.
To set date and time manually, select
menu item Time, Date from the
Settings menu. The menu is
displayed. Select the menu items
required and make the desired
setting.
To correct time with the help of RDS,
select menu item Synchron. clock
automatical. from the Time, Date
menu. The box in front of Synchron.
clock automatical. will be checked.
Graphic-Info-Display,
Colour-Info-Display 3 94.
Power outlets
The socket can be used to connect
electrical accessories.