2014 MITSUBISHI LANCER SPORTBACK tow bar
[x] Cancel search: tow barPage 87 of 422
Free-hand Advanced Security Transmitter (F.A.S.T.-key) (if so equipped) 5-20 Features and controls
5
N00514300025
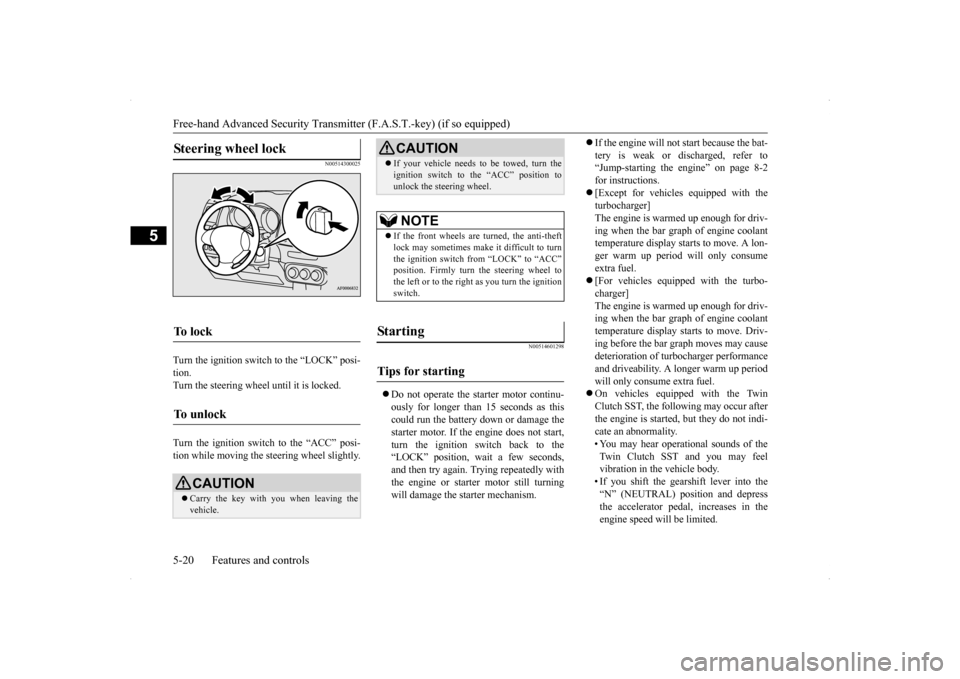
Turn the ignition switch to the “LOCK” posi- tion.Turn the steering wheel until it is locked. Turn the ignition switch to the “ACC” posi- tion while moving the steering wheel slightly.
N00514601298
Do not operate the starter motor continu- ously for longer than 15 seconds as thiscould run the battery down or damage the starter motor. If the engine does not start, turn the ignition switch back to the“LOCK” position, wait a few seconds, and then try again. Trying repeatedly with the engine or starter motor still turningwill damage the starter mechanism.
If the engine will not start because the bat- tery is weak or discharged, refer to “Jump-starting the engine” on page 8-2 for instructions. [Except for vehicles equipped with the turbocharger] The engine is warmed up enough for driv-ing when the bar graph of engine coolant temperature display starts to move. A lon- ger warm up period will only consumeextra fuel. [For vehicles equipped with the turbo- charger] The engine is warmed up enough for driv-ing when the bar graph of engine coolant temperature display starts to move. Driv- ing before the bar graph moves may causedeterioration of turbocharger performance and driveability. A longer warm up period will only consume extra fuel. On vehicles equipped with the Twin Clutch SST, the following may occur after the engine is started, but they do not indi-cate an abnormality. • You may hear operational sounds of the Twin Clutch SST and you may feelvibration in the vehicle body. • If you shift the gearshift lever into the “N” (NEUTRAL) position and depressthe accelerator pedal, increases in the engine speed will be limited.
Steering wheel lock
To l o c k
To u n l o c k
CAUTION Carry the key with you when leaving the vehicle.
If your vehicle needs to be towed, turn the ignition switch to the “ACC” position to unlock the steering wheel.NOTE
If the front wheels are turned, the anti-theft lock may sometimes make it difficult to turn the ignition switch from “LOCK” to “ACC”position. Firmly turn the steering wheel to the left or to the right as you turn the ignition switch.
St arting
Tips for starting
CAUTION
BK0200700US.bo
ok 20 ページ 2013年2月15日 金曜日 午後12時17分
Page 338 of 422
Tools and jack
For emergencies 8-5
8
5. If you do not see steam or spray coming from under the hood, leave the engine on until the bar graph for the engine coolant temperature warning display on the multi-information display goes down. When it is in the middle of the normal zone, you can start driving again. If the bar graphstays in the red zone, turn off the engine. 6. When you do not see any more steam or spray, open the hood. Look for obvious leaks, such as a split radiator hose. Be careful as components will be hot. Anyleak source must be repaired. 7. If there is no obvious leak source, check the coolant level in the reserve tank. Ifthere is none, or if it is too low, slowly add coolant.
8. If the reserve tank needs coolant, you will probably also need to add coolant to the radiator. Do not loosen or remove the radiator cap until the engine has cooleddown. 9. Start the engine, and slowly add coolant, up to the bottom of the filler neck. Useplain water if you have to (and replace it with the right coolant as soon as possible).
10. Replace the radiator cap and tighten it
fully. Check the engine coolant tempera- ture display on the multi-information dis- play. You can start driving again when thebar graph for the engine coolant tempera- ture display returns to the normal zone.
11. Have your vehicle checked by your autho-
rized Mitsubishi Motors dealer or a repair facility of your choice.
N00836600324
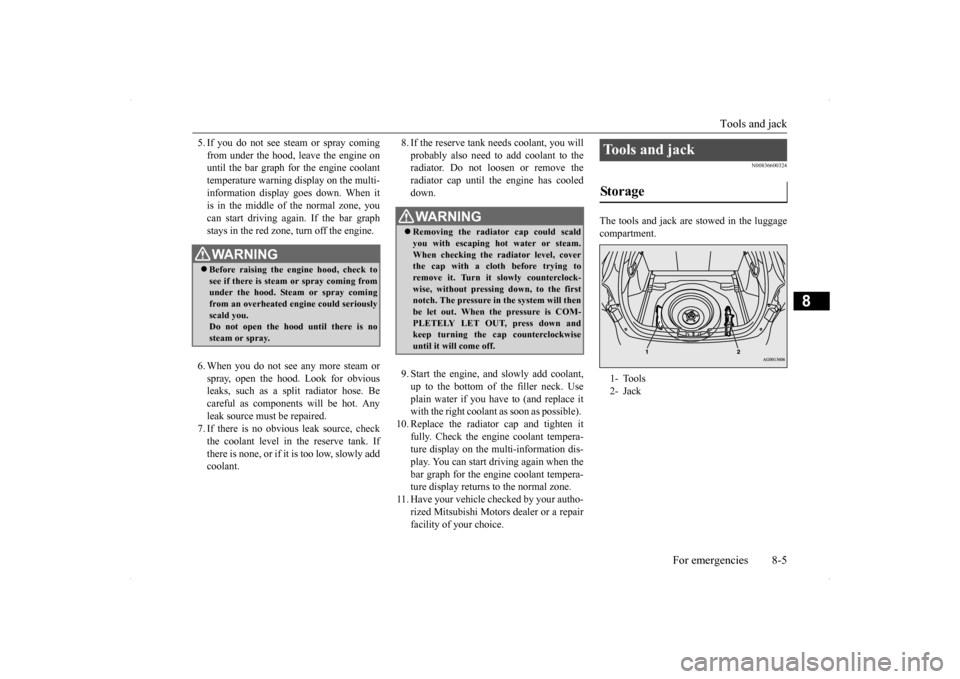
The tools and jack are stowed in the luggage compartment.
WA R N I N G Before raising the engine hood, check to see if there is steam or spray coming fromunder the hood. Steam or spray coming from an overheated engine could seriously scald you.Do not open the hood until there is no steam or spray.
WA R N I N G Removing the radiator cap could scald you with escaping hot water or steam.When checking the radiator level, cover the cap with a cloth before trying to remove it. Turn it slowly counterclock-wise, without pressing down, to the first notch. The pressure in the system will then be let out. When the pressure is COM-PLETELY LET OUT, press down and keep turning the cap counterclockwise until it will come off.
Tools and jack Storage 1- Tools 2- Jack
BK0200700US.bo
ok 5 ページ 2013年2月15日 金曜日 午後12時17分
Page 340 of 422
How to change a tire
For emergencies 8-7
8
6. Get the jack, bar and wheel nut wrench ready.Refer to “Tools and jack” on page 8-5.
N00849600302
The compact spare tire is designed to savespace in the luggage compartment. Its lighter weight makes it easier to use if a flat tire occurs.
N00849701313
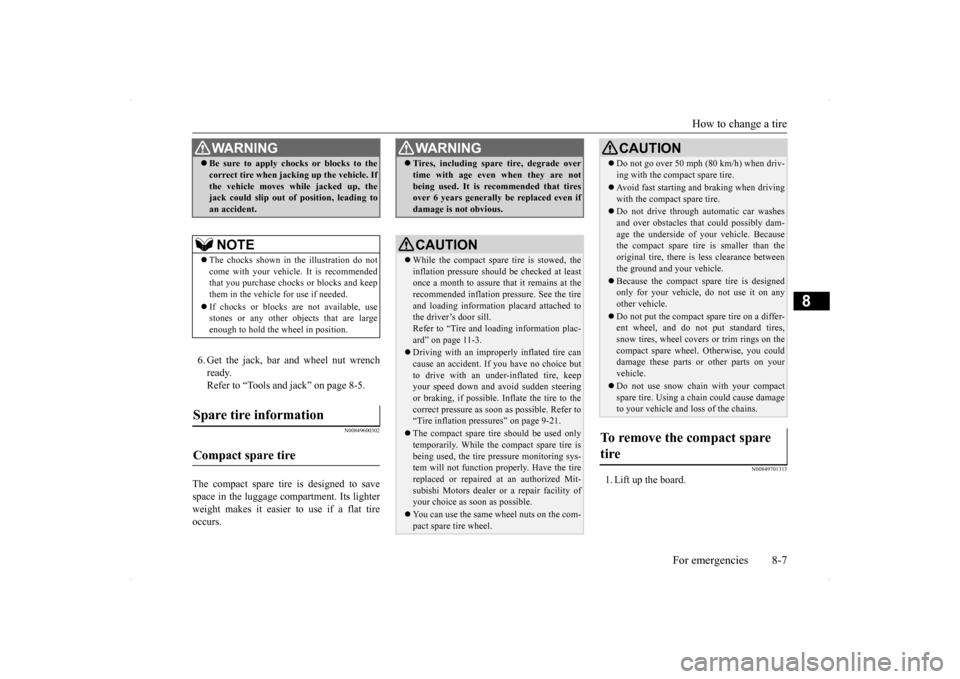
1. Lift up the board.
WA R N I N G Be sure to apply chocks or blocks to the correct tire when jacking up the vehicle. If the vehicle moves while jacked up, the jack could slip out of position, leading to an accident.NOTE
The chocks shown in the illustration do not come with your vehicle. It is recommended that you purchase chocks or blocks and keepthem in the vehicle for use if needed. If chocks or blocks are not available, use stones or any other objects that are large enough to hold the wheel in position.
Spare tire information Compact spare tire
WA R N I N G Tires, including spare tire, degrade over time with age even when they are not being used. It is recommended that tires over 6 years generally be replaced even if damage is not obvious.CAUTION While the compact spare tire is stowed, the inflation pressure should be checked at least once a month to assure that it remains at therecommended inflation pressure. See the tire and loading information placard attached to the driver’s door sill.Refer to “Tire and loading information plac- ard” on page 11-3. Driving with an improperly inflated tire can cause an accident. If you have no choice but to drive with an under-inflated tire, keepyour speed down and avoid sudden steering or braking, if possible
. Inflate the tire to the
correct pressure as soon as possible. Refer to“Tire inflation pressures” on page 9-21. The compact spare tire should be used only temporarily. While the compact spare tire is being used, the tire pressure monitoring sys- tem will not function properly. Have the tire replaced or repaired at an authorized Mit- subishi Motors dealer or a repair facility ofyour choice as soon as possible. You can use the same wheel nuts on the com- pact spare tire wheel.
Do not go over 50 mph (80 km/h) when driv- ing with the compact spare tire. Avoid fast starting and braking when driving with the compact spare tire. Do not drive through automatic car washes and over obstacles that could possibly dam-age the underside of your vehicle. Because the compact spare tire is smaller than the original tire, there is less clearance betweenthe ground and your vehicle. Because the compact spare tire is designed only for your vehicle, do not use it on any other vehicle. Do not put the compact spare tire on a differ- ent wheel, and do not put standard tires, snow tires, wheel covers or trim rings on thecompact spare wheel. Otherwise, you could damage these parts or other parts on your vehicle. Do not use snow chain with your compact spare tire. Using a chain could cause damageto your vehicle and loss of the chains.
To remove the compact spare tire
CAUTION
BK0200700US.bo
ok 7 ページ 2013年2月15日 金曜日 午後12時17分
Page 385 of 422
Replacement of light bulbs 9-36 Vehicle care and maintenance
9
4. While holding down the tab (D), pull out the bulb (E). 5. To install the bulb, perform the removal steps in reverse.
N00901900063
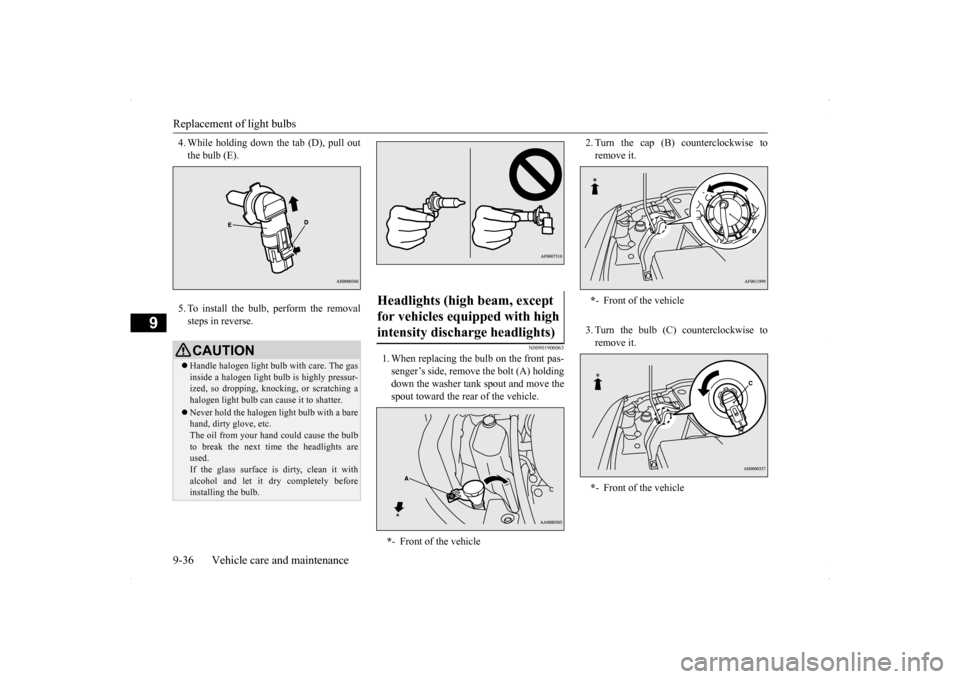
1. When replacing the bulb on the front pas-senger’s side, remove the bolt (A) holdingdown the washer tank spout and move thespout toward the rear of the vehicle.
2. Turn the cap (B) counterclockwise to remove it. 3. Turn the bulb (C) counterclockwise to remove it.
CAUTION Handle halogen light bulb with care. The gas inside a halogen light bulb is highly pressur- ized, so dropping, knocking, or scratching ahalogen light bulb can cause it to shatter. Never hold the halogen light bulb with a bare hand, dirty glove, etc. The oil from your hand could cause the bulb to break the next time the headlights areused. If the glass surface is dirty, clean it with alcohol and let it dry completely beforeinstalling the bulb.
Headlights (high beam, except for vehicles equipped with high intensity discharge headlights) * - Front of the vehicle
*- Front of the vehicle * - Front of the vehicle
BK0200700US.bo
ok 36 ページ 2013年2月15日 金曜日 午後12時17分
Page 386 of 422
Replacement of light bulbs
Vehicle care and maintenance 9-37
9
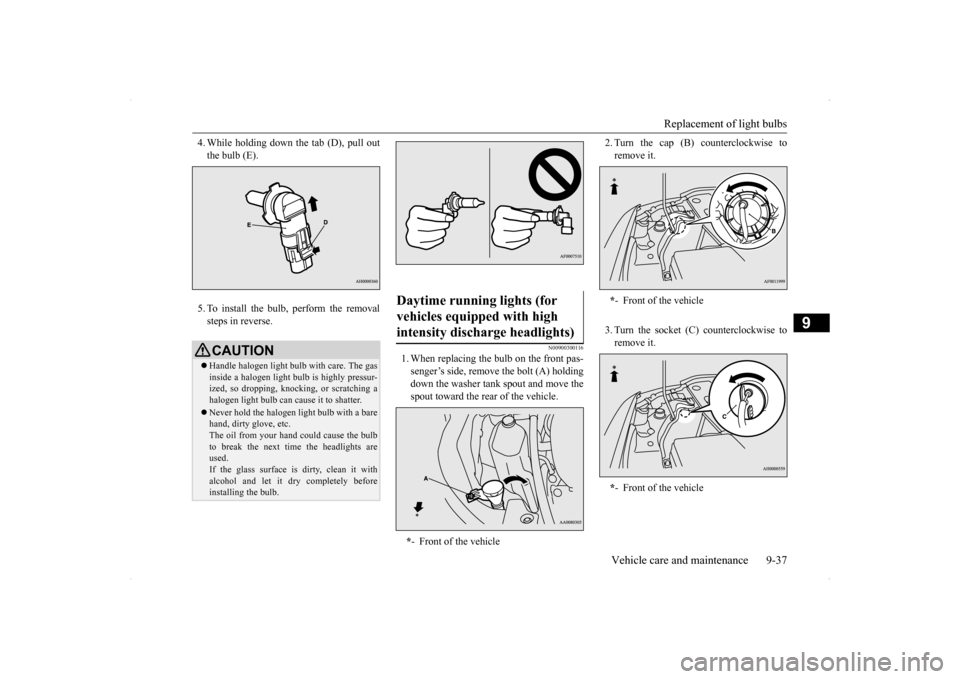
4. While holding down
the tab (D), pull out
the bulb (E). 5. To install the bulb, perform the removal steps in reverse.
N00900300116
1. When replacing the bulb on the front pas-senger’s side, remove the bolt (A) holdingdown the washer tank spout and move thespout toward the rear of the vehicle.
2. Turn the cap (B) counterclockwise to remove it. 3. Turn the socket (C) counterclockwise to remove it.
CAUTION Handle halogen light bulb with care. The gas inside a halogen light bulb is highly pressur- ized, so dropping, knocking, or scratching ahalogen light bulb can cause it to shatter. Never hold the halogen light bulb with a bare hand, dirty glove, etc. The oil from your hand could cause the bulb to break the next time the headlights areused. If the glass surface is dirty, clean it with alcohol and let it dry completely beforeinstalling the bulb.
Daytime running lights (for vehicles equipped with high intensity discharge headlights) * - Front of the vehicle
*- Front of the vehicle * - Front of the vehicle
BK0200700US.bo
ok 37 ページ 2013年2月15日 金曜日 午後12時17分