2014 MITSUBISHI LANCER SPORTBACK brake
[x] Cancel search: brakePage 270 of 422
Trailer towing
Driving safety 6-11
6
N00630600072
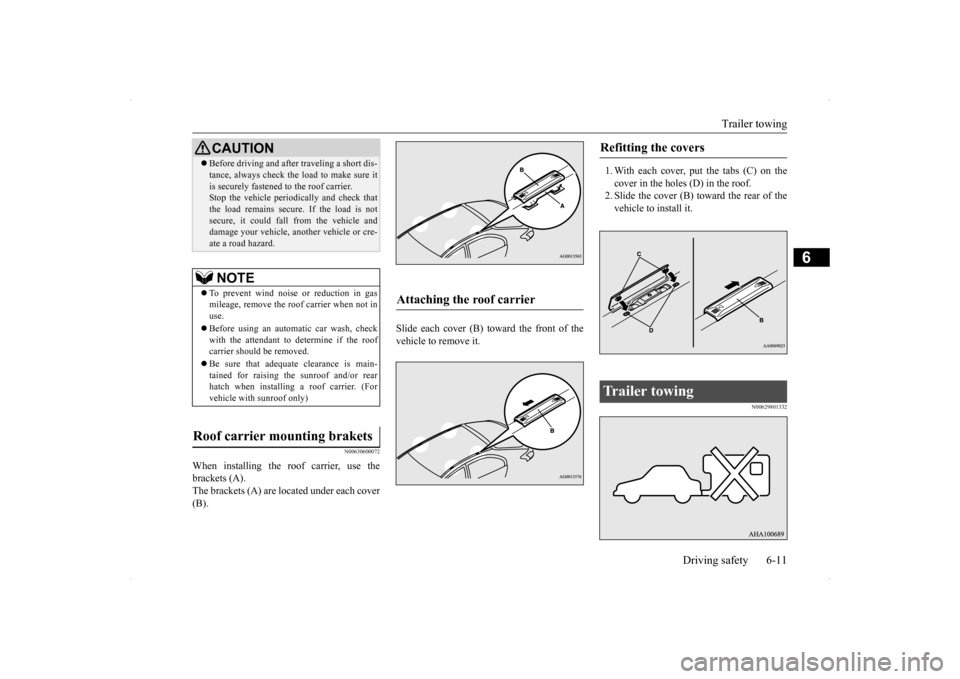
When installing the roof carrier, use the brackets (A). The brackets (A) are located under each cover(B).
Slide each cover (B) toward the front of the vehicle to remove it.
1. With each cover, put the tabs (C) on the cover in the holes (D) in the roof. 2. Slide the cover (B) toward the rear of thevehicle to install it.
N00629801332
Before driving and after traveling a short dis- tance, always check the load to make sure it is securely fastened to the roof carrier. Stop the vehicle periodically and check that the load remains secure. If the load is notsecure, it could fall from the vehicle and damage your vehicle, another vehicle or cre- ate a road hazard.NOTE
To prevent wind noise or reduction in gas mileage, remove the roof carrier when not in use. Before using an automatic car wash, check with the attendant to determine if the roof carrier should be removed. Be sure that adequate clearance is main- tained for raising the sunroof and/or rearhatch when installing a roof carrier. (For vehicle with sunroof only)
Roof carrier mounting brakets
CAUTION
Attaching the roof carrier
Refitting the covers Trailer towing
BK0200700US.bo
ok 11 ページ 2013年2月15日 金曜日 午後12時17分
Page 278 of 422
Manual air conditioning with
MAX A/C mode (if so equipped)
Comfort controls 7-7
7
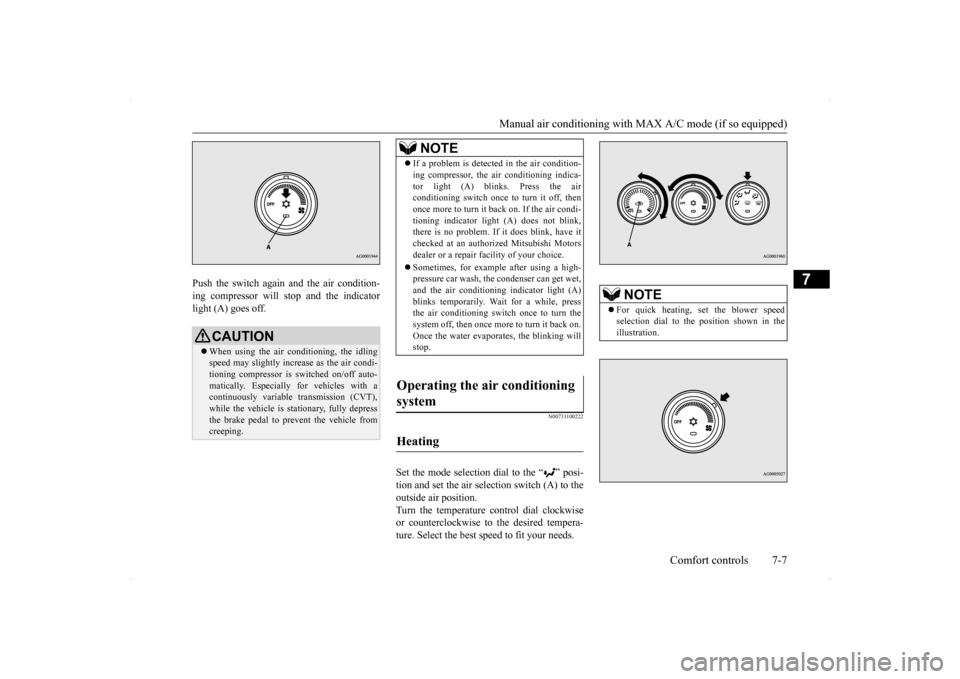
Push the switch again and the air condition- ing compressor will stop and the indicator light (A) goes off.
N00731100222
Set the mode selection dial to the “ ” posi-tion and set the air sel
ection switch (A) to the
outside air position. Turn the temperature control dial clockwise or counterclockwise to the desired tempera-ture. Select the best speed to fit your needs.
CAUTION When using the air conditioning, the idling speed may slightly increase as the air condi-tioning compressor is switched on/off auto- matically. Especially for vehicles with a continuously variable transmission (CVT),while the vehicle is stationary, fully depress the brake pedal to prevent the vehicle from creeping.
NOTE
If a problem is detect
ed in the air condition-
ing compressor, the air conditioning indica- tor light (A) blinks. Press the air conditioning switch once to turn it off, then once more to turn it back on. If the air condi-tioning indicator light (A) does not blink, there is no problem. If it does blink, have it checked at an authorized Mitsubishi Motorsdealer or a repair facility of your choice. Sometimes, for example after using a high- pressure car wash, the condenser can get wet, and the air conditioning indicator light (A) blinks temporarily. Wait for a while, pressthe air conditioning switch once to turn the system off, then once more to turn it back on. Once the water evaporates, the blinking willstop.
Operating the air conditioning system
Heating
NOTE
For quick heating, set the blower speed selection dial to the position shown in the illustration.
BK0200700US.bo
ok 7 ページ 2013年2月15日 金曜日 午後12時17分
Page 283 of 422
Manual air conditioning without
MAX A/C mode (if so equipped)
7-12 Comfort controls
7
N00731000452
Push the switch, and the air conditioning compressor will turn
on. The air conditioning
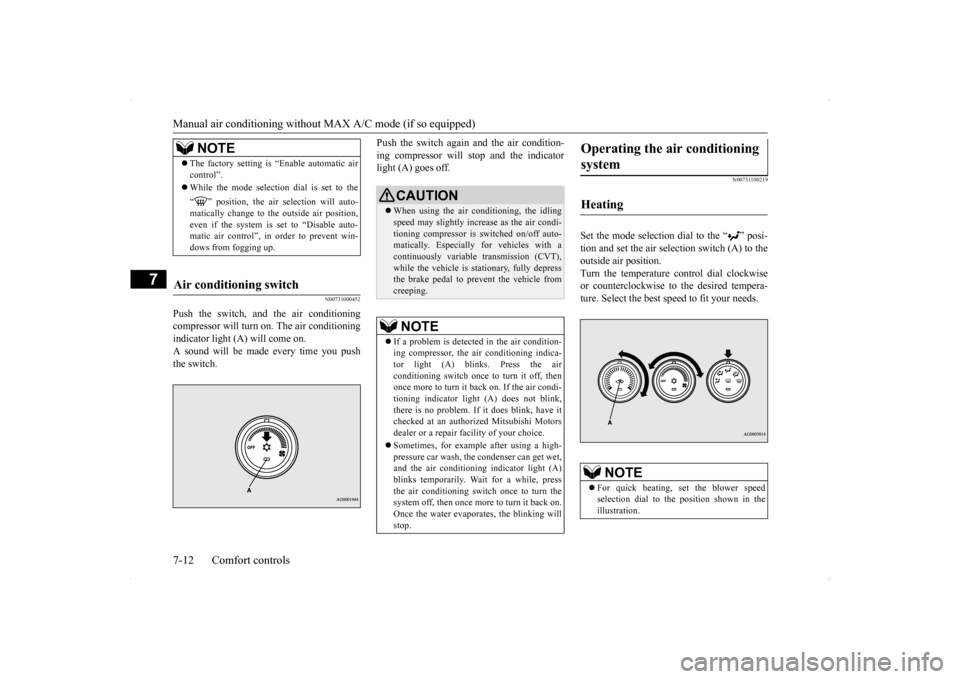
indicator light (A) will come on.A sound will be made every time you pushthe switch.
Push the switch again and the air condition- ing compressor will stop and the indicator light (A) goes off.
N00731100219
Set the mode selection dial to the “ ” posi- tion and set the air selection switch (A) to theoutside air position.Turn the temperature control dial clockwise or counterclockwise to the desired tempera- ture. Select the best speed to fit your needs.
NOTE
The factory setting is “Enable automatic air control”. While the mode selection dial is set to the “ ” position, the air selection will auto- matically change to the outside air position, even if the system is set to “Disable auto-matic air control”, in order to prevent win- dows from fogging up.
Air conditioning switch
CAUTION When using the air conditioning, the idling speed may slightly increase as the air condi- tioning compressor is switched on/off auto- matically. Especially for vehicles with acontinuously variable transmission (CVT), while the vehicle is stationary, fully depress the brake pedal to prevent the vehicle fromcreeping.NOTE
If a problem is detected in the air condition- ing compressor, the air conditioning indica-tor light (A) blinks. Press the air conditioning switch once to turn it off, then once more to turn it back on. If the air condi-tioning indicator light (A) does not blink, there is no problem. If it does blink, have it checked at an authorized Mitsubishi Motorsdealer or a repair facility of your choice. Sometimes, for example after using a high- pressure car wash, the condenser can get wet, and the air conditioning indicator light (A)blinks temporarily. Wait for a while, press the air conditioning switch once to turn the system off, then once more to turn it back on.Once the water evaporates, the blinking will stop.
Operating the air conditioning system
Heating
NOTE
For quick heating, set the blower speed selection dial to the position shown in theillustration.
BK0200700US.bo
ok 12 ページ 2013年2月15日 金曜日 午後12時17分
Page 288 of 422
Automatic air conditioning with
Fahrenheit scale (if so equipped)
Comfort controls 7-17
7
N00760000063
You can change the following functions to match your preference. Enable automatic air control: When the mode selection dial or theblower speed selection dial is set to the “AUTO” position, the air selection switch will also be automatically controlled.
Disable automatic air control: Even when the mode selection dial or the blower speed selection dial is set to the “AUTO” position, the air selection switchwill not be automatically controlled. Changing the settings: Press the air selection switch for about 10seconds or longer. When the setting has changed, the system will beep and the indicator light will flash.• When the setting has changed fromenabled to disabled, the system will beep three times and the indicator will flash three times.• When the setting has changed from dis- abled to enabled, the system will beep two times and theindicator light will flash three times.
N00737300314
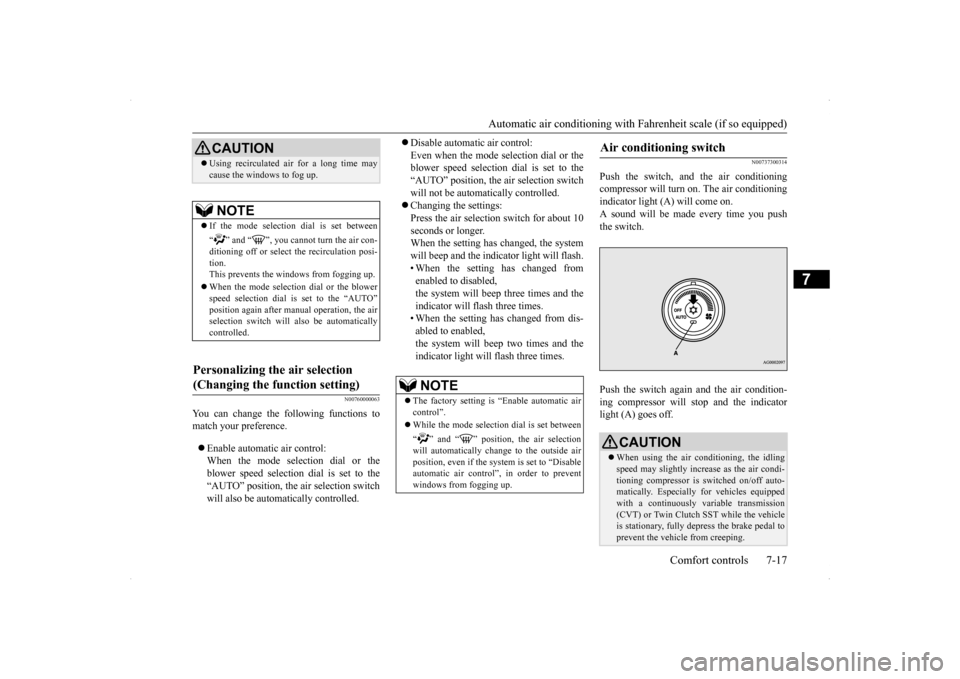
Push the switch, and the air conditioningcompressor will turn on. The air conditioningindicator light (A) will come on. A sound will be made every time you push the switch. Push the switch again and the air condition- ing compressor will stop and the indicator light (A) goes off.
CAUTION Using recirculated air for a long time may cause the windows to fog up.NOTE
If the mode selection dial is set between “ ” and “ ”, you cannot turn the air con- ditioning off or select the recirculation posi- tion.This prevents the windows from fogging up. When the mode selection dial or the blower speed selection dial is set to the “AUTO” position again after manual operation, the air selection switch will also be automaticallycontrolled.
Personalizing the air selection (Changing the function setting)
NOTE
The factory setting is “Enable automatic air control”. While the mode selection dial is set between “ ” and “ ” position, the air selection will automatically change to the outside air position, even if the sy
stem is set to “Disable
automatic air control”, in order to preventwindows from fogging up.
Air conditioning switch
CAUTION When using the air conditioning, the idling speed may slightly increase as the air condi-tioning compressor is switched on/off auto- matically. Especially for vehicles equipped with a continuously variable transmission(CVT) or Twin Clutch SST while the vehicle is stationary, fully depress the brake pedal to prevent the vehicle from creeping.
BK0200700US.bo
ok 17 ページ 2013年2月15日 金曜日 午後12時17分
Page 294 of 422
Automatic air conditioning with
Celsius scale (if so equipped)
Comfort controls 7-23
7
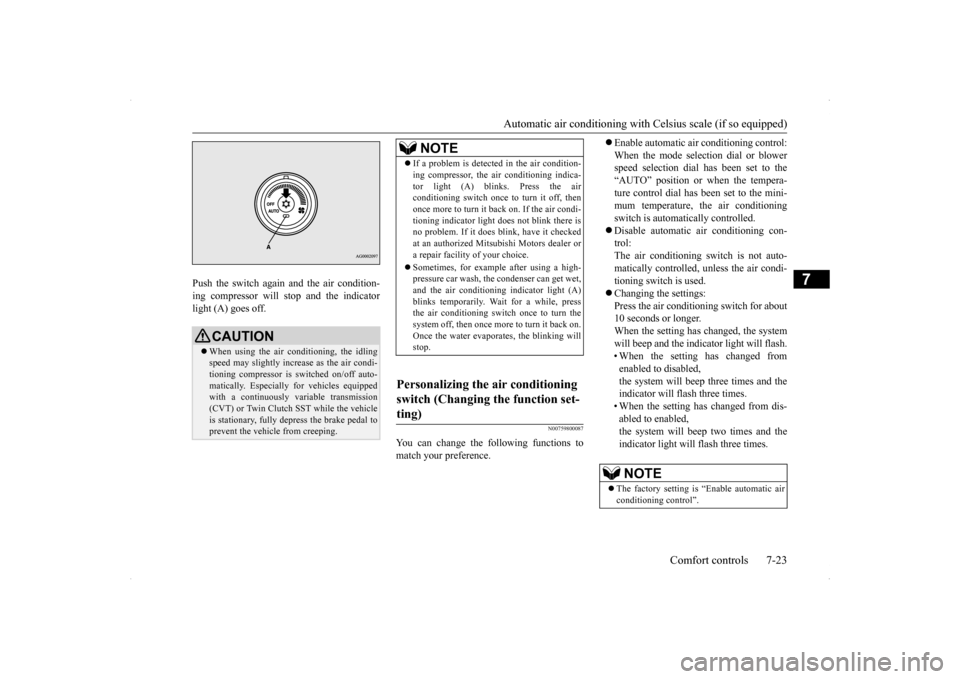
Push the switch again and the air condition- ing compressor will stop and the indicator light (A) goes off.
N00759800087
You can change the following functions tomatch your preference.
Enable automatic air conditioning control: When the mode selection dial or blower speed selection dial has been set to the “AUTO” position or when the tempera-ture control dial has been set to the mini- mum temperature, the air conditioning switch is automatically controlled. Disable automatic air conditioning con- trol: The air conditioning switch is not auto-matically controlled, unless the air condi-tioning switch is used. Changing the settings: Press the air conditioning switch for about10 seconds or longer. When the setting has changed, the system will beep and the indicator light will flash.• When the setting has changed from enabled to disabled, the system will beep three times and theindicator will flash three times. • When the setting has changed from dis- abled to enabled,the system will beep two times and the indicator light will flash three times.
CAUTION When using the air conditioning, the idling speed may slightly increase as the air condi-tioning compressor is switched on/off auto- matically. Especially for vehicles equipped with a continuously variable transmission(CVT) or Twin Clutch SST while the vehicle is stationary, fully depress the brake pedal to prevent the vehicle from creeping.
NOTE
If a problem is detect
ed in the air condition-
ing compressor, the air conditioning indica- tor light (A) blinks. Press the air conditioning switch once to turn it off, then once more to turn it back on. If the air condi-tioning indicator light
does not blink there is
no problem. If it does blink, have it checked at an authorized Mitsubishi Motors dealer ora repair facility of your choice. Sometimes, for example after using a high- pressure car wash, the condenser can get wet, and the air conditioning indicator light (A) blinks temporarily. Wait for a while, pressthe air conditioning switch once to turn the system off, then once more to turn it back on. Once the water evaporates, the blinking willstop.
Personalizing the air conditioning switch (Changing the function set- ting)
NOTE
The factory setting is “Enable automatic air conditioning control”.
BK0200700US.bo
ok 23 ページ 2013年2月15日 金曜日 午後12時17分
Page 335 of 422
If the vehicle breaks down 8-2 For emergencies
8
N00836300204
If your vehicle breaks down on the road, move to the shoulder and turn on the hazardwarning flashers. If there is no shoulder, or the shoulder is not safe, drive in the right lane slowly, with the hazard lights flashing, untilyou come to a safe stopping place. Keep the flashers flashing. If the engine stops, there will be no power assist to the steering and brakes, making these difficult to use. The brake booster will not work, so the brakes will not grip well. The brake pedalwill be harder to press than usual. Since there is no power steering assist, the steering wheel will be hard to turn.
Get help from your passengers, bystanders, etc. to push the vehicl
e and move it to a safe
zone.
N00836400654
If the engine cannot be started because the battery is weak or dead, you can start it withthe battery from another vehicle using jumper cables. 1. Take off any metal jewelry such as watch bands or bracelets that might make an accidental electrical contact.
2. Position the vehicles close enough together so that the jumper cables can reach, but be sure the vehicles aren’t touching each other. 3. You could be injured if the vehicles move. Set the parking brake firmly on each vehi- cle. Put an automatic transaxle, CVT or Twin Clutch SST in “P” (PARK) or amanual transaxle in “N” (Neutral). Turn the ignition switch to the “LOCK” posi- tion.
If the vehicle breaks down If the engine stops/fails When the engine fails at the intersection
Jump-starting the engine
WA R N I N G When using jumper cables to start a vehi- cle, follow the procedures and be very cau- tious. CAUTION Do not try to start your vehicle by pushing or towing. Vehicles equipped with continuously variable transmission (CVT) or Twin Clutch SST cannot be started this way. Pushing ortowing a vehicle that has a manual transaxle may overheat and damage the catalytic con- verter. Also, there is more risk of an accidentwhen a vehicle is being pushed or towed.
CAUTION Check the other vehicle. It must have a 12- volt battery. If the other system isn’t 12-volt, both systems can be damaged.WA R N I N G Turn the ignition switch to the “LOCK” position on both vehicles. Make sure thatthe cables or your clothes cannot be caught by the fan or drive belt. Personal injury could result. NOTE
Turn off all lights, heater, and other electrical loads. This will avoid sparks and help saveboth batteries.
BK0200700US.bo
ok 2 ページ 2013年2月15日 金曜日 午後12時17分
Page 337 of 422
Engine overheating 8-4 For emergencies
8
8. Start the engine in the vehicle providing the boost. Let the engine idle a few min- utes, then start the engine in the vehicle with the low battery. 9. After the engine is started, disconnect the cables in the reverse order from the wayyou connected them.
10. For vehicles equipped with turbocharger,
install the battery upper cover and thenthe air duct. (Refer to “Removing and installing the battery upper cover” on page 9-14.)
If you drive your vehicle with a low battery charge, after the engine has been started by using jumper cables, the engine may misfire. This can cause the anti-lock braking systemwarning light to blink on and off. This is only due to the low battery voltage. It is not a problem with the brake system. If this hap-pens, fully charge the battery and ensure the charging system is operating properly.
N00836500323
When the engine is overheating, the informa- tion screen in the multi-information displaywill be interrupted and the engine coolant temperature warning display will appear. Also “ ” will blink. If this happens: 1. Stop the vehicle in a safe place. Turn on the hazard warning flashers. 2. With the engine still running, carefully raise the engine hood to vent the engine compartment.3. Check that the cooling fan is running. If the fan is not turning, stop the engine immediately and contact an authorizedMitsubishi Motors dealer or a repair facil- ity of your choice for assistance. 4. If you see steam or spray coming from under the hood, turn off the engine.
NOTE
If the engine is started with the air duct removed, the noise produced as air is drawn into the engine will be greater than when the duct is installed.WA R N I N G Charging your battery while it is still in your vehicle might cause the battery tocatch fire and explode. If you have to charge it while in the vehicle, disconnect the negative terminal. Keep sparks, cigarettes and flames away from the battery because the battery may explode. Keep your work area well vented when charging or using the battery in an enclosed space.
Remove all the caps before charging the battery. Electrolyte (battery acid) is corrosive diluted sulphuric acid. If electrolyte comesin contact with your hands, eyes, clothes, or the painted surface of your vehicle, thoroughly flush with water. If electrolytegets in your eyes, flush them immediately and thoroughly with water, and get prompt medical attention. Always wear protective clothing and gog- gles when working near the battery. Keep the battery out of the reach of chil- dren.
As your vehicle has anti-lock brakes
WA R N I N G
Engine overheating
WA R N I N G To avoid personal injury, keep hands, hair, jewelry and clothes away from the cooling fan. The cooling fan can start at any time.
BK0200700US.bo
ok 4 ページ 2013年2月15日 金曜日 午後12時17分
Page 339 of 422
How to change a tire 8-6 For emergencies
8
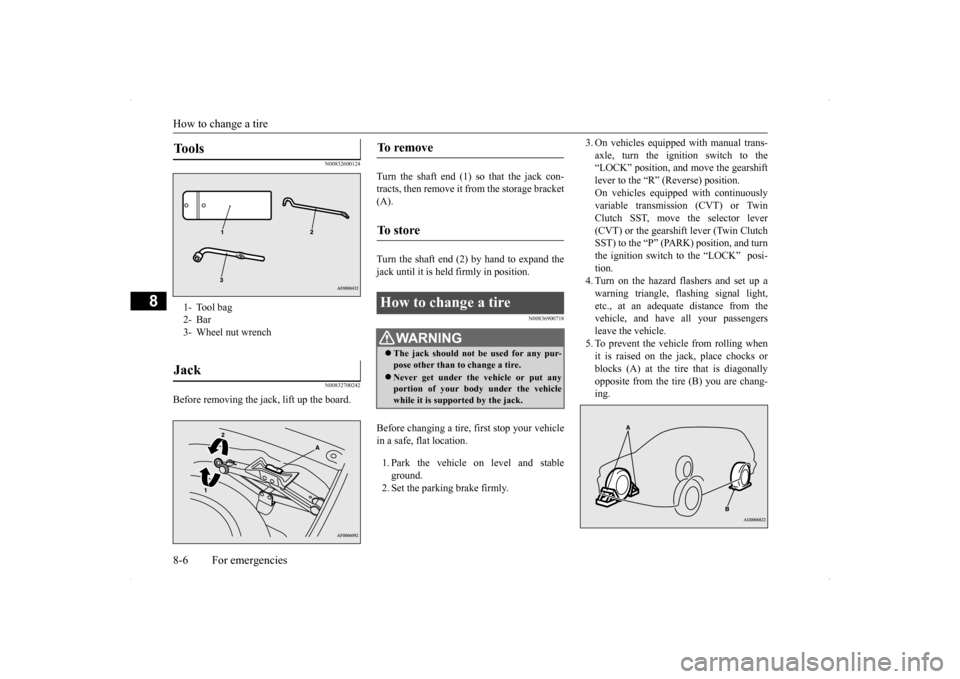
N00832600124 N00832700242
Before removing the jack, lift up the board.
Turn the shaft end (1) so that the jack con- tracts, then remove it from the storage bracket(A). Turn the shaft end (2) by hand to expand the jack until it is held firmly in position.
N00836900718
Before changing a tire, first stop your vehicle in a safe, flat location. 1. Park the vehicle on level and stable ground.2. Set the parking brake firmly.
3. On vehicles equipped with manual trans- axle, turn the ignition switch to the “LOCK” position, and move the gearshift lever to the “R” (Reverse) position.On vehicles equipped with continuously variable transmission (CVT) or Twin Clutch SST, move the selector lever(CVT) or the gearshift lever (Twin Clutch SST) to the “P” (PARK) position, and turn the ignition switch to the “LOCK” posi-tion.4. Turn on the hazard flashers and set up a warning triangle, flashing signal light, etc., at an adequate distance from thevehicle, and have all your passengers leave the vehicle. 5. To prevent the vehicle from rolling whenit is raised on the jack, place chocks or blocks (A) at the tire that is diagonally opposite from the tire (B) you are chang-ing.
Tools 1- Tool bag2- Bar3- Wheel nut wrenchJack
To remove To s t o r e How to change a tire
WA R N I N G The jack should not be used for any pur- pose other than to change a tire. Never get under the vehicle or put any portion of your body under the vehiclewhile it is supported by the jack.
BK0200700US.bo
ok 6 ページ 2013年2月15日 金曜日 午後12時17分