2014 MITSUBISHI LANCER SPORTBACK steering wheel adjustment
[x] Cancel search: steering wheel adjustmentPage 117 of 422

Steering wheel tilt lock lever 5-50 Features and controls
5
N00511500172
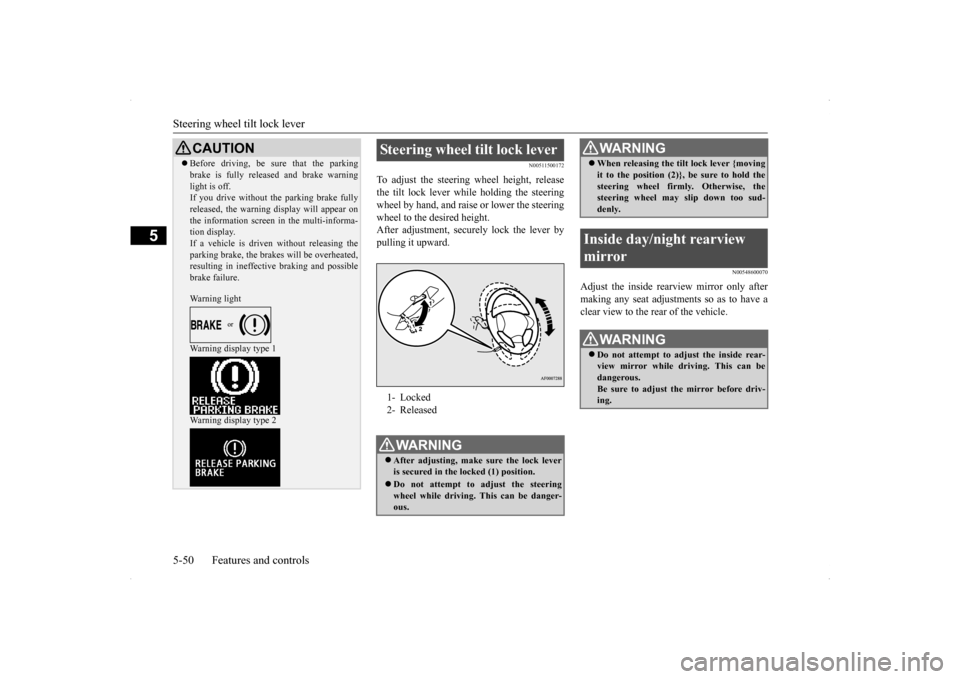
To adjust the steering wheel height, release the tilt lock lever while holding the steeringwheel by hand, and raise or lower the steering wheel to the desired height. After adjustment, securely lock the lever bypulling it upward.
N00548600070
Adjust the inside rearview mirror only aftermaking any seat adjustments so as to have aclear view to the rear of the vehicle.
CAUTION Before driving, be sure that the parking brake is fully released and brake warning light is off. If you drive without the parking brake fully released, the warning display will appear onthe information screen in the multi-informa- tion display. If a vehicle is driven without releasing theparking brake, the brakes will be overheated, resulting in ineffective braking and possible brake failure. Warning light Warning display type 1 Warning display type 2
Steering wheel tilt lock lever 1- Locked 2- ReleasedWA R N I N G After adjusting, make sure the lock lever is secured in the locked (1) position. Do not attempt to adjust the steering wheel while driving. This can be danger-ous.
When releasing the tilt lock lever {moving it to the position (2)}, be sure to hold the steering wheel firmly. Otherwise, the steering wheel may slip down too sud- denly.
Inside day/night rearview mirror
WA R N I N G Do not attempt to adjust the inside rear- view mirror while driving. This can be dangerous. Be sure to adjust the mirror before driv-ing.WA R N I N G
BK0200700US.bo
ok 50 ページ 2013年2月15日 金曜日 午後12時17分
Page 170 of 422

Tire pressure monitoring system
Features and controls 5-103
5
2. If the tire pressure monitoring system warning light remains illuminated after you have been driving for about 20 min- utes after you adjust the tire inflation pres-sure, one or more of the tires may have apuncture. Inspect the tire and if it has a puncture, have it repaired by an autho- rized Mitsubishi Motors dealer as soon aspossible.
The tire pressure monitoring system may not work normally in the following circum- stances: A wireless facility or device using the same frequency is near the vehicle. Snow or ice is stuck inside the fenders and/or on the wheels. The tire inflation pressure sensor’s battery is dead. Wheels other than Mitsubishi genuine wheels are being used. Wheels that are not fitted with tire infla- tion pressure sensors are being used. Wheels whose ID co
des are not memo-
rized by the vehicle are used. Compact spare tire is fitted on a road wheel.
A window tint that affects the radio wave signals is installed.
N00532900179
If new wheels with new tire inflation pressuresensors are installed, their ID codes must beprogrammed into the tire pressure monitoring system. Have tire and wheel replacement per- formed by an authorized Mitsubishi Motorsdealer to avoid the risk of damaging the tire inflation pressure sensors. If the wheel replacement is not done by an authorizedMitsubishi Motors dealer, it is not covered by your warranty.
Once adjustments have been made, the warn- ing light will go off after a few minutes of driving.WA R N I N G If the warning light/display illuminates while you are driving, avoid hard braking, sharp steering maneuvers and high speeds. Driving with an under-inflated tireadversely affects vehicle performance and can result in an accident.CAUTION If a tire has a puncture, replace that tire with the spare tire. Driving on a punctured tire could lead to an accident. The warning light/display may not illuminate immediately in the event of a tire blowout orrapid leak.NOTE
NOTE
To avoid the risk of damage to the tire infla- tion pressure sensors, have any punctured tire repaired by an authorized Mitsubishi Motors dealer. If the tire repair is not done by an authorized Mitsubishi Motors dealer, it isnot covered by your warranty. Do not use an aerosol puncture-repair prod- uct on any tire. Such a spray could damage the tire inflation pressure sensors. Have any puncture repaired by an authorized Mitsubi-shi Motors dealer.
NOTE
Tire inflation pressures vary with the ambi- ent temperature. If the vehicle is subjected to large variations in ambient temperature, thetire inflation pressures may be under-inflated (causing the warning light/display to come on) when the ambient temperature is rela-tively low. If the warning light/display comes on, adjust the tire inflation pressure.
Whenever the tires and wheels are replaced with new ones
BK0200700US.book
103 ページ 2013年2月15日 金曜日 午後12時17分
Page 217 of 422

Headlight leveling switch (if so equipped) 5-150 Features and controls
5
4. The headlights will come on in the low beam setting for about 30 seconds. After the headlights go off, the headlights can be turned on again in the low beam settingfor about 30 seconds by pulling the turn signal lever toward you within 60 seconds of turning the ignition switch to the“LOCK” position. To turn on the head- lights again after 60 seconds of turning the ignition switch to the “LOCK” posi-tion, repeat the process from step 1.
N00537100062
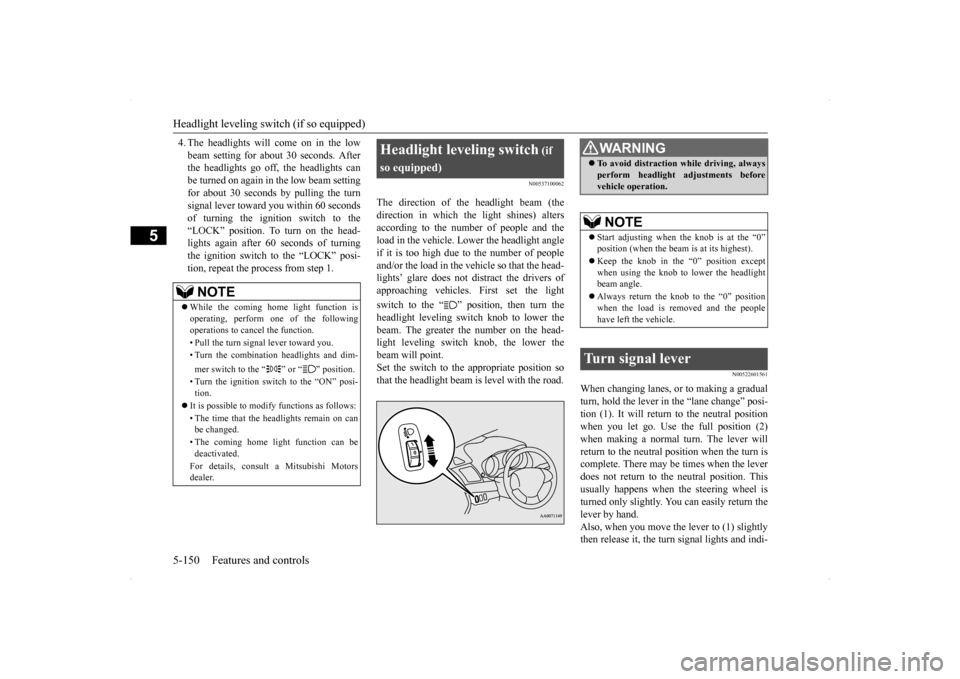
The direction of the headlight beam (thedirection in which the light shines) alters according to the number of people and the load in the vehicle. Lower the headlight angleif it is too high due to the number of people and/or the load in the vehicle so that the head- lights’ glare does not distract the drivers ofapproaching vehicles. First set the light switch to the “ ” position, then turn the headlight leveling switch knob to lower the beam. The greater the number on the head-light leveling switch knob, the lower the beam will point. Set the switch to the appropriate position sothat the headlight beam is level with the road.
N00522601561
When changing lanes, or to making a gradual turn, hold the lever in the “lane change” posi- tion (1). It will return to the neutral positionwhen you let go. Use the full position (2) when making a normal turn. The lever will return to the neutral position when the turn iscomplete. There may be times when the lever does not return to the neutral position. This usually happens when the steering wheel isturned only slightly. You can easily return the lever by hand. Also, when you move the lever to (1) slightlythen release it, the turn signal lights and indi-
NOTE
While the coming home light function is operating, perform one of the followingoperations to cancel the function. • Pull the turn signal lever toward you.• Turn the combination headlights and dim- mer switch to the “ ” or “ ” position. • Turn the ignition switch to the “ON” posi- tion.
It is possible to modify functions as follows: • The time that the headlights remain on can be changed. • The coming home light function can be deactivated. For details, consult a Mitsubishi Motors dealer.
Headlight leveling switch
(if
so equipped)
WA R N I N G To avoid distraction while driving, always perform headlight adjustments before vehicle operation.NOTE
Start adjusting when the knob is at the “0” position (when the beam is at its highest). Keep the knob in the “0” position except when using the knob to lower the headlightbeam angle. Always return the knob to the “0” position when the load is removed and the people have left the vehicle.
Turn signal lever
BK0200700US.book
150 ページ 2013年2月15日 金曜日 午後12時17分