2014 MITSUBISHI LANCER SPORTBACK tow
[x] Cancel search: towPage 285 of 422
Automatic air conditioning with
Fahrenheit scale (if so equipped)
7-14 Comfort controls
7
N00731400544
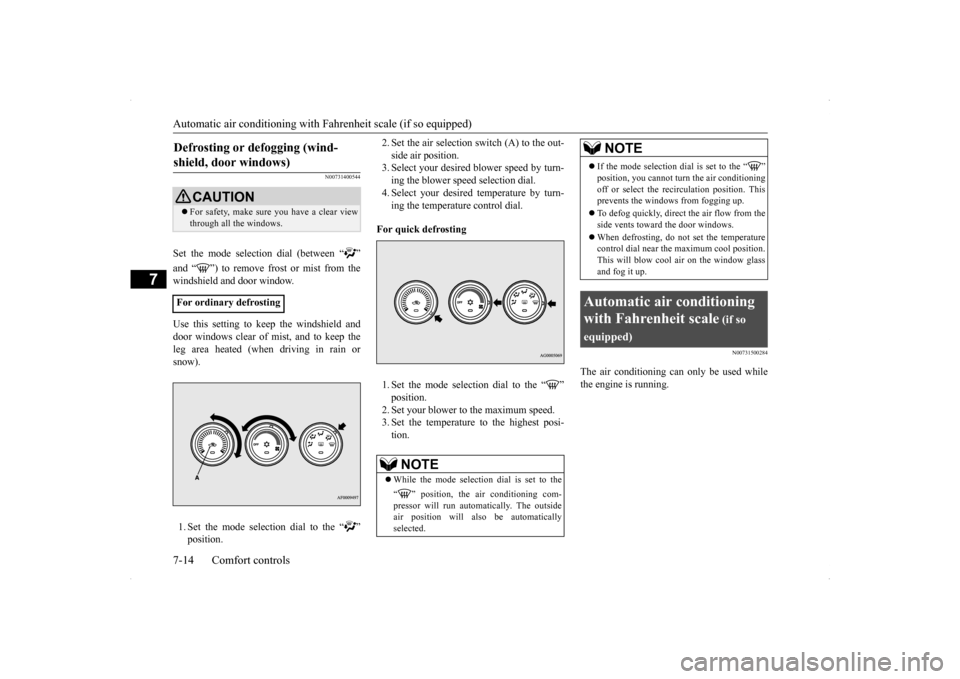
Set the mode selection dial (between “ ” and “ ”) to remove frost or mist from the windshield and door window. Use this setting to keep the windshield and door windows clear of mist, and to keep the leg area heated (when driving in rain orsnow). 1. Set the mode selection dial to the “ ” position.
2. Set the air selection switch (A) to the out- side air position. 3. Select your desired
blower speed by turn-
ing the blower speed selection dial.4. Select your desired temperature by turn- ing the temperature control dial.
For quick defrosting 1. Set the mode selection dial to the “ ” position.2. Set your blower to the maximum speed. 3. Set the temperature to the highest posi- tion.
N00731500284
The air conditioning can only be used whilethe engine is running.
Defrosting or defogging (wind- shield, door windows)
CAUTION For safety, make sure you have a clear view through all the windows.
For ordinary defrosting
NOTE
While the mode selection dial is set to the “ ” position, the air conditioning com- pressor will run automatically. The outside air position will also be automaticallyselected.
If the mode selection dial is set to the “ ” position, you cannot turn the air conditioning off or select the recirculation position. This prevents the windows from fogging up. To defog quickly, direct
the air flow from the
side vents toward the door windows. When defrosting, do not set the temperature control dial near the maximum cool position. This will blow cool air on the window glass and fog it up.
Automatic air conditioning with Fahrenheit scale
(if so
equipped)
NOTE
BK0200700US.bo
ok 14 ページ 2013年2月15日 金曜日 午後12時17分
Page 291 of 422
Automatic air conditioning with
Celsius scale (if so equipped)
7-20 Comfort controls
7
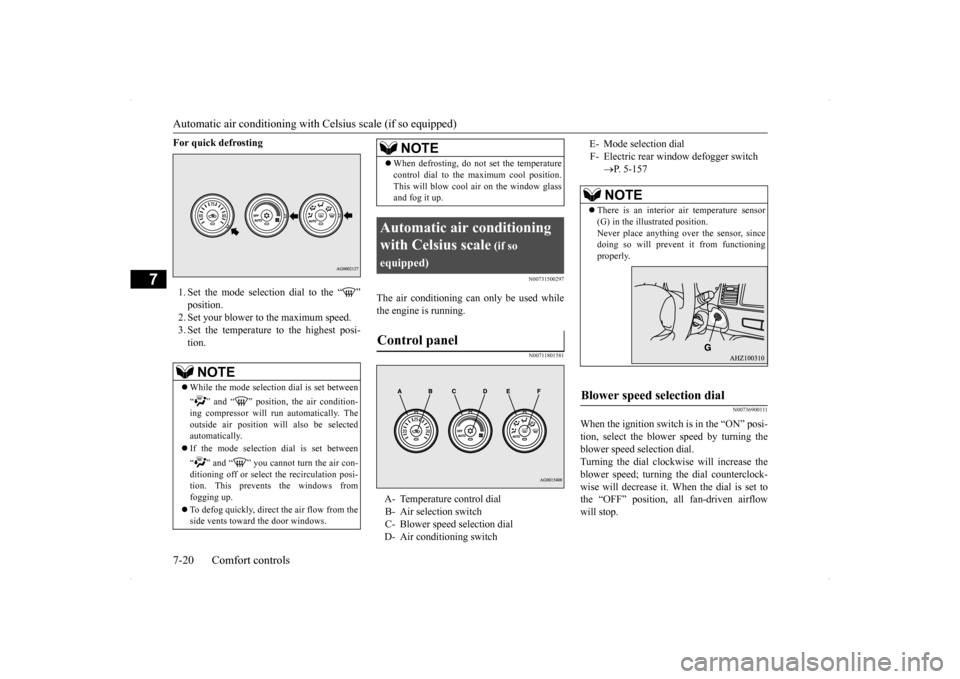
For quick defrosting 1. Set the mode selection dial to the “ ” position. 2. Set your blower to the maximum speed. 3. Set the temperature to the highest posi-tion.
N00731500297
The air conditioning can only be used while the engine is running.
N00711801581
N00736900111
When the ignition switch is in the “ON” posi- tion, select the blower speed by turning the blower speed selection dial.Turning the dial clockwise will increase the blower speed; turning the dial counterclock- wise will decrease it. When the dial is set tothe “OFF” position, all fan-driven airflow will stop.
NOTE
While the mode selection dial is set between “ ” and “ ” position, the air condition- ing compressor will run automatically. The outside air position will also be selectedautomatically. If the mode selection dial is set between “ ” and “ ” you cannot turn the air con- ditioning off or select the recirculation posi- tion. This prevents the windows from fogging up. To defog quickly, direct
the air flow from the
side vents toward the door windows.
When defrosting, do not set the temperature control dial to the maximum cool position. This will blow cool air on the window glass and fog it up.
Automatic air conditioning with Celsius scale
(if so
equipped)Control panel
A- Temperature control dial B- Air selection switch C- Blower speed selection dial D- Air conditioning switch
NOTE
E- Mode selection dialF- Electric rear window defogger switch
P. 5-157NOTE
There is an interior air temperature sensor (G) in the illustrated position. Never place anything over the sensor, sincedoing so will prevent it from functioning properly.
Blower speed selection dial
BK0200700US.bo
ok 20 ページ 2013年2月15日 金曜日 午後12時17分
Page 296 of 422
Important air conditioning operating tips
Comfort controls 7-25
7
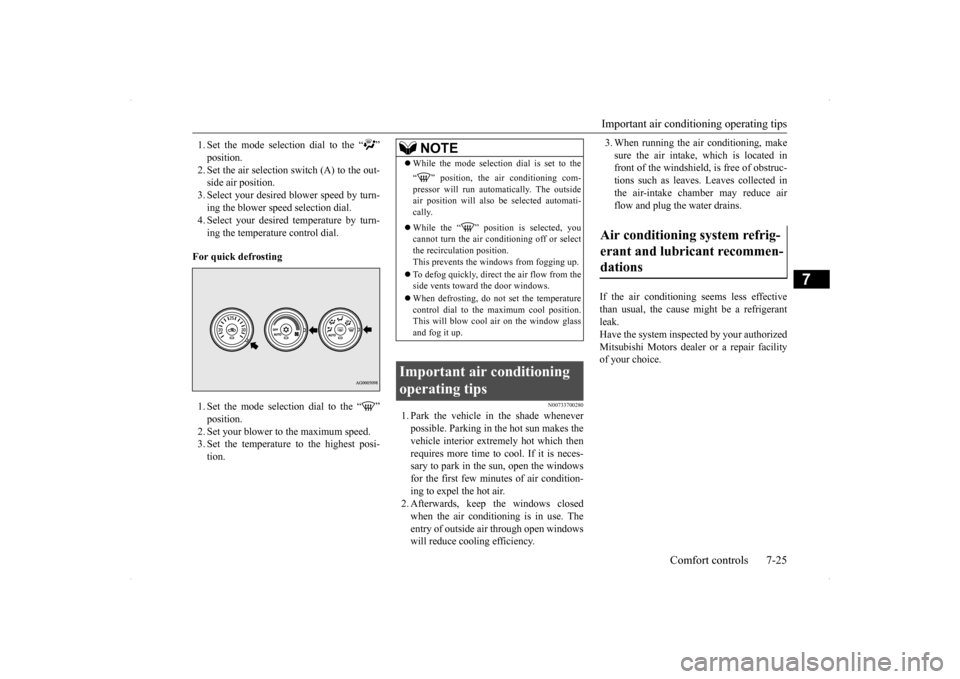
1. Set the mode selection dial to the “ ” position.2. Set the air selection switch (A) to the out- side air position. 3. Select your desired blower speed by turn-ing the blower speed selection dial. 4. Select your desired temperature by turn- ing the temperature control dial.
For quick defrosting 1. Set the mode selection dial to the “ ” position.2. Set your blower to the maximum speed. 3. Set the temperature to the highest posi- tion.
N00733700280
1. Park the vehicle in the shade wheneverpossible. Parking in the hot sun makes thevehicle interior extremely hot which thenrequires more time to cool. If it is neces- sary to park in the sun, open the windows for the first few minutes of air condition-ing to expel the hot air. 2. Afterwards, keep the windows closed when the air conditioning is in use. Theentry of outside air through open windows will reduce cooling efficiency.
3. When running the air conditioning, make sure the air intake, which is located in front of the windshield, is free of obstruc- tions such as leaves. Leaves collected inthe air-intake chamber may reduce air flow and plug the water drains.
If the air conditioning seems less effective than usual, the cause might be a refrigerantleak. Have the system inspected by your authorized Mitsubishi Motors dealer or a repair facilityof your choice.
NOTE
While the mode selection dial is set to the “ ” position, the air conditioning com- pressor will run automatically. The outside air position will also be selected automati-cally. While the “ ” position is selected, you cannot turn the air conditioning off or selectthe recirculation position. This prevents the windows from fogging up. To defog quickly, direct
the air flow from the
side vents toward the door windows. When defrosting, do not set the temperature control dial to the maximum cool position. This will blow cool air on the window glass and fog it up.
Important air conditioning operating tips
Air conditioning system refrig- erant and lubricant recommen-dations
BK0200700US.bo
ok 25 ページ 2013年2月15日 金曜日 午後12時17分
Page 334 of 422
8
For emergenciesIf the vehicle breaks
down ................................................................8-2
Jump-starting the engi
ne .........................................
..........................8-2
Engine overheating ..........
.................................................................8-4
Tools and jack ..................
.................................................................8-5
How to change a tire
...............................................
..........................8-6
Towing .................................................
...........................................8-13
Operation under adverse driv
ing conditions ...................................8-15
BK0200700US.bo
ok 1 ページ 2013年2月15日 金曜日 午後12時17分
Page 335 of 422
If the vehicle breaks down 8-2 For emergencies
8
N00836300204
If your vehicle breaks down on the road, move to the shoulder and turn on the hazardwarning flashers. If there is no shoulder, or the shoulder is not safe, drive in the right lane slowly, with the hazard lights flashing, untilyou come to a safe stopping place. Keep the flashers flashing. If the engine stops, there will be no power assist to the steering and brakes, making these difficult to use. The brake booster will not work, so the brakes will not grip well. The brake pedalwill be harder to press than usual. Since there is no power steering assist, the steering wheel will be hard to turn.
Get help from your passengers, bystanders, etc. to push the vehicl
e and move it to a safe
zone.
N00836400654
If the engine cannot be started because the battery is weak or dead, you can start it withthe battery from another vehicle using jumper cables. 1. Take off any metal jewelry such as watch bands or bracelets that might make an accidental electrical contact.
2. Position the vehicles close enough together so that the jumper cables can reach, but be sure the vehicles aren’t touching each other. 3. You could be injured if the vehicles move. Set the parking brake firmly on each vehi- cle. Put an automatic transaxle, CVT or Twin Clutch SST in “P” (PARK) or amanual transaxle in “N” (Neutral). Turn the ignition switch to the “LOCK” posi- tion.
If the vehicle breaks down If the engine stops/fails When the engine fails at the intersection
Jump-starting the engine
WA R N I N G When using jumper cables to start a vehi- cle, follow the procedures and be very cau- tious. CAUTION Do not try to start your vehicle by pushing or towing. Vehicles equipped with continuously variable transmission (CVT) or Twin Clutch SST cannot be started this way. Pushing ortowing a vehicle that has a manual transaxle may overheat and damage the catalytic con- verter. Also, there is more risk of an accidentwhen a vehicle is being pushed or towed.
CAUTION Check the other vehicle. It must have a 12- volt battery. If the other system isn’t 12-volt, both systems can be damaged.WA R N I N G Turn the ignition switch to the “LOCK” position on both vehicles. Make sure thatthe cables or your clothes cannot be caught by the fan or drive belt. Personal injury could result. NOTE
Turn off all lights, heater, and other electrical loads. This will avoid sparks and help saveboth batteries.
BK0200700US.bo
ok 2 ページ 2013年2月15日 金曜日 午後12時17分
Page 338 of 422
Tools and jack
For emergencies 8-5
8
5. If you do not see steam or spray coming from under the hood, leave the engine on until the bar graph for the engine coolant temperature warning display on the multi-information display goes down. When it is in the middle of the normal zone, you can start driving again. If the bar graphstays in the red zone, turn off the engine. 6. When you do not see any more steam or spray, open the hood. Look for obvious leaks, such as a split radiator hose. Be careful as components will be hot. Anyleak source must be repaired. 7. If there is no obvious leak source, check the coolant level in the reserve tank. Ifthere is none, or if it is too low, slowly add coolant.
8. If the reserve tank needs coolant, you will probably also need to add coolant to the radiator. Do not loosen or remove the radiator cap until the engine has cooleddown. 9. Start the engine, and slowly add coolant, up to the bottom of the filler neck. Useplain water if you have to (and replace it with the right coolant as soon as possible).
10. Replace the radiator cap and tighten it
fully. Check the engine coolant tempera- ture display on the multi-information dis- play. You can start driving again when thebar graph for the engine coolant tempera- ture display returns to the normal zone.
11. Have your vehicle checked by your autho-
rized Mitsubishi Motors dealer or a repair facility of your choice.
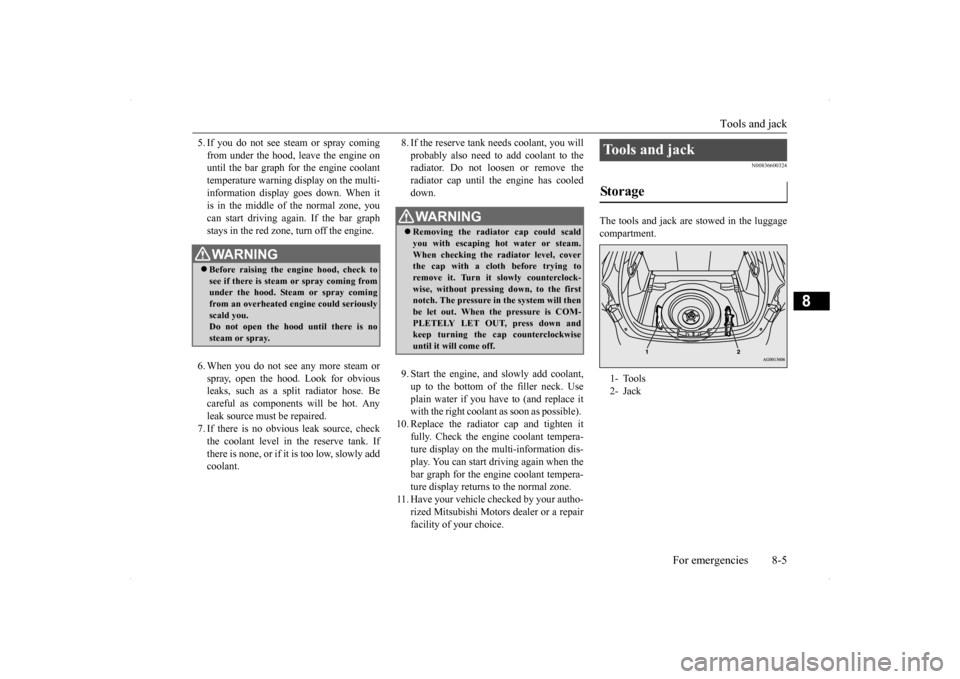
N00836600324
The tools and jack are stowed in the luggage compartment.
WA R N I N G Before raising the engine hood, check to see if there is steam or spray coming fromunder the hood. Steam or spray coming from an overheated engine could seriously scald you.Do not open the hood until there is no steam or spray.
WA R N I N G Removing the radiator cap could scald you with escaping hot water or steam.When checking the radiator level, cover the cap with a cloth before trying to remove it. Turn it slowly counterclock-wise, without pressing down, to the first notch. The pressure in the system will then be let out. When the pressure is COM-PLETELY LET OUT, press down and keep turning the cap counterclockwise until it will come off.
Tools and jack Storage 1- Tools 2- Jack
BK0200700US.bo
ok 5 ページ 2013年2月15日 金曜日 午後12時17分
Page 340 of 422
How to change a tire
For emergencies 8-7
8
6. Get the jack, bar and wheel nut wrench ready.Refer to “Tools and jack” on page 8-5.
N00849600302
The compact spare tire is designed to savespace in the luggage compartment. Its lighter weight makes it easier to use if a flat tire occurs.
N00849701313
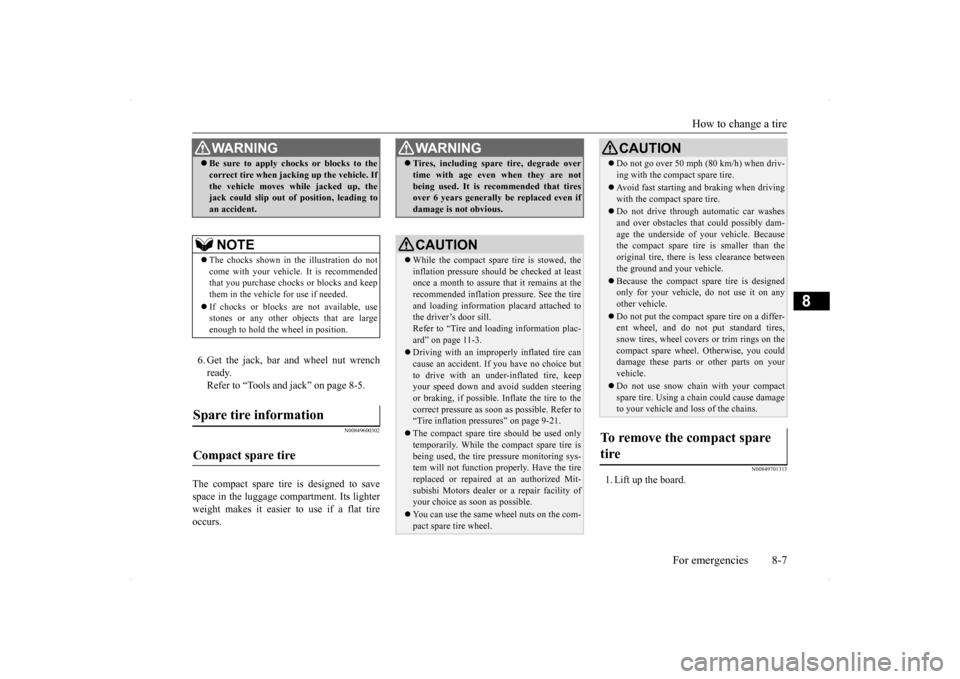
1. Lift up the board.
WA R N I N G Be sure to apply chocks or blocks to the correct tire when jacking up the vehicle. If the vehicle moves while jacked up, the jack could slip out of position, leading to an accident.NOTE
The chocks shown in the illustration do not come with your vehicle. It is recommended that you purchase chocks or blocks and keepthem in the vehicle for use if needed. If chocks or blocks are not available, use stones or any other objects that are large enough to hold the wheel in position.
Spare tire information Compact spare tire
WA R N I N G Tires, including spare tire, degrade over time with age even when they are not being used. It is recommended that tires over 6 years generally be replaced even if damage is not obvious.CAUTION While the compact spare tire is stowed, the inflation pressure should be checked at least once a month to assure that it remains at therecommended inflation pressure. See the tire and loading information placard attached to the driver’s door sill.Refer to “Tire and loading information plac- ard” on page 11-3. Driving with an improperly inflated tire can cause an accident. If you have no choice but to drive with an under-inflated tire, keepyour speed down and avoid sudden steering or braking, if possible
. Inflate the tire to the
correct pressure as soon as possible. Refer to“Tire inflation pressures” on page 9-21. The compact spare tire should be used only temporarily. While the compact spare tire is being used, the tire pressure monitoring sys- tem will not function properly. Have the tire replaced or repaired at an authorized Mit- subishi Motors dealer or a repair facility ofyour choice as soon as possible. You can use the same wheel nuts on the com- pact spare tire wheel.
Do not go over 50 mph (80 km/h) when driv- ing with the compact spare tire. Avoid fast starting and braking when driving with the compact spare tire. Do not drive through automatic car washes and over obstacles that could possibly dam-age the underside of your vehicle. Because the compact spare tire is smaller than the original tire, there is less clearance betweenthe ground and your vehicle. Because the compact spare tire is designed only for your vehicle, do not use it on any other vehicle. Do not put the compact spare tire on a differ- ent wheel, and do not put standard tires, snow tires, wheel covers or trim rings on thecompact spare wheel. Otherwise, you could damage these parts or other parts on your vehicle. Do not use snow chain with your compact spare tire. Using a chain could cause damageto your vehicle and loss of the chains.
To remove the compact spare tire
CAUTION
BK0200700US.bo
ok 7 ページ 2013年2月15日 金曜日 午後12時17分
Page 346 of 422
Towing
For emergencies 8-13
8
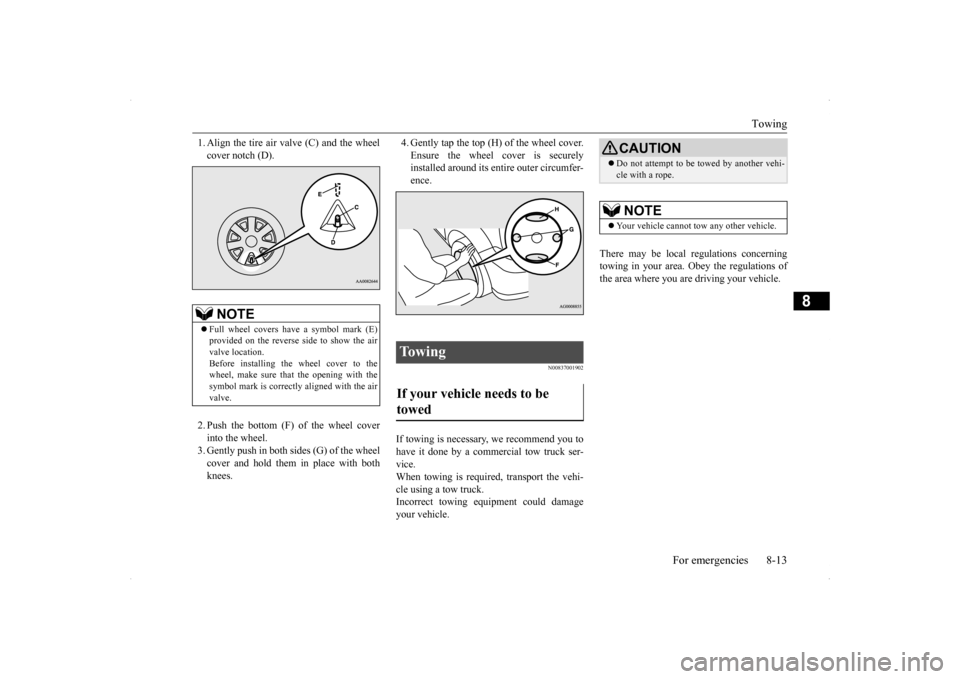
1. Align the tire air valve (C) and the wheel cover notch (D). 2. Push the bottom (F) of the wheel cover into the wheel. 3. Gently push in both sides (G) of the wheel cover and hold them in place with bothknees.
4. Gently tap the top (H) of the wheel cover. Ensure the wheel cover is securely installed around its entire outer circumfer- ence.
N00837001902
If towing is necessary, we recommend you to have it done by a commercial tow truck ser- vice.When towing is required, transport the vehi-cle using a tow truck. Incorrect towing equipment could damage your vehicle.
There may be local regulations concerning towing in your area. Obey the regulations of the area where you are driving your vehicle.
NOTE
Full wheel covers have a symbol mark (E) provided on the reverse side to show the airvalve location. Before installing the wheel cover to the wheel, make sure that the opening with thesymbol mark is correctly aligned with the air valve.
To w i n g If your vehicle needs to be towed
CAUTION Do not attempt to be towed by another vehi- cle with a rope.NOTE
Your vehicle cannot tow any other vehicle.
BK0200700US.bo
ok 13 ページ 2013年2月15日 金曜日 午後12時17分