2014 MITSUBISHI LANCER SPORTBACK battery
[x] Cancel search: batteryPage 108 of 422
Inside rear hatch release
Features and controls 5-41
5
N00523100058
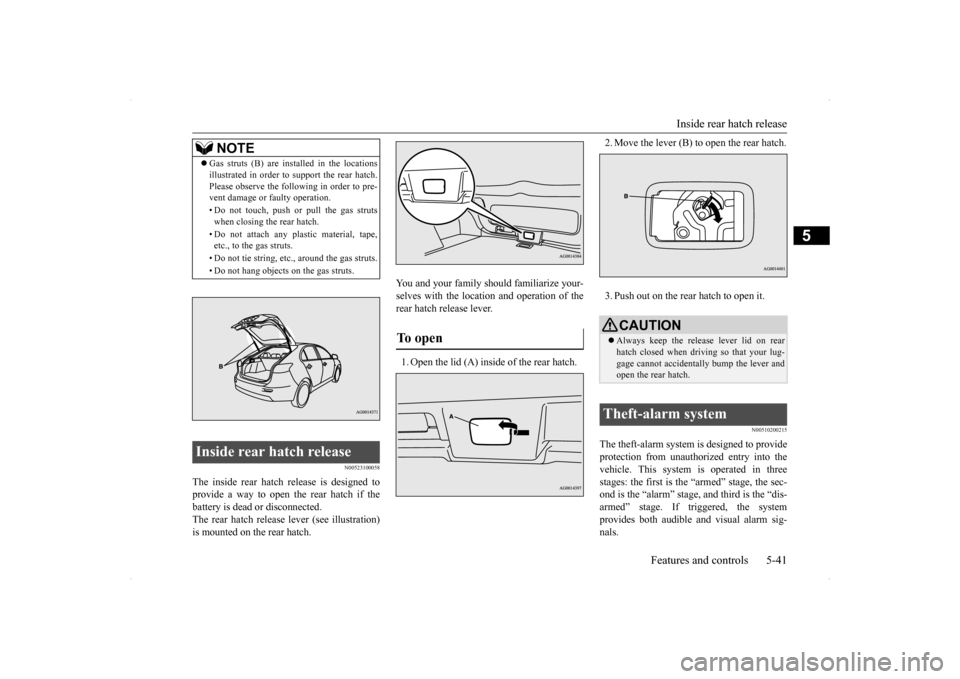
The inside rear hatch release is designed to provide a way to open the rear hatch if the battery is dead or disconnected. The rear hatch release lever (see illustration)is mounted on the rear hatch.
You and your family should familiarize your- selves with the location and operation of the rear hatch release lever. 1. Open the lid (A) inside of the rear hatch.
2. Move the lever (B) to open the rear hatch. 3. Push out on the rear hatch to open it.
N00510200215
The theft-alarm system is designed to provide protection from unauthorized entry into the vehicle. This system is operated in three stages: the first is the “armed” stage, the sec-ond is the “alarm” stage,
and third is the “dis-
armed” stage. If triggered, the system provides both audible and visual alarm sig-nals.
NOTE
Gas struts (B) are installed in the locations illustrated in order to support the rear hatch. Please observe the following in order to pre- vent damage or faulty operation. • Do not touch, push or pull the gas struts when closing the rear hatch. • Do not attach any plastic material, tape, etc., to the gas struts. • Do not tie string, etc., around the gas struts. • Do not hang objects
on the gas struts.
Inside rear hatch release
To open
CAUTIONAlways keep the release lever lid on rear hatch closed when driving so that your lug- gage cannot accidentally bump the lever and open the rear hatch.
Theft-alarm system
BK0200700US.bo
ok 41 ページ 2013年2月15日 金曜日 午後12時17分
Page 110 of 422
Theft-alarm system
Features and controls 5-43
5
N00510401201
The alarm will be activated if any of the fol- lowing occur while the vehicle is parked andthe system is armed. One of the doors and the rear hatch is opened without using the keyless entry system or the F.A.S.T.-key operation. The engine hood is opened.
When the alarm is activated: 1. The headlights blink on and off for 3 min- utes.After 3 minutes the headlights automati- cally shut off. 2. The horn will sound intermittently for 3minutes.
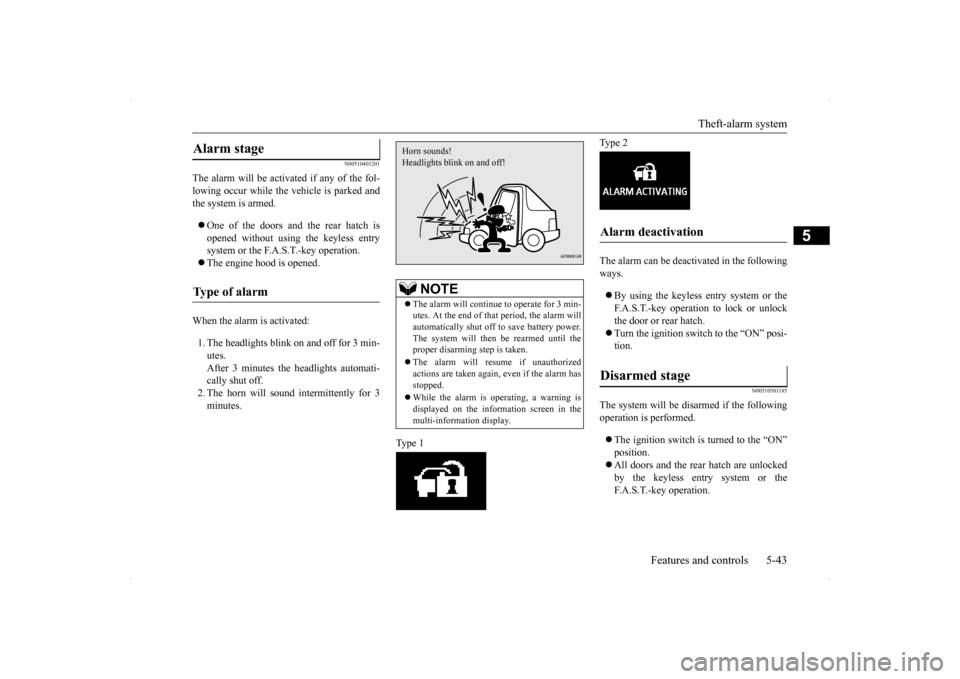
Type 1
Type 2 The alarm can be deactivated in the following ways. By using the keyless entry system or the F.A.S.T.-key operation to lock or unlock the door or rear hatch. Turn the ignition switch to the “ON” posi- tion.
N00510501185
The system will be disarmed if the followingoperation is performed. The ignition switch is turned to the “ON” position. All doors and the rear hatch are unlocked by the keyless entry system or the F.A.S.T.-key operation.
Alarm stage Type of alarm
NOTE
The alarm will continue to operate for 3 min- utes. At the end of that period, the alarm will automatically shut off to save battery power. The system will then
be rearmed until the
proper disarming step is taken. The alarm will resume if unauthorized actions are taken again, even if the alarm has stopped. While the alarm is operating, a warning is displayed on the information screen in the multi-information display.Horn sounds! Headlights blink on and off!
Alarm deactivation Disarmed stage
BK0200700US.bo
ok 43 ページ 2013年2月15日 金曜日 午後12時17分
Page 111 of 422
Power windows 5-44 Features and controls
5
N00510601131
Use the following procedure to test the sys- tem:
1. Lower the driver’s window. 2. Arm the system as explained in “Armed stage”. 3. Make sure that the theft-alarm indicatorcomes on and flashes for approximately 20 seconds. 4. Wait a few seconds and then unlock thedriver’s side door by using the inside door lock knob and open the door. 5. Check to be sure that the horn soundsintermittently and the headlights blink onand off when the door is opened. 6. Disarm the system by unlocking all doors and the rear hatch by using the keylessentry system or the F.A.S.T.-key opera- tion.
N00510800325
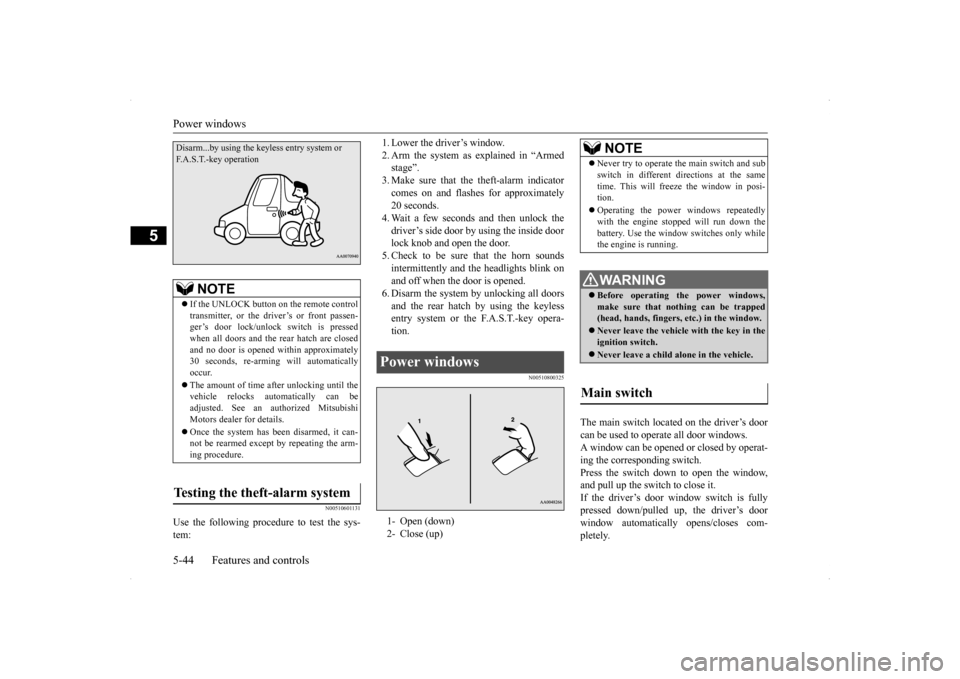
The main switch located on the driver’s door can be used to operate all door windows. A window can be opened or closed by operat- ing the corresponding switch.Press the switch down to open the window, and pull up the switch to close it. If the driver’s door window switch is fullypressed down/pulled up, the driver’s door window automatically opens/closes com- pletely.
NOTE
If the UNLOCK button on the remote control transmitter, or the driver’s or front passen- ger’s door lock/unlock switch is pressedwhen all doors and the rear hatch are closed and no door is opened
within approximately
30 seconds, re-arming will automaticallyoccur. The amount of time after unlocking until the vehicle relocks automatically can be adjusted. See an authorized Mitsubishi Motors dealer for details. Once the system has been disarmed, it can- not be rearmed except by repeating the arm-ing procedure.
Testing the theft-alarm system Disarm...by using the ke
yless entry system or
F.A.S.T.-key operation
Power windows 1- Open (down) 2- Close (up)
NOTE
Never try to operate the main switch and sub switch in different directions at the same time. This will freeze the window in posi- tion. Operating the power windows repeatedly with the engine stopped will run down the battery. Use the window switches only whilethe engine is running. WA R N I N G Before operating the power windows, make sure that nothing can be trapped(head, hands, fingers, etc.) in the window. Never leave the vehicle with the key in the ignition switch. Never leave a child alone in the vehicle.
Main switch
BK0200700US.bo
ok 44 ページ 2013年2月15日 金曜日 午後12時17分
Page 115 of 422

Sunroof (if so equipped) 5-48 Features and controls
5
The sunshade can be opened or closed manu- ally while the sunroof is closed.When the sunroof is opened, the sunshade will also open automatically. Do not deliberately trap your hands or head in order to activate the safety mecha- nism. Personal injury and malfunction of the sunroof could result.CAUTION The safety mechanism is deactivated just before the sunroof closes. This allows the sunroof to close completely. Therefore be especially careful that fingers are not trappedin the sunroof opening.
Sunshade
WA R N I N G
CAUTION Do not attempt to close the sunshade when the sunroof is opened. Be careful that hands are not trapped when closing the sunshade.NOTE
Be sure to tilt down the sunroof before clos- ing the sunshade. When leaving the vehicle unattended, be sure to close the sunroof and without theignition key. Do not try to operate the sunroof if it is fro- zen closed (after snowfall or during extreme cold). Do not sit on or place heavy luggage on the sunroof or roof opening edge. Do not apply any force that may cause dam- age to the sunroof.
Release the switch when the sunroof has reached a completely open or completely closed position. If the sunroof does not operate when the sun- roof switch is operated, release the switch and check whether some
thing is trapped by
the sunroof. If nothing
is trapped, have the
sunroof checked at an authorized Mitsubishi Motors dealer. Be careful when tilting up the sunroof if a ski carrier or a roof carrier is installed. Depend- ing on the model of ski car
rier or roof carrier,
the sunroof may contact the carrier when the sunroof is tilted up. Be sure to close the sunroof completely when washing the vehicle or when leaving the vehicle. Do not put any wax on the weatherstrip (black rubber) around the sunroof opening. Ifit is waxed, the weatherstrip cannot maintain a weatherproof seal with the sunroof. After washing the vehicle or after rain be sure to wipe off any water that is on the sun- roof before operating it. Operating the sunroof repeatedly with the engine turned off will run down the battery.Operate the sunroof only while the engine is running.NOTE
BK0200700US.bo
ok 48 ページ 2013年2月15日 金曜日 午後12時17分
Page 122 of 422
![MITSUBISHI LANCER SPORTBACK 2014 8.G Owners Manual Steering wheel lock
Features and controls 5-55
5
N00512500179
[For vehicles equipped with the F.A.S.T.- key]For information on operations for vehicles equipped with the F.A.S.T.-key, refer to “F.A. MITSUBISHI LANCER SPORTBACK 2014 8.G Owners Manual Steering wheel lock
Features and controls 5-55
5
N00512500179
[For vehicles equipped with the F.A.S.T.- key]For information on operations for vehicles equipped with the F.A.S.T.-key, refer to “F.A.](/manual-img/19/7508/w960_7508-121.png)
Steering wheel lock
Features and controls 5-55
5
N00512500179
[For vehicles equipped with the F.A.S.T.- key]For information on operations for vehicles equipped with the F.A.S.T.-key, refer to “F.A.S.T.-key: Steering wheel lock” on page5-20. [Except for vehicles equipped with the F. A . S . T. - k e y ]
Remove the key at the “LOCK” position. Turn the steering wheel until it is locked. Turn the key to the “ACC” position while moving the steering wheel slightly.
N00542100057
Do not operate the starter motor continu- ously for longer than 15 seconds as thiscould run the battery down or damage the starter motor. If the engine does not start, turn the ignition switch back to the“LOCK” position, wait a few seconds, and then try again. Trying repeatedly with the engine or starter motor still turningwill damage the starter mechanism. If the engine will not start because the bat- tery is weak or discharged, refer to“Jump-starting the engine” (on page 8-2) for instructions.
If the engine is turned off while driving, the power brake booster will stop functioning and braking efficiency will be reduced. Also, the power steering system will not function and it will require greater effort to manuallysteer the vehicle. Do not leave the key in the “ON” position for a long time when the engine is not running. This will cause the battery to run down. Do not turn the key to the “START” position when the engine is running. It will damage the starter motor.
Steering wheel lock
CAUTION
To l o c k To u n l o c k
CAUTION Remove the key when leaving the vehicle.
NOTE
If the front wheels are turned, the anti-theft lock may sometimes make it difficult to turn the key from “LOCK” position to “ACC” position. Firmly turn the steering wheel to the left or to the right as you turn the key.
Starting and stopping the engine Tips for starting
BK0200700US.bo
ok 55 ページ 2013年2月15日 金曜日 午後12時17分
Page 123 of 422
![MITSUBISHI LANCER SPORTBACK 2014 8.G Owners Manual Starting and stopping the engine 5-56 Features and controls
5
[Except for vehicles equipped with the turbocharger] The engine is warmed up enough for driv- ing when the bar graph of engine coolant MITSUBISHI LANCER SPORTBACK 2014 8.G Owners Manual Starting and stopping the engine 5-56 Features and controls
5
[Except for vehicles equipped with the turbocharger] The engine is warmed up enough for driv- ing when the bar graph of engine coolant](/manual-img/19/7508/w960_7508-122.png)
Starting and stopping the engine 5-56 Features and controls
5
[Except for vehicles equipped with the turbocharger] The engine is warmed up enough for driv- ing when the bar graph of engine coolanttemperature display starts to move. A lon- ger warm up period will only consume extra fuel. [For vehicles equipped with the turbo- charger] The engine is warmed up enough for driv-ing when the bar graph of engine coolanttemperature display starts to move. Driv- ing before the bar graph moves may cause deterioration of turbocharger performanceand driveability. A longer warm up period will only consume extra fuel. On vehicles equipped with the Twin Clutch SST, the following may occur after the engine is started, but they do not indi- cate an abnormality.• You may hear operational sounds of the Twin Clutch SST and you may feel vibration in the vehicle body.• If you shift the gearshift lever into the “N” (NEUTRAL) position and depress the accelerator pedal, increases in theengine speed will be limited.
N00542200159
[For vehicles equipped with the F.A.S.T.-key]For information on operation for vehicles equipped with the F.A.S.T.-key, refer to “F.A.S.T.-key: Starting the engine” on page5-20. [Except for vehicles equipped with the F. A . S . T. - k e y ] Your vehicle is equipped with an electroni-cally controlled fuel injection system, which
automatically controls the release of fuel. There is usually no need to depress the accel- erator pedal when starting the engine. The starter should not be run for more than 15seconds at a time. To prevent battery drain, wait a few seconds between attempts to restart the engine. 1. Make sure all occupants are properly seated with seat belts fastened. 2. Insert the ignition key. 3. Make sure the parking brake is applied.4. Press and hold the brake pedal down withyour right foot. 5. Press and hold the clutch pedal all the way down (manual transaxle).
WA R N I N G Never run the engine in a closed or poorly ventilated area any longer than is needed to move your vehicle out of the area. Car- bon monoxide gas, which is odorless and extremely poisonous, could build up andcause serious injury or death.CAUTION Do not push-start the vehicle.Do not run the engine
at high rpms or drive
at high speeds until the engine has had a chance to warm up. Release the ignition switch as soon as the engine starts. Otherwise, the starter motorwill be damaged.
Starting the engine
NOTE
For models equipped with a manual trans- axle, the starter will
not operate unless the
clutch pedal is fully depressed (Clutch inter-lock). This is a safety feature.
BK0200700US.bo
ok 56 ページ 2013年2月15日 金曜日 午後12時17分
Page 131 of 422
Continuously variable transm
ission (CVT) (if so equipped)
5-64 Features and controls
5
N00563100021
When the selector lever cannot be shifted from the “P” (PARK) position to anotherposition while the brake pedal is pressed andheld down with the ignition switch at the “ON” position, the battery may be flat or the shift-lock mechanism may be malfunction-ing. Immediately have your vehicle checked by an authorized Mitsubishi Motors dealer or arepair facility of your choice. If you need to move the vehicle, shift the selector lever as follows.
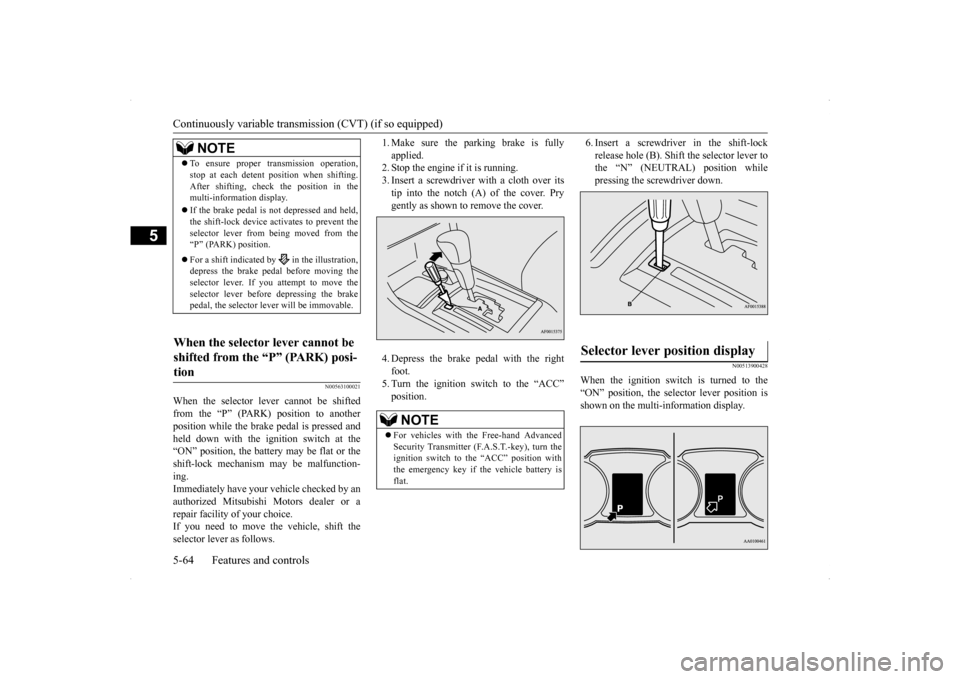
1. Make sure the parking brake is fully applied. 2. Stop the engine if it is running. 3. Insert a screwdriver with a cloth over itstip into the notch (A) of the cover. Pry gently as shown to remove the cover. 4. Depress the brake pedal with the right foot.5. Turn the ignition switch to the “ACC”position.
6. Insert a screwdriver in the shift-lock release hole (B). Shift the selector lever to the “N” (NEUTRAL) position while pressing the screwdriver down.
N00513900428
When the ignition switch is turned to the“ON” position, the selector lever position is shown on the multi-information display.
NOTE
To ensure proper transmission operation, stop at each detent position when shifting. After shifting, check the position in the multi-information display. If the brake pedal is not depressed and held, the shift-lock device activates to prevent the selector lever from being moved from the“P” (PARK) position. For a shift indicated by in the illustration, depress the brake pedal before moving the selector lever. If you attempt to move theselector lever before depressing the brake pedal, the selector lever will be immovable.
When the selector lever cannot be shifted from the “P” (PARK) posi-tion
NOTE
For vehicles with the Free-hand Advanced Security Transmitter (F.A.S.T.-key), turn the ignition switch to the “ACC” position withthe emergency key if the vehicle battery is flat.
Selector lever position display
BK0200700US.bo
ok 64 ページ 2013年2月15日 金曜日 午後12時17分
Page 151 of 422
ACD (Active center differential system) (if so equipped) 5-84 Features and controls
5
N00545500036
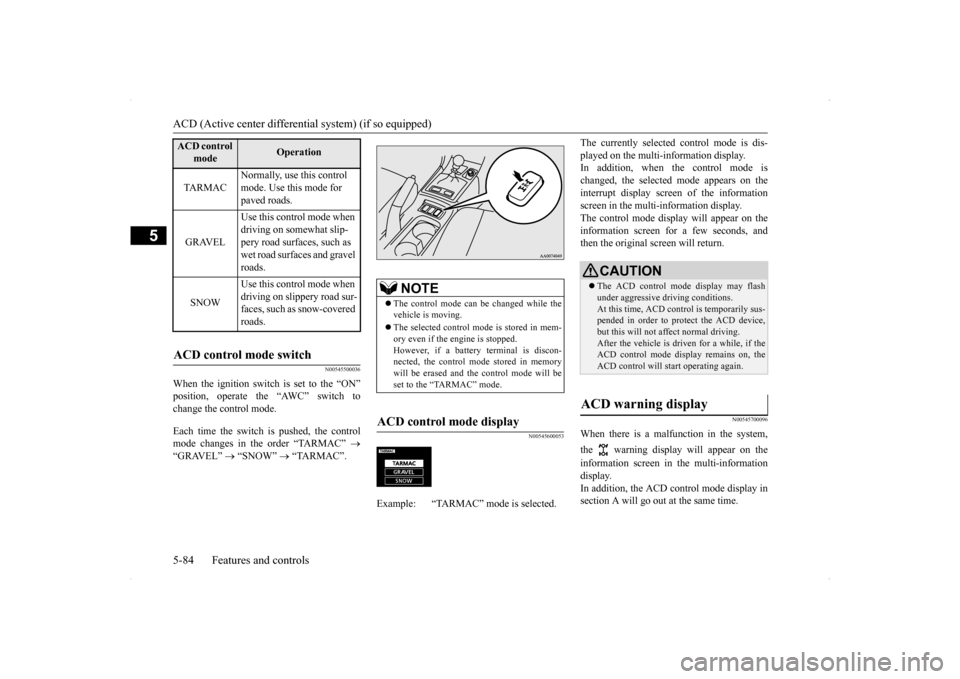
When the ignition switch is set to the “ON” position, operate the “AWC” switch to change the control mode. Each time the switch is pushed, the control mode changes in the order “TARMAC”
“GRAVEL”
“SNOW”
“TARMAC”.
N00545600053
The currently selected control mode is dis- played on the multi-information display. In addition, when the control mode is changed, the selected mode appears on theinterrupt display screen of the information screen in the multi-information display. The control mode display will appear on theinformation screen for a few seconds, and then the original screen will return.
N00545700096
When there is a malfunction in the system, the warning display will appear on the information screen in the multi-information display. In addition, the ACD control mode display in section A will go out at the same time.
ACD control
mode
Operation
TA R M A C
Normally, use this control mode. Use this mode for paved roads.
GRAVEL
Use this control mode when driving on somewhat slip- pery road surfaces, such as wet road surfaces and gravel roads.
SNOW
Use this control mode when driving on slippery road sur-faces, such as snow-covered roads.
ACD control mode switch
NOTE
The control mode can be changed while the vehicle is moving. The selected control mode is stored in mem- ory even if the engine is stopped. However, if a battery terminal is discon-nected, the control mode stored in memory will be erased and the control mode will be set to the “TARMAC” mode.
ACD control mode display
Example: “TARMAC” mode is selected.�ç
CAUTION The ACD control mode display may flash under aggressive driving conditions. At this time, ACD control is temporarily sus- pended in order to protect the ACD device,but this will not affect normal driving. After the vehicle is driven for a while, if the ACD control mode display remains on, theACD control will start operating again.
ACD warning display
BK0200700US.bo
ok 84 ページ 2013年2月15日 金曜日 午後12時17分