Page 105 of 362

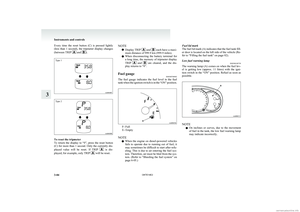
NOTEl As the display brightness can be adjusted in
the center information display only, the bright-
ness inside the meter cannot be changed.Correcting the compass E00519400178
This compass shows the direction of the vehicle by
the 8 azimuth system.
NOTE
l This system uses the earth’s magnetic field,
and so may not show the correct direction de-
pending on the traffic condition or in the fol-
lowing places where the earth’s magnetic
field is disrupted. •Car parks located in buildings and tunnels
• Expressways and underground cables
• Area over the subway
• Transforming station
• Areas along the railroad
In these cases, the correct direction will be
displayed once the vehicle returns to a place
where the earth’s magnetic field is stable.
l Do not install ski racks, antennas, etc. which
are attached to the vehicle by means of a mag-
net. They affect the operation of the compass.
Setting the declination
The declination is the difference between true
north (the direction of the geographic north pole)
and where a compass needle points to. Since the dec-
lination varies from place to place, it needs to be
set for each region. Otherwise the compass will not
show the correct direction.
Set the declination by the following steps:
NOTE
l The default declination setting is 0 degrees
.
In accordance with the illustration, set the dec-
lination setting to the declination contour near-
est to a region where you drive the vehicle.
l The declination can be set at intervals of
1 degrees, from 28 degrees west (W28) to
28 degrees east (E28).
With a settings display showing, press the “ADJ”
button and select “COMPASS VARIANCE”.
1. Press the function button for “SELECT”.
2. Press the function button for “←” or “→” to
set the desired declination.
Pressing “←” or “→” for more than 1 sec-
ond makes the value change rapidly.
Instruments and controls
3-21
OKTE14E2
3
Page 106 of 362

3.When the declination adjustment has been
completed, press the “SET” function button.
Setting the compass
The compass is usually calibrated automatically
when the vehicle is moving. At times when com-
plete calibration is not possible, no compass indica-
tions are given. Manually set the compass using the
following procedure.
NOTE
l If your vehicle has a sunroof, keep the sun-
roof closed when calibrating the compass.
Having the sunroof open when calibrating
the compass could render the compass un-
able to correctly show directions.
With a settings display showing, press the “ADJ”
button and select “COMPASS CALIBRATION”. 1. Press the function button for “SELECT”.
2. Press the function button for “SELECT”.
3.Turn the vehicle slowly through 360 degrees
in a safe, open area with no buildings and oth-
er vehicles.
NOTE
l If you wish to stop calibrating the compass
part-way through the procedure, press the “IN-
FO” button or “ADJ” button.
Instruments and controls
3-22 OKTE14E2
3
Page 107 of 362

NOTEl The “Completed the calibration”. message
may be displayed even if you terminate the
turn before it is complete and return to the ve-
hicle’s original direction. The compass may
not be properly calibrated in this case, so you
must turn the vehicle through at least
360 degrees.
4. The compass setting will finish automatical-
ly and the words “COMPASS CALIBRA-
TION COMPLETE” will appear on the
screen.Changing the calendar setting E00519500065
The date and the calendar indication patterns can
be changed.
Date setting
1.Press the “ADJ” button to select the calendar
setting display.
2. Press the “←” or “→” function button to se-
lect “CALENDAR ADJUST”. Then press
the “SELECT” function button.
3. Use the function buttons to set the calendar.
“→”-Select “YEAR”, “MONTH”, “DAY”
you wish to change.
“ YEAR”, “MONTH”, and “DAY” are
changed over by turns every time you
lightly press the “→” function button.“+”-Change “YEAR”, “MONTH”, “DAY”
you have selected.
The indication is changed to your de-
sired date every time you lightly press
the “+” function button.
If you continue pressing the button for
about 2 seconds or more, the indication
is forwarded.“SET”-Determine the date.
Press the “SET” function button. Then
the display flashes twice and the setting
is changed.
NOTE
l The year changes in the following sequence:
2012 → 2013 → … 2099 → 2012.
l You can return to the previous display by
pressing the “BACK” function button.
Instruments and controls
3-23
OKTE14E2
3
Page 108 of 362
4.After setting the date, press the “INFO” but-
ton to return to the information display.
Changing the calendar pattern
1.Press the “ADJ” button to select the calendar
setting display. Press the “←” or “→” func-
tion button to select “CALENDAR PAT-
TERN SELECT”. Then press the “SELECT”
function button.
2. Press function button “←” or “→” to select
your desired indication pattern.Type 1Type 2Type 3
3. Press the function button “SET”. The display
will flash twice, and the indication pattern
will be updated.
NOTE
l You can return to the previous display by
pressing the “BACK” function button.
4. After setting the calendar pattern, press the
“INFO” button to return to the information
display.
User customization E00519600183
You can set the indication of unit, language, and
the time notation.
In addition, you can return these settings to the fac-
tory default settings.
Instruments and controls
3-24 OKTE14E2
3
Page 109 of 362

Selecting the item to set1. Press the “ADJ” button to select the user cus-tomization display.
2.Press the function button “←” or “→” to se-
lect the item you wish to set.
l “UNIT”: Changing the unit
l “LANGUAGE”: Changing the language
l “12h ↔ 24h”: Changing the time format
l “
DEFAULT”: Resetting to factory settings
Push the function button “SELECT”. The set-
ting display for your selected item will appear.
Changing display units
It is possible to change the display units for the fuel
consumption, driving range, average speed, outside
temperature, elevation, and atmospheric pressure
as shown below.FUEL ECONOMYkm/L → L/100 km → mpg
(UK GALLON) → mpg
(US GALLON)RANGEkm → milesSPEEDkm/h → mphOUTSIDE TEM-
PERATURE°C → °FELEVATIONm → ftBAROMETERhPa → mb → kPa → inHg
l Changing the display unit for fuel consump-
tion
1. Press the “←” or “→” function button to se-
lect “FUEL ECONOMY”. Then press the
“SELECT” function button.
2. Press the “←” or “→” function button to se-
lect “km/L”. Then press the “SET” function
button. The display will flash twice, and the
display unit will be updated to the selected
one.
NOTE
l You can return to the previous display by
pressing the “BACK” function button.
3. After setting, press the “INFO” button to re-
turn to the information display.
Instruments and controls
3-25
OKTE14E2
3
Page 110 of 362

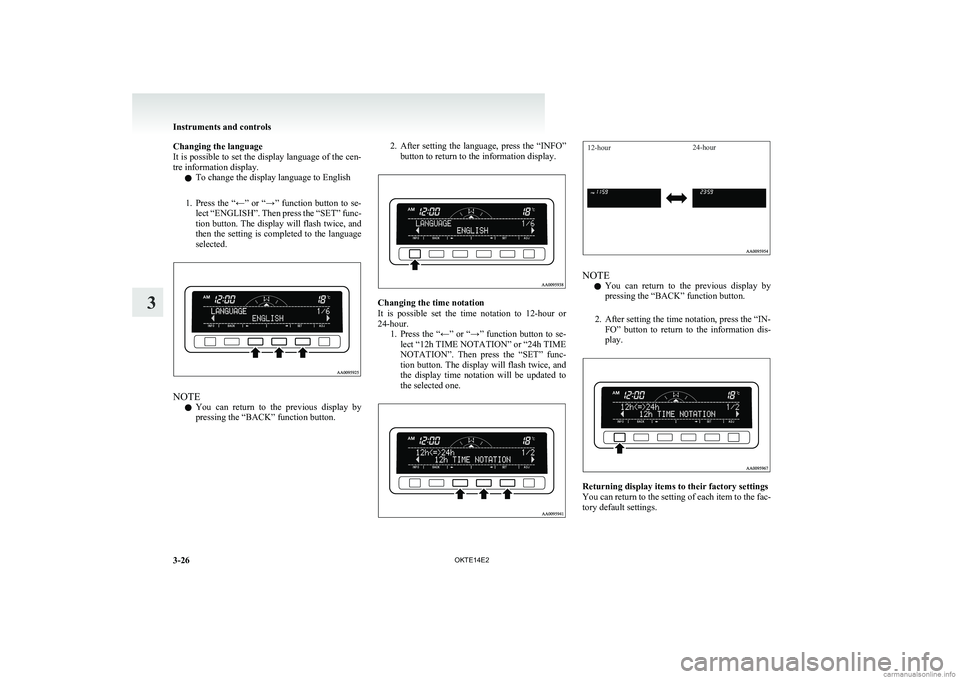
Changing the language
It is possible to set the display language of the cen-
tre information display.
l To change the display language to English
1. Press the “←” or “→” function button to se-
lect “ENGLISH”. Then press the “SET” func-
tion button. The display will flash twice, and
then the setting is completed to the language
selected.
NOTE
l You can return to the previous display by
pressing the “BACK” function button.
2. After setting the language, press the “INFO”
button to return to the information display.
Changing the time notation
It is possible set the time notation to 12-hour or
24-hour. 1.Press the “←” or “→” function button to se-
lect “12h TIME NOTATION” or “24h TIME
NOTATION”. Then press the “SET” func-
tion button. The display will flash twice, and
the display time notation will be updated to
the selected one.
12-hour24-hour
NOTE
l You can return to the previous display by
pressing the “BACK” function button.
2. After setting the time notation, press the “IN- FO” button to return to the information dis-
play.
Returning display items to their factory settings
You can return to the setting of each item to the fac-
tory default settings.
Instruments and controls
3-26 OKTE14E2
3
Page 111 of 362
NOTEl The factory settings are as follows:
• Fuel consumption: L/100 km (62 mph)
• Driving range: km
• Average speed: km/h
• Outside temperature: °C
• Elevation: m
• Atmospheric pressure: hPa
• Display language: English
• Time notation: 12-hour
1. Push the “SELECT” function button.2. Press the “←” function button to select
“YES”.
3. Press the “SELECT” function button.
4. Once more press the “←” function button to
select “YES”.
5. Press the “SET” function button.
6. The display shown below will appear, and
the display items will return to their factory
settings.
Instruments and controls
3-27
OKTE14E2
3
Page 112 of 362

NOTEl If the battery terminals are disconnected, the
settings for the date and time may be erased.
If this happens, please set the date and time
again.
Adjusting the barometer E00524400033
It is possible to adjust the barometer indication and
return it to the factory setting.
NOTE l It is not necessary to adjust the barometer be-
cause it has been adjusted at the factory.
However, if you wish, adjust it using an accu-
rate barometer.
To adjust the barometer
1.Press the “ADJ” button to select the barome-
ter adjustment display.
2. Press the “←” or “→” function button to se-
lect the “BAROMETER ADJUST” display.
Then press the “SELECT” function button.
3. Adjust the barometer by pressing the func-
tion buttons.
“+”-To adjust the barometer
Each gentle press of the “+” function but-
ton will increase the indicated barometer
by 2 hPa. If you continue pressing the but-
ton for about 2 seconds or longer, the in-
dication is fast-forwarded.“-”-To adjust the barometer
Each gentle press of the “-” function but-
ton will decrease the indicated barometer
by 2 hPa. If you continue pressing the but-
ton for about 2 seconds or longer, the in-
dication is fast-forwarded.“SET”-To set the barometer
Press the “SET” function button. The dis-
play will flash twice, and the new setting
will be established.
NOTE
l You can return to the previous display by
pressing the “BACK” function button.
Instruments and controls
3-28 OKTE14E2
3