2014 MERCEDES-BENZ S-CLASS COUPE ignition
[x] Cancel search: ignitionPage 211 of 413
Suspension setting
General notes
The Adaptive Damping System ADS PLUS
automatically controls the calibration of the
dampers.
The damping is tuned individually to each
wheel and depends on:
R your driving style, e.g. sporty
R the road surface condition, e.g. bumps
R your individual selection, i.e. sport or com-
fort
Your selection remains stored even if you
remove the key from the ignition lock.
i You can choose between the sporty and
comfortable mode. One of the two modes is
always active.
Sport mode The firmer suspension tuning in sport mode
ensures the best possible contact with the
road. Select this mode when employing a
sporty driving style, e.g. on winding country
roads.
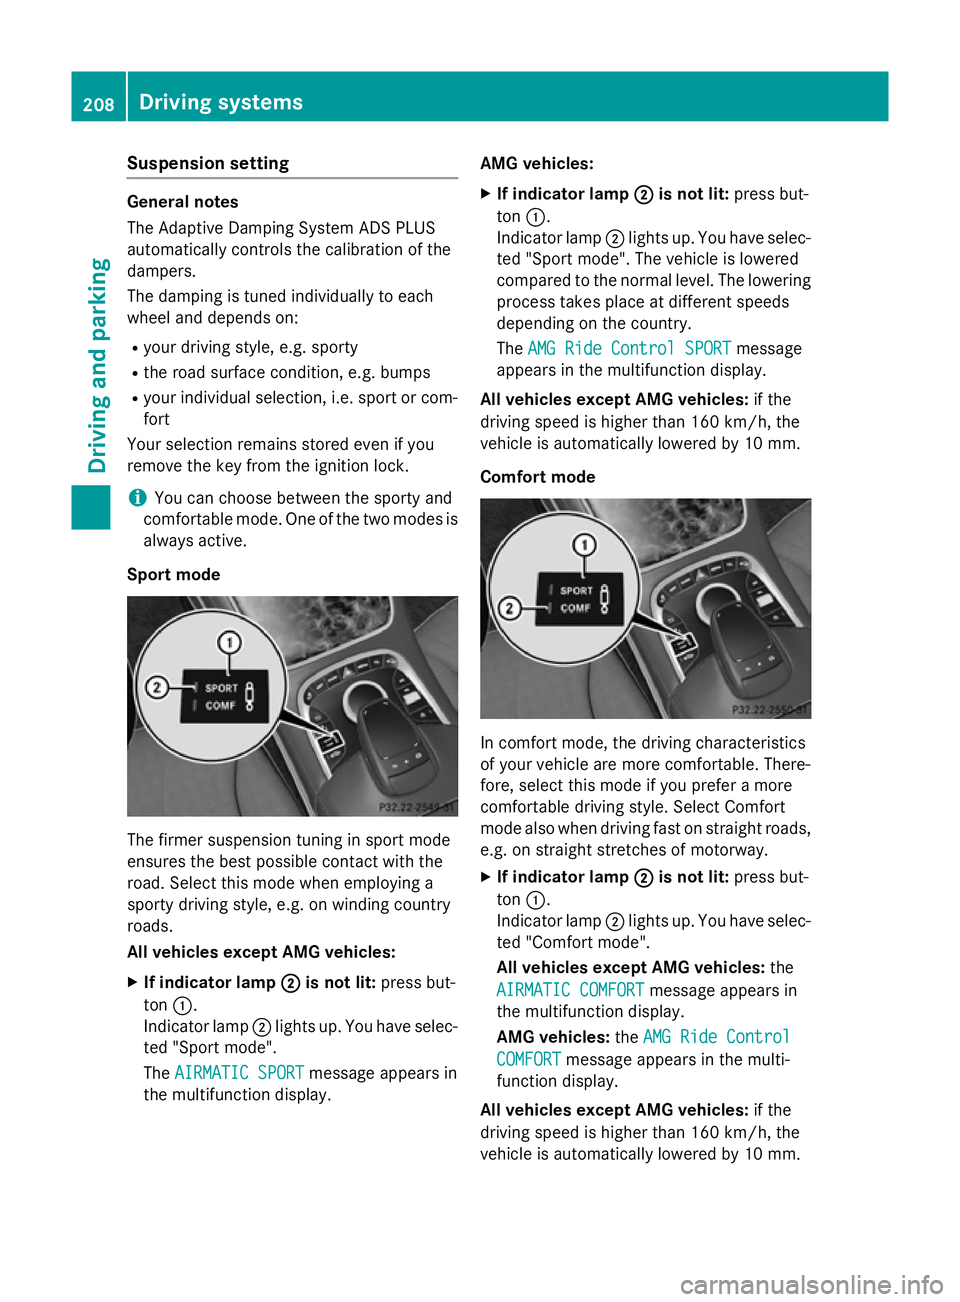
All vehicles except AMG vehicles:
X If indicator lamp ;
; is not lit: press but-
ton :.
Indicator lamp ;lights up. You have selec-
ted "Sport mode".
The AIRMATIC SPORT
AIRMATIC SPORT message appears in
the multifunction display. AMG vehicles:
X If indicator lamp ; ;is not lit: press but-
ton :.
Indicator lamp ;lights up. You have selec-
ted "Sport mode". The vehicle is lowered
compared to the normal level. The lowering
process takes place at different speeds
depending on the country.
The AMG Ride Control SPORT AMG Ride Control SPORT message
appears in the multifunction display.
All vehicles except AMG vehicles: if the
driving speed is higher than 160 km/h, the
vehicle is automatically lowered by 10 mm.
Comfort mode In comfort mode, the driving characteristics
of your vehicle are more comfortable. There-
fore, select this mode if you prefer a more
comfortable driving style. Select Comfort
mode also when driving fast on straight roads,
e.g. on straight stretches of motorway.
X If indicator lamp ; ;is not lit: press but-
ton :.
Indicator lamp ;lights up. You have selec-
ted "Comfort mode".
All vehicles except AMG vehicles: the
AIRMATIC COMFORT AIRMATIC COMFORT message appears in
the multifunction display.
AMG vehicles: theAMG Ride Control AMG Ride Control
COMFORT
COMFORT message appears in the multi-
function display.
All vehicles except AMG vehicles: if the
driving speed is higher than 160 km/h, the
vehicle is automatically lowered by 10 mm. 208
Driving systemsDriving an
d parking
Page 212 of 413

Load compensation
The vehicle can compensate differences in
the vehicle level by raising or lowering the
axles. 4MATIC (permanent all-wheel drive)
4MATIC ensures that all four wheels are per-
manently driven. Together with ESP ®
, it
improves the traction of your vehicle when-
ever a drive wheel spins due to insufficient
grip.
If you fail to adapt your driving style, 4MATIC
can neither reduce the risk of accident nor
override the laws of physics. 4MATIC cannot
take account of road, weather and traffic con- ditions. 4MATIC is only an aid. You are
responsible for the distance to the vehicle in
front, for vehicle speed, for braking in good
time, and for staying in the lane.
If a drive wheel spins due to insufficient grip:
R when pulling away, only depress the accel-
erator pedal as far as is necessary.
R accelerate less when driving
! Never tow the vehicle with one axle
raised. This may damage the transfer case.
Damage of this sort is not covered by the
Mercedes-Benz implied warranty. All
wheels must remain either on the ground or
be fully raised. Observe the instructions for towing the vehicle with all wheels in full
contact with the ground.
i In wintry driving conditions, the maximum
effect of 4MATIC can only be achieved if
you use winter tyres (M+S tyres),with snow
chains if necessary. PARKTRONIC
Important safety notes PARKTRONIC is an electronic parking aid with
ultrasonic sensors. It monitors the area
around your vehicle using six sensors in the
front bumper and six sensors in the rear bumper. PARKTRONIC indicates visually and
audibly the distance between your vehicle
and an object.
PARKTRONIC is only an aid. It is not a substi-
tute for your attention to the immediate sur-
roundings. The responsibility for safe
manoeuvring and parking remains with you.
Make sure that there are no persons, animals
or objects in range while manoeuvring and
parking.
! When parking, pay particular attention to
objects above or below the sensors, such
as flower pots or trailer drawbars.
PARKTRONIC does not detect such objects
when they are in the immediate vicinity of
the vehicle. You could damage the vehicle
or the objects.
The sensors may not detect snow and
objects which absorb ultrasonic sources.
Ultrasonic sources, such as an automatic
car wash, a lorry's compressed-air brakes
or a pneumatic drill, could cause
PARKTRONIC to malfunction.
PARKTRONIC may not function correctly on uneven terrain.
PARKTRONIC is activated automatically if
you:
R switch on the ignition
R shift the transmission to position D,Ror N
PARKTRONIC is deactivated at speeds above
18 km/h. It is reactivated at lower speeds.
Range of the sensors General notes
PARKTRONIC does not take into account
obstacles located:
R below the detection range, e.g. persons,
animals or objects
R above the detection range, e.g. overhang-
ing loads, tail sections or loading ramps of
goods vehicles Driving systems
209Driving and parking Z
Page 214 of 413
Transmission
position Warning display
D
Front area activated
R,
Nor the vehicle
is rolling back-
wards Rear and front areas
activated
P
No areas activated
One or more segments light up as the vehicle
approaches an obstacle, depending on the
vehicle's distance from the obstacle.
From the:
R sixth segment onwards, you will hear an
intermittent warning tone for approx-
imately two seconds.
R seventh segment onwards, you will hear a
warning tone for approximately two sec-
onds. This indicates that you have now
reached the minimum distance.
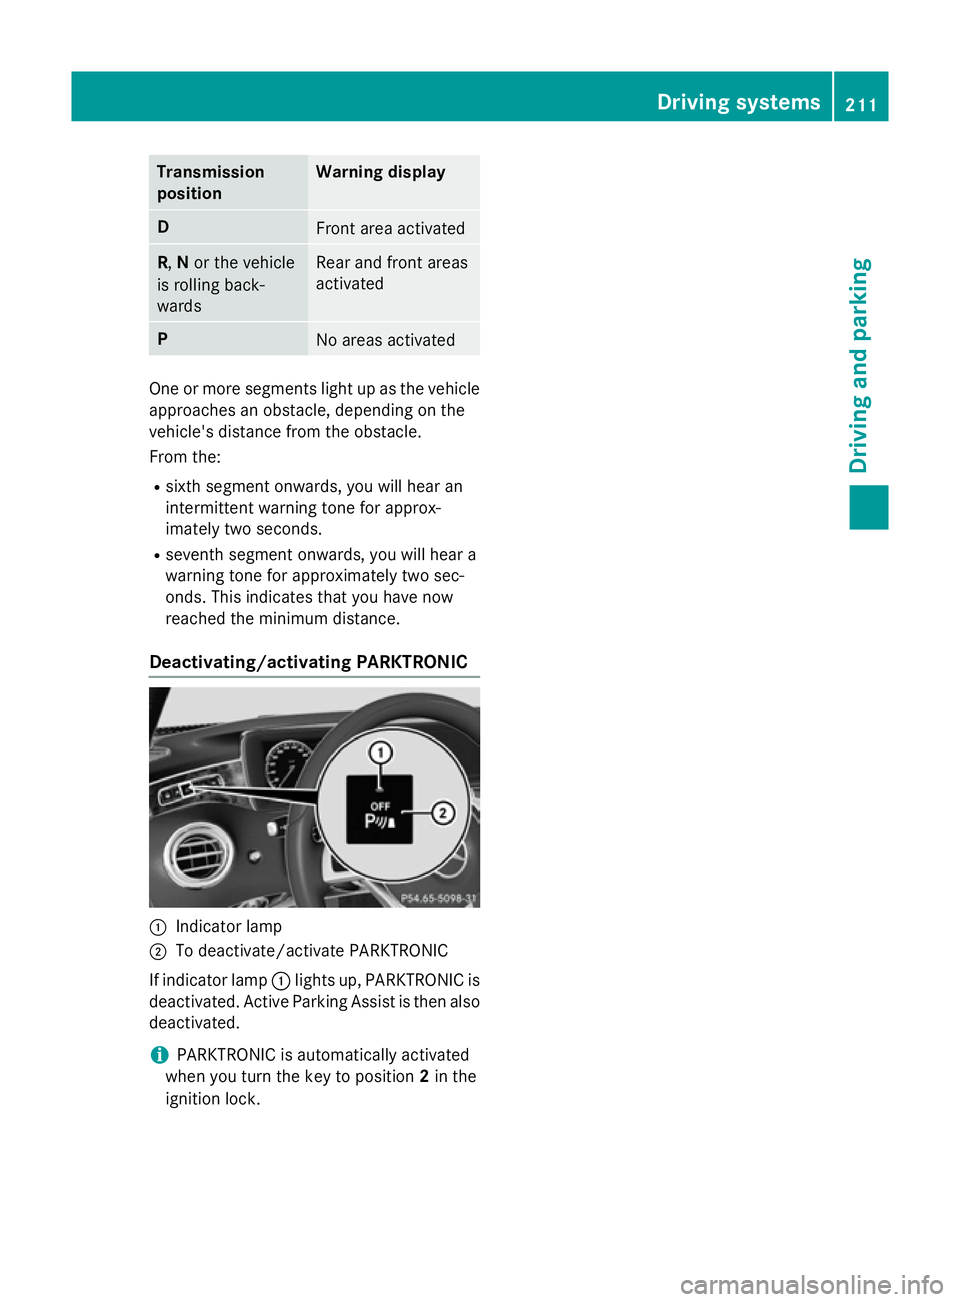
Deactivating/activating PARKTRONIC :
Indicator lamp
; To deactivate/activate PARKTRONIC
If indicator lamp :lights up, PARKTRONIC is
deactivated. Active Parking Assist is then also
deactivated.
i PARKTRONIC is automatically activated
when you turn the key to position 2in the
ignition lock. Driving systems
211Driving and parking Z
Page 215 of 413
Problems with PARKTRONIC
Problem
Possible causes/consequences and
M
MSolutions Only the red segments
in the PARKTRONIC
warning displays are lit.
You also hear a warning
tone for approximately
two seconds.
PARKTRONIC is then
deactivated and the
indicator lamp on the
PARKTRONIC button
lights up. PARKTRONIC has malfunctioned and has switched off.
X If problems persist, have PARKTRONIC checked at a qualified
specialist workshop. Only the red segments
in the PARKTRONIC
warning displays are lit.
PARKTRONIC is then
deactivated. The PARKTRONIC sensors are dirty or there is interference.
X Clean the PARKTRONIC sensors (Y page 347).
X Switch the ignition back on. The problem may be caused by an external source of radio or
ultrasound waves.
X See if PARKTRONIC functions in a different location. Active Parking Assist
General notes Active Parking Assist is an electronic parking
aid with ultrasound. It measures the road on
both sides of the vehicle. A parking symbol
indicates a suitable parking space. Active
steering intervention and brake application
can assist you during parking and when exit-
ing a parking space. You may also use
PARKTRONIC (Y page 209).
Important safety notes Active Parking Assist is only an aid. It is not a
substitute for your attention to the immediate
surroundings. The responsibility for safe
manoeuvring and parking remains with you.
Make sure that no persons, animals or
objects are in the manoeuvring range.
When PARKTRONIC is switched off, Active
Parking Assist is also unavailable. G
WARNING
While parking or pulling out of a parking
space, the vehicle swings out and can drive
onto areas of the oncoming lane. This could
cause you to collide with other road users.
There is a risk of an accident.
Pay attention to other road users. Stop the
vehicle if necessary or cancel the Active Park- ing Assist parking procedure.
! If unavoidable, you should drive over
obstacles such as kerbs slowly and not at a
sharp angle. Otherwise, you may damage
the wheels or tyres.
Active Parking Assist may also display spaces not suitable for parking, e.g.:
R parking or stopping prohibitions
R in front of driveways or entrances and exits
R unsuitable surfaces 212
Driving systemsDriving and parking
Page 221 of 413

Activating/deactivating the reversing
camera X
To activate: make sure that the key is in
position 2in the ignition lock.
X Make sure that the Activation by R
Activation by R
gear
gear function is selected in COMAND
Online (see separate operating instruc-
tions).
X Engage reverse gear.
The reversing camera flap opens. The area
behind the vehicle is shown with guide lines in the COMAND display.
The image from the reversing camera is
available throughout the manoeuvring
process.
To deactivate: the reversing camera deacti-
vates if you shift the transmission to Por after
driving forwards a short distance.
Displays in the COMAND display The reversing camera may show a distorted
view of obstacles or show them incorrectly or not at all. Obstacles are not shown by the
reversing camera in the following locations:
R very close to the rear bumper
R under the rear bumper
R in the area immediately above the tailgate
handle
! Objects not at ground level may appear to
be further away than they actually are, e.g.:
R the bumper of a parked vehicle
R the drawbar of a trailer R
the ball coupling of a trailer tow hitch
R the rear section of an HGV
R a slanted post
Use the guidelines only for orientation.
Approach objects no further than the bot-
tom-most guideline. :
Yellow guide line at a distance of approx-
imately 4.0 mfrom the rear of the vehicle
; White guide line without turning the steer-
ing wheel, vehicle width including the
exterior mirrors (static)
= Yellow guide line for the vehicle width
including the exterior mirrors, for current
steering wheel angle (dynamic)
? Yellow lane marking the course the tyres
will take at the current steering wheel
angle (dynamic) A
Yellow guide line at a distance of approx-
imately 1.0 mfrom the rear of the vehicle
B Vehicle centre axis (locating aid)
C Bumper
D Red guide line at a distance of approx-
imately 0.30 mfrom the rear of the vehicle 218
Driving systemsDriving and parking
Page 226 of 413

Activating the 360° camera using
COMAND Online X
Press the Øbutton in the centre con-
sole.
The vehicle menu appears.
X To select the 360° camera: turn and press
the controller.
The following appears depending on
whether transmission position Dor Ris
selected:
R a split-screen with top view and the
image from the front camera or
R a split-screen with top view and the
image from the reversing camera
Further information on the COMAND control-
ler can be found in the separate operating
instructions.
Activating the 360° camera using
reverse gear You can show images from the 360° camera
automatically by engaging reverse gear.
X Make sure that the key is in position 2in the
ignition lock.
X Make sure that the Activation by R
Activation by R
gear
gear function is selected in COMAND
Online (see separate operating instruc-
tions).
X To show the 360° camera image: engage
reverse gear.
The area behind the vehicle is shown in the
COMAND display in split-screen mode. You see the top view of the vehicle and the
image from the reversing camera.
Selecting the split-screen and full
screen displays Switching between split screen views:
X To switch to the line with the vehicle icons:
slide ZVthe controller.
X To select a vehicle icon: turn the controller.
Switching to full screen mode:
X 180° view
180° view : turn and press the controller. i
The 180° option is only available in the
following views:
R top view with image from the reversing
camera
R top view with image from the front cam-
era
Displays in the COMAND display Important safety notes
The camera system may show a distorted
view of obstacles or show them incorrectly or
not at all. Obstacles are not shown by the
system in the following locations:
R under the front and rear bumpers
R very close to the front and rear bumpers
R in close range above the handle on the boot
lid
R very close to the exterior mirrors
R in the transitional areas between the vari-
ous cameras in the virtual top view
! Objects not at ground level may appear to
be further away than they actually are, e.g.:
R the bumper of a parked vehicle
R the drawbar of a trailer
R the ball coupling of a trailer tow hitch
R the rear section of an HGV
R a slanted post
Use the guidelines only for orientation.
Approach objects no further than the bot-
tom-most guideline. Driving systems
223Driving and parking Z
Page 234 of 413
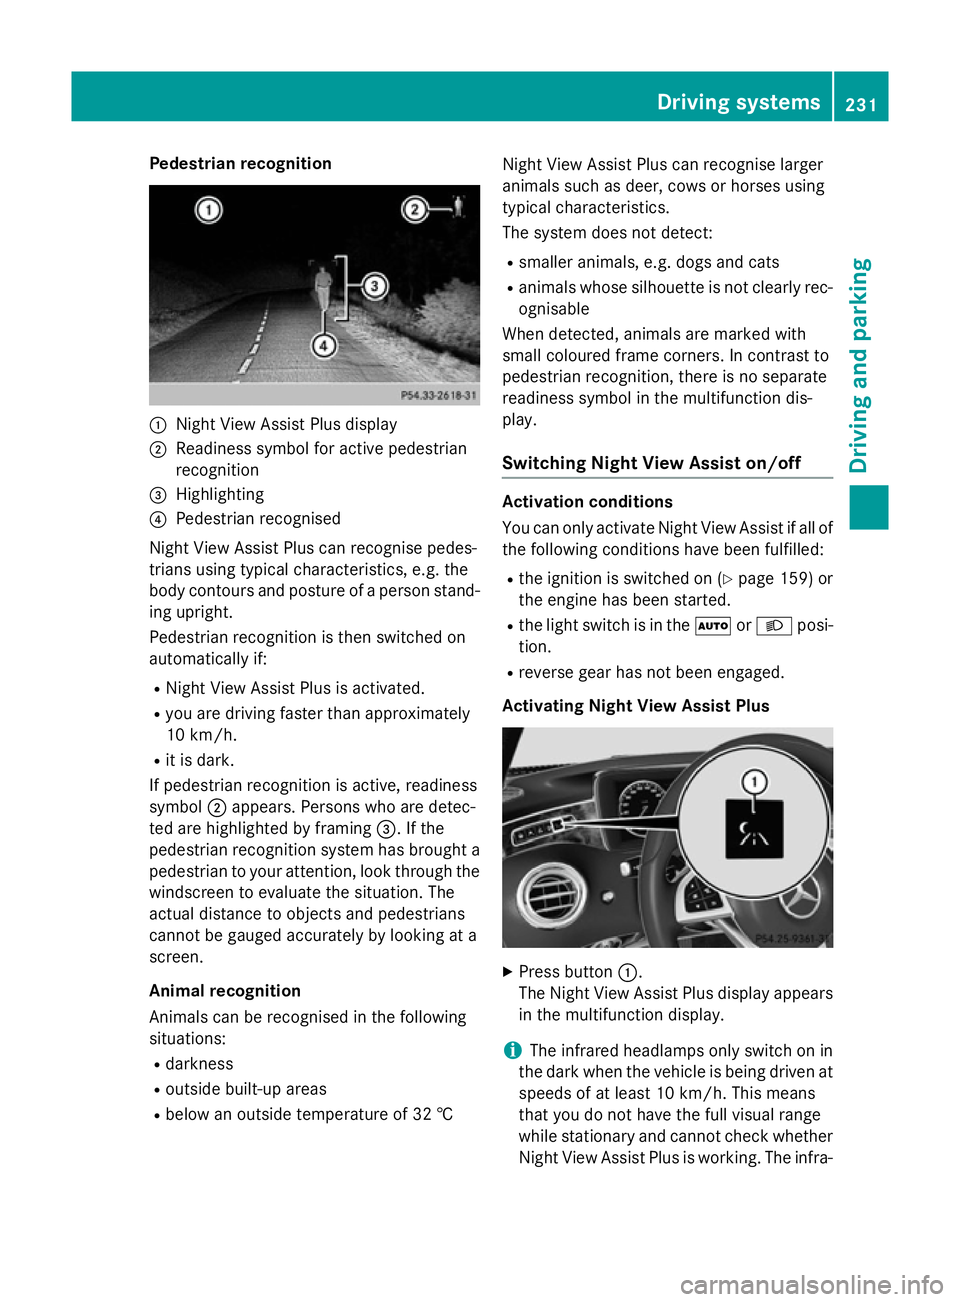
Pedestrian recognition
:
Night View Assist Plus display
; Readiness symbol for active pedestrian
recognition
= Highlighting
? Pedestrian recognised
Night View Assist Plus can recognise pedes-
trians using typical characteristics, e.g. the
body contours and posture of a person stand-
ing upright.
Pedestrian recognition is then switched on
automatically if:
R Night View Assist Plus is activated.
R you are driving faster than approximately
10 km/h.
R it is dark.
If pedestrian recognition is active, readiness
symbol ;appears. Persons who are detec-
ted are highlighted by framing =. If the
pedestrian recognition system has brought a
pedestrian to your attention, look through the windscreen to evaluate the situation. The
actual distance to objects and pedestrians
cannot be gauged accurately by looking at a
screen.
Animal recognition
Animals can be recognised in the following
situations:
R darkness
R outside built-up areas
R below an outside temperature of 32 † Night View Assist Plus can recognise larger
animals such as deer, cows or horses using
typical characteristics.
The system does not detect:
R smaller animals, e.g. dogs and cats
R animals whose silhouette is not clearly rec-
ognisable
When detected, animals are marked with
small coloured frame corners. In contrast to
pedestrian recognition, there is no separate
readiness symbol in the multifunction dis-
play.
Switching Night View Assist on/off Activation conditions
You can only activate Night View Assist if all of
the following conditions have been fulfilled:
R the ignition is switched on (Y page 159) or
the engine has been started.
R the light switch is in the ÃorL posi-
tion.
R reverse gear has not been engaged.
Activating Night View Assist Plus X
Press button :.
The Night View Assist Plus display appears in the multifunction display.
i The infrared headlamps only switch on in
the dark when the vehicle is being driven at speeds of at least 10 km/h. This means
that you do not have the full visual range
while stationary and cannot check whether
Night View Assist Plus is working. The infra- Driving systems
231Driving and parking Z
Page 239 of 413
ted at any time if you steer slightly in the
opposite direction or accelerate.
The course-correcting brake application is
available in the speed range between
30 km/h and 200 km/h.
Either a course-correcting brake application
appropriate to the driving situation, or none at all, may occur if:
R there are vehicles or obstacles, e.g. crash
barriers, on both sides of your vehicle
R a vehicle approaches too closely on the
side
R you have adopted a sporty driving style with
high cornering speeds
R you clearly brake or accelerate
R a driving safety system intervenes, such as
ESP ®
or PRE-SAFE ®
Brake
R ESP ®
is deactivated
R a loss of tyre pressure or a defective tyre is
detected
Activating Active Blind Spot Assist
X Make sure that Active Blind Spot Assist is
activated in the on-board computer
(Y page 259).
X Turn the key to position 2in the ignition
lock.
Warning lamps :in the exterior mirrors
light up red for approximately 1.5 second s.
Grey radar waves propagating backwards
appear next to the vehicle in the assistance
display in the multifunction display. Active Lane Keeping Assist General notes
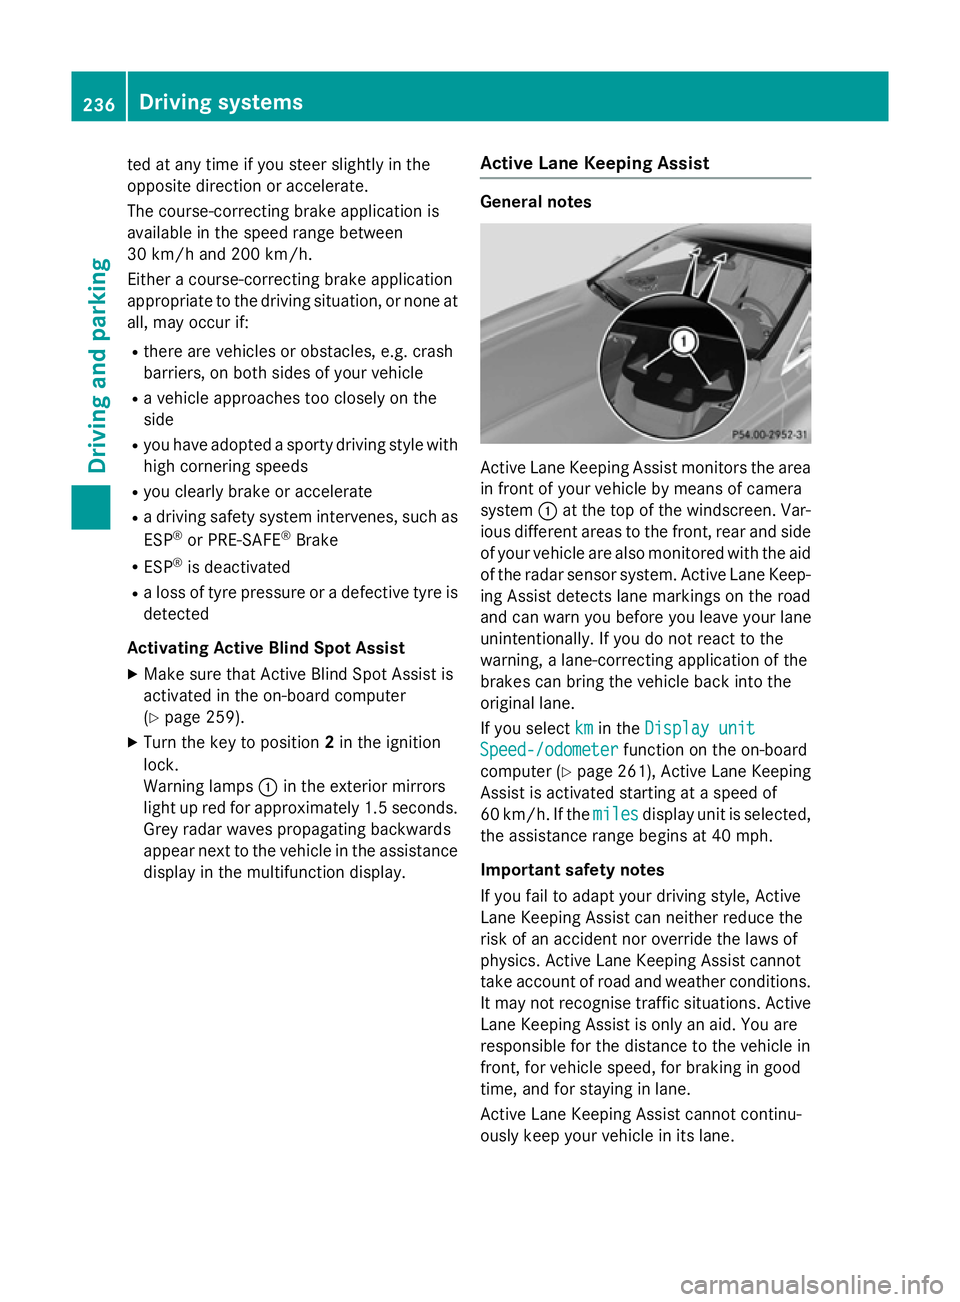
Active Lane Keeping Assist monitors the area
in front of your vehicle by means of camera
system :at the top of the windscreen. Var-
ious different areas to the front, rear and side
of your vehicle are also monitored with the aid
of the radar sensor system. Active Lane Keep-
ing Assist detects lane markings on the road
and can warn you before you leave your lane
unintentionally. If you do not react to the
warning, a lane-correcting application of the
brakes can bring the vehicle back into the
original lane.
If you select km kmin the Display unit
Display unit
Speed-/odometer
Speed-/odometer function on the on-board
computer (Y page 261), Active Lane Keeping
Assist is activated starting at a speed of
60 km/h. If the miles milesdisplay unit is selected,
the assistance range begins at 40 mph.
Important safety notes
If you fail to adapt your driving style, Active
Lane Keeping Assist can neither reduce the
risk of an accident nor override the laws of
physics. Active Lane Keeping Assist cannot
take account of road and weather conditions. It may not recognise traffic situations. Active Lane Keeping Assist is only an aid. You are
responsible for the distance to the vehicle in
front, for vehicle speed, for braking in good
time, and for staying in lane.
Active Lane Keeping Assist cannot continu-
ously keep your vehicle in its lane. 236
Driving systemsDriving and pa
rking