Page 105 of 270

X
To show the menu: press0098the COMAND
controller.
X Select Traffic
Traffic by sliding 00970052and turning
00790052007A the COMAND controller and press
0098 to confirm.
X Select Read Traffic Messages Auto‐
Read Traffic Messages Auto‐
matically
matically and press0098to confirm.
Depending on the previous state, switch
the option on 0073or off 0053. Recalculating the route dynamically
The route types
Dynamic Traffic Route Dynamic Traffic Route
and Dynamic TRF. Route Only After
Dynamic TRF. Route Only After
Request
Request take all relevant traffic messages
into account when calculating a route
(Y page 62).
If you have set the route type Dynamic
DynamicTraf‐
Traf‐
fic Route
fic Route, COMAND guides you on the
updated route to your destination.
If you have set the route type Dynamic DynamicTRF.
TRF.
Route Only After Request
Route Only After Request, a prompt
appears.
You can now decide whether to:
R accept the route suggested by COMAND
R continue your original route
X To accept the suggested route: press
0098 the COMAND controller.
X To continue along the original route:
select Reject
Reject by turning 00790052007Athe
COMAND controller and press 0098to con-
firm. Destination memory
Home address (My Address)
Entering the home address via address
entry X
Proceed as described under “Adopting an
address book entry as a home address”
(Y page 103). Confirm My Address My Addressby
pressing 0098.
X To enter the home address for the first
time: confirm New Entry New Entry by pressing 0098.
X To change the home address: select
Change
Change in the menu showing the home
address by turning 00790052007Athe COMAND con-
troller and press 0098to confirm.
X Confirm New Entry
New Entry by pressing 0098.
X In both cases, enter the home address as a
destination, e.g. as a city, street and house
number (Y page 64). Then, save the home
address (Y page 69).
Adopting an address book entry as a
home address X
To switch to navigation mode: press the
00BE button.
X To show the menu: press0098the COMAND
controller.
X Select Destination Destination in the navigation sys-
tem menu bar by turning 00790052007Athe
COMAND controller and press 0098to con-
firm.
X Select From Memory
From Memory and press0098to con-
firm.
You will see the destination memory list
either with the character bar (option 1) or
as a selection list (option 2).
Option 1: destination memory list with
character bar Destination memory
103Navigation Z
Page 106 of 270

X
Slide 00520097the COMAND controller repeat-
edly until the destination memory list
appears as a selection list.
Option 2: destination memory list as
selection list The
My Address
My Address entry is listed as the first
entry in the destination memory.
X Select My Address My Address by turning00790052007Athe
COMAND controller and press 0098to con-
firm.
i If you have not yet entered any charac-
ters, My Address
My Address is automatically high-
lighted in the selection list.
If no home address has been stored yet, you
can now assign an address book entry. If a
home address already exists, it is displayed
and you can alter it.
i If you select New Entry New Entry, you are also
offered the option of entering the home
address for the first time. You can then
save the home address without having to
start route guidance. X
To enter the home address for the first
time: select Assign to Address Book
Assign to Address Book
Entry Entry and press 0098to confirm.
X Select Home
Home,Work
WorkorNot
Not Classified
Classified and
press 0098to confirm.
X To change the home address: select
Change
Change and press 0098to confirm.
X Select Assign to Address Book Entry
Assign to Address Book Entry
and press 0098to confirm.
i If you select New Entry
New Entry, you are also
offered the option of changing the home
address by entering an address. You can
then save the home address without having
to start route guidance.
X Select Home
Home, Work WorkorNot
Not Classified
Classified and
press 0098to confirm.
In both cases, you will see the address book
either with the character bar or as a selec-
tion list.
X Select an address book entry
(Y page 148).
X To confirm the selection: press0098the
COMAND controller.
If there is no existing home address,
COMAND saves the entry. You will see a
message and then the address menu with
the selected address. Start
Start is highlighted
automatically.
If a home address has already been stored,
you will see a prompt asking you whether
the My Address
My Address entry should be overwrit-
ten.
X Select Yes YesorNo No and press 0098to confirm.
If you select Yes
Yes, COMAND overwrites the
destination. You will see a message and
then the address menu with the selected
address. Start Startis highlighted automati-
cally.
If you select No No, the list will appear again.104
Destination memoryNavigation
Page 107 of 270
. Save destination
General notes This function also stores t")
Selecting the home address for route
guidance X
Proceed as described under "Selecting a
destination from the destination memory"
(Y page 70). Save destination
General notes This function also stores the destination in
the address book.
When the address book is full, no destinations
can be saved in the destination memory. You
must first delete address book entries
(Y page 149).
After destination entry X
The destination has been entered and is
shown in the address entry menu
(Y page 64).
X Select Save
Save by sliding 00520064and turning
00790052007A the COMAND controller and press
0098 to confirm.
You can now select storing options
(Y page 105).
During route guidance X
To show the menu: press0098the COMAND
controller.
X Select Destination
Destination in the navigation sys-
tem menu bar by turning 00790052007Athe
COMAND controller and press 0098to con-
firm.
X Select Save SaveDestination
Destination and press0098to
confirm.
You can now select storing options
(Y page 105).
From the list of previous destinations X
To show the menu: press0098the COMAND
controller. X
Select Destination Destination in the navigation sys-
tem menu bar by turning 00790052007Athe
COMAND controller and press 0098to con-
firm.
X Select From Last Destinations
From Last Destinations and
press 0098to confirm.
The list of last destinations appears.
X Select a destination by turning 00790052007Athe
COMAND controller and press 0098to con-
firm.
The destination address is shown.
X Select Save
Save and press 0098to confirm.
You can now select storing options
(Y page 105).
Selecting storing options Once you have chosen one of the following
options for storing a destination, you can
specify storage options:
R
After destination entry (Y page 105)
R During route guidance (Y page 105)
R From the list of previous destinations
(Y page 70) Storage options
X
To save the destination without a
name: selectSave Without Name Save Without Name and
press 0098to confirm.
COMAND stores the destination in the des-
tination memory and uses the address as
the destination name. Destination memory
105Navigation Z
Page 108 of 270

Example: saving a destination with a name
0043 Selected data field with cursor
0044 Character bar
X To save the destination with a name:
select Save With Name
Save With Name and press0098to
confirm.
X Select a category, e.g. Home
Home, and press 0098
to confirm.
The input menu appears with data fields
and the character bar.
X Proceed as described under "Character
entry (navigation)" (Y page 36).
X Then select 0054and press 0098to confirm.
COMAND stores the destination under the
name entered.
An address with complete address data that
is suitable for navigation can be assigned to
a pre-existing address book entry.
X To assign an address to an address
book entry: selectAssign to Address Assign to Address
Book Entry
Book Entry and press0098to confirm.
X Select a category, e.g. Home
Home, and press0098
to confirm.
You will see the address book either with
the character bar or as a selection list.
X Select an address book entry
(Y page 148).
COMAND stores the data if the address
book entry selected does not yet contain
navigable address data.
If the selected address book entry already
contains navigable address data, a prompt will appear asking whether you wish to
overwrite the existing data.
X Select Yes YesorNo
No and press 0098to confirm.
If you select Yes
Yes, COMAND stores the data.
You can now start route guidance to this
address directly from the address book
(Y page 151).
X To save the destination as My address:
select Save as "My Address" Save as "My Address" and press
0098 to confirm.
COMAND stores the destination in the des-
tination memory as My Address My Address. If the
selected address book entry already con-
tains address data that can be used for
navigation (0048 icon), a prompt will appear
asking whether you wish to overwrite the
existing data.
X Select Yes YesorNo
No and press 0098to confirm.
If you select Yes
Yes, the entry is overwritten.
If you select No
No, the process will be can-
celed.
X To save the destination as a personal
POI: insert the SD memory card
(Y page 191).
X Select Save As Personal POI
Save As Personal POI and press
0098 to confirm.
X Select a category.
X Enter the name.
The current address is saved as a personal
point of interest on the SD memory card. Deleting a destination or the home
address
X To switch to navigation mode: press the
00BE button.
X To show the menu: press0098the COMAND
controller.
X Select Destination Destination in the navigation sys-
tem menu bar by turning 00790052007Athe
COMAND controller and press 0098to con-
firm. 106
Destination memoryNavigation
Page 109 of 270
 or
as a selection list (option 2).
X Option 1: destination")
X
Select From Memory
From Memory and press0098to con-
firm.
You will see the destination memory list
either with the character bar (option 1) or
as a selection list (option 2).
X Option 1: destination memory list with
the character bar: enter characters using
the character bar (Y page 36).
X Option 2: destination memory list as
selection list: select a destination by turn-
ing 00790052007A the COMAND controller and press
0098 to confirm.
You see the address data of the selected
entry.
X Select Delete
Delete and press 0098to confirm.
A prompt appears asking whether you wish
to delete the destination.
X Select Yes
Yes orNo No and press 0098to confirm.
If you select Yes
Yes , COMAND deletes the
destination. You will see a message to this
effect.
If you select No No, the process will be can-
celed.
i If the navigable address data for the des-
tination being deleted is also assigned to
an address book entry, COMAND will also
delete this data from there. If the corre-
sponding address book entry does not con-
tain any further data, such as telephone
numbers, COMAND deletes the entire
address book entry. Previous destinations
Introduction
COMAND automatically stores the previous
destinations for which route calculation has
been started. If the memory is full, COMAND
deletes the oldest destination. You can also
save a destination from the list of previous
destinations in the destination memory. It will
be stored there permanently. Storing a destination permanently in
the destination memory
X Proceed as described in the "From the list
of previous destinations" section
(Y page 70). Storing the vehicle position in the list
of previous destinations
X To switch on navigation mode: press the
00BE function button.
X To show the menu: press0098the COMAND
controller.
X Select Position Position in the navigation system
menu bar by turning 00790052007Athe COMAND
controller and press 0098to confirm.
X Select Save
SaveVehicle
Vehicle Position
Position and press
0098 to confirm.
COMAND stores the current vehicle posi-
tion as a destination in the list of previous
destinations. Storing the crosshair position in the
list of previous destinations
A crosshair appears on the map if you have
moved the map manually (Y page 108). You
can store the crosshair position as a destina-
tion in the list of previous destinations.
X To show the menu: press0098the COMAND
controller.
X Select Position
Position in the navigation system
menu bar by turning 00790052007Athe COMAND
controller and press 0098to confirm.
X Select Save Crosshair Position
Save Crosshair Position and
press 0098to confirm. Previous destinations
107Navigation Z
Page 110 of 270

Deleting one of the previous destina-
tions
X To switch on navigation mode: press the
00BE function button.
X To show the menu: press0098the COMAND
controller.
X Select Destination
Destination in the navigation sys-
tem menu bar by turning 00790052007Athe
COMAND controller and press 0098to con-
firm.
X Select From Last Destinations
From Last Destinations and
press 0098to confirm.
The list of last destinations appears.
X Select the desired destination and press
0098 to confirm.
The destination address appears.
X Select Delete
Delete and press 0098to confirm.
A prompt appears asking whether the entry
should be deleted.
X Select Yes
Yes orNo No and press 0098to confirm.
If you select Yes
Yes , the entry is deleted.
If you select No
No, the process will be can-
celed. Map operation and map settings
General notes
Company logos displayed on the map are
trademarks of the respective companies and
used solely for the purpose of indicating the
locations of these companies. The use of such
logos on the map does not indicate approval
of, support of or advertising by these compa-
nies for the navigation system itself. Setting the map scale
0043
Set map scale as a number with unit
0044 Currently set map scale as indicated by
the needle on the scale bar
0087 New map scale
0085 Scale bar
Unit of measurement 0043in the COMAND dis-
play depends on the selection made in the
instrument cluster; see the separate vehicle
Operator's Manual.
X To hide the menu: slide00970052the COMAND
controller and, when the Full Screen Full Screen
menu item is shown, press 0098.
X To call up the scale bar: as soon as you
turn 00790052007A the COMAND controller, scale
bar 0087appears.
X Turn 00790052007A until the desired scale is set. Moving the map
Showing the crosshair Map with crosshair
0043
Current vehicle position
0044 Crosshair 108
Map ope
ration and map settingsNavigation
Page 111 of 270

0087
Details of the crosshair position
0085 Map scale selected
X To hide the menu: slide00970052the COMAND
controller and, when the Full Screen
Full Screen
menu item is shown, press 0098.
X To scroll the weather map: slide009500520096,
009700520064 or009100520078 the COMAND controller.
A crosshair appears on the map. If you slide
it again, the map under the crosshair moves
in the corresponding direction.
Display 0087may be the name of a street, for
example, provided the digital map contains
the necessary data. It shows the geo-coordi-
nate position of the crosshair if the Geo-
Geo-
coordinates
coordinates display is switched on
(Y page 111).
Hiding the crosshair and centering the
map on the vehicle position or destina-
tion X
Press the 0038back button twice.
The crosshair disappears and the map is
set to the vehicle position.
Centering the map on the vehicle's posi-
tion X
To show the menu: press0098the COMAND
controller.
X Select Position
Position in the navigation system
menu bar by sliding 00520064and turning 00790052007A
the COMAND controller and press 0098to
confirm.
X Select Vehicle Position Map Vehicle Position Map and press
0098 to confirm or, if the crosshair is shown,
press the 0038back button.
This hides the crosshair.
Centering the map on the destination
position This function requires a calculated route to a
destination. If the route includes way points and an intermediate stop, the map can also
be set to these positions.
X
To show the menu: press0098the COMAND
controller.
X Select Position
Position in the navigation system
menu bar by sliding 00520064and turning 00790052007A
the COMAND controller and press 0098to
confirm.
X Select Destination Position Map
Destination Position Map and
press 0098to confirm.
The crosshair position is set to the relevant
destination. Map settings
Calling up the map settings menu X
To show the menu: press0098the COMAND
controller.
X Select Navi
Navi in the main function bar by
sliding 00970052and turning 00790052007Athe COMAND
controller and press 0098to confirm.
X Select Map MapSettings
Settings and press0098to con-
firm.
The map settings menu appears.
Map orientation Example: map orientation
0043
Current map orientation (005B or¤)
Possible map orientations:
R 005B North orientation (The map view is dis-
played so that north is always up)
R ¤ Heading orientation (the map view is
aligned to the direction of travel. The direc-
tion of travel is always at the top, the Map operation and map settings
109Navigation Z
Page 112 of 270

R ¤ Birds-eye view (the map view is aligned
to the direction of travel. The map projec-
tion reproduces the curvature of the earths
surface, the orange")
orange-color tip of the symbol points
north.)
R ¤ Bird's-eye view (the map view is aligned
to the direction of travel. The map projec-
tion reproduces the curvature of the earth's
surface, the orange-color tip of the symbol
points north.)
R ¤ 3D map (the map view is aligned to the
direction of travel. At a scale of 1 km the
map displays elevation, the orange-color
tip of the symbol points north.) Map orientation menu
Setting the map orientation
X
To show the menu: press0098the COMAND
controller.
X Select Navi Naviin the main function bar by
sliding 00970052and turning 00790052007Athe COMAND
controller and press 0098to confirm.
X Select Map
Map Settings
Settings and press0098to con-
firm.
The map settings menu appears.
X Select Map Orientation
Map Orientation and press0098to
confirm.
X Select North up
North up, Heading Up Heading Up, Bird's-
Bird's-
eye View
eye View or3-D Map
3-D Map by turning 00790052007Athe
COMAND controller and press 0098to con-
firm.
A 003B dot indicates the new setting. Selecting POI symbols
Setting the POI symbol display
You can set the points of interest you wish to
have displayed as symbols on the map. Points
of interest are, for example, gas stations,
hotels, cinemas and restaurants.
X
To show the menu: press0098the COMAND
controller.
X Select Navi
Navi in the main function bar by
sliding 00970052and turning 00790052007Athe COMAND
controller and press 0098to confirm.
X Select Map MapSettings
Settings and press0098to con-
firm.
The map settings menu appears.
X Select POI Symbols On Map POI Symbols On Map and press
0098 to confirm.
The following settings are possible:
R Standard Symbols
Standard Symbols
Symbol display determined by the factory
settings.
R Personal Symbols Personal Symbols
You can determine the symbols yourself.
R No Symbols No Symbols
The map does not show any symbols. 110
Map operation and map settingsNavigation
 1
1 2
2 3
3 4
4 5
5 6
6 7
7 8
8 9
9 10
10 11
11 12
12 13
13 14
14 15
15 16
16 17
17 18
18 19
19 20
20 21
21 22
22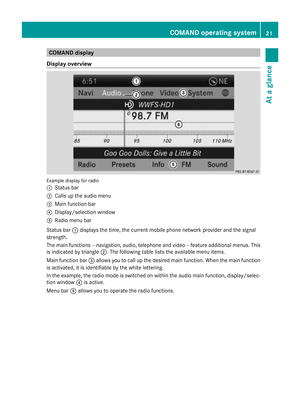 23
23 24
24 25
25 26
26 27
27 28
28 29
29 30
30 31
31 32
32 33
33 34
34 35
35 36
36 37
37 38
38 39
39 40
40 41
41 42
42 43
43 44
44 45
45 46
46 47
47 48
48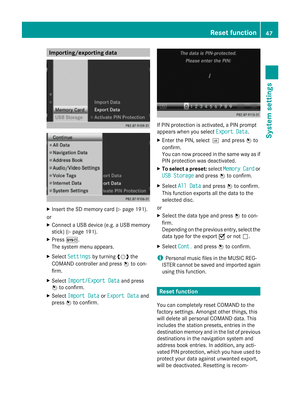 49
49 50
50 51
51 52
52 53
53 54
54 55
55 56
56 57
57 58
58 59
59 60
60 61
61 62
62 63
63 64
64 65
65 66
66 67
67 68
68 69
69 70
70 71
71 72
72 73
73 74
74 75
75 76
76 77
77 78
78 79
79 80
80 81
81 82
82 83
83 84
84 85
85 86
86 87
87 88
88 89
89 90
90 91
91 92
92 93
93 94
94 95
95 96
96 97
97 98
98 99
99 100
100 101
101 102
102 103
103 104
104 105
105 106
106 107
107 108
108 109
109 110
110 111
111 112
112 113
113 114
114 115
115 116
116 117
117 118
118 119
119 120
120 121
121 122
122 123
123 124
124 125
125 126
126 127
127 128
128 129
129 130
130 131
131 132
132 133
133 134
134 135
135 136
136 137
137 138
138 139
139 140
140 141
141 142
142 143
143 144
144 145
145 146
146 147
147 148
148 149
149 150
150 151
151 152
152 153
153 154
154 155
155 156
156 157
157 158
158 159
159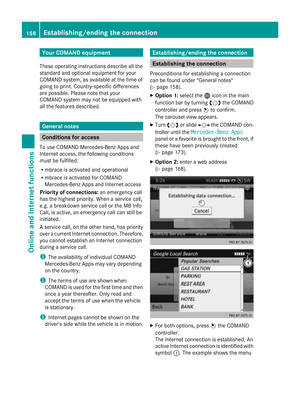 160
160 161
161 162
162 163
163 164
164 165
165 166
166 167
167 168
168 169
169 170
170 171
171 172
172 173
173 174
174 175
175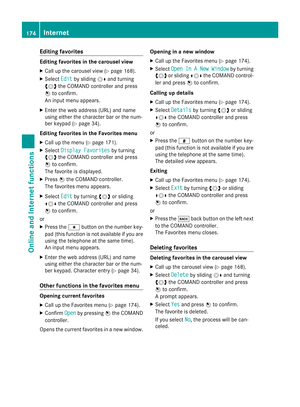 176
176 177
177 178
178 179
179 180
180 181
181 182
182 183
183 184
184 185
185 186
186 187
187 188
188 189
189 190
190 191
191 192
192 193
193 194
194 195
195 196
196 197
197 198
198 199
199 200
200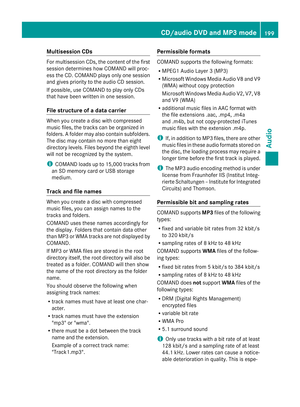 201
201 202
202 203
203 204
204 205
205 206
206 207
207 208
208 209
209 210
210 211
211 212
212 213
213 214
214 215
215 216
216 217
217 218
218 219
219 220
220 221
221 222
222 223
223 224
224 225
225 226
226 227
227 228
228 229
229 230
230 231
231 232
232 233
233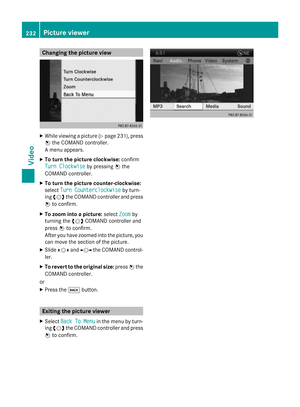 234
234 235
235 236
236 237
237 238
238 239
239 240
240 241
241 242
242 243
243 244
244 245
245 246
246 247
247 248
248 249
249 250
250 251
251 252
252 253
253 254
254 255
255 256
256 257
257 258
258 259
259 260
260 261
261 262
262 263
263 264
264 265
265 266
266 267
267 268
268 269
269