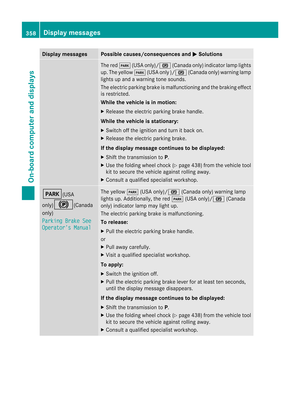
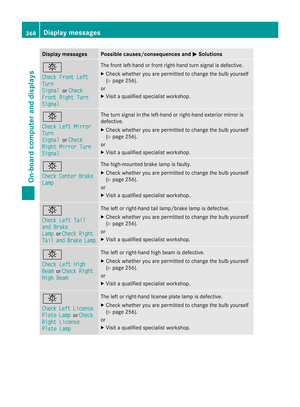
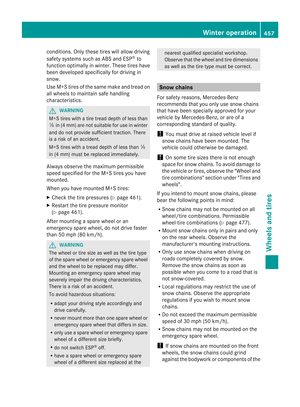
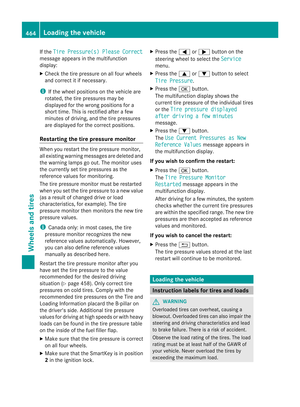
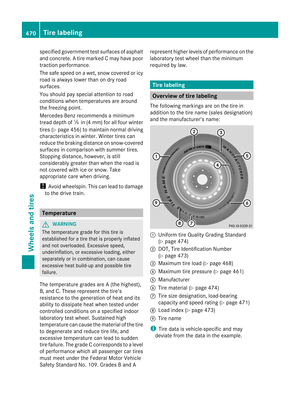
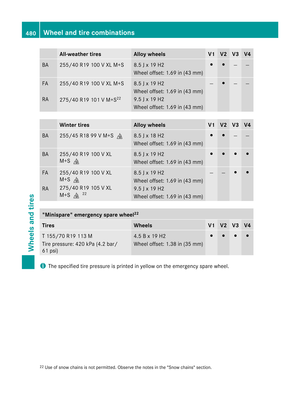
Page 441 of 494

and inserting wheel chocks
.Never
disengage the parking brake while the
vehicle is raised.
R the jack must be placed on a firm, flat and
non-slip surface. On a loose surface, a
large, load-bearing underlay must be used.
On a slippery surface, a non-slip underlay
must be used, e.g. rubber mats.
R do not use wooden blocks or similar
objects as a jack underlay. Otherwise, the
jack will not be able to achieve its load-
bearing capacity due to the restricted
height.
R The maximum clearance between the
underside of the tire and the ground must
be 1.2 in (3 cm).
R never place your hands and feet under the
raised vehicle.
R never lie under the raised vehicle.
R never start the engine when the vehicle is
raised.
R never open or close a door or the trunk lid
when the vehicle is raised.
R make sure that no person sare present in
the vehicle when the vehicl eis raised. X
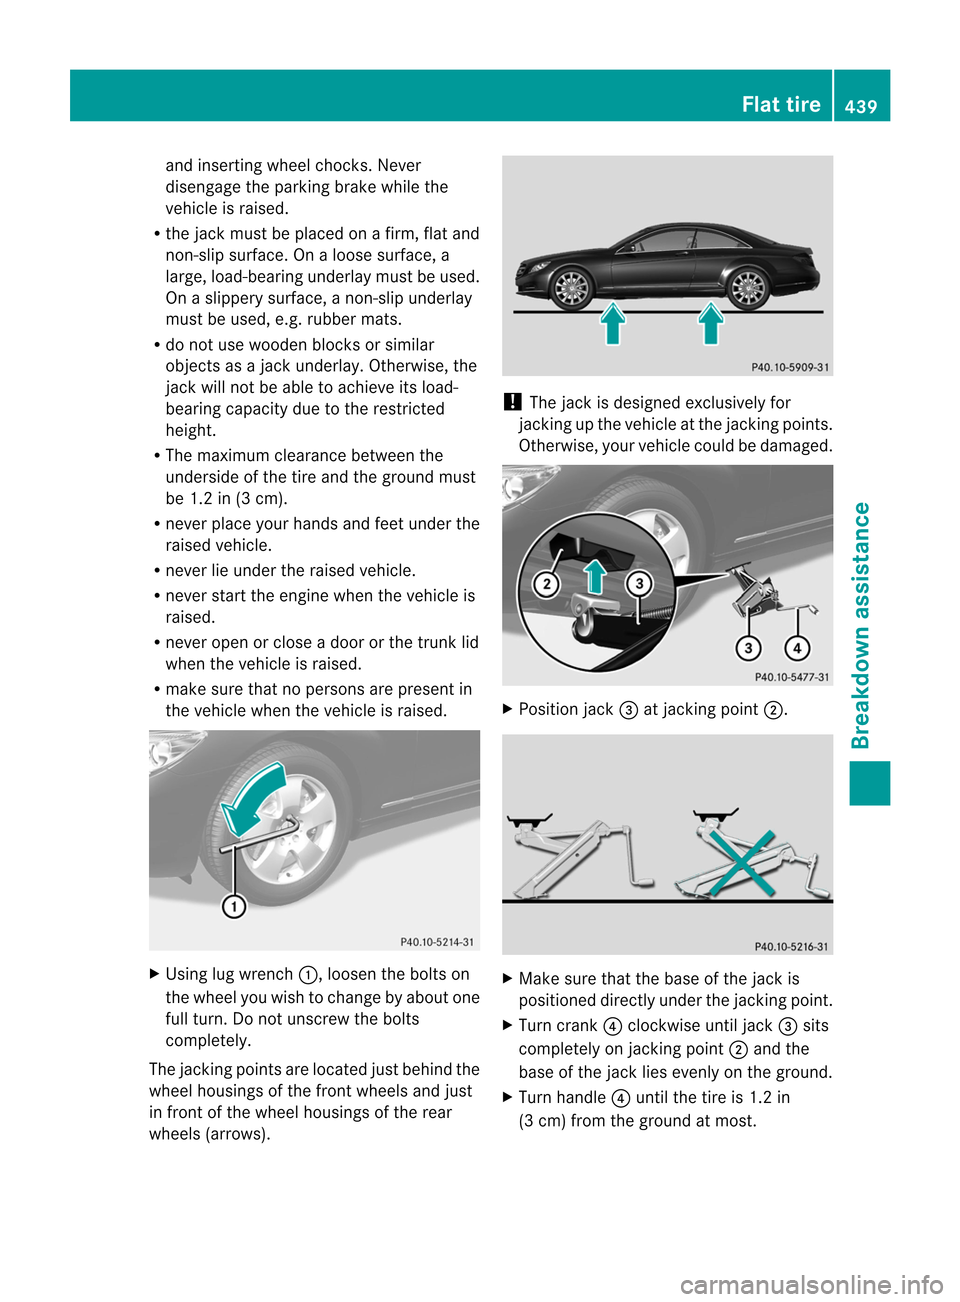
Using lug wrench :, loosen the bolts on
the wheel you wish to change by abouto ne
full turn. Do not unscrew the bolts
completely.
The jacking points are located jus tbehind the
wheel housings of the fron twheels and just
in front of the wheel housings of the rear
wheels (arrows). !
The jack is designed exclusively for
jacking up the vehicle at the jacking points.
Otherwise, your vehicle could be damaged. X
Position jack =at jacking point ;. X
Make sure that the base of the jack is
positioned directly under the jacking point.
X Turn crank ?clockwise until jack =sits
completely on jacking point ;and the
base of the jack lies evenly on the ground.
X Turn handle ?until the tire is 1.2 in
(3 cm) from the ground at most. Flat tire
439Breakdown assistance Z
Page 442 of 494

Removing
awheel X
Unscrew the uppermost wheel bolt
completely.
X Screw alignment bolt :into the thread
instead of the wheel bolt.
X Unscrew the remaining wheel bolts fully.
! Do not place wheel bolts in sand or on a
dirty surface. The bol tand wheel hub
threads could otherwise be damaged when
you screw them in.
X Remove the wheel.
Mounting anew wheel G
WARNING
Oiled or greased wheel bolts or damaged
wheel bolts/hub threads can cause the wheel
bolts to come loose .As a result, you could
lose a wheel while driving. There is a risk of
accident.
Never oil or grease wheel bolts. In the event
of damage to the threads, contact a qualified
specialist workshop immediately.H ave the
damaged wheel bolts or hub threads
replaced/renewed. Do no tcontinue driving. G
WARNING
If you tighten the wheel bolts or wheel nuts
when the vehicle is raised, the jack could tip
over. There is a risk of injury.
Only tighten the wheel bolts or wheel nuts
when the vehicle is on the ground. Always pay attention to the instructions and
safety notices in "Changing a wheel"
(Y page 477).
Only use wheel bolts that have been designed
for the wheel and the vehicle. For safety
reasons, Mercedes-Benz recommends that
you only use wheel bolts which have been
approved for Mercedes-Benz vehicles and the
respective wheel.
Be sure to use the original-length wheel bolts
when refitting the original wheel after it has
been repaired. Wheel bolts for:
:
All alloy wheels
; "Minispare" emergency spare wheel
! Always use wheel bolts ;to mount the
"Minispare" emergency spare wheel. Using
other wheel bolts to mount the "Minispare"
emergency spare wheel could damage the
brake system.
X Clean the wheel and wheel hub contact
surfaces.
! To prevent damage to the paintwork, hold
the wheel securely against the wheel hub
while screwing in the first wheel bolt. 440
Flat tireBreakdown assistance
Page 443 of 494

X
Slide the emergency spare wheel onto the
alignment bol tand push it on.
X Tighte nthe wheel bolts until they are
finger-tight.
X Unscrew the alignment bolt.
X Tighten the last wheel bolt until it is finger-
tight.
Lowering the vehicle G
WARNING
Tire pressure that is too high or too low can
lead to a blowoutoft he mounted emergency
spare wheel/spare wheel, particularly when
driving with a heavy load and increasing
speed. There is a risk of accident.
Check the tire pressure of the emergency
spare wheel or spare wheel and adjust it.
When doing so, observe the specified tire
pressure.
X Turn the crank of the jack counter-
clockwise until the vehicle is once again
standing firmly on the ground.
X Place the jack to one side. G
WARNING
The wheels could work loose if the wheel nuts
and bolts are not tightened to the specified
tightening torque. There is a risk of accident.
Have the tightening torque immediately
checked at a qualified specialist workshop
after a wheel is changed.
X Tighten the wheel bolts evenly in a
crosswise pattern in the sequence
indicated ( :toA). The tightening torque
must be 110 lb-ft (150 Nm) .
X Turn the jack back to its initial position and
store it together with the rest of the tire-
change tool kit in the stowage well under
the trunk floor.
i When you are driving with the emergency
spare wheel mounted, the tire pressure
monitoring system cannot function
reliably. Only restart the tire pressure
monitoring system when the defective
wheel has been replaced with a new wheel.
All wheels mounted must be equipped with
functioning sensors. The defective wheel
should no longer be in the vehicle. MOExtended tires (tires with run-flat
properties)
With MOExtended tires (tires with run flat
characteristics), you can continue to drive
your vehicle even if there is a total loss of
pressure in one or more tires. Flat tire
441Breakdown assistance Z
Page 444 of 494

MOExtended tires may only be used in
conjunction with the activated tire pressure
loss warning system or with the activated tire
pressure monitoring system.
The driving distance in partially laden
condition is approximately 50 miles (80 km),
and approximately 18 miles (30 km) when
fully loaded.
In addition to the vehicle load, the driving
distance possible depends upon:
R speed
R road condition
R outside temperature
The driving distance possible in run-flat mode
may be reduced by extreme driving
conditions/maneuvers, or it can be increased
through a moderate style of driving.
The maximum permissible distance which
can be driven in run-flat mode is counted from
the moment the tire pressure loss warning
appears in the multifunction display.
Do not exceed a vehicle speed of 50 mph
(80 km/h). G
WARNING
When driving in emergency mode, the driving
characteristics deteriorate, e.g. when
cornering, accelerating quickly and when
braking. There is a risk of an accident.
Do not exceed the stated maximum speed.
Avoid abrupt steering and driving maneuvers,
and driving over obstacles (curbs, potholes,
off-road). This applies in particular to a laden
vehicle.
Stop driving in emergency mode if:
R you hear banging noises.
R the vehicle starts to shake.
R you see smoke and smell rubber.
R ESP ®
is intervening constantly.
R there are tears in the sidewalls of the tire.
After driving in emergency mode, have the
wheel rims checked at a qualified specialist
workshop with regard to their further use. The
defective tire must be replaced in every case. i
When replacing one or all tires, make sure
that you only use tires marked
MOExtended. Also ensure that they are of
the specified size for the vehicle. Battery
Important safety notes
Special tools and expert knowledge are
required when working on the battery, e.g.
removal and installing. You should therefore
have all work involving the battery carried out
at a qualified specialist workshop. G
WARNING
Work carried out incorrectly on the battery
can, for example, lead to a short circuit and
damage your vehicle's electronic system. This
can disrupt driving safety systems such as
ABS (anti-lock braking system) or ESP ®
(Electronic Stability Program).
R If ABS malfunctions, the wheels can lock
during braking. This limits the steerability
of the vehicle when braking and the braking
distance may increase. There is a risk of
accident.
R If ESP ®
malfunctions, the vehicle will not be
stabilized if it starts to skid or a wheel starts
to spin. There is a risk of accident.
You should therefore have all work involving
the battery carried out at a qualified specialist
workshop. G
WARNING
Comply with safety precautions and take
protective measures when handling batteries. Risk of explosion
Fire, open flames and
smoking are prohibited
when handling the battery.
Avoid creating sparks.442
BatteryBreakdown assistance
Page 445 of 494

Battery acid is caustic.
Avoid contact with the skin,
eyes or clothing.
Wea
rsuitable protective
clothing, in particular
gloves, an apro nand a face
mask.
Immediately rinse acid
splashes off with clean
water. Consult a doctor if
necessary. Wear eye protection.
Keep children away.
Observe this Operator's
Manual.
G
WARNING
Failure to follow these instructions can result
in severe injury or death.
Never lean ove rbatteries while connecting.
You migh tget injured.
Battery fluid contains sulfuric acid. Do not
allow this fluid to come in contact with eyes,
skin or clothing. In case it does, immediately
flush affected area with water and seek
medical help if necessary.
Ab attery will also produce hydrogen gas,
which is flammable and explosive. Keep
flames or sparks away from battery, avoid
improper connection of jumper cables,
smoking etc. G
WARNING
Do no tplace any metal objects on the battery
as this could result in a shor tcircuit.
Use leak-proof batteries only to avoid the risk
of acid burns in the event of an accident.
Take care that you do not become statically
charged, e.g. by wearin gsynthetic clothing or rubbing against textiles
.For this reason, you
also should not pull or push the battery over
carpets or other synthetic materials.
Never touch the battery first. First, touch the
outside body of the vehicle in order to release
any possible electrostatic charges.
Do not rub the battery with rags or cloths. The
battery could explode if touched due to
electrostatic charge or due to spark
formation. H
Environmental note Batteries contain dangerous
substances. It is against the
law to dispose of them with
the household rubbish. They
must be collected separately
and recycled to protect the
environment.
Dispose of batteries in an
environmentally friendly
manner
.Take discharged
batteries to a qualified
specialist workshop or a
special collectio npoint for
used batteries.
! Have the battery checked regularly at a
qualified specialist workshop.
Observe the service intervals in the
Maintenance Booklet or contact a qualified
specialist workshop for more information.
! You should have all work involving the
battery carried out at aqualified specialist
workshop. In the exceptional case that it is
necessary for you to disconnect the battery
yourself, make sure that:
R you switch off the engine and remove the
SmartKey. On vehicles with KEYLESS-
GO, ensure that the ignition is switched
off .C heck that all the indicator lamps in
the instrumentc luster are off.Otherwise,
electroni ccomponents, such as the
alternator, may be damaged.
R you first remove the negative terminal
clamp and then the positive terminal Battery
443Breakdown assistance Z
Page 446 of 494

clamp. Neve
rswap the terminal clamps.
Otherwise, the vehicle's electronic
system may be damaged.
R the transmission is locked in position P
after disconnecting the battery. The
vehicle is secured agains trolling away.
You can then no longer move the vehicle.
The battery and the cover of the positive
terminal clamp must be installed securely
during operation.
In order for the battery to achieve the
maximum possible service life, it must always
be sufficiently charged.
Like other batteries, the vehicle battery may
discharge over time if you do not use the
vehicle. In this case, have the battery
disconnected at a qualified specialist
workshop. You can also charge the battery
with a charger recommended by Mercedes-
Benz.C ontact a qualified specialist workshop
for further information.
Have the battery charge level checked more
frequently if you use the vehicle mainly for
short trips or if you leave it standing idle for
a lengthy period. Consult a qualified specialist
workshop if you wish to leave your vehicle
parked for a long period of time.
i Remove the SmartKey if you park the
vehicle and do not require any electrical
consumers. The vehicle will then use very
little energy, thus conserving battery
power. Charging the battery
G
WARNING
Never charge a battery still installed in the
vehicle unless a battery charger unit approved
by Mercedes-Benz is being used. Gases may
escape during charging and cause explosions
that may result in paint damage, corrosion or
personal injury.
Ab attery charge runit specially adapted for
Mercedes-Benz vehicles and tested and
approved by Mercedes-Benz is available as an accessory. It permits the charging of the
battery in its installed position. Contact an
authorized Mercedes-Benz Center for further
informatio nand availability.
Charge the battery in accordance with the
separate instructions for the battery charger. G
WARNING
There is a ris kofacid burns during the
charging process due to the gases which
escape from the battery .Do not lean over the
battery during the charging process. G
WARNING
Battery acid is caustic. Avoid contact with the
skin, eyes or clothing.
! Only charge the installed battery with a
battery charger which has been tested and
approved by Mercedes-Benz. These battery
chargers allow the battery to be charged
while still installed in the vehicle.
! Only use battery chargers with a
maximum charging voltage of 14.8 V.
! Only charge the battery using the jump-
starting connection point.
The jump-starting connection point is in the
engine compartment (Y page 445).
X Open the hood (Y page 420).
X Connect the battery charger to the positive
terminal and ground point in the same
order as when connecting the donor
battery in the jump-starting procedure
(Y page 445).
X Read the battery charger's operating
instructions before charging the battery. 444
BatteryBreakdown assistance
Page 447 of 494

Jump-starting
G
WARNING
Failure to follow these directions will cause damage to the electronic components, and can lead
to a battery explosion and severe injury or death.
Never lean over batteries while connecting or jump starting. You might get injured.
Battery fluid contains sulfuric acid. Do not allow this fluid to come in contact with eyes, skin or
clothing. In case it does, immediately flush affected area with water, and seek medical help if
necessary.
Ab attery will also produce hydrogen gas, which is flammable and explosive. Keep flames or
sparks away from battery, avoid improper connectio nofjumpe rcables, smoking, etc.
Attempting to jump start a frozen battery can result in it exploding, causing personal injury.
Read all instructions before proceeding. G
WARNING
Non-combusted fuel can collect in the exhaust system and ignite. There is a risk of fire. Avoid
repeated and lengthy starting attempts.
! Avoid repeated and lengthy starting attempts. Otherwise, the catalytic converte rcould be
damaged by the non-combusted fuel.
Do not use a rapid charging device to start the vehicle. If your vehicle's battery is discharged,
the engine can be jump-started from another vehicle or from a second battery using jumper
cables. Observe the following points:
R The battery is not accessible in all vehicles. If the other vehicle's battery is not accessible,
jump-start the vehicle using a second battery or ajump-starting device.
R You may only jump-start the vehicle when the engine and catalyti cconverter are cold.
R Do not start the engine if the battery is frozen. Let the battery thaw first.
R jump-starting may only be performed from batteries with a nominal voltage of 12 V.
R Only use jumper cables which have a sufficient cross-section and insulated terminal clamps.
R If the battery is fully discharged, leave the battery that is being used to jump-start connected
for a few minutes before attempting to start.T his charges the empty battery a little.
R Make sure that the two vehicles do not touch.
Make sure that:
R the jumper cables are not damaged.
R bare parts of the terminal clamp do not come into contact with other metal parts while the
jumper cables are connected to the battery.
R the jumper cables cannot come into contact with parts such as the V-belt pulley or the fan.
These parts move when the engine is started and while it is running.
X Secure the vehicle by applying the electric parking brake.
X Shift the transmission to position P.
X Switch off all electrical consumers (e.g. radio, blower, etc.).
X Open the hood (Y page 420). Jump-starting
445Breakdown assistance Z
Page 448 of 494

Position number
Aidentifies the charged battery of the other vehicle or an equivalent jump-
starting device.
X Remove the cover from positive terminal :.
X Connec tpositive terminal :on your vehicle to positive terminal ;of donor battery A
using the jumper cable, beginning with your own battery.
X Start the engine of the donor vehicle and run it at idling speed.
X Connect negative terminal =of donor battery Ato ground point ?of your vehicle using
the jumper cable, connecting the jumper cable to donor battery Afirst.
X Start the engine.
X Before disconnecting the jumper cables, let the engine run for several minutes.
X First remove the jumper cables from ground point ?and negative terminal =, then from
positive terminal :and positive terminal ;, each time disconnecting from the battery on
your own vehicle first.
X Have the battery checked at a qualified specialist workshop.
i Jump-starting is not considered to be a normal operating condition.
i Jumper cables and further information regarding jump starting can be obtained at any
qualified specialist workshop. Towing and tow-starting
Important safety notes
G
WARNING
If you tow the vehicle, you must use a rigid
towing bar if: R
the engine is not running.
R there is a brake system malfunction.
R there is a malfunction in the power supply
or the vehicle's electrical system.
The power assistance for the steering and the
brake force booster do not work when the 446
Towing and tow-startingBreakdown assistance