Page 112 of 382

3103
Features of your vehicle
Installing a child restraint on a
front passenger’s seat is forbid-
den.
Never place a rear-facing child restraint
in the front passenger’s seat. If the air
bag deploys, it would impact the rear-fac-
ing child restraint, causing serious or
fatal injury.
In addition, do not place front-facing child
restraint in the front passenger’s seat
either. If the front passenger air bag
inflates, it would cause serious or fatal
injuries to the child.
Air bag warning light
The purpose of the air bag warning light
in your instrument panel is to alert you of
a potential problem with your air bag -
Supplemental Restraint System (SRS).
When the ignition switch is turned ON,
the indicator light should blink or illumi-
nate for approximately 6 seconds, then
go off.
Have the system checked if:
The light does not turn on briefly whenyou turn the ignition ON.
The light stays on after the engine starts.
The light comes on while the vehicle is in motion.
1JBH3051
WARNING
Never put child restraint in thefront passenger’s seat. If the front
passenger air bag inflates, it
would cause serious or fatal
injuries.
When children are seated in the rear outboard seats in which side
air bags are equipped, be sure to
put the child restraint system as
far away from the door side as
possible, and secure the child
restraint system to be locked in
position.
Inflation of side or curtain air bag
could cause serious injury or
death due to the expansion
impact.
W7-147
Page 113 of 382
Features of your vehicle
104
3
SRS care
Your Supplemental Restraint System is
virtually maintenance-free. There are no
parts which you can service.
You must have the system serviced
under the following circumstances:
If an air bag ever inflates, the air bag
must be replaced. Do not try to remove
or discard the air bag by yourself. This
must be done by an authorized Kia
dealer.
If the air bag warning indicator light alerts you to a problem, have the air
bag system checked as soon as possi-
ble. Otherwise, your air bag system
may be ineffective.
When repairing or scrapping thevehicles
Repairing steering wheel, instrument panel, center console or roofs, or
installing car audio around center con-
sole could disable the air bag system.
Have them checked by an authorized
Kia dealer.
When leaving the vehicle at an autho- rized Kia dealer, inform the facility that
the vehicle is equipped with air bag
system, and leave the owner’s manual
in the vehicle.
Since air bag system contains explo- sive chemical substances, contact an
authorized Kia dealer when scrapping
the vehicle.
WARNING- No mainte-
nance or repair
Do not modify your steering
wheel, seat or any other part of
the Supplemental Restraint
System. Modification could make
the system inoperable.
Do not work on the system’s com- ponents or wiring. This could
cause the air bags to inflate inad-
vertently, possibly seriously injur-
ing someone. Working on the sys-
tem could also disable the sys-
tem so that the air bags would not
deploy in a collision.
Any work on the SRS system, such as removing, installing,
repairing, or any work on the
steering wheel must be per-
formed by a qualified Kia techni-
cian. Improper handling of the air
bag system may result in serious
personal injury or death.
WARNING- No modifica-tion
Do not modify any part of the air
bag system. Modification could
make the air bag system ineffective
or could cause unnecessary
deployment.
Page 116 of 382
3107
Features of your vehicle
Tilt steering A tilt steering wheel allows you to adjust
the steering wheel before you drive. You
can also raise it to the highest level to
give your legs more room when you exit
and enter the vehicle.
The steering wheel should be positioned
so that it is comfortable for you to drive,
while permitting you to see the instru-
ment panel warning lights and gauges.To change the steering wheel angle, pull
up the lock release lever (1), adjust the
steering wheel to the desired angle (2),
then release the lock-release lever to
lock the steering wheel in place. Be sure
to adjust the steering wheel to the
desired position before driving.WARNING
Never adjust the angle of thesteering wheel while driving. You
may lose your steering control
and cause an accident that gives
rise to severe personal injury or
death.
After adjusting, push the steering wheel both up and down to be
certain it is locked in position.
OVQ036021N
Page 119 of 382
Features of your vehicle
110
3
Inside rearview mirror
Adjust the rearview mirror to center on
the view through the rear window. Make
this adjustment before you start driving.
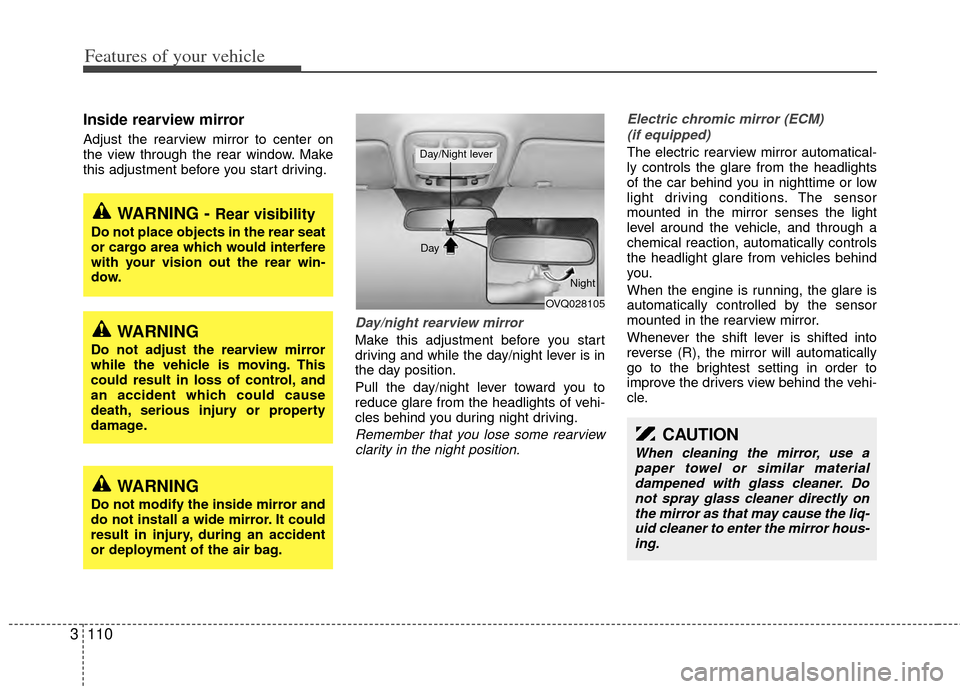
Day/night rearview mirror
Make this adjustment before you start
driving and while the day/night lever is in
the day position.
Pull the day/night lever toward you to
reduce glare from the headlights of vehi-
cles behind you during night driving.
Remember that you lose some rearview
clarity in the night position. Electric chromic mirror (ECM)
(if equipped)
The electric rearview mirror automatical-
ly controls the glare from the headlights
of the car behind you in nighttime or low
light driving conditions. The sensor
mounted in the mirror senses the light
level around the vehicle, and through a
chemical reaction, automatically controls
the headlight glare from vehicles behind
you.
When the engine is running, the glare is
automatically controlled by the sensor
mounted in the rearview mirror.
Whenever the shift lever is shifted into
reverse (R), the mirror will automatically
go to the brightest setting in order to
improve the drivers view behind the vehi-
cle.
WARNING - Rear visibility
Do not place objects in the rear seat
or cargo area which would interfere
with your vision out the rear win-
dow.
CAUTION
When cleaning the mirror, use apaper towel or similar materialdampened with glass cleaner. Do not spray glass cleaner directly onthe mirror as that may cause the liq- uid cleaner to enter the mirror hous-ing.
OVQ028105
Day
Night
Day/Night lever
WARNING
Do not adjust the rearview mirror
while the vehicle is moving. This
could result in loss of control, and
an accident which could cause
death, serious injury or property
damage.
WARNING
Do not modify the inside mirror and
do not install a wide mirror. It could
result in injury, during an accident
or deployment of the air bag.
Page 120 of 382
3111
Features of your vehicle
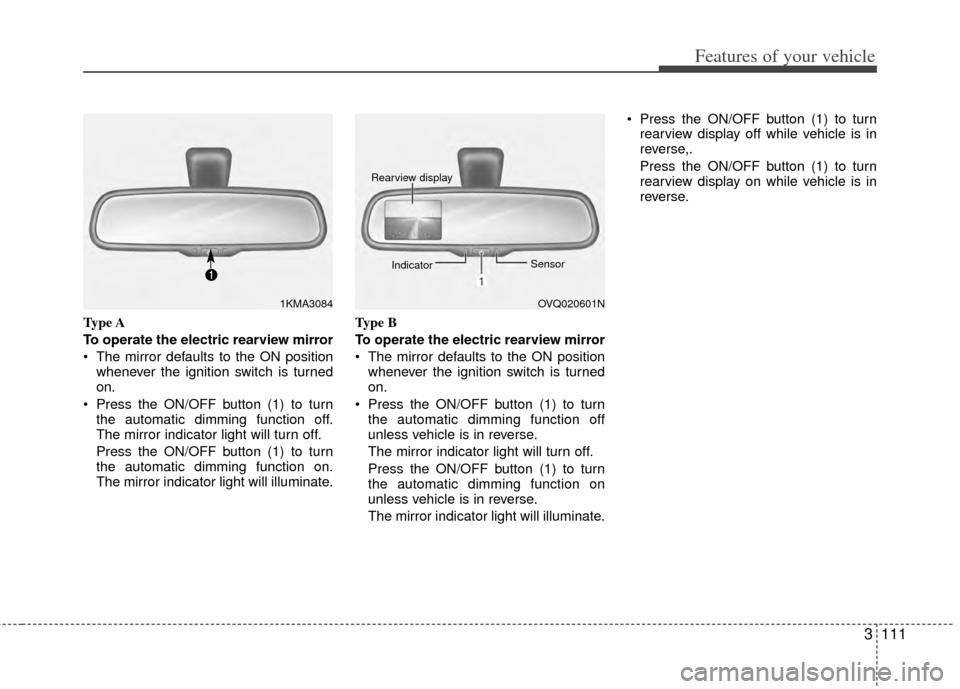
Type A
To operate the electric rearview mirror
The mirror defaults to the ON positionwhenever the ignition switch is turned
on.
Press the ON/OFF button (1) to turn the automatic dimming function off.
The mirror indicator light will turn off.
Press the ON/OFF button (1) to turn
the automatic dimming function on.
The mirror indicator light will illuminate. Type B
To operate the electric rearview mirror
The mirror defaults to the ON position
whenever the ignition switch is turned
on.
Press the ON/OFF button (1) to turn the automatic dimming function off
unless vehicle is in reverse.
The mirror indicator light will turn off.
Press the ON/OFF button (1) to turn
the automatic dimming function on
unless vehicle is in reverse.
The mirror indicator light will illuminate. Press the ON/OFF button (1) to turn
rearview display off while vehicle is in
reverse,.
Press the ON/OFF button (1) to turn
rearview display on while vehicle is in
reverse.
1KMA3084OVQ020601N
Rearview display
Indicator Sensor
Page 121 of 382
Features of your vehicle
112
3
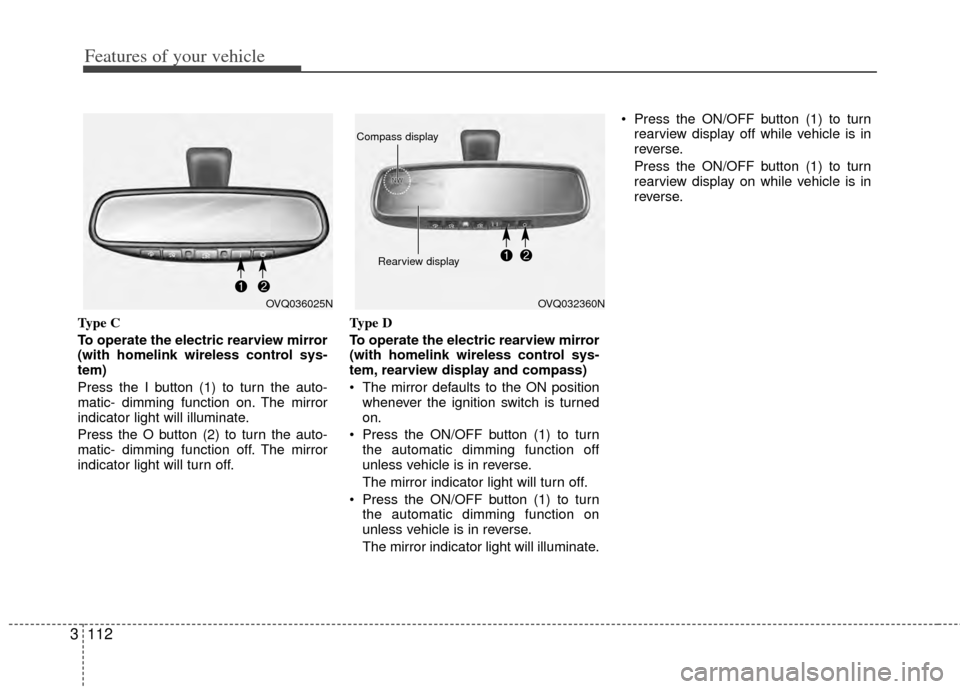
Type C
To operate the electric rearview mirror
(with homelink wireless control sys-
tem)
Press the I button (1) to turn the auto-
matic- dimming function on. The mirror
indicator light will illuminate.
Press the O button (2) to turn the auto-
matic- dimming function off. The mirror
indicator light will turn off. Type D
To operate the electric rearview mirror
(with homelink wireless control sys-
tem, rearview display and compass)
The mirror defaults to the ON position
whenever the ignition switch is turned
on.
Press the ON/OFF button (1) to turn the automatic dimming function off
unless vehicle is in reverse.
The mirror indicator light will turn off.
Press the ON/OFF button (1) to turn the automatic dimming function on
unless vehicle is in reverse.
The mirror indicator light will illuminate. Press the ON/OFF button (1) to turn
rearview display off while vehicle is in
reverse.
Press the ON/OFF button (1) to turn
rearview display on while vehicle is in
reverse.
OVQ036025NOVQ032360N
Rearview display
Compass display
Page 125 of 382
Features of your vehicle
116
3
INSTRUMENT CLUSTER
1. Tachometer
2. Turn signal indicators
3. Speedometer
4. Engine temperature gauge
5. Warning and indicator lights
6. Shift position indicator
(Automatic transaxle only)
7. Odometer/Trip odometer
8. Fuel gauge
OVQ030026C/OVQ030027C
■ ■ Type A
■
■Type B
Page 127 of 382
Features of your vehicle
118
3
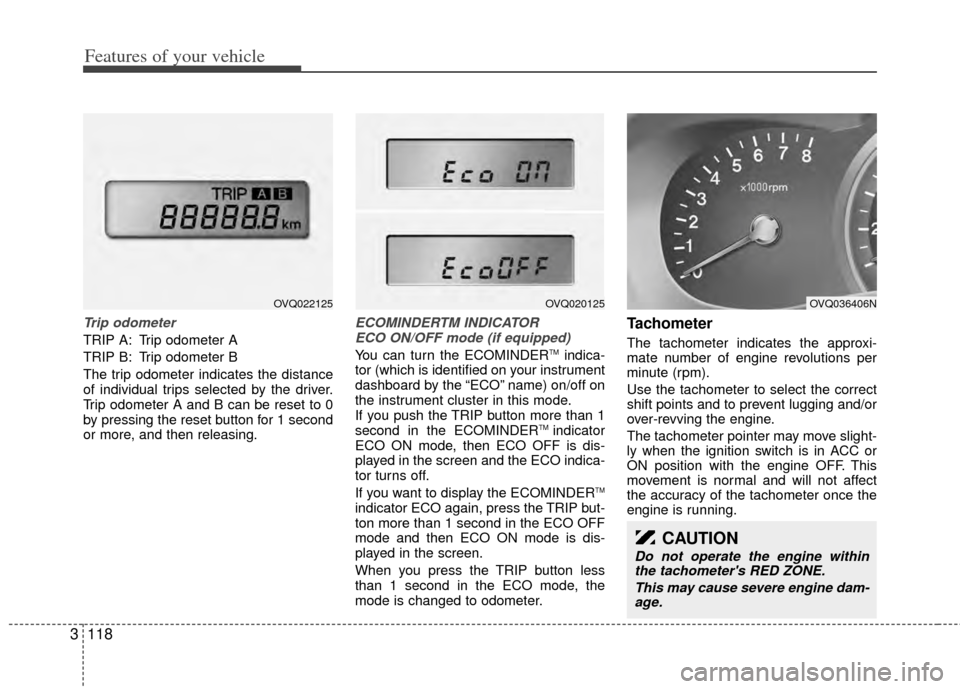
Trip odometer
TRIP A: Trip odometer A
TRIP B: Trip odometer B
The trip odometer indicates the distance
of individual trips selected by the driver.
Trip odometer A and B can be reset to 0
by pressing the reset button for 1 second
or more, and then releasing.
ECOMINDERTM INDICATOR
ECO ON/OFF mode (if equipped)
You can turn the ECOMINDERTMindica-
tor (which is identified on your instrument
dashboard by the “ECO” name) on/off on
the instrument cluster in this mode.
If you push the TRIP button more than 1
second in the ECOMINDER
TM indicator
ECO ON mode, then ECO OFF is dis-
played in the screen and the ECO indica-
tor turns off.
If you want to display the ECOMINDER
TM
indicator ECO again, press the TRIP but-
ton more than 1 second in the ECO OFF
mode and then ECO ON mode is dis-
played in the screen.
When you press the TRIP button less
than 1 second in the ECO mode, the
mode is changed to odometer.
Tachometer
The tachometer indicates the approxi-
mate number of engine revolutions per
minute (rpm).
Use the tachometer to select the correct
shift points and to prevent lugging and/or
over-revving the engine.
The tachometer pointer may move slight-
ly when the ignition switch is in ACC or
ON position with the engine OFF. This
movement is normal and will not affect
the accuracy of the tachometer once the
engine is running.
CAUTION
Do not operate the engine within the tachometer's RED ZONE.
This may cause severe engine dam-age.
OVQ036406NOVQ020125OVQ022125