2014 KIA Sedona stop start
[x] Cancel search: stop startPage 6 of 382
13
Introduction
Gasoline containing alcohol and
methanol
Gasohol, a mixture of gasoline and
ethanol (also known as grain alcohol),
and gasoline or gasohol containing
methanol (also known as wood alcohol)
are being marketed along with or instead
of leaded or unleaded gasoline. Pursuant
to EPA regulations, ethanol may be used
in your vehicle. Do not use gasohol con-
taining more than 10% ethanol, and do
not use gasoline or gasohol containing
any methanol. Ethanol provides less
energy than gasoline and it attracts
water, and it is thus likely to reduce your
fuel efficiency and could lower your MPG
results. Methanol may cause drivability
problems and damage to the fuel sys-
tem. Discontinue using gasohol of any
kind if drivability problems occur. Vehicle
damage or drivability problems may not
be covered by the manufacturer's war-
ranty if they result from the use of:
1. Gasoline or gasohol containingmethanol.
2. Leaded fuel or leaded gasohol.
Fuel Additives
Kia recommends that you use good qual-
ity gasolines treated with detergent addi-
tives such as TOP TIER Detergent
Gasoline, which help prevent deposit for-
mation in the engine. These gasolines
will help the engine run cleaner and
enhance performance of the Emission
Control System. For more information on
TOP TIER Detergent Gasoline, please
go to the website (www
.toptiergas.com).
For customers who do not use TOP Tier
Detergent Gasoline regularly, and have
problems starting or the engine does not
run smoothly, additives that you can buy
separately may be added to the gasoline.
If TOP TIER Detergent Gasoline is not
available, one bottle of additive added to
the fuel tank at every 12,000 km or every
engine oil change is recommended.
Additives are available from your author-
ized Kia dealer along with information on
how to use them. Do not mix other addi-
tives. No special break-in period is needed. By
following a few simple precautions for the
first 1,000 km (600 miles) you may add to
the performance, economy and life of
your vehicle.
Do not race the engine.
Do not maintain a single speed for long
periods of time, either fast or slow.
Varying engine speed is needed to
properly break-in the engine.
Avoid hard stops, except in emergen- cies, to allow the brakes to seat prop-
erly.
Avoid full-throttle starts.
CAUTION
Never use gasohol which contains methanol. Discontinue use of anygasohol product which impairs dri-vability.
VEHICLE BREAK-IN PROCESS
Page 18 of 382

39
Features of your vehicle
Your vehicle is equipped with an elec-
tronic engine immobilizer system to
reduce the risk of unauthorized vehicle
use.
Your immobilizer system is comprised of
a small transponder in the ignition key,
and antenna coil in the key cylinder and
Immobilizer Control Unit (or Smartra
Unit).
With this system, whenever you insert
your ignition key into the ignition switch
and turn it to ON, the antenna coil in the
ignition switch receives a signal from the
transponder in the ignition key and then
sends the signal to the ECU (Engine
Control Unit).
The ECU checks the signal whether the
ignition key is valid.
If the key is determined to be valid, the
engine will start.
If the key is determined to be invalid, the
engine will not start.
To deactivate the immobilizer
system:
Insert the ignition key into the key cylin-
der and turn it to the ON position.
To activate the immobilizer sys-
tem:
Turn the ignition key to the OFF position.
The immobilizer system activates auto-
matically. Without a valid ignition key for
your vehicle, the engine will not start.
✽ ✽NOTICE
When starting the engine, do not use the
key with other immobilizer keys around.
Otherwise the engine may not start or
may stop soon after it starts. Keep each
key separately not to have any malfunc-
tion after you receive your new vehicle.
✽ ✽NOTICE
If you need additional keys or lose your
keys, consult your authorized Kia dealer.
Limp home (override) procedure
When you turn the ignition key to the ON
position, if the IMMO indicator goes off
after blinking 5 times, your transponder
equipped in the ignition key is out of order.
You cannot start the engine without the
lime home procedure. To start the engine,
you have to input your password by using
the ignition switch.
The following procedure is how to input
your password of “2345” as an example.
1. Turn the ignition key to the ON position.
The IMMO indicator ( ) will blink 5
times and go off indicating the begin-
ning of the limp home procedure.
2. Turn the ignition key to the ACC posi- tion.
IMMOBILIZER SYSTEM (IF EQUIPPED)
CAUTION
Do not put metal accessories nearthe key or ignition switch.
The engine may not start for themetal accessories may interrupt thetransponder signal from normally transmitting.
WARNING
In order to prevent theft of your
vehicle, do not leave spare keys
anywhere in your vehicle. Your
Immobilizer password is a cus-
tomer unique password and should
be kept confidential. Do not leave
this number anywhere in your vehi-
cle.
Page 31 of 382
Features of your vehicle
22
3
OVQ036004
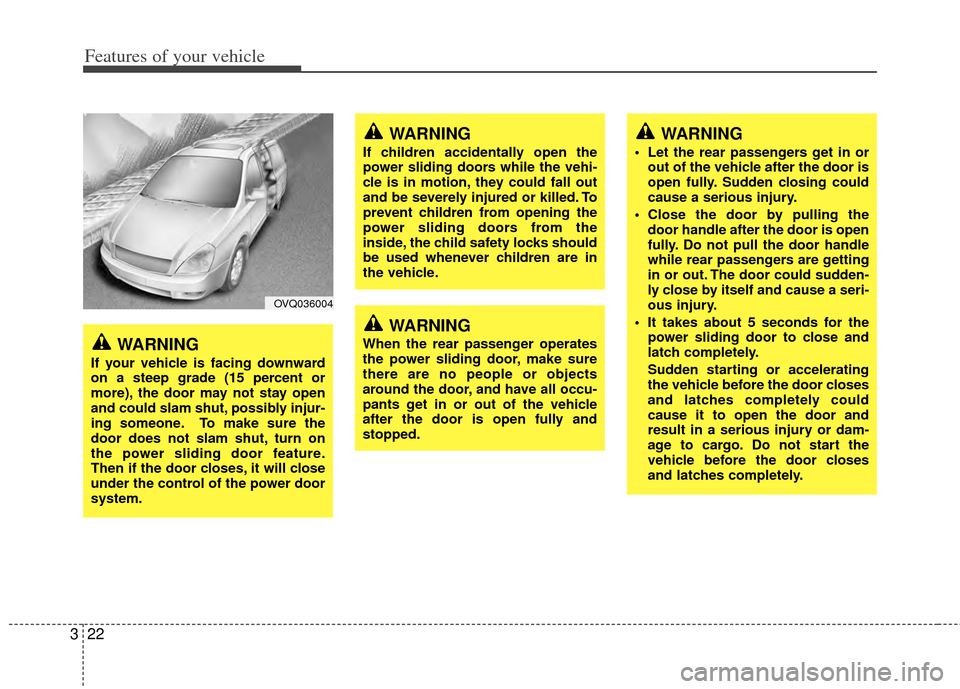
WARNING
If your vehicle is facing downward
on a steep grade (15 percent or
more), the door may not stay open
and could slam shut, possibly injur-
ing someone. To make sure the
door does not slam shut, turn on
the power sliding door feature.
Then if the door closes, it will close
under the control of the power door
system.
WARNING
If children accidentally open the
power sliding doors while the vehi-
cle is in motion, they could fall out
and be severely injured or killed. To
prevent children from opening the
power sliding doors from the
inside, the child safety locks should
be used whenever children are in
the vehicle.
WARNING
When the rear passenger operates
the power sliding door, make sure
there are no people or objects
around the door, and have all occu-
pants get in or out of the vehicle
after the door is open fully and
stopped.
WARNING
Let the rear passengers get in or
out of the vehicle after the door is
open fully. Sudden closing could
cause a serious injury.
Close the door by pulling the door handle after the door is open
fully. Do not pull the door handle
while rear passengers are getting
in or out. The door could sudden-
ly close by itself and cause a seri-
ous injury.
It takes about 5 seconds for the power sliding door to close and
latch completely.
Sudden starting or accelerating
the vehicle before the door closes
and latches completely could
cause it to open the door and
result in a serious injury or dam-
age to cargo. Do not start the
vehicle before the door closes
and latches completely.
Page 115 of 382

Features of your vehicle
106
3
Power steering
Power steering uses energy from the
engine to assist you in steering the vehi-
cle. If the engine is off or if the power
steering system becomes inoperative,
the vehicle may still be steered, but it will
require increased steering effort.
Should you notice any change in the
effort required to steer during normal
vehicle operation, have the power steer-
ing checked by an Authorized Kia Dealer.
✽ ✽
NOTICE
If the vehicle is parked for extended
periods outside in cold weather (below -
10 °C/14 °F), the power steering may
require increased effort when the engine
is first started. This is caused by
increased fluid viscosity due to the cold
weather and does not indicate a mal-
function.
When this happens, increase the engine
RPM by depressing accelerator until the
RPM reaches 1,500 rpm then release or
let the engine idle for two or three min-
utes to warm up the fluid.
STEERING WHEEL
CAUTION
Never hold the steering wheel
against a stop (extreme right orleft turn) for more than 5 secondswith the engine running. Holding the steering wheel for more than5 seconds in either position may cause damage to the power steer-ing pump.
If the power steering drive belt breaks or if the power steeringpump malfunctions, the steering effort will greatly increase.
Page 138 of 382

3129
Features of your vehicle
Engine oil pressure
warning
This warning light indicates the engine oil
pressure is low.
If the warning light illuminates while dri-
ving:
1. Drive safely to the side of the road andstop.
2. With the engine off, check the engine oil level. If the level is low, add oil as
required.
If the warning light remains on after
adding oil or if oil is not available, call an
Authorized Kia Dealer.
Parking brake & brake
fluid warning
Parking brake warning
This light is illuminated when the parking
brake is applied with the ignition switch in
the START or ON position. The warning
light should go off when the parking
brake is released while engine is run-
ning.
Low brake fluid level warning
If the warning light remains on, it may
indicate that the brake fluid level in the
reservoir is low.
If the warning light remains on:
1. Drive carefully to the nearest safe location and stop your vehicle.
2. With the engine stopped, check the brake fluid level immediately and add
fluid as required. Then check all brake
components for fluid leaks.
3. Do not drive the vehicle if leaks are found, the warning light remains on or
the brakes do not operate properly.
Have it towed to any Authorized Kia
Dealer for a brake system inspection
and necessary repairs. To check bulb operation, check whether
the parking brake and brake fluid warning
light illuminates when the ignition switch
is in the ON position.
Parking start warning chime
If you drive over 10 km/h (6 mph) with the
parking brake applied, the parking start
warning chime will sound.
Front fog light indicator
(if equipped)
This light comes on when the front fog
lights are ON.
Shift pattern indicators
(if equipped)
The individual indicators illuminate to
show the automatic transaxle shift lever
selection.
CAUTION
If the engine is not stopped imme-
diately after the engine oil pressurewarning light is illuminated, severedamage could result.
WARNING
Driving the vehicle with a warning
light on is dangerous. If the brake
warning light remains on, have the
brakes checked and repaired imme-
diately by an authorized Kia Dealer.
Page 151 of 382
Features of your vehicle
142
3
✽
✽
NOTICE
If there is heavy accumulation of snow
or ice on the windshield, defrost the
windshield for about 10 minutes, or
until the snow and/or ice is removed
before using the windshield wipers to
ensure proper operation.
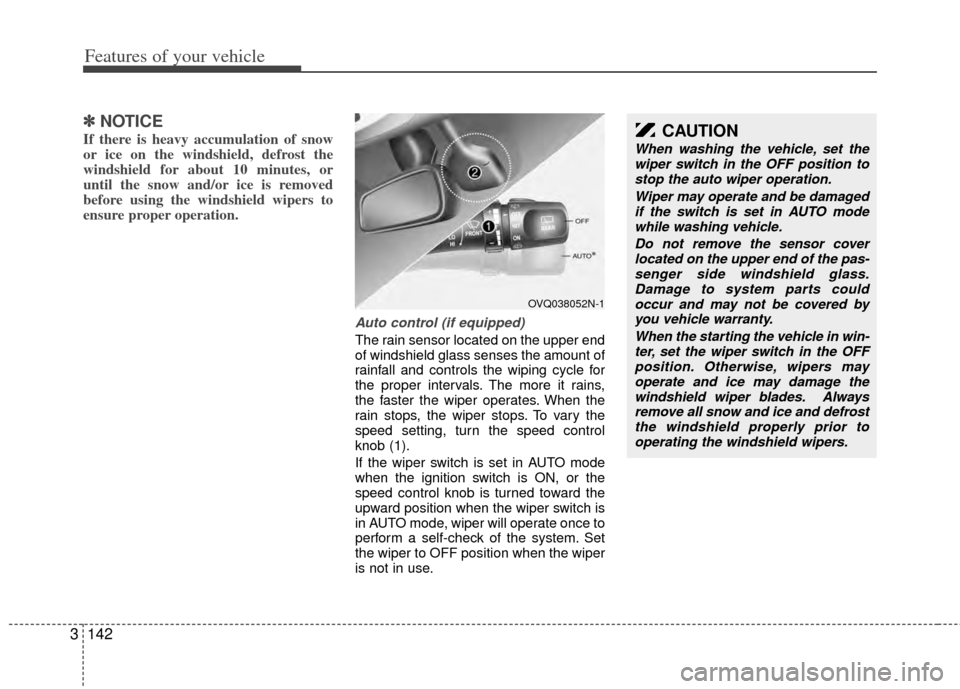
Auto control (if equipped)
The rain sensor located on the upper end
of windshield glass senses the amount of
rainfall and controls the wiping cycle for
the proper intervals. The more it rains,
the faster the wiper operates. When the
rain stops, the wiper stops. To vary the
speed setting, turn the speed control
knob (1).
If the wiper switch is set in AUTO mode
when the ignition switch is ON, or the
speed control knob is turned toward the
upward position when the wiper switch is
in AUTO mode, wiper will operate once to
perform a self-check of the system. Set
the wiper to OFF position when the wiper
is not in use.
OVQ038052N-1
CAUTION
When washing the vehicle, set the
wiper switch in the OFF position tostop the auto wiper operation.
Wiper may operate and be damagedif the switch is set in AUTO modewhile washing vehicle.
Do not remove the sensor coverlocated on the upper end of the pas- senger side windshield glass.Damage to system parts could occur and may not be covered byyou vehicle warranty.
When the starting the vehicle in win-ter, set the wiper switch in the OFFposition. Otherwise, wipers mayoperate and ice may damage the windshield wiper blades. Alwaysremove all snow and ice and defrost the windshield properly prior tooperating the windshield wipers.
Page 211 of 382
Features of your vehicle
202
3
Using RADIO, SETUP, VOLUME
and AUDIO CONTROL
1. FM/AM Button
The FM/AM button toggles between FM
and AM. Listed below are the paths as
the system switches from FM to AM and
back to FM.
FM/AM : FM1
➟FM2➟AM➟FM1...
2. SEEK Button
When the [SEEK ] is pressed, it will
automatically tune to the next lower
station.
When the [SEEK ] is pressed, it will automatically tune to the next higher
station.
3.POWER Button & VOLUMEKnob
Turns the audio system on/off whenthe IGNITION SWITCH is on ACC or
ON.
If the knob is turned clockwise/counte clockwise, the volume will increase
/decrease.
4. SCAN Button
When the button is pressed, it auto-matically scans the radio stations
upwards.
The SCAN feature steps through each station, starting from the initial station,
for 5 seconds.
Press the [SCAN] button again to stop the scan feature and to listen to the
currently selected channel.
5. MUTE Button
When the button is pressed, stops sound
and “Audio Mute” is displayed on LCD.
6. SETUP Button
Press this button to enter SETUP mode,
If no action is taken for 8 seconds, it will
return to previous mode.
In “SETUP” mode, rotate the TUNE knob
to move the cursor between items, and
push the TUNE knob to select.
Select whether long file names are
scrolled continuously (“ON”) or just once
(“OFF”).
Select this item to turn the SDVC(Speed
Dependent Volume Control) feature ON
or OFF. If it is turned ON, volume level is
adjusted automatically according to the
vehicle speed.
Select default display of SIRIUS mode.
“Category/Channel name” or “Artist/Song
Title” can be selected.
Select this item to enter
Bluetooth®
Wireless Technology setup mode. Refer
to “Bluetooth®Wireless Technology
PHONE OPERATION” section for
detailed information.
NOTE:
The Bluetooth®word mark and logos
are registered trademarks owned by
Bluetooth SIG, Inc. and any use of
such marks by Kia is under license.
Other trademarks and trade names
are those of their respective owners.
A
Bluetooth®enabled cell phone is
required to use Bluetooth®wireless
technology.
Page 226 of 382
3217
Features of your vehicle
Using SIRIUS Satellite Radio
Your Kia vehicle is equipped with a 3
month complimentary period of SIRIUS
Satellite Radio so you have access to over
130 channels of music, information, and
entertainment programming.
Activation
In order to extend or reactivate your sub-
scription to SIRIUS Satellite Radio, you
will need to contact SIRIUS Customer
Care at 1-888-539-7474. Have your 12
digit SID (Sirius Identification Number)/ESN
(Electronic Serial Number) ready. To
retrieve the SID/ESN, turn on the radio,
press the [SAT] button and tune to chan-
nel zero. Please note that the vehicle will
need to be turned on, in Sirius mode, and
have an unobstructed view of the sky in
order for the radio to receive the activa-
tion signal.
1. SAT Button(SIRIUS Satellite Radio)
Press the [SAT] button to switch to SIR-
IUS Satellite Radio. It cycles through the
different bands as noted below.
SAT1
➟ SAT2 ➟ SAT3 ➟ SAT1...
2. SEEK Button
Press [ SEEK ] button for less
than 0.8 seconds to select previous or
next channel.
Press [ SEEK ] button for 0.8 seconds or longer to continuously
move to previous or next channel.
If "CATEGORY" Icon is displayed at the top of the screen, channel up/down
is done through the channels within
current category.
3. PRESET Buttons
Press [1]~[6] buttons less than 0.8 sec-onds to play the channel saved in each
button.
Press [1]~[6] buttons for 0.8 seconds or longer to save current channel to the
respective button with a beep.
4. SCAN Button
When the [SCAN] button is pressed, itautomatically scans the radio stations
upwards.
The SCAN feature steps through every channel, starting from the initial chan-
nel, for ten seconds.
Press the [SCAN] button again to stop the scan feature and to listen to the
currently selected channel.
If "CATEGORY" Icon is displayed at the top of the screen, channel chang-
ing is done through the channels with-
in current category.
5. TUNE knob & ENTER button
Rotate clockwise to increase the chan-nel number or to scroll down the cate-
gory list.
Rotate counterclockwise to decrease the channel number or to scroll up the
category list.
Press this to make selection of chan- nels or items.