2014 HONDA RIDGELINE display
[x] Cancel search: displayPage 330 of 422
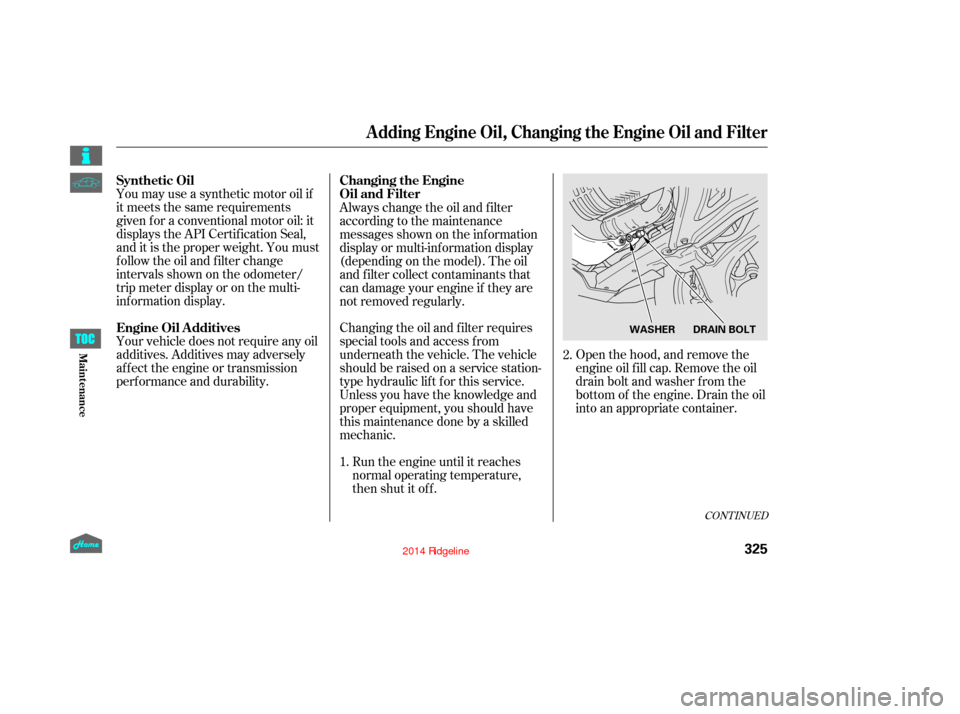
Open the hood, and remove the
engine oil f ill cap. Remove the oil
drain bolt and washer f rom the
bottom of the engine. Drain the oil
into an appropriate container.
You may use a synthetic motor oil if
it meets the same requirements
given f or a conventional motor oil: it
displays the API Certif ication Seal,
and it is the proper weight. You must
f ollow the oil and f ilter change
intervals shown on the odometer/
trip meter display or on the multi-
inf ormation display.
Your vehicle does not require any oil
additives. Additives may adversely
af f ect the engine or transmission
perf ormance and durability.
Changing the oil and f ilter requires
special tools and access f rom
underneath the vehicle. The vehicle
should be raised on a service station-
type hydraulic lif t f or this service.
Unless you have the knowledge and
proper equipment, you should have
this maintenance done by a skilled
mechanic.
Run the engine until it reaches
normal operating temperature,
then shut it off.
Always change the oil and f ilter
according to the maintenance
messages shown on the inf ormation
display or multi-inf ormation display
(depending on the model). The oil
and f ilter collect contaminants that
can damage your engine if they are
not removed regularly.
1.
2.
CONT INUED
Synthetic Oil
Changing the Engine
Oil and Filter
Engine Oil A dditives
A dding Engine Oil, Changing the Engine Oil and Filter
325
WASHER DRAIN BOLT
12/08/09 16:42:00 31SJC670_332
Maint enance
Page 333 of 422
Make sure the engine and radiator
are cool.
When the radiator and engine are
cool, relieve any pressure in the
cooling system by turning the
radiator cap counterclockwise,
without pressing down.
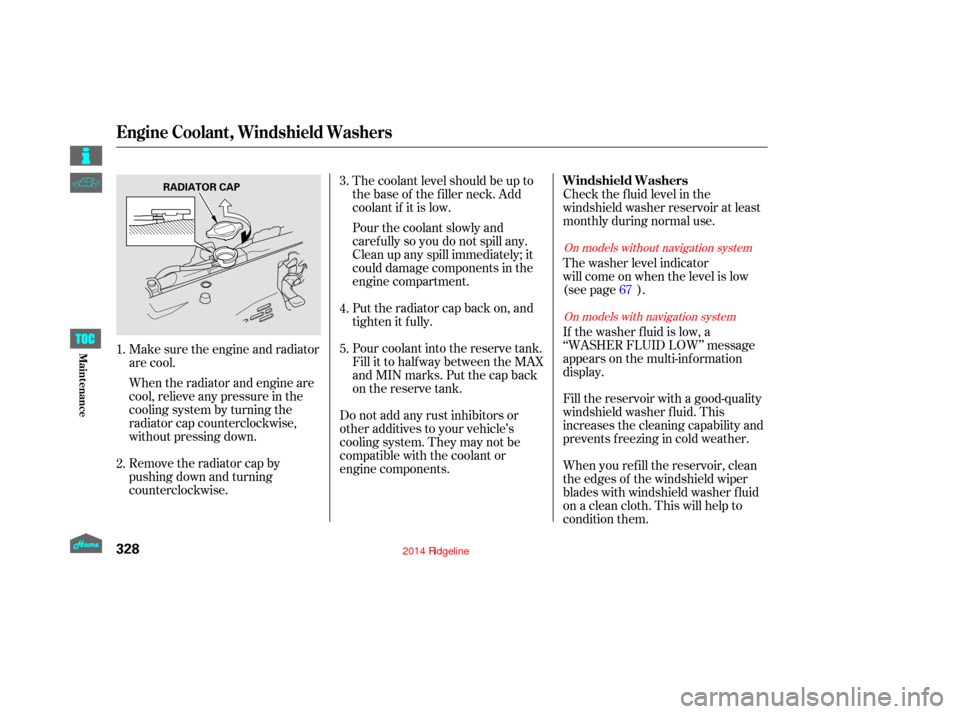
Remove the radiator cap by
pushing down and turning
counterclockwise.The coolant level should be up to
the base of the f iller neck. Add
coolant if it is low.
Pourthecoolantslowlyand
caref ully so you do not spill any.
Clean up any spill immediately; it
could damage components in the
engine compartment.
Put the radiator cap back on, and
tighten it fully.
Pour coolant into the reserve tank.
Fill it to half way between the MAX
and MIN marks. Put the cap back
on the reserve tank.
Do not add any rust inhibitors or
other additives to your vehicle’s
cooling system. They may not be
compatible with the coolant or
engine components. Check the f luid level in the
windshield washer reservoir at least
monthly during normal use.
Fill the reservoir with a good-quality
windshield washer fluid. This
increases the cleaning capability and
prevents freezing in cold weather. The washer level indicator
will come on when the level is low
(see page
).
If the washer fluid is low, a
‘‘WASHER FLUID LOW’’ message
appears on the multi-information
display.
When you ref ill the reservoir, clean
the edges of the windshield wiper
blades with windshield washer f luid
on a clean cloth. This will help to
condition them.
3.
4.
5.
1.
2. 67
On models without navigation system
On models with navigation system
Windshield Washers
Engine Coolant, Windshield Washers
328
RADIATOR CAP
12/08/09 16:42:27 31SJC670_335
Maint enance
Page 334 of 422
CONT INUED
Check the f luid level with the engine
at normal operating temperature.Park the vehicle on level ground.
Start the engine, let it run until the
radiator f an comes on, then shut
of f the engine. For accurate
results, wait about 60 seconds (but
no longer than 90 seconds) bef ore
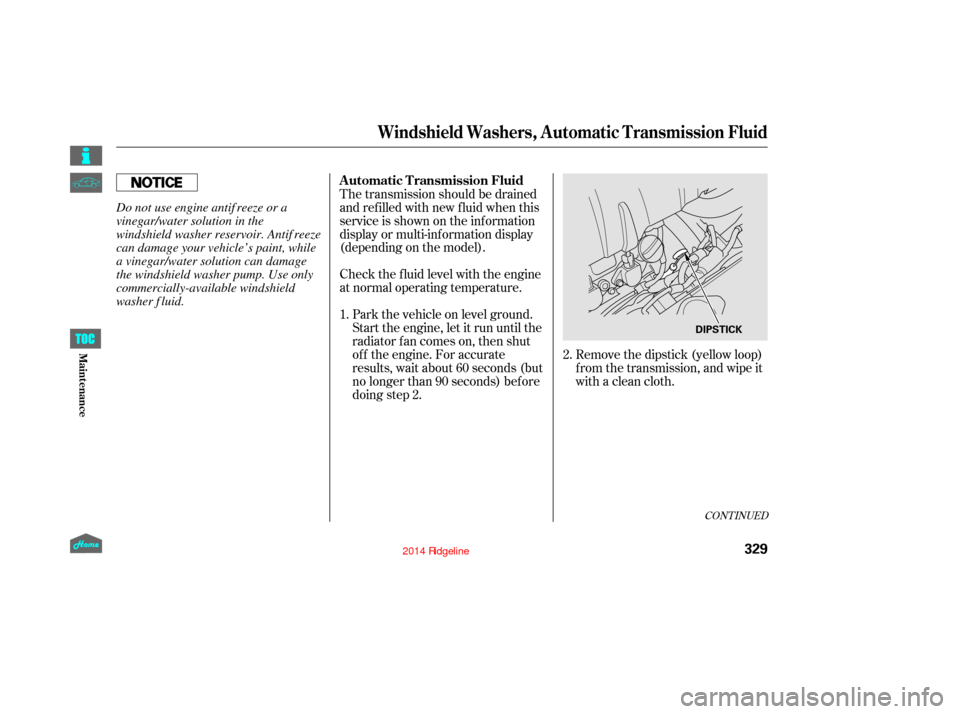
doing step 2. Remove the dipstick (yellow loop)
f rom the transmission, and wipe it
with a clean cloth.
The transmission should be drained
and ref illed with new f luid when this
service is shown on the inf ormation
display or multi-inf ormation display
(depending on the model).
1.
2.
Windshield Washers, A utomatic T ransmission Fluid
Automatic Transmission Fluid
329
DIPSTICK
Do not use engine antif reeze or a
vinegar/water solution in the
windshield washer reservoir. Antif reeze
can damage your vehicle’s paint, while
a vinegar/water solution can damage
the windshield washer pump. Use only
commercially-available windshield
washer f luid.
12/08/09 16:42:33 31SJC670_336
Maint enance
Page 336 of 422
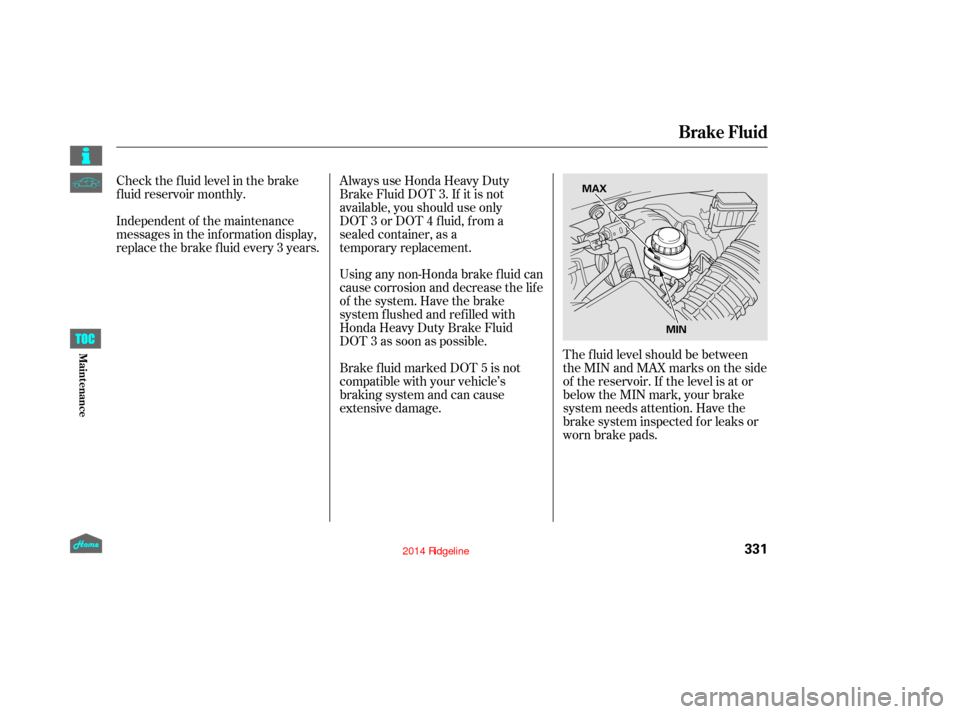
The f luid level should be between
theMINandMAXmarksontheside
of the reservoir. If the level is at or
below the MIN mark, your brake
system needs attention. Have the
brake system inspected f or leaks or
worn brake pads.
Using any non-Honda brake f luid can
cause corrosion and decrease the lif e
of the system. Have the brake
system f lushed and ref illed with
Honda Heavy Duty Brake Fluid
DOT 3 as soon as possible.
Brake f luid marked DOT 5 is not
compatible with your vehicle’s
braking system and can cause
extensive damage.
Check the f luid level in the brake
f luid reservoir monthly.
Always use Honda Heavy Duty
Brake Fluid DOT 3. If it is not
available, you should use only
DOT 3 or DOT 4 fluid, from a
sealed container, as a
temporary replacement.
Independent of the maintenance
messages in the inf ormation display,
replace the brake f luid every 3 years.
Brake Fluid
331
MAX
MIN
12/08/09 16:42:48 31SJC670_338
Maint enance
Page 347 of 422

The floor mats that came
with your vehicle hook over the
floor mat anchors. This keeps
the floor mats from sliding
forward, possibly interfering
with the pedals, or backwards,
making the front passenger’s
weight sensors ineffective.
If you remove a floor mat, make sure
to re-anchor it when you put it back
in your vehicle.A non-Honda f loor mat may not f it
your vehicle properly. This could
prevent the proper operation of the
f olding rear seats and the passenger’s
seat weight sensors. We recommend
using genuine Honda f loor mats. Do
not put additional f loor mats on top
of the anchored mats.
This filter removes the dust and
pollen that is brought
in from the outside through the
heating and cooling system/
climate control system.
Have your dealer replace the filter
when this service is indicated by a
maintenance message on the
information display or multi-
information display (depending on
the models). It should be replaced
every 15,000 miles (24,000 km) if
you drive primarily in urban areas
that have high concentrations of
soot in the air, or if the flow
from the heating and cooling
system/climate control system
becomes less than usual.
Floor Mats
Dust and Pollen Filter
Floor Mats, Dust and Pollen Filter
342
12/08/09 16:44:17 31SJC670_349
Maint enance
Page 353 of 422
In addition to proper inf lation,
correct wheel alignment helps to
decrease tire wear. If you f ind a tire
is worn unevenly, have your dealer
check the wheel alignment.
Have your dealer check the tires if
you feel a consistent vibration while
driving. A tire should always be
rebalanced if it is removed from the
wheel. When you have new tires
installed, make sure they are
balanced. This increases riding
comfort and tire life. For best
results, have the installer perform a
dynamic balance.
The service lif e of your tires is
dependent on many f actors,
including, but not limited to, driving
habits, road conditions, vehicle
loading, inf lation pressure,
maintenance history, speed, and
environmental conditions (even
when the tires are not in use).
In addition to your regular
inspections and inf lation pressure
maintenance, it is recommended that
you have annual inspections
perf ormed once the tires reach f ive
years old. It is also recommended
that all tires, including the spare, be
removed from service after 10 years
from the date of manufacture,
regardless of their condition or state
of wear.
The last f our digits of the TIN (tire
identif ication number) are f ound on
the sidewall of the tire and indicate
the date of manufacture (See
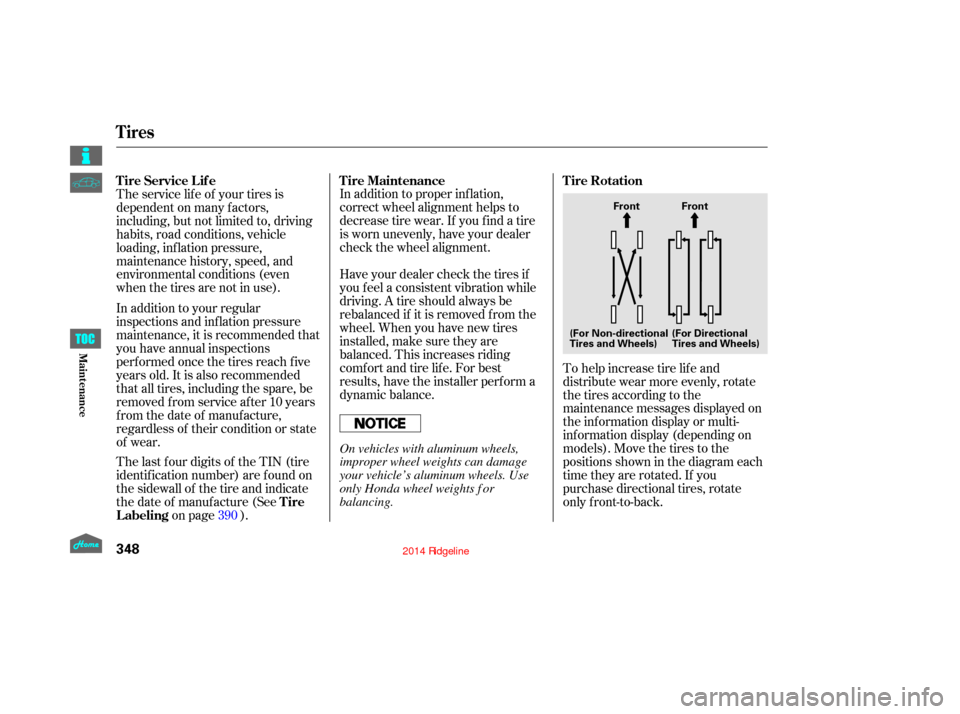
on page ). To help increase tire lif e and
distribute wear more evenly, rotate
the tires according to the
maintenance messages displayed on
the inf ormation display or multi-
inf ormation display (depending on
models). Move the tires to the
positions shown in the diagram each
time they are rotated. If you
purchase directional tires, rotate
only f ront-to-back.
390 Tire Rotation
T ire Maintenance
Tire Service Lif e
Tire
Labeling
Tires
348
Front
(For Non-directional
Tires and Wheels) (For Directional
Tires and Wheels)Front
On vehicles with aluminum wheels,
improper wheel weights can damage
your vehicle’s aluminum wheels. Use
only Honda wheel weights f or
balancing.
12/08/09 16:45:17 31SJC670_355
Maint enance
Page 359 of 422
Block the rear wheels.
If the vehicle is to be stored f or a
longer period, it should be
supported on jackstands so the
tires are of f the ground.
Leave one window open slightly (if
the vehicle is being stored
indoors).
Disconnect the battery.
Support the f ront wiper blade
arms with a f olded towel or rag so
they do not touch the windshield.
To minimize sticking, apply a
silicone spray lubricant to all door,
In-Bed Trunk lid, and tailgate seals.
Also, apply a vehicle body wax to
the painted surfaces that mate
with the door, In-Bed Trunk lid
and tailgate seals.
If your vehicle’s battery is
disconnected, or goes dead, the time
setting may be lost. To reset the time,
see page .
If your vehicle’s battery is
disconnected or goes dead, the audio
system may disable itself . The next
timeyouturnontheradioyouwill
see ‘‘CODE’’ in the f requency display.
Use the preset bars to enter the code
(see page ).
The navigation system will also
disableitself.Thenexttimeyouturn
on the ignition switch, the system
will require you to enter a PIN
bef ore it can be used. Ref er to the
navigation system manual.
If you need to park your vehicle f or
an extended period (more than 1
month), there are several things you
should do to prepare it f or storage.
Proper preparation helps prevent
deterioration and makes it easier to
get your vehicle back on the road. If
possible, store your vehicle indoors.
Leave the parking brake off. Put
the transmission in Park. Cleantheinterior.Makesurethe
carpeting, floor mats, etc., are
completely dry. Wash and dry the exterior
completely. Fill the f uel tank.
207
205On models without navigation system
On models with navigation systemVehicle Storage
Checking the Battery, Vehicle Storage
354
12/08/09 16:46:02 31SJC670_361
Maint enance
Page 363 of 422

Use the compact spare tire as a
temporary replacement only. Get
your regular tire repaired or replaced,
and put it back on your vehicle as
soon as you can.
Check the air pressure of the
compact spare tire every time you
check the other tires. It should be
inf lated to:
Follow these precautions:Replace the tire when you can see
the tread wear indicator bars. The
replacement tire should be the same
sizeanddesign,mountedonthe
same wheel. The spare tire is not
designed to be mounted on a regular
wheel, and the spare wheel is not
designed f or mounting a regular tire.
Never exceed 50 mph (80 km/h).
This tire gives a harsher ride and
less traction on some road
surf aces. Use greater caution
while driving.
Do not mount snow chains on a
compact spare. Do not use your compact spare
tire on another vehicle unless it is
thesamemakeandmodel.
The low tire pressure indicator
comes on and stays on af ter you
replace the flat tire with the compact
spare tire. Af ter several miles
(kilometers) driving with the
compact spare tire, the TPMS
indicator comes on and the low tire
pressure indicator goes of f .
After the flat tire is replaced with the
spare tire, the low tire pressure/
TPMS indicator stays on. After
several miles (kilometers) driving
with the spare, this indicator begins
to f lash, then stays on again. You will
also see a ‘‘CHECK TPMS
SYSTEM’’ message on the multi-
inf ormation display (see page ). 282
On models without navigation system
On models with navigation system
Compact Spare Tire
358
INDICATOR LOCATION MARK
TREAD WEAR INDICATOR BAR
60 psi (420 kPa , 4.2 kgf/cm)
12/08/09 16:46:20 31SJC670_365
T aking Care of t he Unexpect ed