Page 51 of 422

When not using the LATCH system,
all child seats must be secured to the
vehicle with the lap part of a lap/
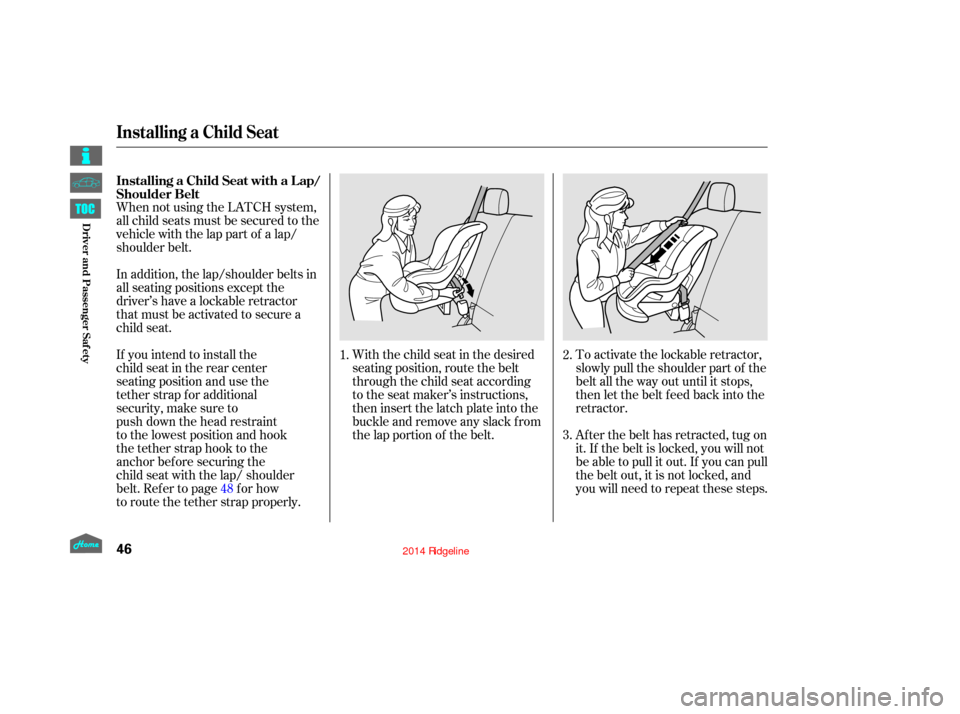
shoulder belt.With the child seat in the desired
seating position, route the belt
through the child seat according
to the seat maker’s instructions,
then insert the latch plate into the
buckle and remove any slack f rom
the lap portion of the belt.To activate the lockable retractor,
slowly pull the shoulder part of the
belt all the way out until it stops,
then let the belt f eed back into the
retractor.
Af ter the belt has retracted, tug on
it. If the belt is locked, you will not
be able to pull it out. If you can pull
thebeltout,itisnotlocked,and
you will need to repeat these steps.
In addition, the lap/shoulder belts in
all seating positions except the
driver’s have a lockable retractor
that must be activated to secure a
child seat.
If you intend to install the
child seat in the rear center
seating position and use the
tether strap for additional
security, make sure to
push down the head restraint
to the lowest position and hook
the tether strap hook to the
anchor before securing the
child seat with the lap/ shoulder
belt. Refer to page for how
to route the tether strap properly.
1.
2.
3.
48
Installing a Child Seat with a L ap/
Shoulder Belt
Installing a Child Seat
46
12/08/09 16:05:15 31SJC670_053
Driver and Passenger Saf ety
Page 129 of 422

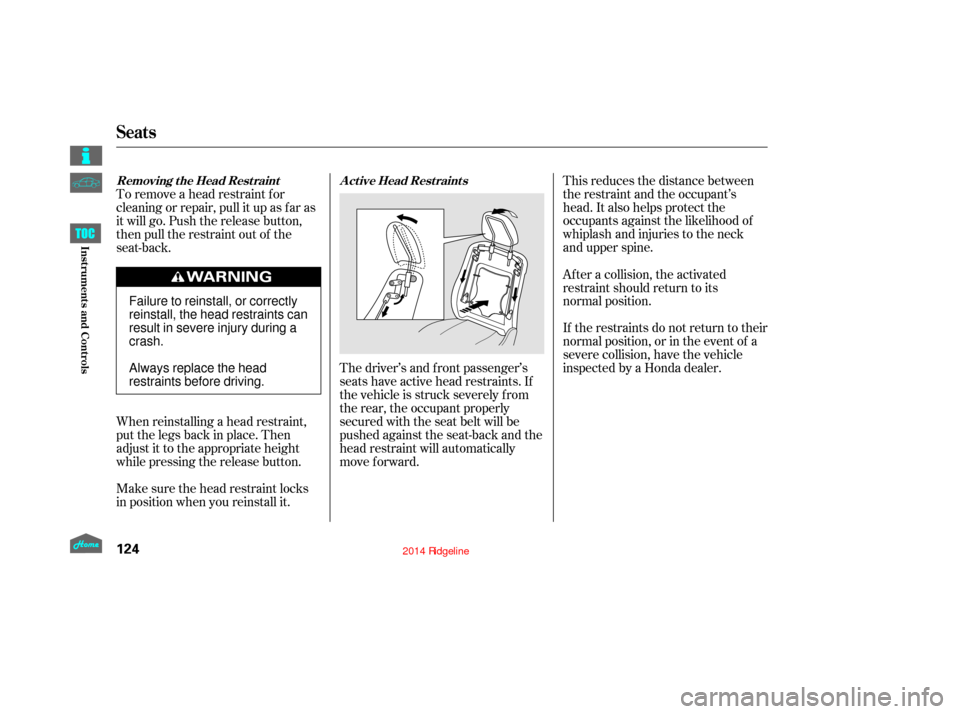
The driver’s and f ront passenger’s
seats have active head restraints. If
the vehicle is struck severely f rom
the rear, the occupant properly
secured with the seat belt will be
pushed against the seat-back and the
head restraint will automatically
move forward.This reduces the distance between
the restraint and the occupant’s
head. It also helps protect the
occupants against the likelihood of
whiplash and injuries to the neck
and upper spine.
To remove a head restraint for
cleaning or repair, pull it up as far as
it will go. Push the release button,
then pull the restraint out of the
seat-back.
If the restraints do not return to their
normal position, or in the event of a
severe collision, have the vehicle
inspected by a Honda dealer. After a collision, the activated
restraint should return to its
normal position.
Make sure the head restraint locks
in position when you reinstall it. When reinstalling a head restraint,
put the legs back in place. Then
adjust it to the appropriate height
while pressing the release button.
Seats
A ct ive Head Rest raint s
Removing t he Head Rest raint
124
Failure to reinstall, or correctly
reinstall, the head restraints can
result in severe injury during a
crash.
Always replace the head
restraints before driving.
12/08/09 16:15:44 31SJC670_131
Inst rument s and Cont rols
Page 130 of 422
CONT INUED
For a head restraint system to work
properly:Do not hang any items on the head
restraints, or f rom the restraint
legs.
Do not place any object between
an occupant and the seat-back.
Install each restraint in its proper
location.
Only use genuine Honda
replacement head restraints. The lef t and right rear seat cushions
can be lifted up separately to make
room f or cargo.
To f old a rear seat cushion, pull up
the lever on the outside of the
cushion. The seat cushion pops up,
and the seat legs store underneath it.
Push the cushion firmly against the
seat-back to lock it in place.
Remove any items from the seat
beforeyoufolduptheseatcushion. Folding the Rear Seats
Seats
125
12/08/09 16:15:52 31SJC670_132
Inst rument s and Cont rols
Page 347 of 422

The floor mats that came
with your vehicle hook over the
floor mat anchors. This keeps
the floor mats from sliding
forward, possibly interfering
with the pedals, or backwards,
making the front passenger’s
weight sensors ineffective.
If you remove a floor mat, make sure
to re-anchor it when you put it back
in your vehicle.A non-Honda f loor mat may not f it
your vehicle properly. This could
prevent the proper operation of the
f olding rear seats and the passenger’s
seat weight sensors. We recommend
using genuine Honda f loor mats. Do
not put additional f loor mats on top
of the anchored mats.
This filter removes the dust and
pollen that is brought
in from the outside through the
heating and cooling system/
climate control system.
Have your dealer replace the filter
when this service is indicated by a
maintenance message on the
information display or multi-
information display (depending on
the models). It should be replaced
every 15,000 miles (24,000 km) if
you drive primarily in urban areas
that have high concentrations of
soot in the air, or if the flow
from the heating and cooling
system/climate control system
becomes less than usual.
Floor Mats
Dust and Pollen Filter
Floor Mats, Dust and Pollen Filter
342
12/08/09 16:44:17 31SJC670_349
Maint enance