Page 252 of 458
5.Locate the vertical adjuster on eachheadlamp. Using a Phillips #2screwdriver, turn the adjuster eitherclockwise or counterclockwise in orderto adjust the vertical aim of theheadlamp. The horizontal edge of thebrighter light should touch thehorizontal reference line.
6.Close the hood and turn off the lamps.
Horizontal Aim Adjustment
Horizontal aim is not required for thisvehicle and is not adjustable.
REMOVING A HEADLAMP
1.Make sure the headlamp control is inthe off position and open the hood.
2.Remove the six fasteners securing thefront fascia to the front trim cover.
3.Remove the three bumper cover upperscrews.
4.Remove the fastener at the inboardside of the headlamp you are servicing.
249Fusion (CC7) , enUSAMaintenanceE145594 E159693
Page 253 of 458
5.Remove the two headlamp assemblyscrews.
6.Remove the lower three wheel housingfasteners.
7.Remove the three front bumper coverlower fasteners, only on the side of theheadlamp you are servicing.
8.Separate the front bumper cover fromthe fender and pull the fender outward1.2 inches (3 centimeters).
9.From the front of the vehicle, pull thefront bumper cover forward 4 inches(10 centimeters).
10.Carefully pull the headlamp assemblyoutward to disengage it from thelower fixing point.
250Fusion (CC7) , enUSAMaintenanceE159694 E159695 E159696 E159697 E159698 E159699
Page 254 of 458

11.Carefully lift the headlamp andremove it from the vehicle.
12.Disconnect the electrical connector.
CHANGING A BULB
Lamp Assembly Condensation
Exterior lamps are vented toaccommodate normal changes in pressure.Condensation can be a natural by-productof this design. When moist air enters thelamp assembly through the vents, there isa possibility that condensation can occurwhen the temperature is cold. Whennormal condensation occurs, a thin film ofmist can form on the interior of the lens.The thin mist eventually clears and exitsthrough the vents during normal operation.Clearing time may take as long as 48 hoursunder dry weather conditions.
Examples of acceptable condensation are:
•Presence of thin mist (no streaks, dripmarks or droplets).
•Fine mist covers less than 50% of thelens.
Examples of unacceptable moisture(usually caused by a lamp water leak) are:
•Water puddle inside the lamp.
•Large water droplets, drip marks orstreaks present on the interior of thelens.
Take your vehicle to an authorized dealerfor service if any of the above conditionsof unacceptable moisture are present.
Replacing the Headlamp Bulbs
WARNING
Handle a halogen headlamp bulbcarefully and keep out of children’sreach. Grasp the bulb by only itsplastic base and do not touch the glass.The oil from your hand could cause thebulb to break the next time the headlampsare operated.
Note:If the bulb is accidentally touched, itshould be cleaned with rubbing alcoholbefore being used.
Headlamp assembly:
A.Side marker lamp bulb
B.High beam headlamp bulb
C.Low beam headlamp bulb
D.Front parking/Turn signal lamp bulb
Replacing the High Beam HeadlampBulb
1.Remove the headlamp assembly.
2.Remove the service cap.
3.Disconnect the electrical connector.
4.Turn the bulb counterclockwise andremove it from the headlampassembly.
5.Install the new bulb in reverse order.
251Fusion (CC7) , enUSAMaintenanceABCDE159753
Page 255 of 458

Replacing the Low Beam HeadlampBulb
1.Remove the headlamp assembly.
2.Remove the service cap.
3.Disconnect the electrical connector.
4.Release the retainer spring and removeit from the headlamp assembly.
5.Install the new bulb in reverse order.
Replacing the Front Parking/TurnSignal Lamp Bulb
1.Remove the headlamp assembly.
2.Turn the bulb assemblycounterclockwise and remove it fromthe headlamp assembly.
3.Separate the bulb from the bulbsocket.
4.Install the new bulb in reverse order.
Replacing the Side Marker Lamp Bulb
1.Remove the headlamp assembly.
2.Remove the service cap.
3.Depress the tabs on the socket andremove the socket and bulb together.
4.Separate the bulb from the bulbsocket.
5.Install the new bulb in reverse order.
Replacing the Tail, Brake, High-Mount Brake Lamp, and TurnSignal Lamp Bulbs
These lamps are designed with LED lightsources. For replacement, see yourauthorized dealer.
Replacing a Reverse Lamp Bulb
1.Make sure the lighting control is in theoff position.
2.Open the trunk deck lid.
3.Remove the push pins and repositionthe inner body side trim.
4.Remove the three lamp assembly nuts.
5.Gently pull the lamp assembly awayfrom the vehicle.
252Fusion (CC7) , enUSAMaintenanceE145777 E145778
Page 256 of 458
6.Turn the bulb holder counterclockwiseand remove the bulb holder.
7.Remove the bulb from the bulb holder.
Install the new bulb in reverse order.
Replacing the License Plate LampBulb
1.Carefully release the spring clip.
2.Remove the lamp.
3.Remove the bulb.
Install the new bulb in reverse order.
BULB SPECIFICATION CHART
Replacement bulbs are specified in thechart below. Headlamp bulbs must bemarked with an authorized “D.O.T.” forNorth America to make sure they have theproper lamp performance, light brightness,light pattern, and safe visibility. The correctbulbs will not damage the lamp assemblyor void the lamp assembly warranty andwill provide quality bulb illumination time.
Trade nameFunction
H7LL*Headlamp high beam (Halogen)
H11LL*Headlamp low beam (Halogen)
LED*Side marker lamp - front
253Fusion (CC7) , enUSAMaintenanceE145779 E145780 321E72789
Page 257 of 458
Trade nameFunction
W5W*Park lamp - front
PWY24W*Turn lamp - front
H11*Fog lamp - front
LED*Tail and brake lamp - high series
LED*Tail and brake lamp - low series
921Reverse lamp
LED*Turn lamp - rear - high series
LED*Turn lamp - rear - low series
LED*Side marker lamp - rear
W5WLicense plate lamp
W5W or LED***Trunk lamp
LED*High-mount brake lamp
LED*Side repeater lamp
LED*Interior lamp
*To replace these bulbs, see your authorized dealer.
To replace all instrument panel bulbs, see your authorized dealer.
**If so equipped.
254Fusion (CC7) , enUSAMaintenance
Page 258 of 458

CHANGING THE ENGINE AIR
FILTER
WARNING
To reduce the risk of vehicle damageand/or personal burn injuries do notstart your engine with the air cleanerremoved and do not remove it while theengine is running.
When changing the air filter element, useonly the air filter element listed. SeeCapacities and Specifications (page287).
For EcoBoost equipped vehicles: Whenservicing the air cleaner, it is important thatno foreign material enter the air inductionsystem. The engine and turbocharger aresusceptible to damage from even smallparticles.
Change the air filter element at the properinterval. See Scheduled Maintenance(page 428).
Note:Failure to use the correct air filterelement may result in severe enginedamage. The customer warranty may bevoid for any damage to the engine if thecorrect air filter element is not used.
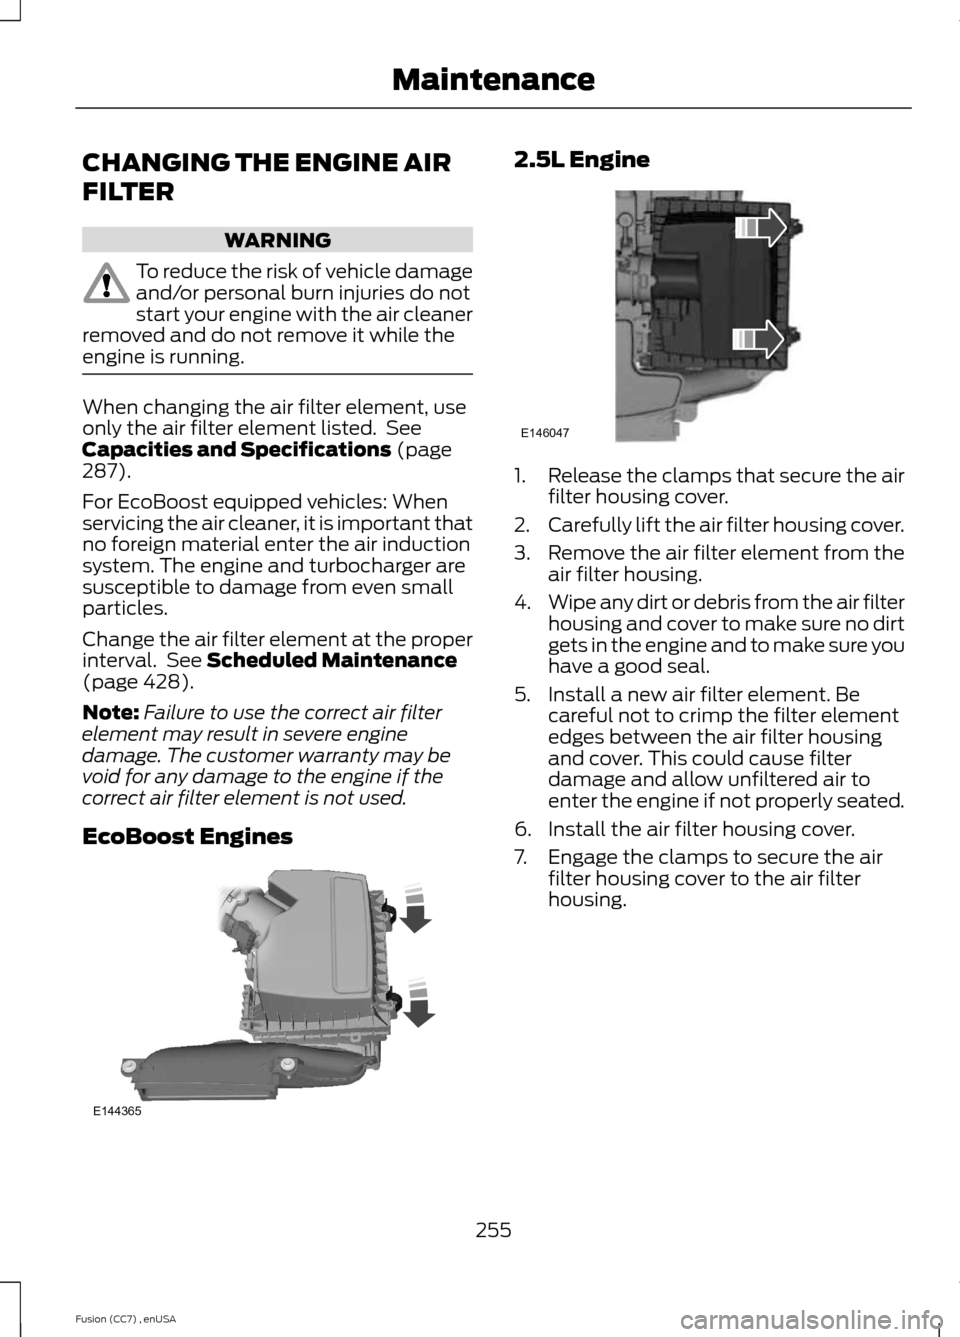
EcoBoost Engines
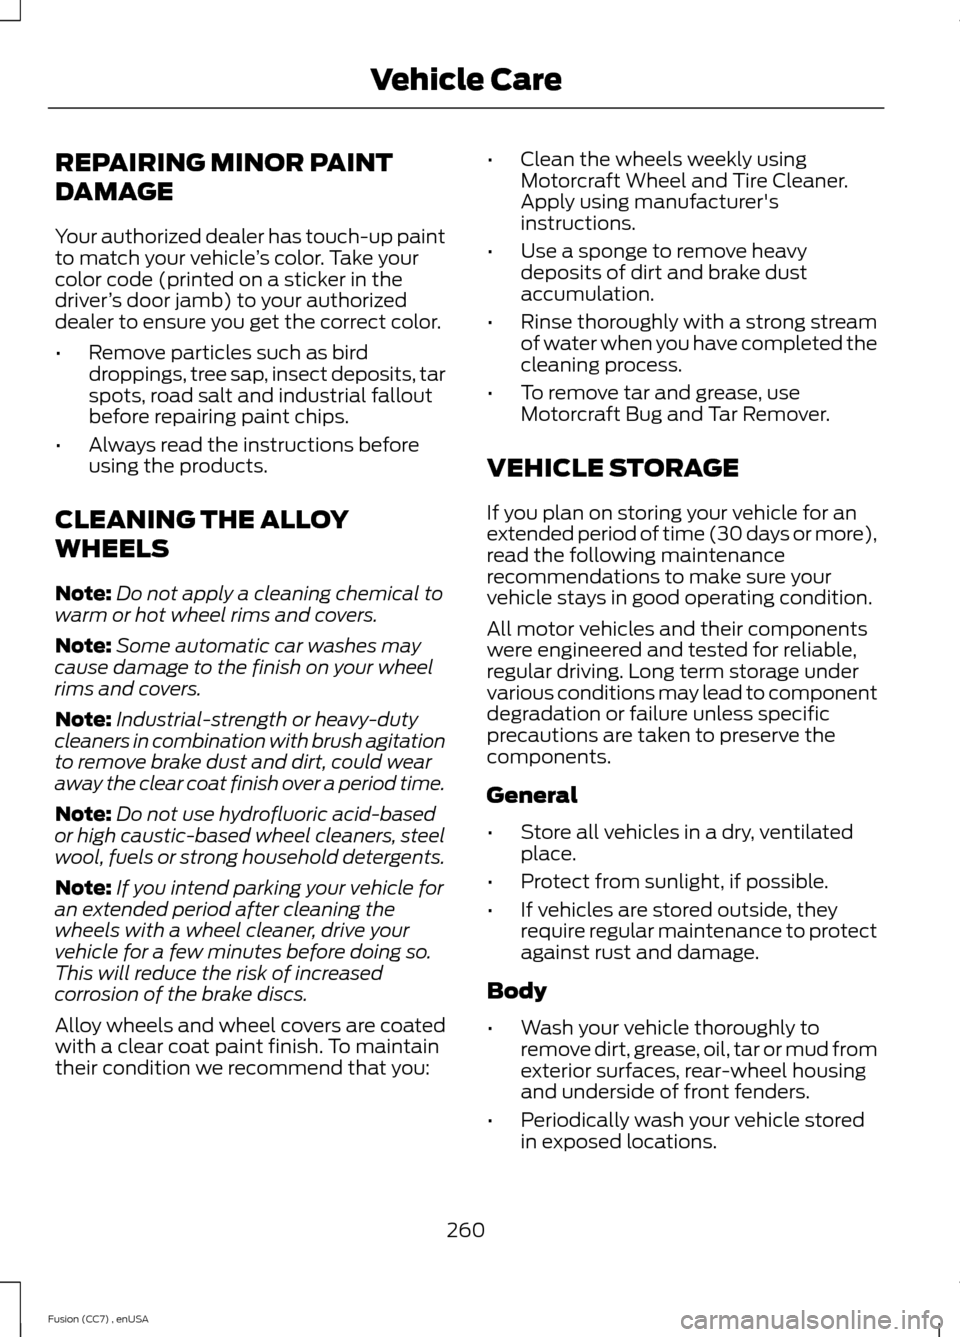
2.5L Engine
1.Release the clamps that secure the airfilter housing cover.
2.Carefully lift the air filter housing cover.
3.Remove the air filter element from theair filter housing.
4.Wipe any dirt or debris from the air filterhousing and cover to make sure no dirtgets in the engine and to make sure youhave a good seal.
5.Install a new air filter element. Becareful not to crimp the filter elementedges between the air filter housingand cover. This could cause filterdamage and allow unfiltered air toenter the engine if not properly seated.
6.Install the air filter housing cover.
7.Engage the clamps to secure the airfilter housing cover to the air filterhousing.
255Fusion (CC7) , enUSAMaintenanceE144365 E146047
Page 263 of 458

REPAIRING MINOR PAINT
DAMAGE
Your authorized dealer has touch-up paintto match your vehicle’s color. Take yourcolor code (printed on a sticker in thedriver’s door jamb) to your authorizeddealer to ensure you get the correct color.
•Remove particles such as birddroppings, tree sap, insect deposits, tarspots, road salt and industrial falloutbefore repairing paint chips.
•Always read the instructions beforeusing the products.
CLEANING THE ALLOY
WHEELS
Note:Do not apply a cleaning chemical towarm or hot wheel rims and covers.
Note:Some automatic car washes maycause damage to the finish on your wheelrims and covers.
Note:Industrial-strength or heavy-dutycleaners in combination with brush agitationto remove brake dust and dirt, could wearaway the clear coat finish over a period time.
Note:Do not use hydrofluoric acid-basedor high caustic-based wheel cleaners, steelwool, fuels or strong household detergents.
Note:If you intend parking your vehicle foran extended period after cleaning thewheels with a wheel cleaner, drive yourvehicle for a few minutes before doing so.This will reduce the risk of increasedcorrosion of the brake discs.
Alloy wheels and wheel covers are coatedwith a clear coat paint finish. To maintaintheir condition we recommend that you:
•Clean the wheels weekly usingMotorcraft Wheel and Tire Cleaner.Apply using manufacturer'sinstructions.
•Use a sponge to remove heavydeposits of dirt and brake dustaccumulation.
•Rinse thoroughly with a strong streamof water when you have completed thecleaning process.
•To remove tar and grease, useMotorcraft Bug and Tar Remover.
VEHICLE STORAGE
If you plan on storing your vehicle for anextended period of time (30 days or more),read the following maintenancerecommendations to make sure yourvehicle stays in good operating condition.
All motor vehicles and their componentswere engineered and tested for reliable,regular driving. Long term storage undervarious conditions may lead to componentdegradation or failure unless specificprecautions are taken to preserve thecomponents.
General
•Store all vehicles in a dry, ventilatedplace.
•Protect from sunlight, if possible.
•If vehicles are stored outside, theyrequire regular maintenance to protectagainst rust and damage.
Body
•Wash your vehicle thoroughly toremove dirt, grease, oil, tar or mud fromexterior surfaces, rear-wheel housingand underside of front fenders.
•Periodically wash your vehicle storedin exposed locations.
260Fusion (CC7) , enUSAVehicle Care