2014 FORD FUSION (AMERICAS) turn signal
[x] Cancel search: turn signalPage 51 of 458

5.Reinstall the housing and cover.
Car Finder
Press the button twice withinthree seconds. The horn willsound and the turn signals willflash. We recommend you use this methodto locate your vehicle, rather than usingthe panic alarm.
Sounding a Panic Alarm
Note:The panic alarm will only operatewhen the ignition is off.
Press the button to activate thealarm. Press the button again orswitch the ignition on todeactivate.
Remote Start (If Equipped)
WARNING
To avoid exhaust fumes, do not useremote start if your vehicle is parkedindoors or areas that are not wellventilated.
Note:Do not use remote start if your vehicleis low on fuel.
The remote start button is on thetransmitter.
This feature allows you to start yourvehicle from outside the vehicle. Thetransmitter has an extended operatingrange.
Vehicles with automatic climate controlcan be configured to operate when thevehicle is remote started. See ClimateControl (page 110). A manual climatecontrol system will run at the setting it wasset to when you switched the vehicle off.
Many states and provinces haverestrictions for the use of remote start.Check your local and state or provinciallaws for specific requirements regardingremote start systems.
The remote start system will not work if:
•the ignition is on
•the alarm system triggered
•you disable the feature
•the hood is open
•the transmission is not in P
•the vehicle battery voltage is too low
•the service engine soon light is on.
Remote Control Feedback
An LED on the remote control providesstatus feedback of remote start or stopcommands.
StatusLED
Remote start orextensionsuccessful
Solid green
Remote stopsuccessful; engineoff
Solid red
Remote start orstop failedBlinking red
Waiting for statusupdateBlinking green
Remote Starting the Vehicle
Note:You must press each button withinthree seconds of each other. Your vehiclewill not remote start if you do not follow thissequence.
48Fusion (CC7) , enUSAKeys and Remote ControlsE138623 E138624 E138625
Page 57 of 458

LOCKING AND UNLOCKING
You can use the power door lock controlor the remote control to lock and unlockthe vehicle.
Power Door Locks
The power door lock control is on the driverand front passenger door panels.
UnlockA
LockB
Door Lock Indicator
An LED on each door window trim will lightwhen you lock the door. It will remain lit forup to 10 minutes after you switch off theignition.
Switch Inhibitor
When you electronically lock your vehicle,the power door lock switch will no longeroperate after 20 seconds. You must unlockyour vehicle with the remote control orkeyless keypad, or switch the ignition on,to restore function to these switches. Youcan switch this feature on or off in theinformation display. See GeneralInformation (page 87).
Rear Door Unlocking and Opening
Pull the interior door release handle twiceto unlock and open the rear door. The firstpull unlocks the door and the second pullwill unlatch the door.
Remote Control
You can use the remote control at anytime. The luggage compartment releasebutton will only work when the vehiclespeed is less than 5 mph (8 km/h).
Unlocking the Doors (Two-StageUnlock)
Press the button to unlock thedriver door.
Press the button again withinthree seconds to unlock all doors. The turnsignals will flash.
Press and hold both the lock and unlockbuttons on the remote control for threeseconds to change between driver door orall doors unlock mode. The turn signals willflash twice to indicate a change to theunlocking mode. Driver door unlock modewill only unlock the driver door when theunlock button is pressed once. All doorunlock mode will unlock all doors with onepress of the unlock button. The unlockingmode applies to the remote control,keyless entry keypad and intelligentaccess. You can also change the mode inthe information display. See GeneralInformation (page 87).
Locking the Doors
Press the button to lock all thedoors. The turn signals willilluminate.
Press the button again within threeseconds to confirm that all the doors areclosed. The doors will lock again, the hornwill sound and the turn signals willilluminate if all the doors and the luggagecompartment are closed.
54Fusion (CC7) , enUSALocksE138628 E138629 E138623
Page 80 of 458

Signal Indicator Mirrors (If Equipped)
The outer portion of the appropriate mirrorhousing will blink when you switch on theturn signal.
Integrated Blind Spot Mirrors (If
Equipped)
WARNING
Objects in the blind spot mirror arecloser than they appear.
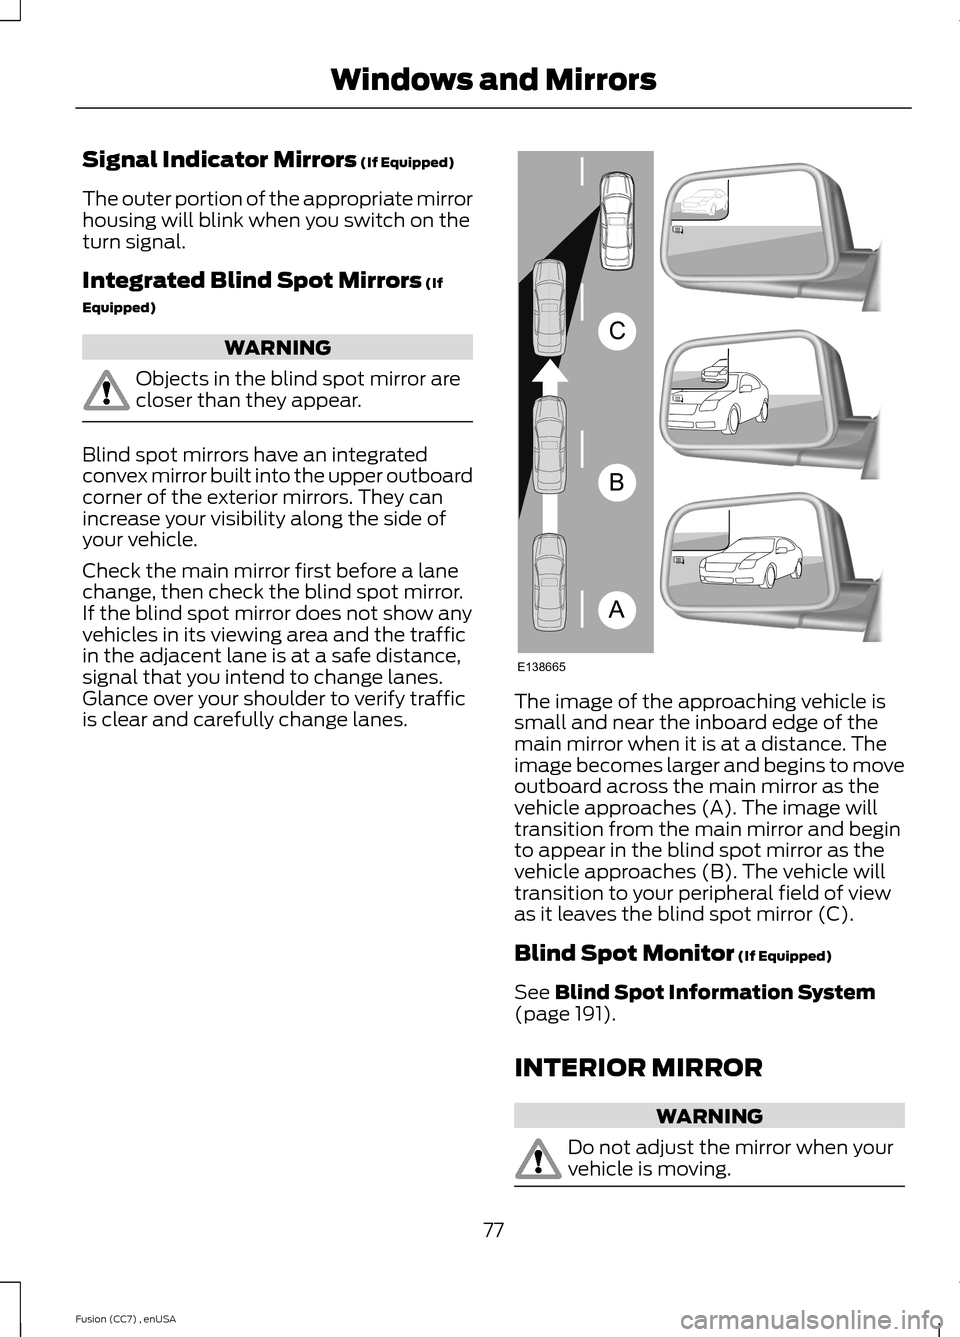
Blind spot mirrors have an integratedconvex mirror built into the upper outboardcorner of the exterior mirrors. They canincrease your visibility along the side ofyour vehicle.
Check the main mirror first before a lanechange, then check the blind spot mirror.If the blind spot mirror does not show anyvehicles in its viewing area and the trafficin the adjacent lane is at a safe distance,signal that you intend to change lanes.Glance over your shoulder to verify trafficis clear and carefully change lanes.The image of the approaching vehicle issmall and near the inboard edge of themain mirror when it is at a distance. Theimage becomes larger and begins to moveoutboard across the main mirror as thevehicle approaches (A). The image willtransition from the main mirror and beginto appear in the blind spot mirror as thevehicle approaches (B). The vehicle willtransition to your peripheral field of viewas it leaves the blind spot mirror (C).
Blind Spot Monitor (If Equipped)
See Blind Spot Information System(page 191).
INTERIOR MIRROR
WARNING
Do not adjust the mirror when yourvehicle is moving.
77Fusion (CC7) , enUSAWindows and MirrorsABCE138665
Page 86 of 458

Note:Some warning indicators appear inthe information display and function thesame as a warning lamp but do not displaywhen you start your vehicle.
Adaptive Cruise Control (If Equipped)
The speed control systemindicator light changes color toindicate what mode the systemis in: See Using Cruise Control (page 179).
On (white light): Illuminates when theadaptive cruise control system is turnedon. Turns off when the speed controlsystem is turned off.
Engaged (green light): Illuminates whenthe adaptive cruise control system isengaged. Turns off when the speed controlsystem is disengaged.
Anti-Lock Braking System
If it illuminates when you aredriving, this indicates amalfunction. You will continueto have the normal braking system(without ABS) unless the brake systemwarning lamp is also illuminated. Have thesystem checked by your authorized dealer.
Auto Start-stop (If Equipped)
It will illuminate to inform youwhen the engine shuts down orin conjunction with a message.
Battery
If it illuminates while driving, itindicates a malfunction. Switchoff all unnecessary electricalequipment and have the system checkedby your authorized dealer immediately.
Blind Spot Monitor (If Equipped)
It will illuminate when you switchthis feature off or in conjunctionwith a message. See Blind SpotInformation System (page 191). SeeInformation Messages (page 95).
Brake System
It will illuminate when youengage the parking brake withthe ignition on.
If it illuminates when you are driving, checkthat the parking brake is not engaged. Ifthe parking brake is not engaged, thisindicates low brake fluid level or a brakesystem malfunction. Have the systemchecked immediately by your authorizeddealer.
WARNING
Driving your vehicle with the warninglamp on is dangerous. A significantdecrease in braking performancemay occur. It will take you longer to stopyour vehicle. Have your vehicle checked byyour authorized dealer immediately. Drivingextended distances with the parking brakeengaged can cause brake failure and therisk of personal injury.
Cruise Control (If Equipped)
It will illuminate when you switchthis feature on.
Direction Indicator
Illuminates when the left or rightturn signal or the hazard warningflasher is turned on. If theindicators stay on or flash faster, check fora burned out bulb. See Changing a Bulb(page 251).
83Fusion (CC7) , enUSAInstrument ClusterE144524 E151262 E144522 E71340
Page 132 of 458

HomeLink Wireless ControlSystem (If Equipped)
WARNING
Do not use the system with anygarage door opener that does nothave the safety stop and reversefeature as required by U.S. Federal SafetyStandards (this includes any garage dooropener manufactured before April 1, 1982).A garage door opener which cannot detectan object, signaling the door to stop andreverse, does not meet current federalsafety standards. Using a garage dooropener without these features increasesthe risk of serious injury or death.
Note:Make sure that the garage door andsecurity device are free from obstructionwhen you are programming. Do not programthe system with the vehicle in the garage.
Note:Make sure you keep the originalremote control transmitter for use in othervehicles as well as for future systemprogramming.
Note:We recommend that upon the saleor lease termination of your vehicle, youerase the programmed function buttons forsecurity reasons. See Erasing the functionbutton codes later in this section.
Note:You can program a maximum ofthree devices. To change or replace any ofthe three devices after it has been initiallyprogrammed, you must first erase thecurrent settings. See Erasing the functionbutton codes later in this section.
The universal garage door opener replacesthe common hand-held garage dooropener with a three-button transmitterthat is integrated into the driver’s sun visor.
The system includes two primary features,a garage door opener and a platform forremote activation of devices within thehome. As well as being programmed forgarage doors, the system transmitter canbe programmed to operate entry gateoperators, security systems, entry doorlocks and home or office lighting.
Additional system information can befound online at www.homelink.com or bycalling the toll-free help line on1-800-355-3515.
In-vehicle programming
This process is to program your hand-heldtransmitter and your in-vehicle HomeLinkbutton.
Note:Put a new battery in the hand-heldtransmitter. This will ensure quicker trainingand accurate transmission of theradio-frequency signal.
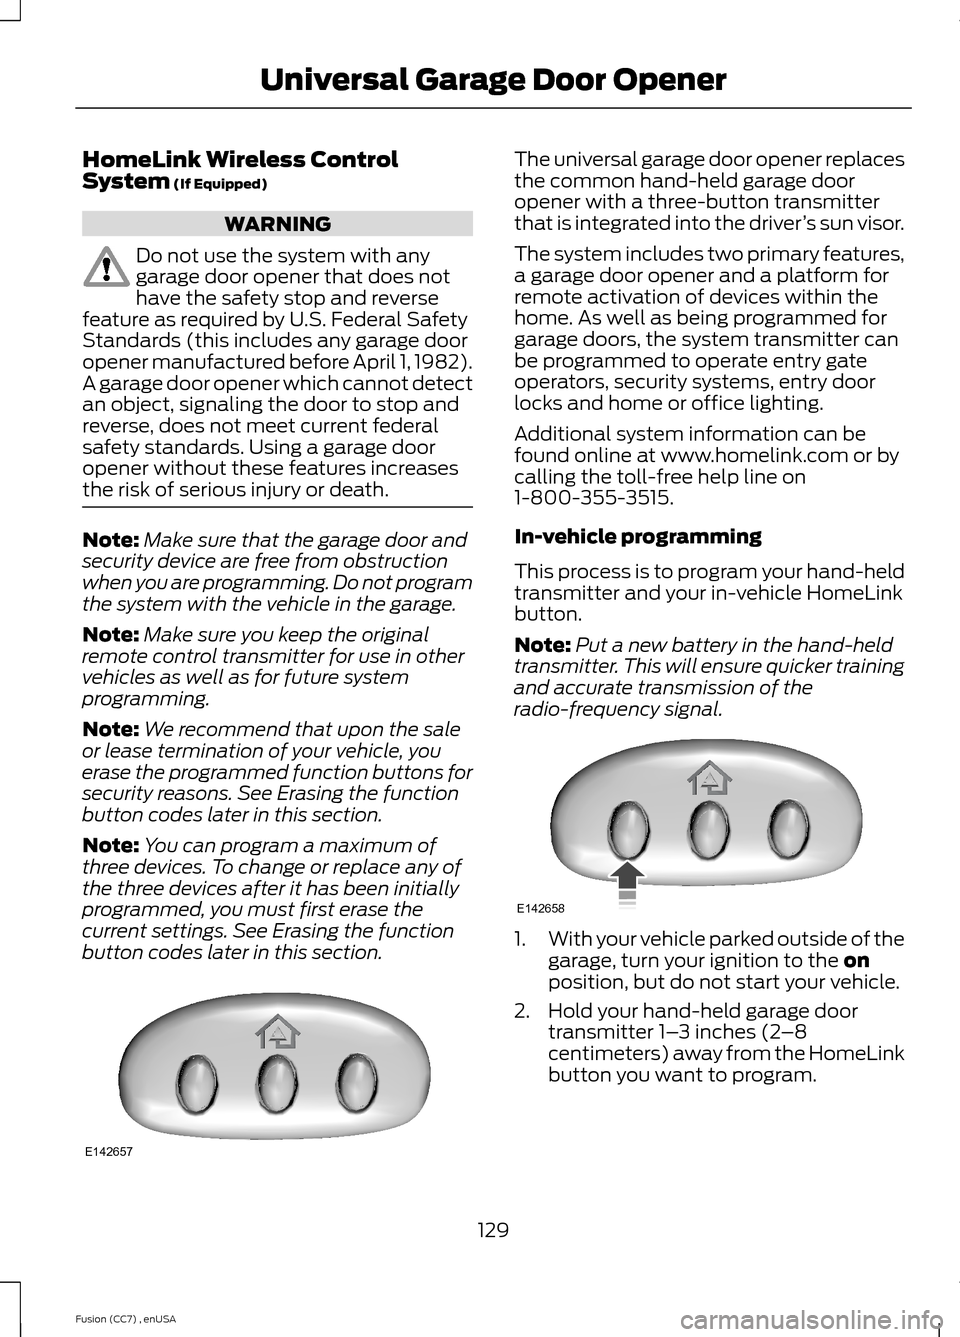
1.With your vehicle parked outside of thegarage, turn your ignition to the onposition, but do not start your vehicle.
2.Hold your hand-held garage doortransmitter 1–3 inches (2–8centimeters) away from the HomeLinkbutton you want to program.
129Fusion (CC7) , enUSAUniversal Garage Door OpenerE142657 E142658
Page 133 of 458

3.Using both hands, simultaneously,press and hold the desired HomeLinkbutton and the hand-held transmitterbutton. DO NOT release either one untilthe HomeLink indicator light flashesslowly and then rapidly. When theindicator light flashes rapidly, bothbuttons may be released. The rapidflashing indicates successful training.
4.Press and hold the HomeLink buttonyou programmed for five seconds, thenrelease. You may need to do this twiceto activate the door. If your garage doordoes not operate, watch the HomeLinkindicator light.
If the indicator light stays on, theprogramming is complete. SeeProgramming your garage door motorlater in this section.
If the indicator light flashes rapidly for 2seconds and then turns to a constant light,the HomeLink button is not programmedyet. Do the following:
Press and hold the HomeLink button whileyou press and release the hand-heldtransmitter button every 2 seconds. TheHomeLink indicator light will flash slowlyand then rapidly once the HomeLinkfunction button recognizes and acceptsthe hand-held transmitter’s radiofrequency signal.
After programming the HomeLink button,begin programming your garage dooropener motor.
Note:You may need a ladder to reach theunit and you may need to remove the coveror lamp lens on your garage door opener.
To program additional buttons, repeatSteps 1 – 4.
For questions or comments, please contactHomeLink at www.homelink.com or1-800-355-3515.
Programming your garage door openermotor
1.Press the learn button on the garagedoor opener motor and then you have30 seconds to complete the next twosteps.
2.Return to your vehicle.
3.Press and hold the function button youwant to program for 2 seconds, thenrelease. Repeat this step. Dependingon your brand of garage door opener,you may need to repeat this sequencea third time.
Erasing the Function Button Codes
Note:You cannot erase individual buttons.
130Fusion (CC7) , enUSAUniversal Garage Door OpenerE142659 E142658
Page 175 of 458

For specific information on the reversesensing portion of the system, refer to thatsection.
ACTIVE PARK ASSIST (IF
EQUIPPED)
WARNING
Designed to be a supplementary parkaid, this system may not work in allconditions. This system cannotreplace the driver’s attention andjudgment. The driver is responsible foravoiding hazards and maintaining a safedistance and speed, even when the systemis in use.
Note:The driver is always responsible forcontrolling the vehicle, supervising thesystem and intervening if required.
The system detects an available parallelparking space and automatically steersyour vehicle into the space (hands-free)while you control the accelerator, gearshiftand brakes. The system visually andaudibly instructs you to park your vehicle.
The system may not function correctly ifsomething passes between the frontbumper and the parking space (apedestrian or cyclist) or if the edge of theneighboring parked vehicle is high off theground (for example, a bus, tow truck orflatbed truck).
Note:The sensors may not detect objectsin heavy rain or other conditions that causedisruptive reflections.
Note:The sensors may not detect objectswith surfaces that absorb ultrasonic waves.
Do not use the system if:
•You have attached a foreign object(bike rack or trailer) to the front or rearof your vehicle or attached close to thesensors.
•You have attached an overhangingobject (surfboard) to the roof.
•The front bumper or side sensors aredamaged or obstructed by a foreignobject (front bumper cover).
•A mini-spare tire is in use.
Using Active Park Assist
Press the button located on thecenter console near the gearshiftlever.
The touchscreen displays a message anda corresponding graphic to indicate it issearching for a parking space. Use thedirection indicator to indicate which sideof your vehicle you want the system tosearch.
Note:If the turn signal is not on, the systemautomatically searches on your vehicle'spassenger side.
172Fusion (CC7) , enUSAParking AidsE146186 AE130107
Page 192 of 458

•Low
•Medium
•High
System Display
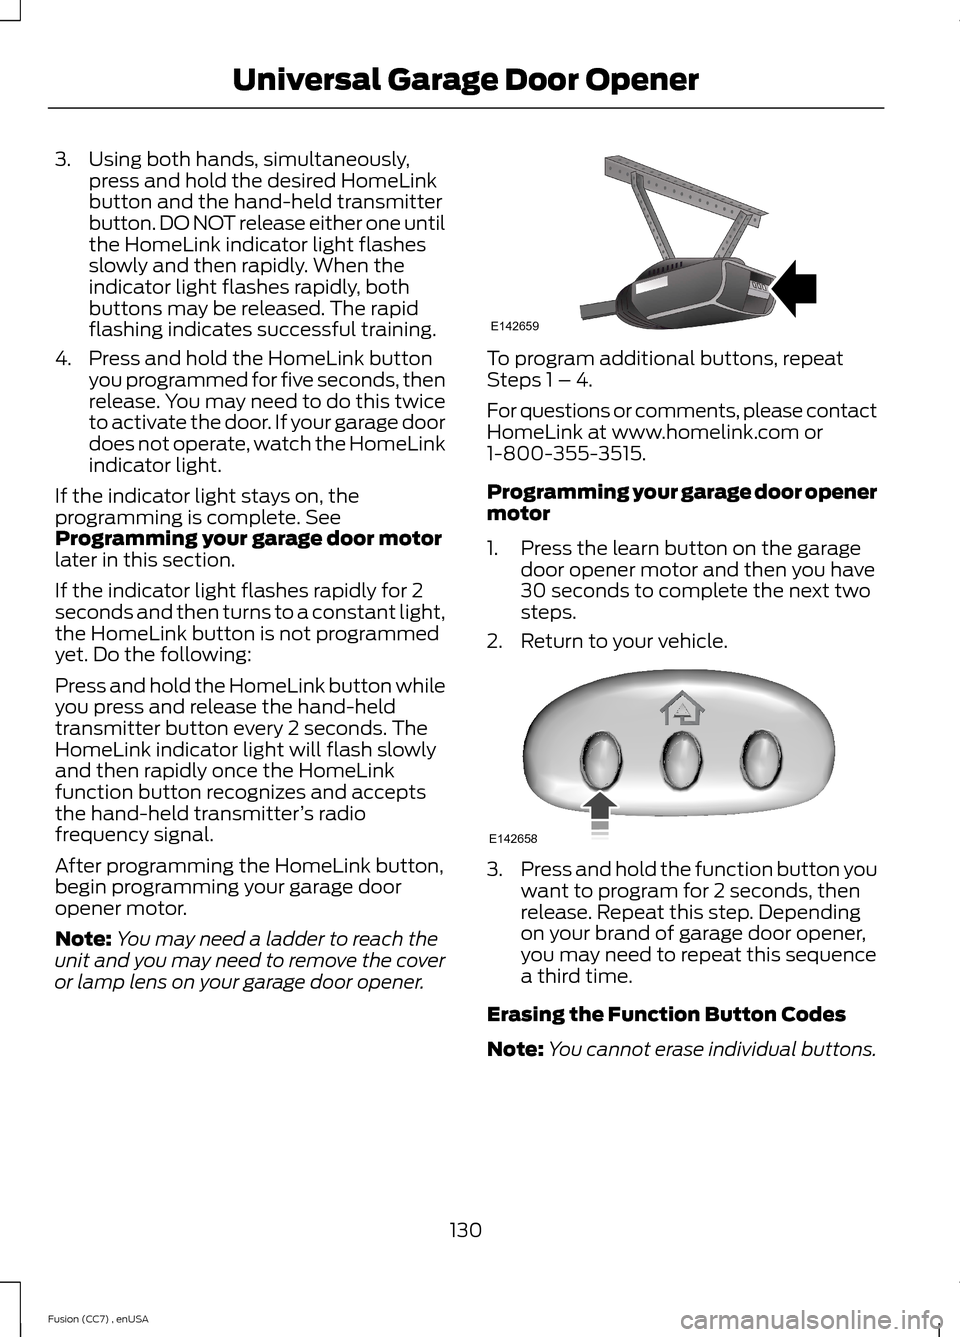
When the system is turned on, an overheadgraphic of a vehicle with lane markings willbe displayed in the information display. Ifthe aid mode is selected when the systemis turned on, a separate white icon will alsoappear in the instrument cluster or in somevehicles arrows will be displayed with thelane markings.
When the system is turned off, the lanemarking graphics will not be displayed.
While the system is on, the color of thelane markings will change to indicate thesystem status.
Gray: Indicates that the system istemporarily unable to provide a warningor intervention on the indicated side(s).This may be because:
•the vehicle is under the activationspeed
•the turn indicator is active
•the vehicle is in a dynamic maneuver
•the road has no or poor lane markingsin the camera field-of-view
•the camera is obscured or unable todetect the lane markings due toenvironmental conditions (e.g.significant sun angles or shadows,snow, heavy rain, fog), trafficconditions (e.g. following a largevehicle that is blocking or shadowingthe lane), or vehicle conditions (e.g.poor headlamp illumination).
See Troubleshooting for additionalinformation.
Green: Indicates that the system isavailable or ready to provide a warning orintervention, on the indicated side(s).
Yellow: Indicates that the system isproviding or has just provided a lanekeeping aid intervention.
Red: Indicates that the system is providingor has just provided a lane keeping alertwarning.
The system can be temporarily suppressedat any time by the following:
•Quick braking
•Fast acceleration
•Using the turn signal indicator
•Evasive steering maneuver
Troubleshooting
Why is the feature not available (line markings are gray) when I can see the lane markingson the road?
Vehicle speed is outside the operational range of the feature
Sun is shining directly into the camera lens
Quick intentional lane change
189Fusion (CC7) , enUSADriving AidsE151660