2014 FORD FUSION (AMERICAS) fuel cap
[x] Cancel search: fuel capPage 149 of 458

Regular unleaded gasoline with a pump(R+M)/2 octane rating of 87 isrecommended. Some stations offer fuelsposted as "Regular" with an octane ratingbelow 87, particularly in high altitude areas.Fuels with octane levels below 87 are notrecommended. Premium fuel will provideimproved performance and isrecommended for severe duty usage suchas trailer tow.
Do not be concerned if your enginesometimes knocks lightly. However, if itknocks heavily while you are using fuel withthe recommended octane rating, see yourauthorized dealer to prevent any enginedamage.
RUNNING OUT OF FUEL
Avoid running out of fuel because thissituation may have an adverse effect onpowertrain components.
If you have run out of fuel:
•You may need to cycle the ignition fromoff to on several times after refuelingto allow the fuel system to pump thefuel from the tank to the engine. Onrestarting, cranking time will take a fewseconds longer than normal. Withkeyless ignition, just start the engine.Crank time will be longer than usual.
•Normally, adding 1 gallon (3.8 liters) offuel is enough to restart the engine. Ifthe vehicle is out of fuel and on a steepgrade, more than 1 gallon (3.8 liters)may be required.
•The service engine soon indicator maycome on. For more information on theservice engine soon indicator, SeeWarning Lamps and Indicators(page 82).
Refilling With a Portable FuelContainer
WARNINGS
Do not insert the nozzle of portablefuel containers or aftermarketfunnels into the capless fuel system.This could damage the fuel system and itsseal, and may cause fuel to run onto theground instead of filling the tank, whichcould result in serious personal injury.
Do not try to pry open or push openthe capless fuel system with foreignobjects. This could damage the fuelsystem and its seal and cause injury to youor others.
Note:Do not use aftermarket funnels; theywill not work with the capless fuel systemand can damage it. The included fuel funnelhas been specially designed to work safelywith your vehicle.
When filling the vehicle’s fuel tank from aportable fuel container, use the funnelincluded with the vehicle.
146Fusion (CC7) , enUSAFuel and Refueling
Page 150 of 458
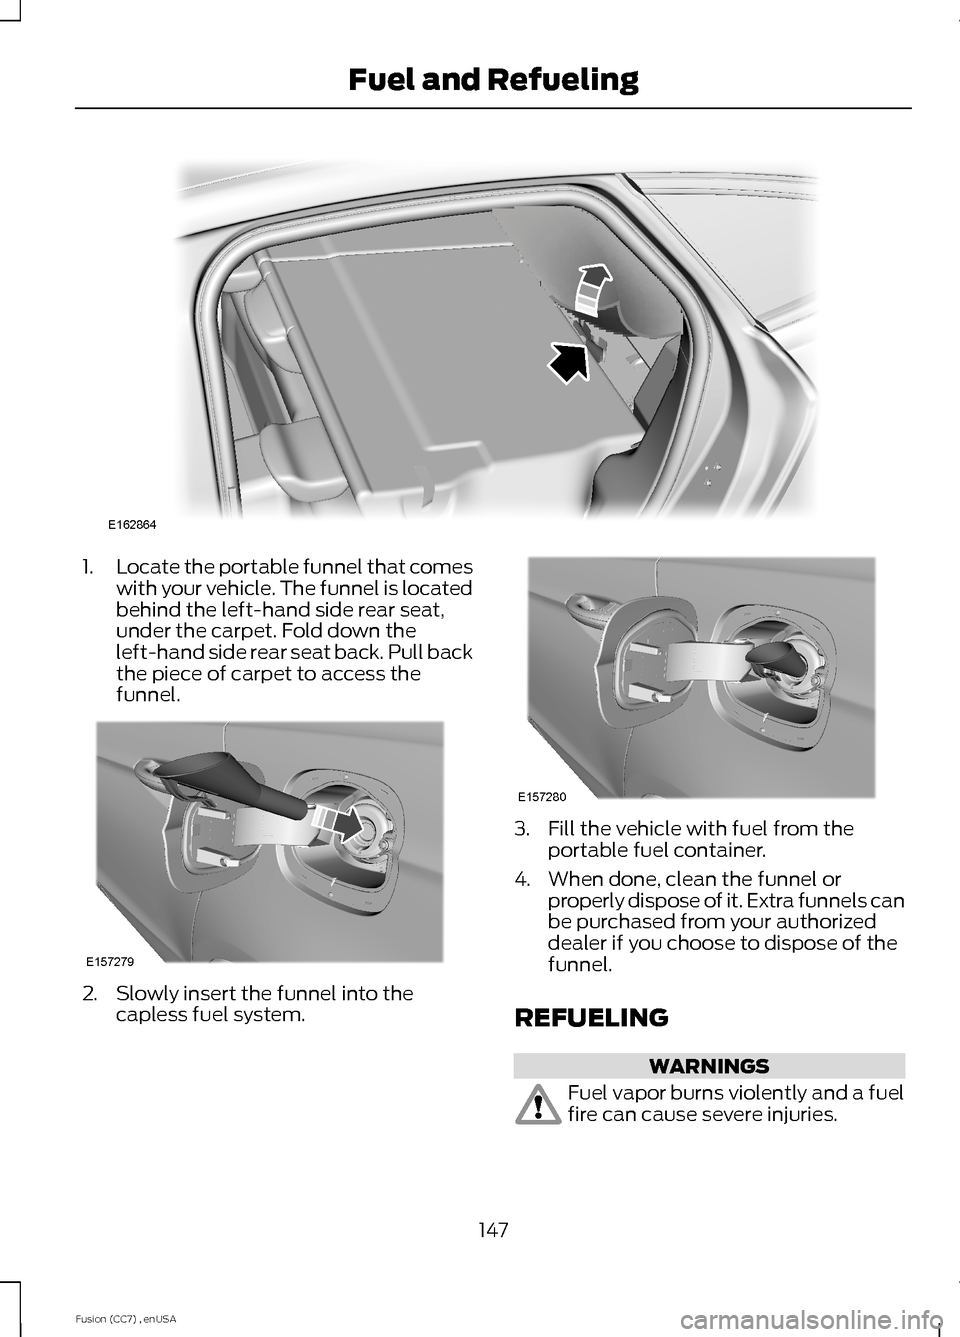
1.Locate the portable funnel that comeswith your vehicle. The funnel is locatedbehind the left-hand side rear seat,under the carpet. Fold down theleft-hand side rear seat back. Pull backthe piece of carpet to access thefunnel.
2.Slowly insert the funnel into thecapless fuel system.
3.Fill the vehicle with fuel from theportable fuel container.
4.When done, clean the funnel orproperly dispose of it. Extra funnels canbe purchased from your authorizeddealer if you choose to dispose of thefunnel.
REFUELING
WARNINGS
Fuel vapor burns violently and a fuelfire can cause severe injuries.
147Fusion (CC7) , enUSAFuel and RefuelingE162864 E157279 E157280
Page 151 of 458
WARNINGS
Read and follow all the instructionson the pump island.
Switch off your engine when you arerefueling.
Do not smoke if you are near fuel orrefueling your vehicle.
Keep sparks, flames and smokingmaterials away from fuel.
Stay outside your vehicle and do notleave the fuel pump unattendedwhen refueling your vehicle. This isagainst the law in some places.
Keep children away from the fuelpump; never let children pump fuel.
Do not use personal electronicdevices while refueling.
Use the following guidelines to avoidelectrostatic charge build-up when fillingan ungrounded fuel container:
•Place approved fuel container on theground.
•Do not fill a fuel container while it is inyour vehicle (including the cargo area).
•Keep the fuel pump nozzle in contactwith the fuel container while filling.
•Do not use a device that would holdthe fuel pump handle in the fill position.
Easy Fuel™ Capless Fuel System
WARNING
The fuel system may be underpressure. If you hear a hissing soundnear the fuel filler door, do not refueluntil the sound stops. Otherwise, fuel mayspray out, which could cause seriouspersonal injury.
When fueling your vehicle:
1.Put the vehicle in position P and switchthe ignition off.
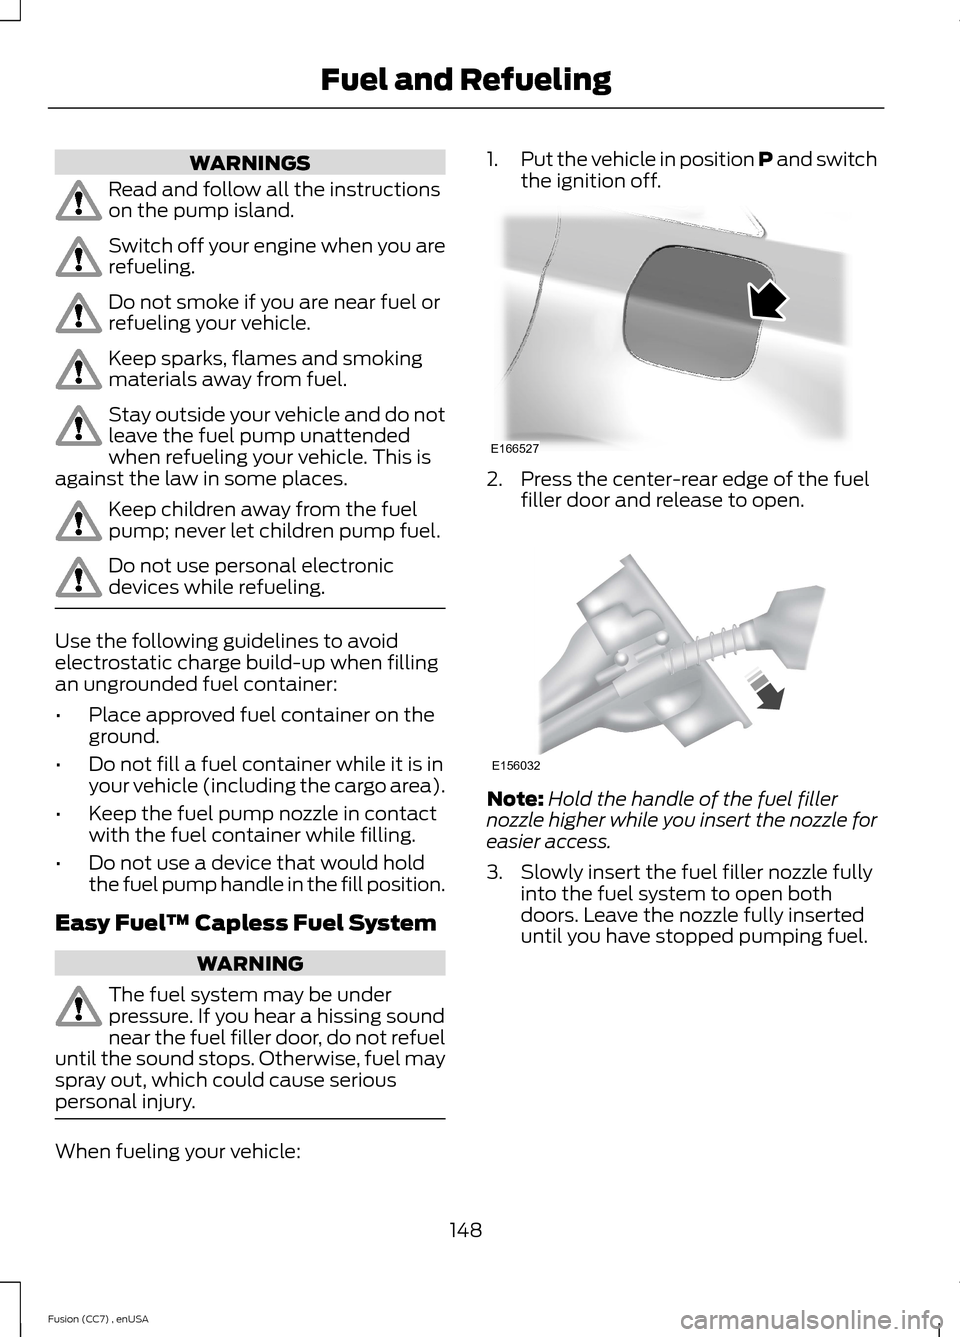
2.Press the center-rear edge of the fuelfiller door and release to open.
Note:Hold the handle of the fuel fillernozzle higher while you insert the nozzle foreasier access.
3.Slowly insert the fuel filler nozzle fullyinto the fuel system to open bothdoors. Leave the nozzle fully inserteduntil you have stopped pumping fuel.
148Fusion (CC7) , enUSAFuel and RefuelingE166527 E156032
Page 152 of 458
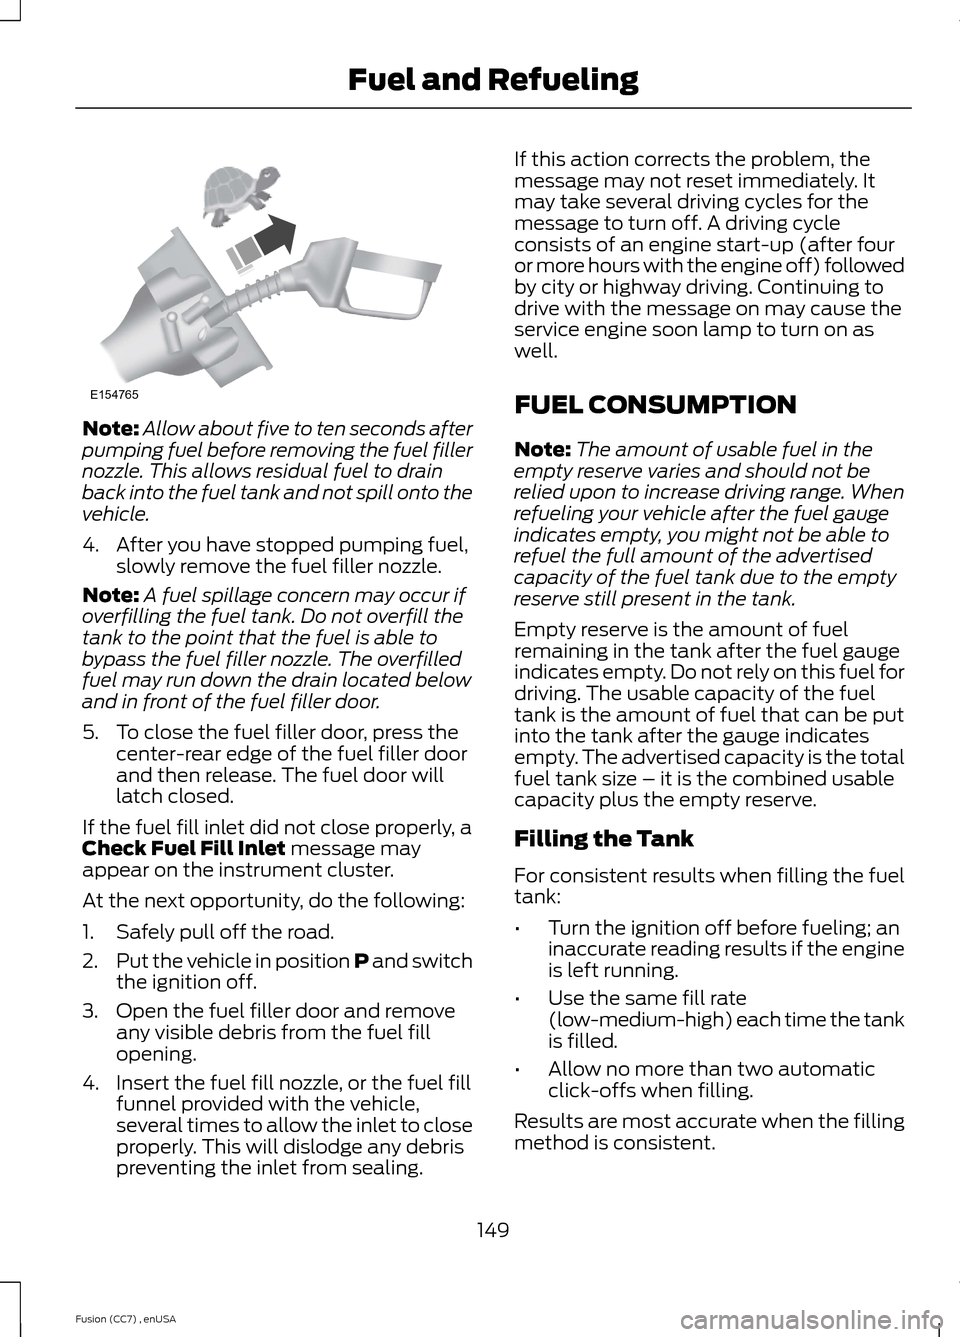
Note:Allow about five to ten seconds afterpumping fuel before removing the fuel fillernozzle. This allows residual fuel to drainback into the fuel tank and not spill onto thevehicle.
4.After you have stopped pumping fuel,slowly remove the fuel filler nozzle.
Note:A fuel spillage concern may occur ifoverfilling the fuel tank. Do not overfill thetank to the point that the fuel is able tobypass the fuel filler nozzle. The overfilledfuel may run down the drain located belowand in front of the fuel filler door.
5.To close the fuel filler door, press thecenter-rear edge of the fuel filler doorand then release. The fuel door willlatch closed.
If the fuel fill inlet did not close properly, aCheck Fuel Fill Inlet message mayappear on the instrument cluster.
At the next opportunity, do the following:
1.Safely pull off the road.
2.Put the vehicle in position P and switchthe ignition off.
3.Open the fuel filler door and removeany visible debris from the fuel fillopening.
4.Insert the fuel fill nozzle, or the fuel fillfunnel provided with the vehicle,several times to allow the inlet to closeproperly. This will dislodge any debrispreventing the inlet from sealing.
If this action corrects the problem, themessage may not reset immediately. Itmay take several driving cycles for themessage to turn off. A driving cycleconsists of an engine start-up (after fouror more hours with the engine off) followedby city or highway driving. Continuing todrive with the message on may cause theservice engine soon lamp to turn on aswell.
FUEL CONSUMPTION
Note:The amount of usable fuel in theempty reserve varies and should not berelied upon to increase driving range. Whenrefueling your vehicle after the fuel gaugeindicates empty, you might not be able torefuel the full amount of the advertisedcapacity of the fuel tank due to the emptyreserve still present in the tank.
Empty reserve is the amount of fuelremaining in the tank after the fuel gaugeindicates empty. Do not rely on this fuel fordriving. The usable capacity of the fueltank is the amount of fuel that can be putinto the tank after the gauge indicatesempty. The advertised capacity is the totalfuel tank size – it is the combined usablecapacity plus the empty reserve.
Filling the Tank
For consistent results when filling the fueltank:
•Turn the ignition off before fueling; aninaccurate reading results if the engineis left running.
•Use the same fill rate(low-medium-high) each time the tankis filled.
•Allow no more than two automaticclick-offs when filling.
Results are most accurate when the fillingmethod is consistent.
149Fusion (CC7) , enUSAFuel and RefuelingE154765
Page 202 of 458
LOAD LIMIT
Vehicle Loading - with andwithout a Trailer
This section will guide you in theproper loading of your vehicle,trailer or both, to keep your loadedvehicle weight within its designrating capability, with or withouta trailer. Properly loading yourvehicle will provide maximumreturn of vehicle designperformance. Before loading yourvehicle, familiarize yourself with
the following terms fordetermining your vehicle’s weightratings, with or without a trailer,from the vehicle’s Tire Label orSafety Compliance CertificationLabel:
Base Curb Weight - is the weightof the vehicle including a full tankof fuel and all standardequipment. It does not includepassengers, cargo, or optionalequipment.
Vehicle Curb Weight - is theweight of your new vehicle whenyou picked it up from yourauthorized dealer plus anyaftermarket equipment.
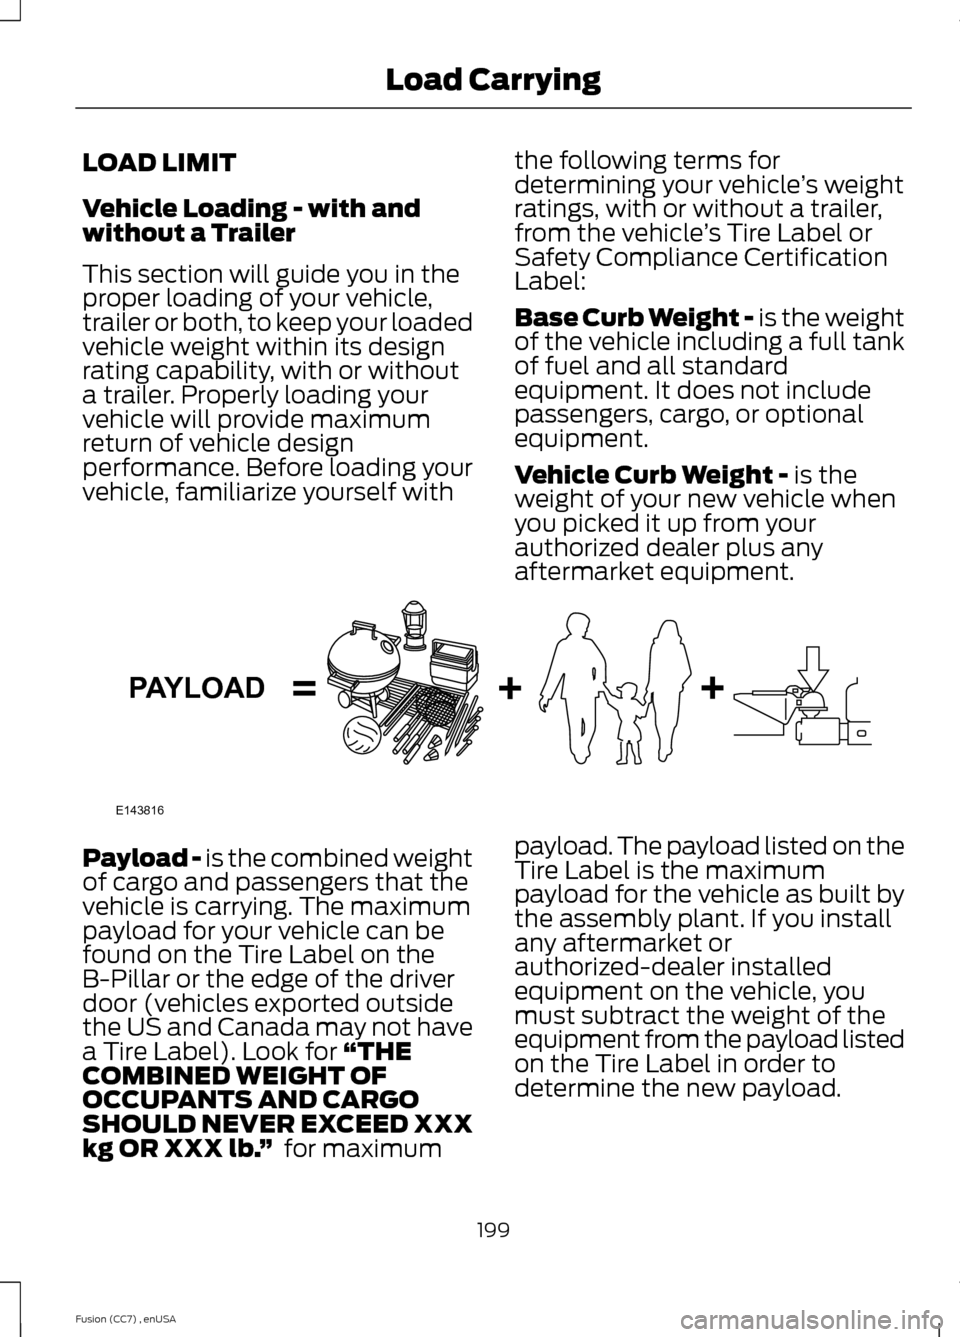
Payload - is the combined weightof cargo and passengers that thevehicle is carrying. The maximumpayload for your vehicle can befound on the Tire Label on theB-Pillar or the edge of the driverdoor (vehicles exported outsidethe US and Canada may not havea Tire Label). Look for “THECOMBINED WEIGHT OFOCCUPANTS AND CARGOSHOULD NEVER EXCEED XXXkg OR XXX lb.” for maximum
payload. The payload listed on theTire Label is the maximumpayload for the vehicle as built bythe assembly plant. If you installany aftermarket orauthorized-dealer installedequipment on the vehicle, youmust subtract the weight of theequipment from the payload listedon the Tire Label in order todetermine the new payload.
199Fusion (CC7) , enUSALoad CarryingE143816PAYLOAD
Page 220 of 458

Preparing Your Vehicle
Note:Do not attempt to push-start yourautomatic transmission vehicle. Automatictransmissions do not have push-startcapability. Attempting to push-start avehicle with an automatic transmission maycause transmission damage.
Note:Use only a 12-volt supply to start yourvehicle.
Note:Do not disconnect the battery of thedisabled vehicle as this could damage thevehicle's electrical system.
Park the booster vehicle close to the hoodof the disabled vehicle, making sure thetwo vehicles do not touch. Turn allaccessories off.
Connecting the Jumper Cables
WARNING
Do not attach the cables to fuel lines,engine rocker covers, the intakemanifold or electrical componentsas grounding points. Stay clear of movingparts. To avoid reverse polarityconnections, make sure that you correctlyidentify the positive (+) and negative (-)terminals on both the disabled and boostervehicles before connecting the cables.
Note:In the illustration, the bottom vehiclerepresents the booster vehicle.
1.Connect the positive (+) jumper cableto the positive (+) terminal of thedischarged battery.
2.Connect the other end of the positive(+) cable to the positive (+) terminalof the assisting battery.
3.Connect the negative (-) cable to thenegative (-) terminal of the assistingbattery.
4.Make the final connection of thenegative (-) cable to an exposed metalpart of the stalled vehicle's engine, orconnect the negative (-) cable to aground connection point if available.
WARNING
Do not connect the end of thesecond cable to the negative (-)terminal of the battery to be jumped.A spark may cause an explosion of thegases that surround the battery.
217Fusion (CC7) , enUSARoadside Emergencies4213E142664
Page 244 of 458
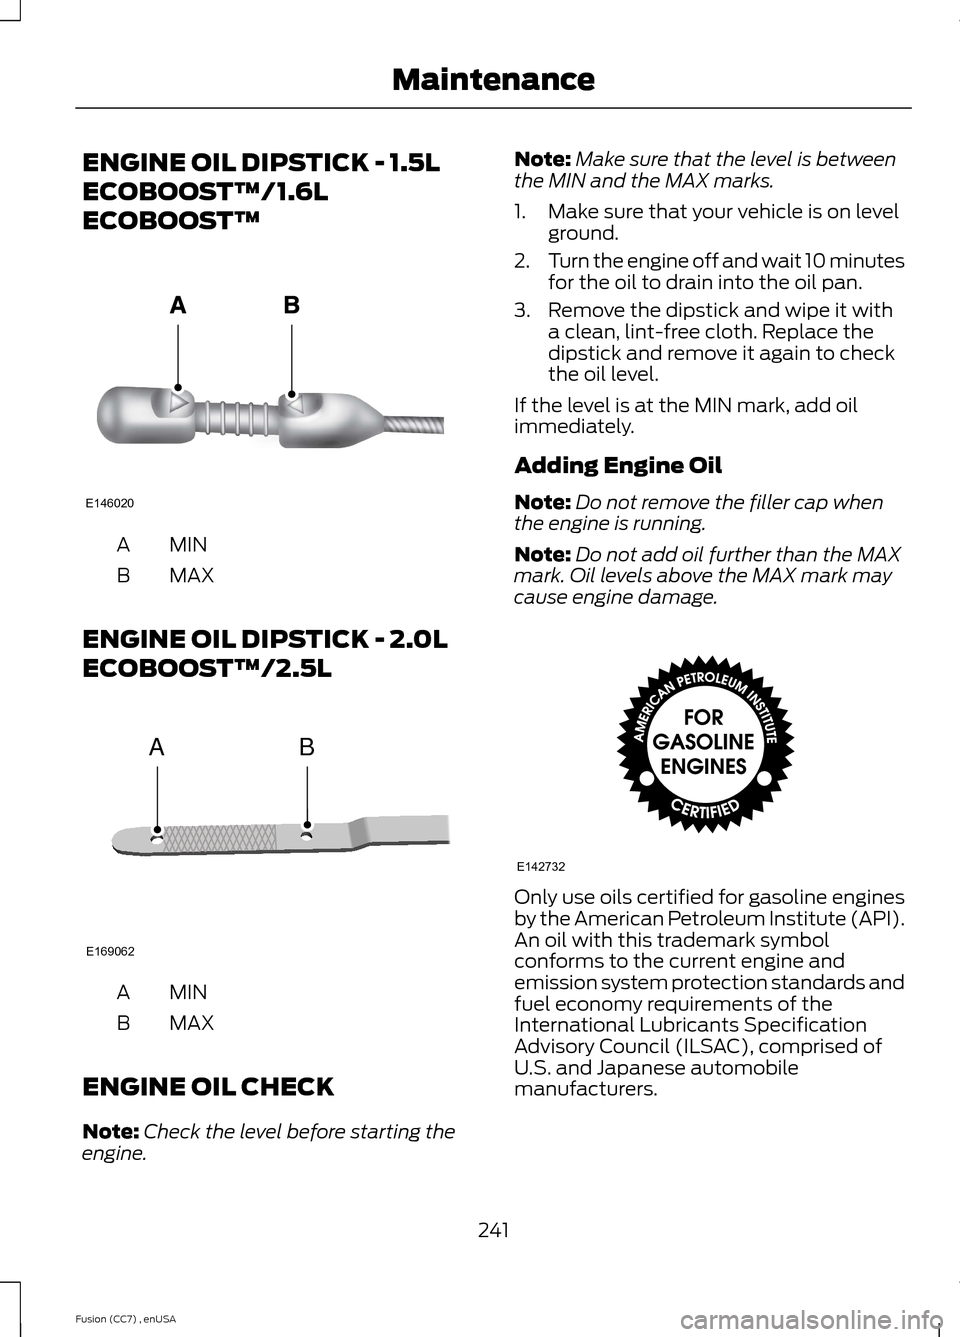
ENGINE OIL DIPSTICK - 1.5L
ECOBOOST™/1.6L
ECOBOOST™
MINA
MAXB
ENGINE OIL DIPSTICK - 2.0L
ECOBOOST™/2.5L
MINA
MAXB
ENGINE OIL CHECK
Note:Check the level before starting theengine.
Note:Make sure that the level is betweenthe MIN and the MAX marks.
1.Make sure that your vehicle is on levelground.
2.Turn the engine off and wait 10 minutesfor the oil to drain into the oil pan.
3.Remove the dipstick and wipe it witha clean, lint-free cloth. Replace thedipstick and remove it again to checkthe oil level.
If the level is at the MIN mark, add oilimmediately.
Adding Engine Oil
Note:Do not remove the filler cap whenthe engine is running.
Note:Do not add oil further than the MAXmark. Oil levels above the MAX mark maycause engine damage.
Only use oils certified for gasoline enginesby the American Petroleum Institute (API).An oil with this trademark symbolconforms to the current engine andemission system protection standards andfuel economy requirements of theInternational Lubricants SpecificationAdvisory Council (ILSAC), comprised ofU.S. and Japanese automobilemanufacturers.
241Fusion (CC7) , enUSAMaintenanceE146020 ABE169062 E142732
Page 248 of 458
AUTOMATIC TRANSMISSION
FLUID CHECK
Note:Transmission fluid should be checkedby an authorized dealer. If required, fluidshould be added by an authorized dealer.
The automatic transmission does not havea transmission fluid dipstick.
Have an authorized dealer check andchange the transmission fluid and filter atthe correct service interval. SeeScheduled Maintenance (page 428). Yourtransmission does not consume fluid.However, the fluid level should be checkedif the transmission is not working properly,(i.e., if the transmission slips or shiftsslowly) or if you notice some sign of fluidleakage.
Do not use supplemental transmissionfluid additives, treatments or cleaningagents. The use of these materials mayaffect transmission operation and resultin damage to internal transmissioncomponents.
BRAKE AND CLUTCH FLUID
CHECK
Fluid levels between the MIN and MAXlines are within the normal operating range;there is no need to add fluid. If the fluidlevels are outside of the normal operatingrange, the performance of the systemcould be compromised; seek service fromyour authorized dealer immediately.
POWER STEERING FLUID
CHECK
Your vehicle is equipped with an electricpower steering (EPS) system. There is nofluid reservoir to check or fill.
WASHER FLUID CHECK
WARNING
If you operate your vehicle intemperatures below 40°F (5°C), usewasher fluid with antifreezeprotection. Failure to use washer fluid withantifreeze protection in cold weather couldresult in impaired windshield vision andincrease the risk of injury or accident.
Add fluid to fill the reservoir if the level islow. Only use a washer fluid that meetsFord specifications. See Capacities andSpecifications (page 287).
State or local regulations on volatileorganic compounds may restrict the useof methanol, a common windshield washerantifreeze additive. Washer fluidscontaining non-methanol antifreezeagents should be used only if they providecold weather protection without damagingthe vehicle’s paint finish, wiper blades orwasher system.
FUEL FILTER
Your vehicle is equipped with a lifetimefuel filter that is integrated with the fueltank. Regular maintenance or replacementis not needed.
CHANGING THE 12V BATTERY
WARNINGS
Batteries normally produce explosivegases which can cause personalinjury. Therefore, do not allowflames, sparks or lighted substances tocome near the battery. When working nearthe battery, always shield your face andprotect your eyes. Always provide properventilation.
245Fusion (CC7) , enUSAMaintenance