2014 FORD F150 fuel pressure
[x] Cancel search: fuel pressurePage 244 of 472
Only use oils certified for gasoline engines
by the American Petroleum Institute (API).
An oil with this trademark symbol
conforms to the current engine and
emission system protection standards and
fuel economy requirements of the
International Lubricants Specification
Advisory Council (ILSAC), comprised of
U.S. and Japanese automobile
manufacturers.
1. Check the engine oil level.
2. If the engine oil level is not within the
normal range, add engine oil that
meets Ford specifications. See
Capacities and Specifications (page
296
).
3. Remove the engine oil filler cap and use a funnel to pour the engine oil into
the opening.
4. Recheck the engine oil level. Make sure
the oil level is not above the normal
operating range on the engine oil level
dipstick.
5. Install the engine oil level dipstick and ensure it is fully seated.
6. Fully install the engine oil filler cap by turning the filler cap clockwise until
three clicks are heard or until the cap
is fully seated.
ENGINE COOLANT CHECK WARNINGS
Do not add engine coolant when the
engine is hot. Steam and scalding
liquids released from a hot cooling
system can burn you badly. Also, spilling
coolant on hot engine parts can burn you. Do not put engine coolant in the
windshield washer fluid container. If
sprayed on the windshield, engine
coolant could make it difficult to see
through the windshield. WARNINGS
To reduce the risk of personal injury,
make sure the engine is cool before
unscrewing the coolant pressure
relief cap. The cooling system is under
pressure. steam and hot liquid can come
out forcefully when you loosen the cap
slightly. Do not add coolant further than the
MAX mark.
Checking the Engine Coolant
When the engine is cold, check the
concentration and level of the engine
coolant at the intervals listed in the
scheduled maintenance information. See
Scheduled Maintenance
(page 438).
Note: Make sure that the coolant level is
between the MIN and MAX marks on the
coolant reservoir.
Note: Coolant expands when it is hot. The
level may extend beyond the MAX mark.
Note: If the level is at the MIN mark, below
the MIN mark, or empty, add coolant
immediately. See
Adding Engine Coolant
in this chapter.
Maintain coolant concentration within
48% to 50%, which equates to a freeze
point between -30°F (-34°C) and -34°F
(-37°C).
Note: For best results, coolant
concentration should be tested with a
refractometer such as Rotunda tool
300-ROB75240 available from your
authorized dealer. Ford does not
recommend the use of hydrometers or
coolant test strips for measuring coolant
concentrations.
Note: Automotive fluids are not
interchangeable. Do not use engine coolant,
antifreeze or windshield washer fluid outside
of its specified function and vehicle location.
241
F150 (TF6) , enUSA Maintenance
Page 250 of 472
WARNINGS
This vehicle may be equipped with
more than one battery, removal of
cable from only one battery does not
disconnect your vehicle electrical system.
Be sure to disconnect cables from all
batteries when disconnecting power.
Failure to do so may cause serious
personal injury or property damage. When lifting a plastic-cased battery,
excessive pressure on the end walls
could cause acid to flow through the
vent caps, resulting in personal injury and
damage to the vehicle or battery. Lift the
battery with a battery carrier or with your
hands on opposite corners. Keep batteries out of reach of
children. Batteries contain sulfuric
acid. Avoid contact with skin, eyes or
clothing. Shield your eyes when working
near the battery to protect against possible
splashing of acid solution. In case of acid
contact with skin or eyes, flush
immediately with water for a minimum of
15 minutes and get prompt medical
attention. If acid is swallowed, call a
physician immediately. Note:
If your battery has a cover/shield,
make sure it is reinstalled after the battery
has been cleaned or replaced.
Note: Battery posts, terminals and related
accessories contain lead and lead
compounds. Wash hands after handling.
Note: Electrical or electronic accessories
or components added to your vehicle by the
dealer or the owner may adversely affect
battery performance and durability.
Your vehicle is equipped with a Motorcraft
maintenance-free battery which normally
does not require additional water during
its life of service. For longer, trouble-free operation, keep the
top of the battery clean and dry. Also,
make certain the battery cables are always
tightly fastened to the battery terminals.
If you see any corrosion on the battery or
terminals, remove the cables from the
terminals and clean with a wire brush. You
can neutralize the acid with a solution of
baking soda and water.
It is recommended that the negative
battery cable terminal be disconnected
from the battery if you plan to store your
vehicle for an extended period of time.
Because your vehicle
’s engine is
electronically controlled by a computer,
some control conditions are maintained
by power from the battery. When the
battery is disconnected or a new battery
is installed, the engine must relearn its idle
and fuel trim strategy for optimum
driveability and performance. Flexible fuel
vehicles (FFV) must also relearn the
ethanol content of the fuel for optimum
driveability and performance. To begin this
process:
1. With your vehicle at a complete stop, set the parking brake.
2. Put the gearshift in P(Park), turn off all
accessories.
3. Start the engine. Run the engine until it reaches normal operating
temperature.
4. Allow the engine to idle for at least one
minute.
5. Turn the air conditioning on and allow the engine to idle for at least one
minute.
247
F150 (TF6) , enUSA Maintenance
Page 262 of 472
GENERAL INFORMATION
Your Ford or Lincoln authorized dealer has
many quality products available to clean
your vehicle and protect its finishes.
CLEANING PRODUCTS
For best results, use the following products
or products of equivalent quality:
•
Motorcraft Bug and Tar Remover
(ZC-42)
• Motorcraft Custom Bright Metal
Cleaner (ZC-15)
• Motorcraft Detail Wash (ZC-3-A)
• Motorcraft Dusting Cloth (ZC-24)
• Motorcraft Engine Shampoo and
Degreaser (U.S. only) (ZC-20)
• Motorcraft Engine Shampoo (Canada
only) (CXC-66-A)
• Motorcraft Multi-Purpose Cleaner
(Canada only) (CXC-101)
• Motorcraft Premium Glass Cleaner
(Canada only) (CXC-100)
• Motorcraft Premium Quality
Windshield Washer Fluid (Canada
only) [CXC-37-(A, B, D or F)]
• Motorcraft Premium Windshield Wash
Concentrate with Bitterant (U.S. only)
(ZC-32-B2)
• Motorcraft Professional Strength
Carpet & Upholstery Cleaner (ZC-54)
• Motorcraft Spot and Stain Remover
(U.S. only) (ZC-14)
• Motorcraft Ultra-Clear Spray Glass
Cleaner (ZC-23)
• Motorcraft Wheel and Tire Cleaner
(ZC-37-A) CLEANING THE EXTERIOR
Wash your vehicle regularly with cool or
lukewarm water and a neutral pH
shampoo, such as Motorcraft Detail Wash.
•
Never use strong household detergents
or soap, such as dish washing or
laundry liquid. These products can
discolor and spot painted surfaces.
• Never wash a vehicle that is “hot to the
touch ” or during exposure to strong,
direct sunlight.
• Dry your vehicle with a chamois or soft
terry cloth towel in order to eliminate
water spotting.
• Immediately remove items such as
gasoline, diesel fuel, bird droppings and
insect deposits because they can cause
damage to your vehicle ’s paintwork
and trim over time. Use Motorcraft Bug
and Tar Remover.
• Remove any exterior accessories, such
as antennas, before entering a car
wash.
Note: Suntan lotions and insect repellents
can damage any painted surface; if these
substances come in contact with your
vehicle, wash off as soon as possible.
Stripes or Graphics (if equipped)
Do not use a commercial or high-pressure
sprayer on the surface or edge of stripes
and graphics. This can cause damage to
the film and cause the edge of the film to
peel away from the vehicle surface.
Exterior Chrome
Note: Never use abrasive materials such as
steel wool or plastic pads as they can
scratch the chrome surface.
Note: Do not use chrome cleaner, metal
cleaner or polish on wheels and wheel
covers
259
F150 (TF6) , enUSA Vehicle Care
Page 268 of 472
Engine
•
The engine oil and filter should be
changed prior to storage, as used
engine oil contain contaminates that
may cause engine damage.
• Start the engine every 15 days. Run at
fast idle until it reaches normal
operating temperature
• With your foot on the brake, shift
through all the gears while the engine
is running.
Fuel system
• Fill the fuel tank with high-quality fuel
until the first automatic shutoff of the
fuel pump nozzle.
Cooling system
• Protect against freezing temperatures.
• When removing your vehicle from
storage, check coolant fluid level.
Confirm there are no cooling system
leaks, and fluid is at the recommended
level.
Battery
• Check and recharge as necessary. Keep
connections clean.
• If storing your vehicle for more than 30
days without recharging the battery, it
may be advisable to disconnect the
battery cables to ensure battery charge
is maintained for quick starting.
Note: If battery cables are disconnected, it
will be necessary to reset memory features.
Brakes
• Make sure brakes and parking brake
are fully released.
Tires
• Maintain recommended air pressure. Miscellaneous
•
Make sure all linkages, cables, levers
and pins under your vehicle are covered
with grease to prevent rust.
• Move vehicles at least 25 feet (8
meters) every 15 days to lubricate
working parts and prevent corrosion.
Removing Vehicle From Storage
When your vehicle is ready to come out of
storage, do the following:
• Wash your vehicle to remove any dirt
or grease film build-up on window
surfaces.
• Check windshield wipers for any
deterioration.
• Check under the hood for any foreign
material that may have collected
during storage (mice/squirrel nests).
• Check the exhaust for any foreign
material that may have collected
during storage.
• Check tire pressures and set tire
inflation per the Tire Label.
• Check brake pedal operation. Drive
your vehicle 15 feet (4.5 meters) back
and forth to remove rust build-up.
• Check fluid levels (including coolant,
oil and gas) to make sure there are no
leaks, and fluids are at recommended
levels.
• If the battery was removed, clean the
battery cable ends and inspect.
Contact your authorized dealer if you have
any concerns or issues.
265
F150 (TF6) , enUSA Vehicle Care
Page 286 of 472
USING SNOW CHAINS
WARNING
Snow tires must be the same size,
load index, speed rating as those
originally provided by Ford. Use of
any tire or wheel not recommended by
Ford can affect the safety and
performance of your vehicle, which could
result in an increased risk of loss of vehicle
control, vehicle rollover, personal injury and
death. Additionally, the use of
non-recommended tires and wheels could
cause steering, suspension, axle, transfer
case or power transfer unit failure. Note:
The suspension insulation and
bumpers will help prevent vehicle damage.
Do not remove these components from your
vehicle when using snow tires and chains.
Note: Do not place chains on the following
tires sizes: P265/60R18, P275/65R18,
LT275/65R18, LT315/70R17, P275/55R20,
and P275/45R22.
The tires on your vehicle have all-weather
treads to provide traction in rain and snow.
However, in some climates, you may need
to use snow tires and cables. If you need
to use cables, it is recommended that steel
wheels (of the same size and
specifications) be used, as cables may chip
aluminum wheels.
Follow these guidelines when using snow
tires and chains:
• If possible, avoid fully loading your
vehicle
• Use only SAE Class S chains.
• Install chains securely, verifying that
the chains do not touch any wiring,
brake lines or fuel lines. •
Drive cautiously. If you hear the chains
rub or bang against your vehicle, stop
and retighten the chains. If this does
not work, remove the chains to prevent
damage to your vehicle.
• Remove the tire chains when they are
no longer needed. Do not use tire
chains on dry roads.
If you have any questions regarding snow
chains or cables, please contact your
authorized dealer.
TIRE PRESSURE MONITORING
SYSTEM WARNING
The tire pressure monitoring system
is not a substitute for manually
checking tire pressure. The tire
pressure should be checked periodically
(at least monthly) using a tire gauge, see
Inflating your tires in this chapter. Failure
to properly maintain your tire pressure
could increase the risk of tire failure, loss
of control, vehicle rollover and personal
injury. Each tire, including the spare (if
provided), should be checked
monthly when cold and inflated
to the inflation pressure
recommended by the vehicle manufacturer
on the vehicle placard or tire inflation
pressure label. (If your vehicle has tires of
a different size than the size indicated on
the vehicle placard or tire inflation pressure
label, you should determine the proper tire
inflation pressure for those tires.)
As an added safety feature, your vehicle
has been equipped with a Tire Pressure
Monitoring System (TPMS) that
illuminates a low tire pressure telltale
when one or more of your tires is
significantly under-inflated. Accordingly,
283
F150 (TF6) , enUSA Wheels and Tires
Page 287 of 472

when the low tire pressure telltale
illuminates, you should stop and check
your tires as soon as possible, and inflate
them to the proper pressure. Driving on a
significantly under-inflated tire causes the
tire to overheat and can lead to tire failure.
Under-inflation also reduces fuel efficiency
and tire tread life, and may affect the
vehicle
’s handling and stopping ability.
Please note that the TPMS is not a
substitute for proper tire maintenance, and
it is the driver ’s responsibility to maintain
correct tire pressure, even if under-inflation
has not reached the level to trigger
illumination of the TPMS low tire pressure
telltale.
Your vehicle has also been equipped with
a TPMS malfunction indicator to indicate
when the system is not operating properly.
The TPMS malfunction indicator is
combined with the low tire pressure
telltale. When the system detects a
malfunction, the telltale will flash for
approximately one minute and then remain
continuously illuminated. This sequence
will continue upon subsequent vehicle
start-ups as long as the malfunction exists.
When the malfunction indicator is
illuminated, the system may not be able
to detect or signal low tire pressure as
intended. TPMS malfunctions may occur
for a variety of reasons, including the
installation of replacement or alternate
tires or wheels on the vehicle that prevent
the TPMS from functioning properly.
Always check the TPMS malfunction
telltale after replacing one or more tires or
wheels on your vehicle to ensure that the
replacement or alternate tires and wheels
allow the TPMS to continue to function
properly. The tire pressure monitoring system
complies with part 15 of the FCC rules and
with RSS-210 of Industry Canada.
Operation is subject to the following two
conditions: (1) This device may not cause
harmful interference, and (2) This device
must accept any interference received,
including interference that may cause
undesired operation.
Changing Tires With a Tire
Pressure Monitoring System
Note:
Each road tire is equipped with a tire
pressure sensor located inside the wheel
and tire assembly cavity. The pressure
sensor is attached to the valve stem. The
pressure sensor is covered by the tire and is
not visible unless the tire is removed. Take
care when changing the tire to avoid
damaging the sensor
You should always have your tires serviced
by an authorized dealer.
Check the tire pressure periodically (at
least monthly) using an accurate tire
gauge. See Inflating Your Tires in this
chapter.
284
F150 (TF6) , enUSA Wheels and TiresE142549
Page 294 of 472
Tire Change Procedure
WARNINGS
When one of the front wheels is off
the ground, the transmission alone
will not prevent the vehicle from
moving or slipping off the jack, even if the
transmission selector lever is in position P. To help prevent the vehicle from
moving when you change a tire, be
sure to place the transmission
selector lever in position P, set the parking
brake and block (in both directions) the
wheel that is diagonally opposite (other
side and end of the vehicle) to the tire
being changed. Never get underneath a vehicle that
is supported only by a jack. If the
vehicle slips off the jack, you or
someone else could be seriously injured. Do not attempt to change a tire on
the side of the vehicle close to
moving traffic. Pull far enough off the
road to avoid the danger of being hit when
operating the jack or changing the wheel. Always use the jack provided as
original equipment with your vehicle.
If using a jack other than the one
provided as original equipment with your
vehicle, make sure the jack capacity is
adequate for the vehicle weight, including
any vehicle cargo or modifications. Disable the power running boards
before jacking, lifting, or placing any
object under the vehicle. Never place
your hand between the power running
board and the vehicle as extended power
running boards will retract when the doors
are closed. Failure to follow these
instructions may result in personal injury. Note:
Passengers should not remain in the
vehicle when the vehicle is being jacked. Park on a level surface, activate the hazard
flashers and set the parking brake. Then,
place the transmission selector lever in
position P and turn the engine off.
To remove the jack on Regular Cab and
SuperCab models:
Remove the wing nut and turn the jack
screw counterclockwise to release
pressure before removing the jack from the
bracket.
To remove the jack on SuperCrew
models:
1. Lift both rear seat cushions.
2. Remove the insert containing the Easy
Fuel funnel from the driver's side.
3. Remove the two small wing nuts on the passenger side.
4. Slide the plastic box toward the driver's
side and remove.
See the instruction sheet (located with the
jack) for detailed tire change instructions.
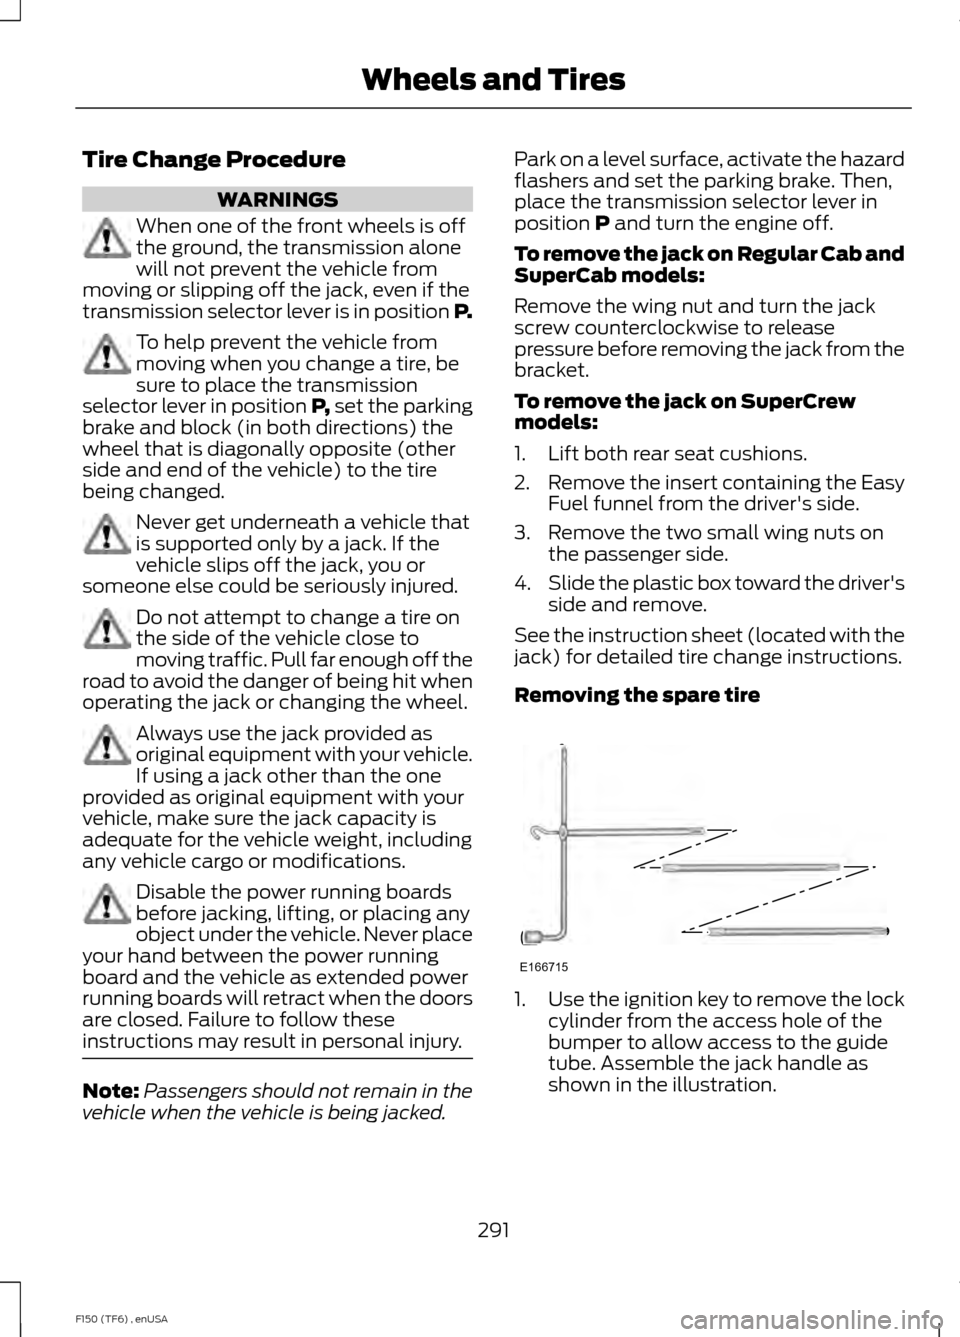
Removing the spare tire 1.
Use the ignition key to remove the lock
cylinder from the access hole of the
bumper to allow access to the guide
tube. Assemble the jack handle as
shown in the illustration.
291
F150 (TF6) , enUSA Wheels and TiresE166715
Page 465 of 472

Front Seat Armrest.......................................122
Fuel and Refueling.......................................139
Fuel Consumption........................................143
Calculating Fuel Economy.............................. 144
Filling the Tank..................................................... 143
Fuel Filter
........................................................246
Fuel Quality....................................................140 Choosing the Right Fuel With a Flex Fuel
Vehicle (If Equipped)................................... 140
Choosing the Right Fuel Without a Flex Fuel Vehicle (If Equipped)................................... 140
Octane Recommendations............................ 140
Fuel Shutoff....................................................216
Fuses.................................................................225
Fuse Specification Chart
...........................225
Auxiliary relay box (SVT Raptor
only)................................................................... 233
Passenger Compartment Fuse Panel.................................................................. 229
Power Distribution Box.................................... 225
G
Garage Door Opener See: Universal Garage Door Opener............124
Gauges................................................................81 Engine Coolant Temperature Gauge............82
Engine Oil Pressure Gauge............................... 82
Fuel Gauge.............................................................. 82
Information Display............................................. 82
Transmission Fluid Temperature Gauge................................................................... 82
General Information on Radio Frequencies...................................................49
General Maintenance Information.......438 Multi-point Inspection.................................... 440
Owner Checks and Services.......................... 439
Protecting Your Investment.......................... 438
Why Maintain Your Vehicle?......................... 438
Why Maintain Your Vehicle at Your Dealership?..................................................... 438
Getting Assistance Outside the U.S. and Canada..........................................................222
Getting the Services You Need................219 Away From Home............................................... 219H
Handbrake
See: Parking Brake............................................. 164
Hazard Warning Flashers
..........................216
HDC See: Using Hill Descent Control.................... 170
Head Restraints
..............................................114
Adjusting the Head Restraint.......................... 115
Heated Seats
.................................................120
Rear Heated Seats............................................... 121
Heated Windows and Mirrors
....................112
Heated Exterior Mirror........................................ 113
Heated Rear Window......................................... 112
Heating See: Climate Control......................................... 106
Hill Start Assist..............................................164 Using Hill Start Assist....................................... 164
Hints on Controlling the Interior Climate...........................................................110
Cooling the Interior Quickly............................... 111
General Hints........................................................ 110
Heating the Interior Quickly.............................. 111
Recommended Settings for Cooling ...........112
Recommended Settings for Heating.............111
Side Window Defogging in Cold Weather.............................................................. 112
Hints on Driving With Anti-Lock Brakes............................................................163
Hood Lock See: Opening and Closing the Hood..........235
I
Ignition Switch
...............................................135
In California (U.S. Only)............................220
Information Display Control.......................67 Type 1........................................................................\
. 67
Type 2........................................................................\
67
Information Displays
.....................................87
General Information............................................ 87
462
F150 (TF6) , enUSA Index