Page 34 of 420

STEERING LOCK
Engagement:when the key is in position STOP,
remove the key and turn the steering wheel until it is
locked.
Disengagement:move the steering wheel slightly
as you turn the ignition key to MAR.
WARNING
It is absolutely forbidden to carr y out
any after-market operation involving
steering system or steering column
modifications (e.g.: installation of anti-theft
device) that could badly affect performance and
safety, invalidate the warranty and also result
in non-compliance of the car with type-
approval requirements.
WARNING
Never remove the key while the car is
moving.The steering wheel will lock
as soon as it is turned.This holds true for cars
being towed as well.
SEATS
WARNING
All adjustments must be made with the
car stationary.The fabric upholstery of the seats has
been designed to withstand long-term
wear deriving from normal use of the car.
Some precautions are however required. Avoid
prolonged and/or excessive rubbing against
clothing accessories such as metal buckles and
Velcro strips which, by applying a high pressure on
the fabric in a small area, could cause it to
break, thereby damaging the upholstery.
30GETTING TO
KNOW YOUR CAR
SAFETY
STARTING AND
DRIVING
WARNING LIGHTS
AND MESSAGES
IN AN EMERGENCY
SERVICING AND
MAINTENANCE
TECHNICAL
SPECIFICATIONS
INDEX
Page 35 of 420
FRONT SEATS
Lengthwise adjustment
Lift lever A fig. 19 (on the inner side of the seat) and
push the seat forwards or backwards: in driving
position your arms should rest on the rim of the
steering wheel.
WARNING
Once you have released the adjustment
lever, always check that the seat is
locked on the guides by trying to move it back
and for th. If the seat is not locked into place,
it may unexpectedly slide and cause the driver
to lose control of the car.Height adjustment
(for versions/markets, where provided)
Move lever B fig. 20 upwards or downwards to
achieve the required height.
IMPORTANT Carry out the adjustment while sitting
on the seat involved (driver side or passenger side).
fig. 19
F0Y0218
fig. 20
F0Y0216
31GETTING TO
KNOW YOUR CARSAFETY
STARTING AND
DRIVING
WARNING LIGHTS
AND MESSAGES
IN AN EMERGENCY
SERVICING AND
MAINTENANCE
TECHNICAL
SPECIFICATIONS
INDEX
Page 42 of 420
STEERING WHEELThe steering wheel can be adjusted both axially and
vertically.
To adjust, move lever A fig. 32 downwards to
position 1, then adjust the steering wheel to the
most suitable position and lock it in position by
moving lever A to position 2.
WARNING
All adjustments must be carried out only
with the car stationary and engine off.
WARNING
It is absolutely forbidden to carr y out
any after-market operation involving
steering system or steering column
modifications (e.g. installation of anti-theft
device) that could badly affect performance and
safety, invalidate the warranty and also result
in the car not meeting type-approval
requirements.
fig. 32
F0Y0043
38GETTING TO
KNOW YOUR CAR
SAFETY
STARTING AND
DRIVING
WARNING LIGHTS
AND MESSAGES
IN AN EMERGENCY
SERVICING AND
MAINTENANCE
TECHNICAL
SPECIFICATIONS
INDEX
Page 70 of 420

"Smart washing" function
Pull the lever towards the steering wheel (unstable
position) to activate the windscreen washer.
Keeping the stalk pulled for more than half a second,
with just one movement it is possible to operate
the washer jet and the wiper at the same time.
The wiper stops working three strokes after the
stalk is released.
A further stroke after approximately six seconds
completes the wiping cycle (for versions/markets,
where provided).
RAIN SENSOR
(for versions/markets, where provided)
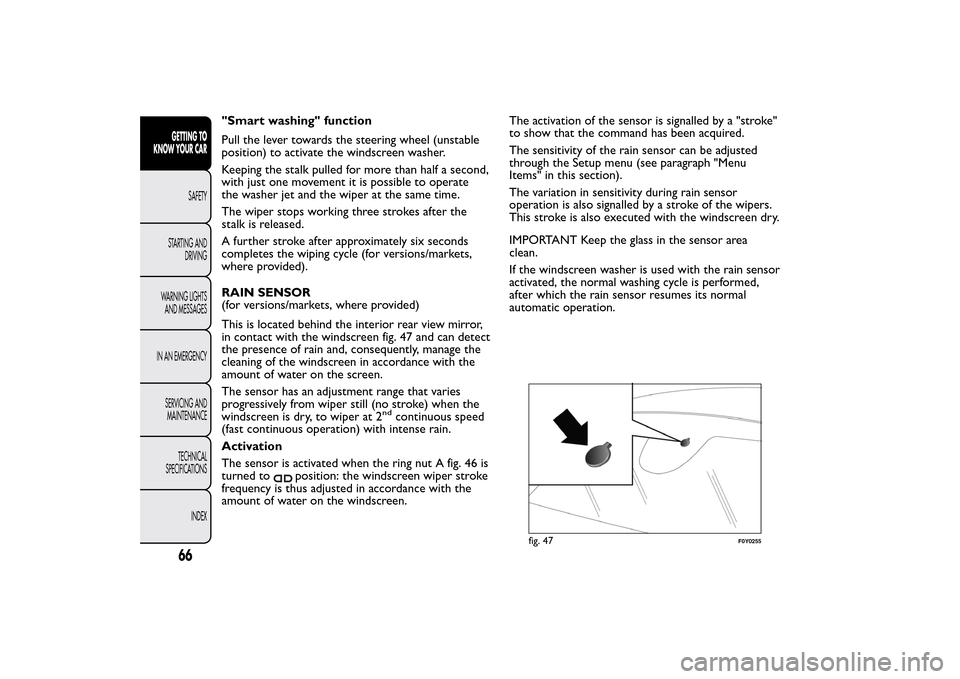
This is located behind the interior rear view mirror,
in contact with the windscreen fig. 47 and can detect
the presence of rain and, consequently, manage the
cleaning of the windscreen in accordance with the
amount of water on the screen.
The sensor has an adjustment range that varies
progressively from wiper still (no stroke) when the
windscreen is dry, to wiper at 2
nd
continuous speed
(fast continuous operation) with intense rain.
Activation
The sensor is activated when the ring nut A fig. 46 is
turned to
position: the windscreen wiper stroke
frequency is thus adjusted in accordance with the
amount of water on the windscreen.The activation of the sensor is signalled by a "stroke"
to show that the command has been acquired.
The sensitivity of the rain sensor can be adjusted
through the Setup menu (see paragraph "Menu
Items" in this section).
The variation in sensitivity during rain sensor
operation is also signalled by a stroke of the wipers.
This stroke is also executed with the windscreen dry.
IMPORTANT Keep the glass in the sensor area
clean.
If the windscreen washer is used with the rain sensor
activated, the normal washing cycle is performed,
after which the rain sensor resumes its normal
automatic operation.
fig. 47
F0Y0255
66GETTING TO
KNOW YOUR CAR
SAFETY
STARTING AND
DRIVING
WARNING LIGHTS
AND MESSAGES
IN AN EMERGENCY
SERVICING AND
MAINTENANCE
TECHNICAL
SPECIFICATIONS
INDEX
Page 362 of 420

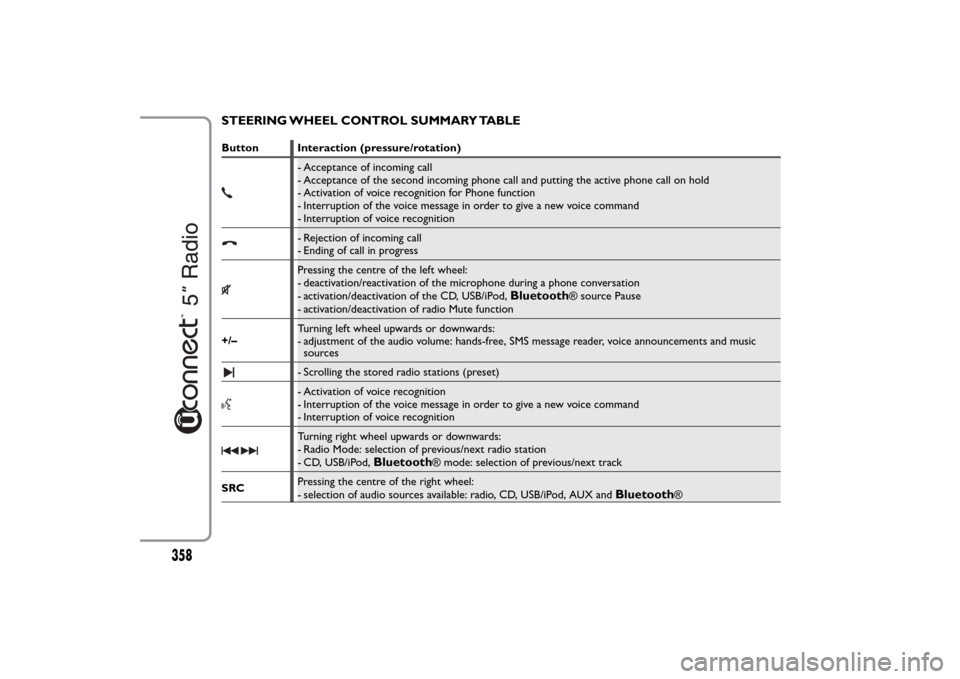
STEERING WHEEL CONTROL SUMMARY TABLEButton Interaction (pressure/rotation)
- Acceptance of incoming call
- Acceptance of the second incoming phone call and putting the active phone call on hold
- Activation of voice recognition for Phone function
- Interruption of the voice message in order to give a new voice command
- Interruption of voice recognition- Rejection of incoming call
- Ending of call in progressPressing the centre of the left wheel:
- deactivation/reactivation of the microphone during a phone conversation
- activation/deactivation of the CD, USB/iPod,
Bluetooth
® source Pause
- activation/deactivation of radio Mute function
+/–Turning left wheel upwards or downwards:
- adjustment of the audio volume: hands-free, SMS message reader, voice announcements and music
sources
- Scrolling the stored radio stations (preset)- Activation of voice recognition
- Interruption of the voice message in order to give a new voice command
- Interruption of voice recognitionTurning right wheel upwards or downwards:
- Radio Mode: selection of previous/next radio station
- CD, USB/iPod,
Bluetooth
® mode: selection of previous/next track
SRCPressing the centre of the right wheel:
- selection of audio sources available: radio, CD, USB/iPod, AUX and
Bluetooth
®
358
Page 374 of 420

USB/iPod SUPPORTTo activate the USB/iPod mode insert the
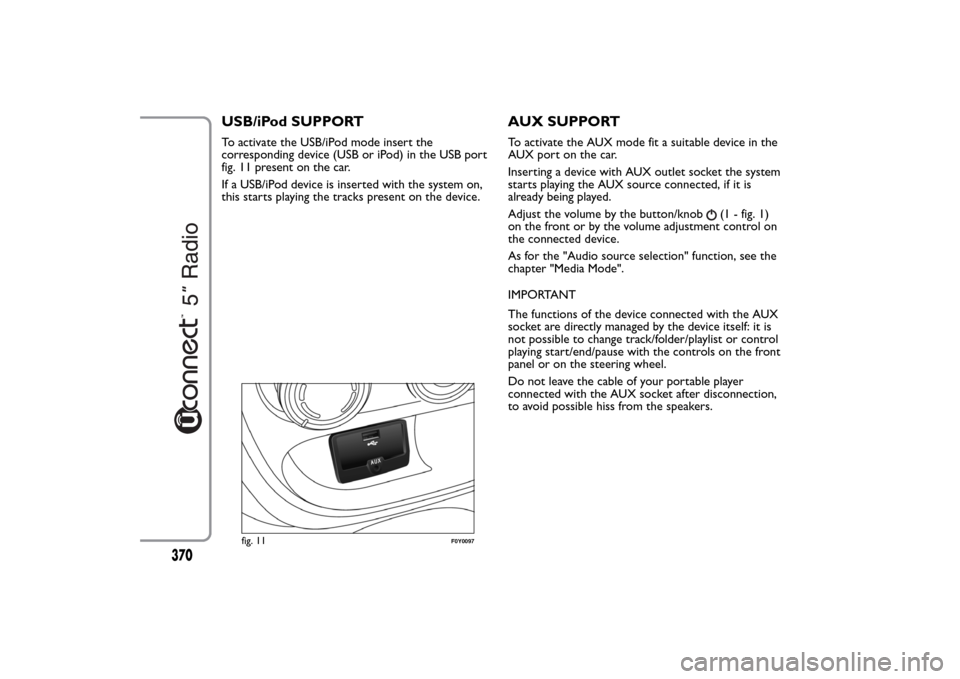
corresponding device (USB or iPod) in the USB port
fig. 11 present on the car.
If a USB/iPod device is inserted with the system on,
this starts playing the tracks present on the device.
AUX SUPPORTTo activate the AUX mode fit a suitable device in the
AUX port on the car.
Inserting a device with AUX outlet socket the system
starts playing the AUX source connected, if it is
already being played.
Adjust the volume by the button/knob
(1 - fig. 1)
on the front or by the volume adjustment control on
the connected device.
As for the "Audio source selection" function, see the
chapter "Media Mode".
IMPORTANT
The functions of the device connected with the AUX
socket are directly managed by the device itself: it is
not possible to change track/folder/playlist or control
playing start/end/pause with the controls on the front
panel or on the steering wheel.
Do not leave the cable of your portable player
connected with the AUX socket after disconnection,
to avoid possible hiss from the speakers.
fig. 11
F0Y0097
370