Page 121 of 156

JUMP-STARTING
• If your vehicle has a discharged battery itcan be jump-started using a set of jumper
cables and a battery in another vehicle or
by using a portable battery booster pack.
• Jump-starting can be dangerous if done improperly so please follow the proce-
dures in this section carefully.
NOTE:
When using a portable battery booster pack
follow the manufacturer’s operating instruc-
tions and precautions.
Preparations For Jump-Start
• The battery in your vehicle is located on the left side of the engine compartment.
• Set the parking brake, shift the automatic transmission into PARK and turn the ignition to LOCK.
• Turn off the heater, radio, and all unnecessary electrical accessories.
• If using another vehicle to jump-start the battery, park the vehicle within the jumper cables reach, set the parking brake and make sure the ignition is OFF.
Jump-Starting Procedure
1. Connect the positive (+)end of the jumper cable to the positive (+)post of the vehicle with
the discharged battery.
2. Connect the opposite end of the positive (+)jumper cable to the positive (+)post of the
booster battery.
3. Connect the negative (-)end of the jumper cable to the negative (-)post of the booster
battery.
4. Connect the opposite end of the negative (-)jumper cable to a good engine ground
(exposed metal part of the discharged vehicle’s engine) away from the battery and the
fuel injection system.
5. Start the engine in the vehicle that has the booster battery, let the engine idle a few minutes, and then start the engine in the vehicle with the discharged battery.
Once the engine is started, remove the jumper cables in the reverse sequence:
1. Disconnect the negative (-)end of the jumper cable from the engine ground of the vehicle
with the discharged battery.
2. Disconnect the opposite end of the negative (-)jumper cable from the negative (-)post
of the booster battery.
Positive Battery Post
WHAT TO DO IN EMERGENCIES
119
Page 122 of 156
end of the jumper cable from the positive (+)post of the
booster battery.
4. Disconnect the opposite end of the positive (+)jumper cable from the positive (+)post of
the v")
3. Disconnect the positive(+)end of the jumper cable from the positive (+)post of the
booster battery.
4. Disconnect the opposite end of the positive (+)jumper cable from the positive (+)post of
the vehicle with the discharged battery.
NOTE:
If frequent jump-starting is required to start your vehicle you should have the battery and
charging system inspected at your authorized dealer.
CAUTION!
• Do not use a portable battery booster pack or any other booster source with a system voltage greater than 12 Volts or damage to the battery, starter motor, alternator or
electrical system may occur.
• Failure to follow these procedures could result in damage to the charging system of the booster vehicle or the discharged vehicle.
• Accessories that can be plugged into the vehicle power outlets draw power from the vehicle’s battery, even when not in use (e.g., cellular phones, etc.). Eventually, if
plugged in long enough, the vehicle’s battery discharges sufficiently to degrade
battery life and/or prevent the engine from starting.
WARNING!
• When temperatures are below the freezing point, electrolyte in a discharged batterymay freeze. Do not attempt jump-starting because the battery could rupture or
explode and cause personal injury. Battery temperature must be brought above the
freezing point before attempting a jump-start.
• Take care to avoid the radiator cooling fan whenever the hood is raised. It can start anytime the ignition switch is on. You can be injured by moving fan blades.
• Remove any metal jewelry, such as watch bands or bracelets, that might make an
inadvertent electrical contact. You could be severely injured.
•
Batteries contain sulfuric acid that can burn your skin or eyes and generate hydrogen gas
which is flammable and explosive. Keep open flames or sparks away from the battery.
• Do not allow vehicles to touch each other as this could establish a ground connection
and personal injury could result.
• Failure to follow this procedure could result in personal injury or property damage
due to battery explosion.
• Do not connect the cable to the negative post (-) of the discharged battery. The resulting electrical spark could cause the battery to explode and could result in
personal injury.
WHAT TO DO IN EMERGENCIES
120
Page 123 of 156

SHIFT LEVER OVERRIDE
If a malfunction occurs and the shift lever
cannot be moved out of the PARK position,
you can use the following procedure to tem-
porarily move the shift lever:
1. To access the shift lever override, removethe cover located to the top right of the
shift lever in the instrument panel.
2. Firmly set the parking brake.
3. Turn the ignition switch to the ACC or ON position without starting the engine.
4. Press and maintain firm pressure on the brake pedal.
5. The override can be activated by pressing the white-colored tab, which can be ac-
cessed through the hole in the instru-
ment panel.
6. Move the shift lever into the NEUTRAL position.
7. The vehicle may then be started in NEUTRAL.
8. Reinstall the override cover.
TOWING A DISABLED VEHICLE
Towing Condition Wheels OFF the Ground ALL MODELS
Flat Tow NONEIf transmission is operable:
• Transmission in NEUTRAL
• 25 mph (40 km/h) max
speed
• 15 miles (24 km) max
distance
Wheel lift Rear
Front OK
Flatbed ALLBEST METHOD
Shift Lever Override
WHAT TO DO IN EMERGENCIES
121
Page 124 of 156

FREEING A STUCK VEHICLE
• If your vehicle becomes stuck in mud, sand or snow, it can often be moved using arocking motion. Turn your steering wheel right and left to clear the area around the front
wheels. Then shift back and forth between DRIVE and REVERSE while gently pressing the
accelerator. Use the least amount of accelerator pedal pressure that will maintain the
rocking motion, without spinning the wheels or racing the engine.
NOTE:
Press the "ESC Off" switch, to place the Electronic Stability Control (ESC) system in "Partial
Off" mode before rocking the vehicle. Once the vehicle has been freed, press the "ESC Off"
switch again to restore "ESC On" mode.
CAUTION!
• When “rocking” a stuck vehicle by shifting between REVERSE and DRIVE, do not spin the wheels faster than 15 mph (24 km/h), or drivetrain damage may result.
• Revving the engine or spinning the wheels too fast may lead to transmission over-
heating and failure. It can also damage the tires. Do not spin the wheels above
30 mph (48 km/h) while in gear (no transmission shifting occurring).
WARNING!
Fast spinning tires can be dangerous. Forces generated by excessive wheel speeds may
cause tire damage or failure. A tire could explode and injure someone. Do not spin your
vehicle's wheels faster than 30 mph (48 km/h) when you are stuck. Do not let anyone
near a spinning wheel, no matter what the speed.
WHAT TO DO IN EMERGENCIES
122
Page 125 of 156

This vehicle is equipped with an Event Data Recorder (EDR). The main purpose of an EDR is
to record, in certain crash or near crash-like situations, such as an air bag deploy")
EVENT DATA RECORDER (EDR)
This vehicle is equipped with an Event Data Recorder (EDR). The main purpose of an EDR is
to record, in certain crash or near crash-like situations, such as an air bag deployment or
hitting a road obstacle, data that will assist in understanding how a vehicle’s systems
performed. The EDR is designed to record data related to vehicle dynamics and safety
systems for a short period of time, typically 30 seconds or less. The EDR in this vehicle is
designed to record such data as:
• How various systems in your vehicle were operating.
• Whether or not the driver and passenger safety belts were buckled/fastened.
• How far (if at all) the driver was depressing the accelerator and/or brake pedal.
• How fast the vehicle was traveling.
These data can help provide a better understanding of the circumstances in which crashes
and injuries occur.
NOTE:
EDR data is recorded by your vehicle only if a non-trivial crash situation occurs; no data is
recorded by the EDR under normal driving conditions and no personal data (e.g. name,
gender, age, and crash location) is recorded. However, other parties, such as law enforce-
ment, could combine the EDR data with the type of personally identifying data routinely
acquired during a crash investigation.
To read data recorded by an EDR, special equipment is required, and access to the vehicle
or the EDR is needed. In addition to the vehicle manufacturer, other parties such as law
enforcement, that have the special equipment, can read the information if they have
access to the vehicle or the EDR.
WHAT TO DO IN EMERGENCIES
123
Page 126 of 156
OPENING THE HOOD
1.Pull the hood release lever located on the
instrument panel, below the steering col-
umn.
2. Raise the hood and locate the safety catch lever, in the middle of the hood
opening.
3. Move the safety latch while lifting the hood at the same time.
4. Insert the support rod into the slot on the hood.
5. To close the hood, remove the support rod and place it in the retaining clip, then
lower the hood slowly.
WARNING!
Be sure the hood is fully latched before driving your vehicle. If the hood is not fully
latched, it could open when the vehicle is in motion and block your vision. Failure to
follow this warning could result in serious injury or death.
Hood Release Lever
MAINTAINING YOUR VEHICLE
124
Page 127 of 156

• The gas cap is located behind the fuelfiller door on the left side of the vehicle.
If the gas cap is lost or damaged, be sure
the replacement cap is for use w")
ADDING FUEL
Fuel Filler Cap (Gas Cap)
• The gas cap is located behind the fuelfiller door on the left side of the vehicle.
If the gas cap is lost or damaged, be sure
the replacement cap is for use with this
vehicle.
• When the fuel nozzle “clicks” or shuts off, the fuel tank is full.
• Tighten the gas cap until you hear a “clicking” sound. This is an indication that
the gas cap is properly tightened. If not
properly tightened, the MIL (Malfunction
Indicator Light) may come on.
NOTE:
The driver’s side sliding door cannot be
opened while the fuel door is open.
CAUTION!
• Damage to the fuel system or emissions control system could result from using an improper gas cap. A poorly fitting cap could let impurities into the fuel system and
may cause the MIL to turn on, due to fuel vapors escaping from the system.
• To avoid fuel spillage and overfilling, do not “top off” the fuel tank after filling.
WARNING!
• Never have any smoking materials lit in or near the vehicle when the gas cap is
removed or the tank filled.
• Never add fuel when the engine is running. This is in violation of most state and
federal fire regulations and/or local bylaws, and will cause the MIL to turn on.
• A fire may result if gasoline is pumped into a portable container that is inside of a
vehicle. You could be burned. Always place gas containers on the ground while filling.
E-85 FLEXIBLE FUEL — (3.6L ENGINE ONLY)
Refer to your Owner's Manual on the DVD for further details.
CAUTION!
Only vehicles with the E-85 fuel filler door label or a yellow gas cap can operate on E-85.
MAINTAINING YOUR VEHICLE
125
Page 128 of 156
ENGINE COMPARTMENT3.6L Engine
MAINTAINING YOUR VEHICLE
126
 1
1 2
2 3
3 4
4 5
5 6
6 7
7 8
8 9
9 10
10 11
11 12
12 13
13 14
14 15
15 16
16 17
17 18
18 19
19 20
20 21
21 22
22 23
23 24
24 25
25 26
26 27
27 28
28 29
29 30
30 31
31 32
32 33
33 34
34 35
35 36
36 37
37 38
38 39
39 40
40 41
41 42
42 43
43 44
44 45
45 46
46 47
47 48
48 49
49 50
50 51
51 52
52 53
53 54
54 55
55 56
56 57
57 58
58 59
59 60
60 61
61 62
62 63
63 64
64 65
65 66
66 67
67 68
68 69
69 70
70 71
71 72
72 73
73 74
74 75
75 76
76 77
77 78
78 79
79 80
80 81
81 82
82 83
83 84
84 85
85 86
86 87
87 88
88 89
89 90
90 91
91 92
92 93
93 94
94 95
95 96
96 97
97 98
98 99
99 100
100 101
101 102
102 103
103 104
104 105
105 106
106 107
107 108
108 109
109 110
110 111
111 112
112 113
113 114
114 115
115 116
116 117
117 118
118 119
119 120
120 121
121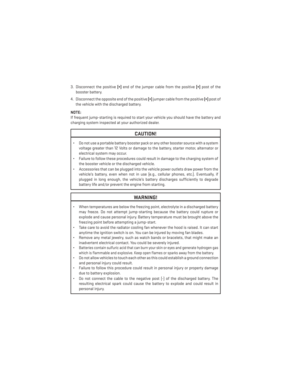 122
122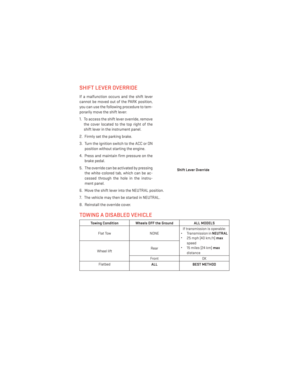 123
123 124
124 125
125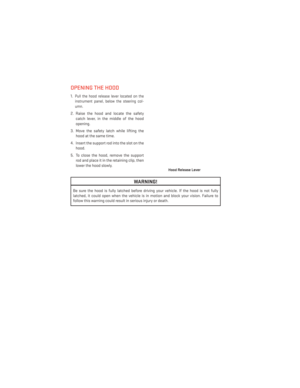 126
126 127
127 128
128 129
129 130
130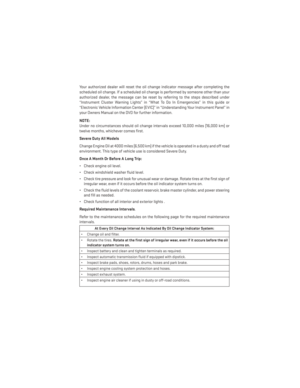 131
131 132
132 133
133 134
134 135
135 136
136 137
137 138
138 139
139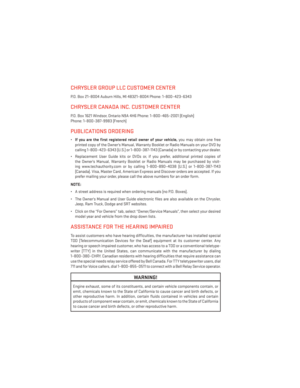 140
140 141
141 142
142 143
143 144
144 145
145 146
146 147
147 148
148 149
149 150
150 151
151 152
152 153
153 154
154 155
155
