Page 97 of 188

• Touch + or – next to Set Time Hours and Set Time Minutes to adjust the time.
• If these features are not available, uncheck the Sync Time box.
• Touch X to save your settings and exit out of the Clock Setting screen.
Audio Settings
• Touch the “Audio” soft-key to activate the Audio settings screen to adjust Balance\Fade,Equalizer and Speed Adjusted Volume.
• You can return to the Radio screen by touching the X located at the top right.
Balance/Fade
• Touch the “Balance/Fade” soft-key to balance audio between the front speakers or fade the audio between the rear and front speakers.
• Touching the “Front, Rear, Left, or Right” soft-keys or touch and drag the blue Speaker Icon to adjust the Balance/Fade.
Equalizer
• Touch the “Equalizer” soft-key to activate the Equalizer screen.
• Touch the + or - soft-keys, or by touching and dragging over the level bar for each of the equalizer bands. The level value, which spans between plus or minus 9, is displayed at
the bottom of each of the Bands.
Speed Adjusted Volume
• Touch the “Speed Adjusted Volume” soft-key to activate the Speed Adjusted Volume screen. The Speed Adjusted Volume is adjusted by touching the volume level indicator.
This alters the automatic adjustment of the audio volume with variation to vehicle speed.
Surround Sound
• Touch the “Surround Sound” soft-key, select On or Off followed by pressing the “arrow back” soft-key. When this feature is activated, it provides simulated surround sound
mode.
ELECTRONICS
95
Page 98 of 188
 soft-key.
Seek Up/Seek Dow")
RADIO
• To access the Radio mode, touch the “Radio” soft-key at the lower left of the screen.
Selecting Radio Stations
• Touch the desired radio band (AM, FM or SXM) soft-key.
Seek Up/Seek Down
• Touch the “Seek” arrow soft-keys for less than two seconds to seek through radiostations.
• Touch and hold either arrow soft-key for more than two seconds to bypass stations without stopping. The radio will stop at the next listenable station once the arrow
soft-key is released.
Direct Tune
• Tune directly to a radio station by pressing the “Tune” button on the screen, and entering the desired station number.
Store Radio Presets
• Your radio can store 36 total preset stations, 12 presets per band (AM, FM and SXM). They are shown at the top of your radio screen. To see the 12 preset stations per band, press the
arrow soft-key at the top right of the screen to toggle between the two sets of six presets.
• To set a station into memory press and hold the desired numbered soft-key for more than two seconds or until you hear a confirmation beep.
Uconnect® 8.4AN Radio
ELECTRONICS
96
Page 99 of 188
 allows broadcasters to transmit ahigh-quality digital signal.
• With an HD radio receiver, the listener is provided with a clear soun")
HD Radio
• HD Radio technology (available on Uconnect® 8.4AN) allows broadcasters to transmit ahigh-quality digital signal.
• With an HD radio receiver, the listener is provided with a clear sound that enhances the listening experience. HD radio can also transmit data such as song title or artist.
SiriusXM PREMIER OVER 160 CHANNELS
•Get every channel available on your satellite radio, and enjoy all you want, all in one place.
Hear commercial-free music plus sports, news, talk and entertainment. Get all the premium
programming, including Howard Stern, every NFL game, Oprah Radio®, every MLB® and
NHL® game, every NASCAR® race, Martha Stewart and more. And get 20+ extra channels,
including SiriusXM Latino, offering 20 channels of commercial free music, news, talk,
comedy, sports and more dedicated to Spanish language programming.
• To access SiriusXM Satellite Radio, touch the “SXM” soft-key on the main Radio screen.
•
The following describes features that are available when in SiriusXM Satellite Radio mode.
Seek Up/Seek Down
• Touch the “Seek” arrow soft-keys for less than two seconds to seek through channels in SXM mode.
• Touch and hold either “arrow” soft-key for more than two seconds to bypass channels without stopping. The radio will stop at the next listenable channel once the “arrow”
soft-key is released.
Direct Tune
• Tune directly to a SXM channel by pressing the “Tune” soft-key on the screen, and entering the desired station number.
Jump
• Automatically tells you when Traffic & Weather for a favorite city is available, and gives you the option to switch to that channel. Touch “Jump” to activate the feature. After
listening to Traffic and Weather, touch “Jump” again to return to the previous channel.
Fav
• Activates the favorites menu. You can add up to 50 favorite artists or songs. Just touch “Add Fav Artist” or “Add Fav Song” while the song is playing. You will then be alerted any
time one of these songs, or works by these artists, is playing on other SiriusXM channels.
SiriusXM Parental Controls
• You can skip or hide certain channels from view if you do not want access to them. Touch the “More” soft-key, then the “Settings” soft-key, next touch the “Sirius Setup” soft-key,
then select “Channel Skip”. Touch the box, check-mark, next to the channel you want
skipped. They will not show up in normal usage.
•
SiriusXM also offers the option to permanently block selected channels. Call (1-888-601-6297
for U.S. customers, 1-877-438-9677 for Canadian customers) and request the Family - Friendly
Package.
ELECTRONICS
97
Page 100 of 188

Browse
• Lets you browse the SiriusXM channel listing or Genre listing. Favorites, Game Zone,Weather and Jump settings also provide a way to browse the SiriusXM channel list.
Browse
Sub-Menu Sub-Menu Description
All Shows the channel listing.
Genre Provides a list of all genres, and lets you jump to a channel within the selected genre.
Presets Lets you scroll the list of Preset satellite channels. Touch the channel, or press Enter on the Tune knob, to go to that channel. Touch the trash can icon to
delete a preset. Your presets are also shown at the top of the main Satellite
Radio screen.
Favorites Lets you manage artists and songs in the Favorites list and configure Alert Settings to let you know when favorite songs or artists are playing on other
channels. Also, view a list of channels airing any of your Favorites.
Game Zone
Provides alerts when your favorite sports teams are starting a game which is
being aired on other SiriusXM channels, or when their game score is announced.
You can select and manage your Teams list here, and configure alerts.
Jump Lets you select your favorite cities for Traffic & Weather information, which is used by the Jump feature on the main satellite radio screen.
Replay
• Lets you replay up to 44 minutes of the content of the current SiriusXM channel.
Replay Option Option Description
Play/Pause Touch to Pause content playback. Touch Pause/Play again to resume play-back.
Rewind/RW Rewinds the channel content in steps of five seconds. Touch and hold to rewind continuously, then release to begin playing content at that point.
Fast
Forward/FW Forwards the content, and works similarly to Rewind/RW. However, Fast
Forward/FW can only be used when content has been previously rewound.
Replay Time Displays the amount of time in the upper center of the screen by which your content lags the Live channel.
Live
Resumes playback of Live content at any time while replaying rewound content.
•SiriusXM services require subscriptions, sold separately after the 12-month trial included
with the new vehicle purchase.If you decide to continue your service at the end of your
trial subscription, the plan you choose will automatically renew and bill at then-current
rates until you call SiriusXM at 1-866-635-2349 for U.S. residents and 1-888-539-7474 for
Canadian residents to cancel. See SiriusXM Customer Agreement for complete terms at
www.siriusxm.com for U.S. residents and www.siriusxm.ca for Canadian residents.
All
fees and programming subject to change. Our satellite service is available only to those
at least 18 and older in the 48 contiguous USA and D.C. Our Sirius satellite service is also
available in PR (with coverage limitations). Our Internet radio service is available through-
out our satellite service area and in AK and HI. ©2014 Sirius XM Radio Inc. Sirius, XM and
all related marks and logos are trademarks of Sirius XM Radio Inc.
ELECTRONICS
98
Page 101 of 188

Disc Operation
•Your vehicle may have a remote CD player located in the lower center console storage bin.
• CD/Disc Mode is entered by either inserting a CD/Disc or by touching the “Media” buttonlocated on the side of the display. Once in Media Mode, select “Disc”.
• Gently insert one CD into the CD player with the CD label facing as indicated on the illustration located on the Disc player.
Seek Up/Down Buttons
• Press to seek through Disc tracks.
• Hold either button to bypass tracks without stopping.
Browse
• Touch the “Browse” soft-key to scroll through and select a desired track on the Disc. Touch the “Exit” soft-key if you wish to cancel the browse function.
MEDIA HUB – PLAYING iPod®/USB/MP3 DEVICES
• There are many ways to play music from iPod®/MP3 players or USB devices through yourvehicle's sound system.
Audio Jack (AUX)
• The AUX allows a portable device, such as an MP3 player or an iPod®, to be plugged into the radio and utilize the vehicle’s sound system, using a 3.5 mm audio cable, to amplify
the source and play through the vehicle speakers.
• Touching the Media soft-key then choose AUX source will change the mode to auxiliary device if the audio jack is connected, allowing the music from your portable device to be
heard through the vehicle's speakers. In order to activate the AUX, plug in the audio jack.
• The functions of the portable device are controlled using the device buttons. The volume may be controlled using the radio or portable device.
• To route the audio cable out of the center console, use the access cut out in the front of the console.
USB Port
• Connect your iPod® or compatible device using a USB cable into the USB Port. USB Memory sticks with audio files can also be used. Then, audio from the device can be
played on the vehicle’s sound system while providing metadata (artist, track title, album,
etc.) information on the radio display.
• When connected, the iPod®/compatible USB device can be controlled using the radio or Steering Wheel Audio Controls to play, skip to the next or previous track, browse, and list
the contents.
• The iPod® battery charges when plugged into the USB port (if supported by the specific device).
• To route the USB/iPod® cable out of the center console, use the access cut out.
ELECTRONICS
99
Page 102 of 188

NOTE:
• When connecting your iPod® device for the first time, the system may take severalminutes to read your music, depending on the number of files. For example, the system
will take approximately five minutes for every 1000 songs loaded on the device. Also
during the reading process, the Shuffle and Browse functions will be disabled. This
process is needed to ensure the full use of your iPod® features and only happens the first
time it is connected. After the first time, the reading process of your iPod® will take
considerably less time unless changes are made or new songs are added to the playlist.
• The USB port supports certain Mini, Classic, Nano, Touch, and iPhone® devices. The USB port also supports playing music from compatible external USB Mass Storage Class
memory devices. Some iPod® software versions may not fully support the USB port
features. Please visit Apple’s website for iPod® software updates.
SD Card
• Play songs stored on an SD card inserted into the SD card slot.
• Song playback can be controlled using the radio or Steering Wheel Audio Controls to play, skip to the next or previous track, browse, and list the contents.
Bluetooth® Streaming Audio
• If equipped with Uconnect® Voice Command, your Bluetooth®-equipped iPod® devices, cell phones or other media players, may also be able to stream music to your vehicle's
sound system. Your connected device must be Bluetooth®-compatible, and paired with
your system (see Uconnect® Phone for pairing instructions). You can access the music
from your connected Bluetooth® device by touching the Bluetooth® soft-key while in
Media mode.
Uconnect®
8.4A & 8.4AN Media Hub
(USB, AUX Ports) Media Hub
(SD, USB,
AUX Ports) Remote USB
Port (Fully
Functional) Remote USB
Port (Charg- ing Only) Dual Charg-
ing Ports
-SSOO
S = Standard Equipment
O = Optional Equipment
ELECTRONICS
100
Page 103 of 188
iPod®/CD/AUX CONTROLS
• The iPod®/CD/AUX controls are accessed by touching the desired soft-key displayed onthe side of the screen and choose between Disc, AUX, iPod®, Bluetooth® or SD Card.
NOTE:
Uconnect® will usually automatically switch to the appropriate mode when something is
first connected or inserted into the system.
iPod®/CD/AUX Controls
ELECTRONICS
101
Page 104 of 188
NAVIGATION
• Touch the “Nav” soft-key in the menu bar to access the Navigation system.
Changing The Navigation Voice Prompt Volume
1. Touch the “Settings” soft-key.
2. In the Settings menu, touch the “Guidance” soft-key.
3.
In the Guidance menu, adjust the Nav Volume by touching the + or – Nav Volume Adjust-
ment soft-keys.
Finding Points Of Interest (POI)
• From the main Navigation menu, touch the “Where To?” soft-key, then touch the “Points” of Interest soft-key.
• Select a Category and then a subcategory, if necessary.
• Select your destination and touch the “Yes” soft-key.
Navigation Main
ELECTRONICS
102
 1
1 2
2 3
3 4
4 5
5 6
6 7
7 8
8 9
9 10
10 11
11 12
12 13
13 14
14 15
15 16
16 17
17 18
18 19
19 20
20 21
21 22
22 23
23 24
24 25
25 26
26 27
27 28
28 29
29 30
30 31
31 32
32 33
33 34
34 35
35 36
36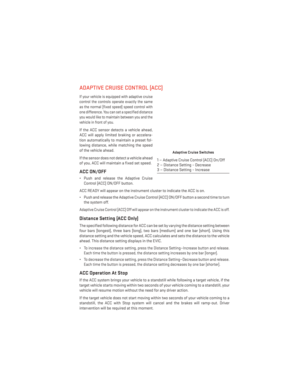 37
37 38
38 39
39 40
40 41
41 42
42 43
43 44
44 45
45 46
46 47
47 48
48 49
49 50
50 51
51 52
52 53
53 54
54 55
55 56
56 57
57 58
58 59
59 60
60 61
61 62
62 63
63 64
64 65
65 66
66 67
67 68
68 69
69 70
70 71
71 72
72 73
73 74
74 75
75 76
76 77
77 78
78 79
79 80
80 81
81 82
82 83
83 84
84 85
85 86
86 87
87 88
88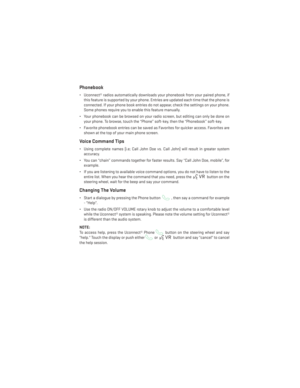 89
89 90
90 91
91 92
92 93
93 94
94 95
95 96
96 97
97 98
98 99
99 100
100 101
101 102
102 103
103 104
104 105
105 106
106 107
107 108
108 109
109 110
110 111
111 112
112 113
113 114
114 115
115 116
116 117
117 118
118 119
119 120
120 121
121 122
122 123
123 124
124 125
125 126
126 127
127 128
128 129
129 130
130 131
131 132
132 133
133 134
134 135
135 136
136 137
137 138
138 139
139 140
140 141
141 142
142 143
143 144
144 145
145 146
146 147
147 148
148 149
149 150
150 151
151 152
152 153
153 154
154 155
155 156
156 157
157 158
158 159
159 160
160 161
161 162
162 163
163 164
164 165
165 166
166 167
167 168
168 169
169 170
170 171
171 172
172 173
173 174
174 175
175 176
176 177
177 178
178 179
179 180
180 181
181 182
182 183
183 184
184 185
185 186
186 187
187
