2014 CHEVROLET SILVERADO 1500 ECO mode
[x] Cancel search: ECO modePage 313 of 542
Black plate (47,1)Chevrolet Silverado Owner Manual (GMNA-Localizing-U.S./Canada/Mexico-
5853506) - 2014 - CRC 3rd Edition - 8/28/13
Driving and Operating 9-47
It is typical for the vehicle to exhibit
significant engagement noise and
bump when shifting between
Four-Wheel Drive Low and
Four-Wheel Drive High ranges or
from transfer case N (Neutral) with
the engine running.
If the knob is turned to the
Four-Wheel Drive Low position
when the vehicle is in gear and/or
moving more than 5 km/h (3 mph),
the Four-Wheel Drive Low indicator
light will flash for 30 seconds and
not complete the shift. After
30 seconds the transfer case will
shift to Four-Wheel Drive
High mode. In this case, the knob
will need to be turned to the
Four-Wheel Drive High position in
order to see the indicator. With the
vehicle moving less than 5 km/h
(3 mph), and the transmission in
N (Neutral), attempt the shift again.Shifting Out of Four-Wheel
Drive Low
To shift from Four-Wheel Drive Low
to Four-Wheel Drive High or
Two-Wheel Drive High, the vehicle
must be stopped or moving less
than 5 km/h (3 mph) with the
transmission in N (Neutral) and the
ignition in ON/RUN. The preferred
method for shifting out of
Four-Wheel Drive Low is to have
the vehicle moving 1.6 to 3.2 km/h
(1 to 2 mph). Turn the knob to the
Four-Wheel Drive High or
Two-Wheel Drive High position. You
must wait for the Four-Wheel Drive
High or Two-Wheel Drive High
indicator light to stop flashing before
shifting the transmission into gear.
{Caution
Shifting the transmission into gear
before the requested mode
indicator light has stopped
flashing could damage the
(Continued)
Caution (Continued)
transfer case. To help avoid
damaging the vehicle, always wait
for the mode indicator lights to
stop flashing before shifting the
transmission into gear.
It is typical for the vehicle to exhibit
significant engagement noise and
bump when shifting between
Four-Wheel Drive Low and
Four-Wheel Drive High ranges or
from transfer case N (Neutral) with
the engine running.
If the knob is turned to the
Four-Wheel Drive High or
Two-Wheel Drive High switch
position when the vehicle is in gear
and/or moving more than
5 km/h (3 mph), the Four-Wheel
Drive High or Two-Wheel Drive High
indicator light will flash for
30 seconds, but will not complete
the shift. With the vehicle moving
Page 314 of 542
Black plate (48,1)Chevrolet Silverado Owner Manual (GMNA-Localizing-U.S./Canada/Mexico-
5853506) - 2014 - CRC 3rd Edition - 8/28/13
9-48 Driving and Operating
less than 5 km/h (3 mph), and the
transmission in N (Neutral), attempt
the shift again.
Shifting into N (Neutral)
To shift the transfer case to
N (Neutral):
1. Make sure the vehicle is parkedso that it will not roll.
2. Set the parking brake and press and hold the regular brake
pedal. See Parking Brake on
page 9-54.
3. Start the vehicle or turn the ignition to ON/RUN.
4. Shift the transmission to N (Neutral).
5. Shift the transfer case to Two-Wheel Drive High.
6. Turn the transfer case dial clockwise to N (Neutral) until it
stops and hold it there until the
N (Neutral) light starts blinking.
This will take at least
10 seconds. Then slowly release
the dial to the Four-Wheel Drive Low position. The N (Neutral)
light will come on when the
transfer case shift to N (Neutral)
is complete.
7. If the engine is running, verify that the transfer case is in
N (Neutral) by shifting the
transmission to R (Reverse) for
one second, then shift the
transmission to D (Drive) for
one second.
8. Turn the ignition to ACC/ ACCESSORY, which will turn the
engine off.
9. Place the transmission shift lever in P (Park).
10. Release the parking brake prior to moving the vehicle.
11. Turn the ignition to LOCK/OFF.
Shifting Out of N (Neutral)
To shift the transfer case out of
N (Neutral):
1. Set the parking brake and apply the regular brake pedal. 2. Turn the ignition to ON/RUN with
the engine off, and shift the
transmission to N (Neutral).
3. Turn the transfer case dial to Two-Wheel Drive High.
After the transfer case has
shifted out of N (Neutral), the
N (Neutral) light will go out.
4. Release the parking brake prior to moving the vehicle.
{Caution
Shifting the transmission into gear
before the requested mode
indicator light has stopped
flashing could damage the
transfer case. To help avoid
damaging the vehicle, always wait
for the mode indicator lights to
stop flashing before shifting the
transmission into gear.
5. Start the engine and shift the transmission to the desired
position.
Page 315 of 542
Black plate (49,1)Chevrolet Silverado Owner Manual (GMNA-Localizing-U.S./Canada/Mexico-
5853506) - 2014 - CRC 3rd Edition - 8/28/13
Driving and Operating 9-49
Automatic Transfer Case
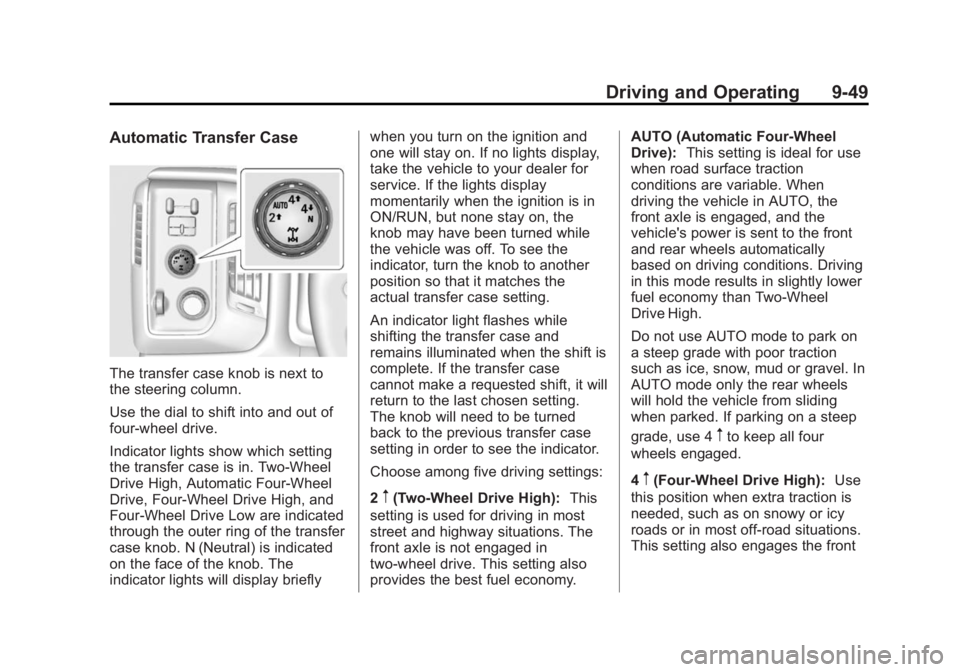
The transfer case knob is next to
the steering column.
Use the dial to shift into and out of
four-wheel drive.
Indicator lights show which setting
the transfer case is in. Two-Wheel
Drive High, Automatic Four-Wheel
Drive, Four-Wheel Drive High, and
Four-Wheel Drive Low are indicated
through the outer ring of the transfer
case knob. N (Neutral) is indicated
on the face of the knob. The
indicator lights will display brieflywhen you turn on the ignition and
one will stay on. If no lights display,
take the vehicle to your dealer for
service. If the lights display
momentarily when the ignition is in
ON/RUN, but none stay on, the
knob may have been turned while
the vehicle was off. To see the
indicator, turn the knob to another
position so that it matches the
actual transfer case setting.
An indicator light flashes while
shifting the transfer case and
remains illuminated when the shift is
complete. If the transfer case
cannot make a requested shift, it will
return to the last chosen setting.
The knob will need to be turned
back to the previous transfer case
setting in order to see the indicator.
Choose among five driving settings:
2
m(Two-Wheel Drive High):
This
setting is used for driving in most
street and highway situations. The
front axle is not engaged in
two-wheel drive. This setting also
provides the best fuel economy. AUTO (Automatic Four-Wheel
Drive):
This setting is ideal for use
when road surface traction
conditions are variable. When
driving the vehicle in AUTO, the
front axle is engaged, and the
vehicle's power is sent to the front
and rear wheels automatically
based on driving conditions. Driving
in this mode results in slightly lower
fuel economy than Two-Wheel
Drive High.
Do not use AUTO mode to park on
a steep grade with poor traction
such as ice, snow, mud or gravel. In
AUTO mode only the rear wheels
will hold the vehicle from sliding
when parked. If parking on a steep
grade, use 4
mto keep all four
wheels engaged.
4
m(Four-Wheel Drive High): Use
this position when extra traction is
needed, such as on snowy or icy
roads or in most off-road situations.
This setting also engages the front
Page 317 of 542

Black plate (51,1)Chevrolet Silverado Owner Manual (GMNA-Localizing-U.S./Canada/Mexico-
5853506) - 2014 - CRC 3rd Edition - 8/28/13
Driving and Operating 9-51
for shifting into Four-Wheel Drive
Low is to have the vehicle moving
1.6 to 3.2 km/h (1 to 2 mph). Turn the
knob to the Four-Wheel Drive Low
position. You must wait for the
Four-Wheel Drive Low indicator light
to stop flashing before shifting the
transmission into gear.
{Caution
Shifting the transmission into gear
before the requested mode
indicator light has stopped
flashing could damage the
transfer case. To help avoid
damaging the vehicle, always wait
for the mode indicator lights to
stop flashing before shifting the
transmission into gear.
It is typical for the vehicle to exhibit
significant engagement noise and
bump when shifting between
Four-Wheel Drive Low and
Four-Wheel Drive High ranges or
from N (Neutral) with the engine
running. If the knob is turned to the
Four-Wheel Drive Low position
when the vehicle is in gear and/or
moving more than 5 km/h (3 mph),
the Four-Wheel Drive Low indicator
light will flash for 30 seconds and
not complete the shift. After
30 seconds the transfer case will
shift to Four-Wheel Drive
High mode. In this case, the knob
will need to be turned to the
Four-Wheel Drive High position in
order to see the indicator. With the
vehicle moving less than 5 km/h
(3 mph), and the transmission in
N (Neutral), attempt the shift again.
Shifting Out of Four-Wheel
Drive Low
To shift from Four-Wheel Drive Low
to Four-Wheel Drive High, AUTO,
or Two-Wheel Drive High, the
vehicle must be stopped or moving
less than 5 km/h (3 mph) with the
transmission in N (Neutral) and the
ignition in ON/RUN. The preferred
method for shifting out of
Four-Wheel Drive Low is to have
the vehicle moving
1.6 to 3.2 km/h (1 to 2 mph). Turn the
knob to the Four-Wheel Drive High,
AUTO, or Two-Wheel Drive High
position. You must wait for the
Four-Wheel Drive High, AUTO,
or Two-Wheel Drive High indicator
light to stop flashing before shifting
the transmission into gear.
{Caution
Shifting the transmission into gear
before the requested mode
indicator light has stopped
flashing could damage the
transfer case. To help avoid
damaging the vehicle, always wait
for the mode indicator lights to
stop flashing before shifting the
transmission into gear.
It is typical for the vehicle to exhibit
significant engagement noise and
bump when shifting between
Four-Wheel Drive Low and
Four-Wheel Drive High ranges or
from N (Neutral) with the engine
running.
Page 319 of 542
Black plate (53,1)Chevrolet Silverado Owner Manual (GMNA-Localizing-U.S./Canada/Mexico-
5853506) - 2014 - CRC 3rd Edition - 8/28/13
Driving and Operating 9-53
{Caution
Shifting the transmission into gear
before the requested mode
indicator light has stopped
flashing could damage the
transfer case. To help avoid
damaging the vehicle, always wait
for the mode indicator lights to
stop flashing before shifting the
transmission into gear.
5. Start the engine and shift the transmission to the desired
position.
Brakes
Antilock Brake
System (ABS)
This vehicle has ABS, an advanced
electronic braking system that helps
prevent a braking skid.
When the vehicle begins to drive
away, ABS checks itself.
A momentary motor or clicking noise
might be heard while this test is
going on, and it might even be
noticed that the brake pedal moves
a little. This is normal.
If there is a problem with ABS, this
warning light stays on. See Antilock
Brake System (ABS) Warning Light
on page 5-25. If driving safely on a wet road and it
becomes necessary to slam on the
brakes and continue braking to
avoid a sudden obstacle, a
computer senses that the wheels
are slowing down. If one of the
wheels is about to stop rolling, the
computer will separately work the
brakes at each wheel.
ABS can change the brake pressure
to each wheel, as required, faster
than any driver could. This can help
you steer around the obstacle while
braking hard.
As the brakes are applied, the
computer keeps receiving updates
on wheel speed and controls
braking pressure accordingly.
Remember: ABS does not change
the time needed to get a foot up to
the brake pedal or always decrease
stopping distance. If you get too
close to the vehicle in front of you,
there will not be enough time to
apply the brakes if that vehicle
Page 328 of 542
Black plate (62,1)Chevrolet Silverado Owner Manual (GMNA-Localizing-U.S./Canada/Mexico-
5853506) - 2014 - CRC 3rd Edition - 8/29/13
9-62 Driving and Operating
hold the Tow/Haul button for
five seconds. A DIC message
displays. SeeTransmission
Messages on page 5-41.
.Vehicles with a diesel engine
have Cruise Grade Braking
enabled when Tow/Haul Mode is
on, the exhaust brake is on,
or both are on.
For other forms of Grade Braking,
see Automatic Transmission on
page 9-34.Tow/Haul Mode on
page 9-38, and Hill Descent Control
(HDC) on page 9-58. Ending Cruise Control
There are three ways to end cruise
control:.To disengage cruise control,
step lightly on the brake pedal.
.To disengage cruise control,
press
*on the steering wheel.
.To turn off the cruise control,
press
5on the steering wheel.
Erasing Speed Memory
The cruise control set speed is
erased from memory by pressing
5
or if the ignition is turned off.
Driver Assistance
Systems
This vehicle may have features that
work together to help avoid crashes
or reduce crash damage while
driving, backing, and parking. Read
this entire section before using
these systems.
{Warning
Do not rely on the Driver
Assistance Systems. These
systems do not replace the need
for paying attention and driving
safely. You may not hear or feel
alerts or warnings provided by
these systems. Failure to use
proper care when driving may
result in injury, death, or vehicle
damage. See Defensive Driving
on page 9-3.
(Continued)
Page 340 of 542
Black plate (74,1)Chevrolet Silverado Owner Manual (GMNA-Localizing-U.S./Canada/Mexico-
5853506) - 2014 - CRC 3rd Edition - 8/28/13
9-74 Driving and Operating
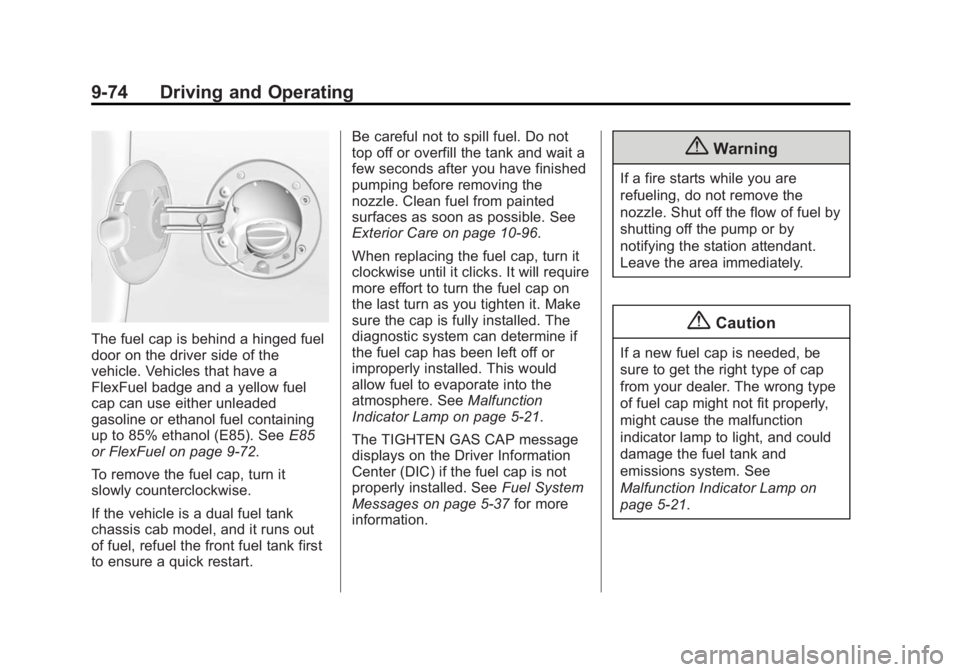
The fuel cap is behind a hinged fuel
door on the driver side of the
vehicle. Vehicles that have a
FlexFuel badge and a yellow fuel
cap can use either unleaded
gasoline or ethanol fuel containing
up to 85% ethanol (E85). SeeE85
or FlexFuel on page 9-72.
To remove the fuel cap, turn it
slowly counterclockwise.
If the vehicle is a dual fuel tank
chassis cab model, and it runs out
of fuel, refuel the front fuel tank first
to ensure a quick restart. Be careful not to spill fuel. Do not
top off or overfill the tank and wait a
few seconds after you have finished
pumping before removing the
nozzle. Clean fuel from painted
surfaces as soon as possible. See
Exterior Care on page 10-96.
When replacing the fuel cap, turn it
clockwise until it clicks. It will require
more effort to turn the fuel cap on
the last turn as you tighten it. Make
sure the cap is fully installed. The
diagnostic system can determine if
the fuel cap has been left off or
improperly installed. This would
allow fuel to evaporate into the
atmosphere. See
Malfunction
Indicator Lamp on page 5-21.
The TIGHTEN GAS CAP message
displays on the Driver Information
Center (DIC) if the fuel cap is not
properly installed. See Fuel System
Messages on page 5-37 for more
information.
{Warning
If a fire starts while you are
refueling, do not remove the
nozzle. Shut off the flow of fuel by
shutting off the pump or by
notifying the station attendant.
Leave the area immediately.
{Caution
If a new fuel cap is needed, be
sure to get the right type of cap
from your dealer. The wrong type
of fuel cap might not fit properly,
might cause the malfunction
indicator lamp to light, and could
damage the fuel tank and
emissions system. See
Malfunction Indicator Lamp on
page 5-21.
Page 345 of 542
Black plate (79,1)Chevrolet Silverado Owner Manual (GMNA-Localizing-U.S./Canada/Mexico-
5853506) - 2014 - CRC 3rd Edition - 8/28/13
Driving and Operating 9-79
{Caution
Pulling a trailer improperly can
damage the vehicle and result in
costly repairs not covered by the
vehicle warranty. To pull a trailer
correctly, follow the advice in this
section and see your dealer for
important information about
towing a trailer with the vehicle.
To identify the trailering capacity of
the vehicle, read the information in
“Weight of the Trailer” later in this
section.
Trailering is different than just
driving the vehicle by itself.
Trailering means changes in
handling, acceleration, braking,
durability, and fuel economy.
Successful, safe trailering takes
correct equipment, and it has to be
used properly.
The following information has many
time-tested, important trailering tips
and safety rules. Many of these are important for your safety and that of
your passengers. Read this section
carefully before pulling a trailer.
Weight of the Trailer
How heavy can a trailer safely be?
It depends on how the rig is used.
Speed, altitude, road grades,
outside temperature, and how much
the vehicle is used to pull a trailer
are all important. It can depend on
any special equipment on the
vehicle, and the amount of tongue
weight the vehicle can carry. See
“Weight of the Trailer Tongue”
later
in this section for more information.
Trailer weight rating (TWR) is
calculated assuming the tow vehicle
has only the driver but all required
trailering equipment. Weight of
additional optional equipment,
passengers, and cargo in the tow
vehicle must be subtracted from the
trailer weight rating. For kingpin weight and trailer
tongue weight information, see
“Weight of the Trailer Tongue”
later
in this section.
Use the following chart to determine
how much the vehicle can weigh,
based upon the vehicle model and
options.
Weights listed apply for
conventional trailers and fifth-wheel
trailers unless otherwise noted.