2014 CHEVROLET SILVERADO 1500 ECO mode
[x] Cancel search: ECO modePage 244 of 542
Black plate (42,1)Chevrolet Silverado Owner Manual (GMNA-Localizing-U.S./Canada/Mexico-
5853506) - 2014 - CRC 3rd Edition - 8/28/13
7-42 Infotainment System
2. Say“Transfer Call.”
To Transfer Audio to the Bluetooth
System from a Cell Phone
During a call with the audio on the
cell phone, press
g. The audio
transfers to the vehicle. If the audio
does not transfer to the vehicle, use
the audio transfer feature on the cell
phone. See your cell phone
manufacturer's user guide for more
information.
Voice Pass-Thru
Voice pass-thru allows access to the
voice recognition commands on the
cell phone. See your cell phone
manufacturer's user guide to see if
the cell phone supports this feature.
To access contacts stored in the cell
phone:
1. Press
g. The system responds
“Say a command or say help,”
followed by a tone.
2. Say “Bluetooth.” 3. Say
“Voice.” The system
responds “OK, accessing
The cell phone's normal prompt
messages will go through their cycle
according to the phone's operating
instructions.
Dual Tone Multi-Frequency
(DTMF) Tones
The Bluetooth system can send
numbers and the numbers stored as
name tags during a call. You can
use this feature when calling a
menu-driven phone system.
Account numbers can also be
stored for use.
Sending a Number or Name Tag
During a Call
1. Press
g. The system responds
“Ready,” followed by a tone.
2. Say “Dial.”
3. Say the number or name tag to send.
Clearing the System
Unless information is deleted out of
the in-vehicle Bluetooth system, it
will be retained indefinitely. This
includes all phone pairing
information. For information on how
to delete this information, see
“Deleting a Paired Phone.”
Bluetooth (Infotainment
Controls - Base
Connected Radio)
For information about how to
navigate the menu system using the
infotainment controls, see Overview
on page 7-2.
Switching to Handset or
Hands-Free Mode
To switch between handset or
hands-free mode, from the Home
Page select the PHONE to display
Call View.
.While the active call is
hands-free, press the Handset
screen button to switch to the
Page 258 of 542
Black plate (2,1)Chevrolet Silverado Owner Manual (GMNA-Localizing-U.S./Canada/Mexico-
5853506) - 2014 - CRC 3rd Edition - 8/29/13
8-2 Climate Controls
9(Fan Control):Turn clockwise
or counterclockwise to increase or
decrease the fan speed. Turn the
knob all the way counterclockwise
to turn the fan off.
Air Delivery Mode Control: Press
Y,\,[, or-to change the
direction of the airflow. An indicator
light comes on in the selected mode
button.
Y(Vent): Air is directed to the
instrument panel outlets.
\(Bi-Level): Air is divided
between the instrument panel and
floor outlets.
[(Floor): Air is directed to the
floor outlets, with some air directed
to the windshield, side window, and
second row floor outlets.
-(Defog): This mode clears the
windows of fog or moisture. Air is
directed to the windshield, floor
outlets, and side window vents.
0(Defrost): Press to clear the
windshield of fog or frost more
quickly. Air is directed to the
windshield and the side window
vents. The system automatically
forces outside air into the vehicle.
Do not drive the vehicle until all the
windows are clear.
See Air Vents on page 8-8.
@(Recirculation): Press to turn
on recirculation. An indicator light
comes on. Air is recirculated to
quickly cool the inside of the
vehicle. It can also be used to help
reduce outside air and odors that
enter the vehicle.
Page 262 of 542
Black plate (6,1)Chevrolet Silverado Owner Manual (GMNA-Localizing-U.S./Canada/Mexico-
5853506) - 2014 - CRC 3rd Edition - 8/29/13
8-6 Climate Controls
The recirculation light will not come
on when automatically controlled.
Press
@to manually select
recirculation; press it again to select
outside air.
Do not cover the solar sensor on the
top of the instrument panel near the
windshield. This sensor regulates
air temperature based on sun load.
See “Sensors” later in this section.
Manual Operation
O(On/Off): Press to turn the
climate control system on or off.
Outside air still enters the vehicle,
and is directed to the floor. This
direction can be changed by
pressing the air delivery mode.
9(Fan Control): Turn clockwise
or counterclockwise to increase or
decrease the fan speed. Press the
knob to turn the fan off.
Press AUTO to return to automatic
operation. Driver and Passenger
Temperature Control:
The
temperature can be adjusted
separately for the driver and
passenger.
Turn the knob clockwise or
counterclockwise to increase or
decrease the driver or passenger
temperature setting.
SYNC (Synchronized
Temperature): Press to link the
passenger temperature setting to
the driver setting. The SYNC
indicator light will turn on. When the
passenger setting is adjusted, the
SYNC indicator light is off.
The driver side or passenger side
temperature display shows the
temperature setting increasing or
decreasing.
Air Delivery Mode Control: Press
Y,\,[, or-to change the
direction of the airflow. An indicator
light comes on in the selected mode
button. Changing the mode cancels the
automatic operation and the system
goes into manual mode. Press
AUTO to return to automatic
operation.
Y(Vent):
Air is directed to the
instrument panel outlets.
\(Bi-Level): Air is divided
between the instrument panel and
floor outlets. Some air is directed
toward the windshield and side
window outlets.
[(Floor): Air is directed to the
floor outlets, with some to the
windshield, side window outlets, and
second row floor outlets.
-(Defog): This mode clears the
windows of fog or moisture. Air is
directed to the windshield, floor
outlets, and side window vents. The
system automatically forces outside
air into the vehicle and the air
conditioning compressor will run,
unless the outside temperature is
close to freezing.
Page 267 of 542
Black plate (1,1)Chevrolet Silverado Owner Manual (GMNA-Localizing-U.S./Canada/Mexico-
5853506) - 2014 - CRC 3rd Edition - 8/28/13
Driving and Operating 9-1
Driving and
Operating
Driving Information
Distracted Driving . . . . . . . . . . . . . 9-2
Defensive Driving . . . . . . . . . . . . . 9-3
Drunk Driving . . . . . . . . . . . . . . . . . 9-3
Control of a Vehicle . . . . . . . . . . . 9-3
Braking . . . . . . . . . . . . . . . . . . . . . . . 9-3
Steering . . . . . . . . . . . . . . . . . . . . . . . 9-4
Off-Road Recovery . . . . . . . . . . . . 9-5
Loss of Control . . . . . . . . . . . . . . . . 9-5
Off-Road Driving . . . . . . . . . . . . . . 9-6
Driving on Wet Roads . . . . . . . . 9-11
Highway Hypnosis . . . . . . . . . . . 9-11
Hill and Mountain Roads . . . . . 9-12
Winter Driving . . . . . . . . . . . . . . . 9-12
If the Vehicle Is Stuck . . . . . . . . 9-14
Vehicle Load Limits . . . . . . . . . . 9-15
Truck-Camper LoadingInformation . . . . . . . . . . . . . . . . . 9-21
Starting and Operating
New Vehicle Break-In . . . . . . . . 9-23
Adjustable Throttle and BrakePedal . . . . . . . . . . . . . . . . . . . . . . . 9-24
Ignition Positions . . . . . . . . . . . . 9-24 Starting the Engine . . . . . . . . . . 9-26
Fast Idle System . . . . . . . . . . . . . 9-28
Retained Accessory
Power (RAP) . . . . . . . . . . . . . . . 9-29
Engine Coolant Heater . . . . . . . 9-29
Shifting Into Park . . . . . . . . . . . . 9-30
Shifting out of Park . . . . . . . . . . 9-31
Parking (Manual
Transmission) . . . . . . . . . . . . . . 9-32
Parking over Things That Burn . . . . . . . . . . . . . . . . . . 9-32
Active Fuel Management
®. . . 9-32
Engine Exhaust
Engine Exhaust . . . . . . . . . . . . . . 9-33
Running the Vehicle While Parked . . . . . . . . . . . . . . . . . . . . . 9-33
Automatic Transmission
Automatic Transmission . . . . . 9-34
Manual Mode . . . . . . . . . . . . . . . . 9-37
Tow/Haul Mode . . . . . . . . . . . . . . 9-38
Manual Transmission
Manual Transmission . . . . . . . . 9-39
Drive Systems
Four-Wheel Drive . . . . . . . . . . . . 9-41
Brakes
Antilock Brake
System (ABS) . . . . . . . . . . . . . . 9-53
Parking Brake . . . . . . . . . . . . . . . 9-54
Brake Assist . . . . . . . . . . . . . . . . . 9-55
Hill Start Assist (HSA) . . . . . . . 9-56
Ride Control Systems
Traction Control/Electronic Stability Control . . . . . . . . . . . . 9-56
Hill Descent Control (HDC) . . . . . . . . . . . . . . 9-58
Locking Rear Axle . . . . . . . . . . . 9-59
Cruise Control
Cruise Control . . . . . . . . . . . . . . . 9-59
Driver Assistance Systems
Driver Assistance Systems . . . . . . . . . . . . . . . . . . . . 9-62
Assistance Systems for Parking or Backing . . . . . . . . . 9-63
Assistance Systems for Driving . . . . . . . . . . . . . . . . . . . . . 9-66
Forward Collision Alert (FCA) System . . . . . . . . . . . . . . . . . . . . . 9-66
Lane Departure Warning (LDW) . . . . . . . . . . . . . 9-68
Page 298 of 542
Black plate (32,1)Chevrolet Silverado Owner Manual (GMNA-Localizing-U.S./Canada/Mexico-
5853506) - 2014 - CRC 3rd Edition - 8/28/13
9-32 Driving and Operating
The shift lock release is always
functional except in the case of an
uncharged or low voltage (less than
9 volt) battery.
If the vehicle has an uncharged
battery or a battery with low voltage,
try charging or jump starting the
battery. SeeJump Starting on
page 10-89.
To shift out of P (Park):
1. Apply the brake pedal.
2. Move the shift lever to the desired position.
If you still are unable to shift out of
P (Park):
1. Ease the pressure on the shift lever.
2. While holding down the brake pedal, press the shift lever all
the way into P (Park).
3. Move the shift lever to the desired position.
If you are still having a problem
shifting, then have the vehicle
serviced soon.Parking (Manual
Transmission)
If the vehicle has a manual
transmission, before you get out of
the vehicle, move the shift lever into
R (Reverse), and firmly apply the
parking brake. Once the shift lever
has been placed into R (Reverse)
with the clutch pedal pressed in,
turn the ignition key to LOCK/OFF,
remove the key and release the
clutch.
If you are parking on a hill, or if the
vehicle is pulling a trailer, see
Driving Characteristics and Towing
Tips on page 9-75.
Parking over Things
That Burn
{Warning
Things that can burn could touch
hot exhaust parts under the
vehicle and ignite. Do not park
over papers, leaves, dry grass,
or other things that can burn.
Active Fuel Management®
Vehicles with a V8 or V6 gasoline
engine may have Active Fuel
Management. This system allows
the engine to operate on either all of
its cylinders, or in V4 mode,
depending on the driving conditions.
When less power is required, such
as cruising at a constant vehicle
speed, the system will operate in
the V4 mode, allowing the vehicle to
achieve better fuel economy. When
greater power demands are
required, such as accelerating from
Page 303 of 542
Black plate (37,1)Chevrolet Silverado Owner Manual (GMNA-Localizing-U.S./Canada/Mexico-
5853506) - 2014 - CRC 3rd Edition - 8/28/13
Driving and Operating 9-37
when driving on downhill grades by
using the engine and transmission
to slow the vehicle. The first time
the system engages for each
ignition key cycle, a DIC message
will be displayed. SeeTransmission
Messages on page 5-41.
To disable or enable Normal Mode
Grade Braking within the current
ignition key cycle, press and hold
the Tow/Haul button for
five seconds. When the button is
released, the requested mode
change is made. A DIC message
displays. See Transmission
Messages on page 5-41.
For other forms of grade braking,
see Tow/Haul Mode on page 9-38
and Cruise Control on page 9-59.Manual Mode
Range Selection Mode
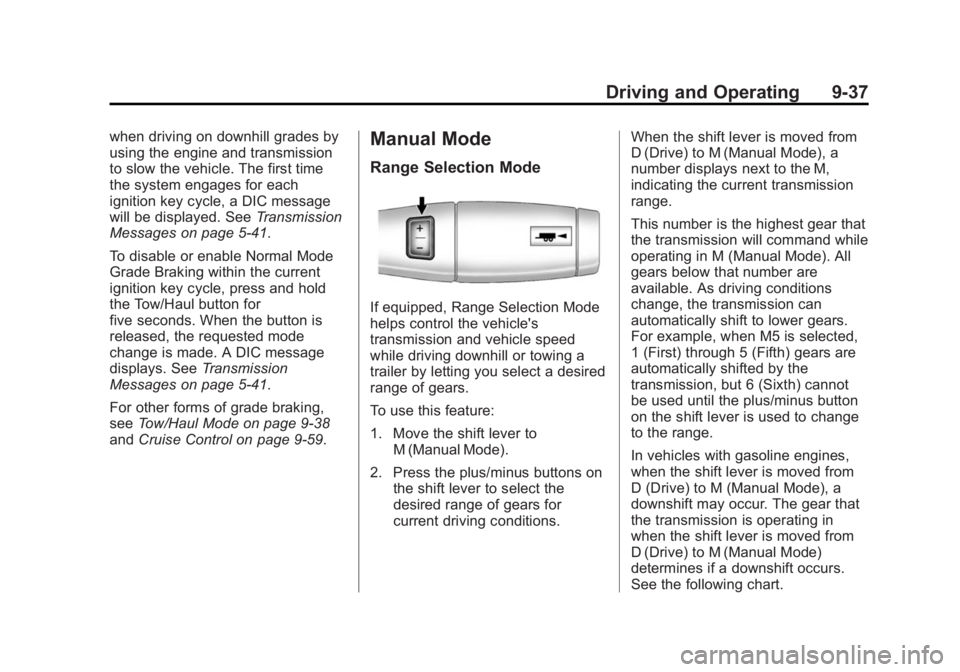
If equipped, Range Selection Mode
helps control the vehicle's
transmission and vehicle speed
while driving downhill or towing a
trailer by letting you select a desired
range of gears.
To use this feature:
1. Move the shift lever to
M (Manual Mode).
2. Press the plus/minus buttons on the shift lever to select the
desired range of gears for
current driving conditions. When the shift lever is moved from
D (Drive) to M (Manual Mode), a
number displays next to the M,
indicating the current transmission
range.
This number is the highest gear that
the transmission will command while
operating in M (Manual Mode). All
gears below that number are
available. As driving conditions
change, the transmission can
automatically shift to lower gears.
For example, when M5 is selected,
1 (First) through 5 (Fifth) gears are
automatically shifted by the
transmission, but 6 (Sixth) cannot
be used until the plus/minus button
on the shift lever is used to change
to the range.
In vehicles with gasoline engines,
when the shift lever is moved from
D (Drive) to M (Manual Mode), a
downshift may occur. The gear that
the transmission is operating in
when the shift lever is moved from
D (Drive) to M (Manual Mode)
determines if a downshift occurs.
See the following chart.
Page 305 of 542
Black plate (39,1)Chevrolet Silverado Owner Manual (GMNA-Localizing-U.S./Canada/Mexico-
5853506) - 2014 - CRC 3rd Edition - 8/28/13
Driving and Operating 9-39
SeeTow/Haul Mode Light on
page 5-25 andHill and Mountain
Roads on page 9-12.
Also see “Tow/Haul Mode” under
Towing Equipment on page 9-89.
Tow/Haul Mode Grade Braking
Tow/Haul Mode Grade Braking is
only enabled while the Tow/Haul
Mode is selected and the vehicle is
not in the Range Selection Mode.
See “Tow/Haul Mode” listed
previously and Manual Mode on
page 9-37. Tow/Haul Mode Grade
Braking assists in maintaining
desired vehicle speeds when driving
on downhill grades by using the
engine and transmission to slow the
vehicle.
On vehicles with a gasoline engine,
to disable or enable Tow/Haul
Grade Braking within the current
ignition key cycle, press and hold
the Tow/Haul button for
five seconds. When the button is
released, the requested mode change is made. A DIC message is
displayed. See
Transmission
Messages on page 5-41.
On vehicles with a diesel engine,
Tow/Haul Mode Grade Braking can
be enabled or disabled by pressing
the Tow/Haul Mode button. Use the
exhaust brake and Tow/Haul Mode
for maximum grade braking.
See Towing Equipment on
page 9-89.
For other forms of grade braking,
see Automatic Transmission on
page 9-34 andCruise Control on
page 9-59.
Manual Transmission
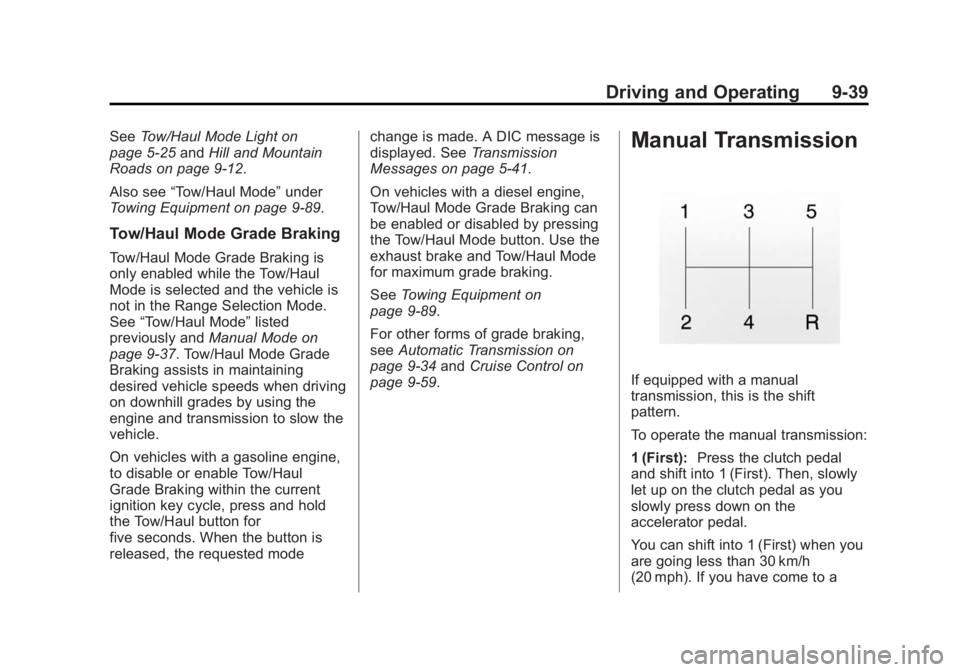
If equipped with a manual
transmission, this is the shift
pattern.
To operate the manual transmission:
1 (First): Press the clutch pedal
and shift into 1 (First). Then, slowly
let up on the clutch pedal as you
slowly press down on the
accelerator pedal.
You can shift into 1 (First) when you
are going less than 30 km/h
(20 mph). If you have come to a
Page 309 of 542
Black plate (43,1)Chevrolet Silverado Owner Manual (GMNA-Localizing-U.S./Canada/Mexico-
5853506) - 2014 - CRC 3rd Edition - 8/28/13
Driving and Operating 9-43
roads or in most off-road situations.
This setting also engages the front
axle to help drive your vehicle. This
is the best setting to use when
plowing snow.
You can shift from Two-Wheel Drive
High to Four-Wheel Drive High or
Four-Wheel Drive High to
Two-Wheel Drive High while the
vehicle is moving. In extremely cold
weather, it may be necessary to
stop or slow the vehicle to shift into
Four-Wheel Drive High.
When Using the Manual
Transfer Case
.Shifts into or out of Four-Wheel
Drive Low or N (Neutral) should
be made using quick motions to
avoid excessive gear grinding.
Shifting slowly may make it more
difficult to shift.
.You may notice that it is harder
to shift when the vehicle is cold.
After the vehicle warms up, the
shifting will return to normal.
.While in Four-Wheel Drive High
or Four-Wheel Drive Low you
may experience reduced fuel
economy.
.Avoid driving in four-wheel drive
on clean, dry pavement. It may
cause your tires to wear faster,
make the transfer case harder to
shift, and run noisier.
.If the transfer case shift lever is
in the N (Neutral) position and
you have difficulty reaching the
selected transfer case mode,
with the engine running, shift the
transmission momentarily to
D (Drive) and then back to
N (Neutral). This will realign the
gear teeth in the transfer case
and allow you to complete the
shift.
Shifting from Two-Wheel Drive
High to Four-Wheel Drive High
.Shifts between Two-Wheel Drive
High and Four-Wheel Drive High
can be made at any vehicle
speed.
.Shift the transfer case shift lever
in one continuous motion into
either the Four-Wheel Drive High
or Two-Wheel Drive High
position.
.Shifting from Two-Wheel Drive
High to Four-Wheel Drive High
while the vehicle is in motion
may require that moderate force
be applied to the shift lever for a
few seconds before Four-Wheel
Drive High can be engaged,
especially in cold weather.
.In extremely cold weather, it may
be necessary to slow or stop the
vehicle to shift into Four-Wheel
Drive High.
.While in Four-Wheel Drive High,
the vehicle can be driven at any
posted legal speed limit.