2014 CHEVROLET ORLANDO p button
[x] Cancel search: p buttonPage 63 of 98
Black plate (63,1)Chevrolet Orlando Infotainment System (GMNA-Localizing-Canada-
6081467) - 2014 - CRC - 6/13/13
Infotainment System 63
Route Guidance Not Active
If an OnStar destination is
downloaded while route guidance is
not active, the navigation system
displays a pop-up screen with the
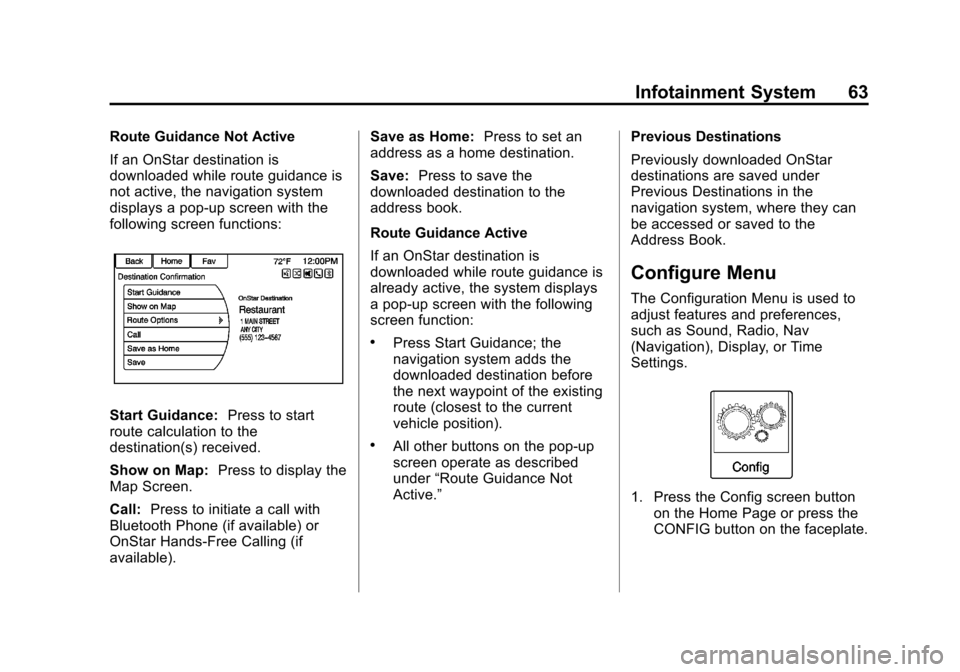
following screen functions:
Start Guidance:Press to start
route calculation to the
destination(s) received.
Show on Map: Press to display the
Map Screen.
Call: Press to initiate a call with
Bluetooth Phone (if available) or
OnStar Hands-Free Calling (if
available). Save as Home:
Press to set an
address as a home destination.
Save: Press to save the
downloaded destination to the
address book.
Route Guidance Active
If an OnStar destination is
downloaded while route guidance is
already active, the system displays
a pop-up screen with the following
screen function:
.Press Start Guidance; the
navigation system adds the
downloaded destination before
the next waypoint of the existing
route (closest to the current
vehicle position).
.All other buttons on the pop-up
screen operate as described
under “Route Guidance Not
Active.” Previous Destinations
Previously downloaded OnStar
destinations are saved under
Previous Destinations in the
navigation system, where they can
be accessed or saved to the
Address Book.
Configure Menu
The Configuration Menu is used to
adjust features and preferences,
such as Sound, Radio, Nav
(Navigation), Display, or Time
Settings.
1. Press the Config screen button
on the Home Page or press the
CONFIG button on the faceplate.
Page 64 of 98

Black plate (64,1)Chevrolet Orlando Infotainment System (GMNA-Localizing-Canada-
6081467) - 2014 - CRC - 6/13/13
64 Infotainment System
2. Press the scroll bar until thedesired option displays. Select
the desired settings to change.
See the owner manual for
information on adjusting most
vehicle settings. See “Navigation
Settings” and“Navigation
Settings Button” later in this
section.
Languages
Press the Config button on the
Home Page or the CONFIG button
on the faceplate to enter the menu
options. Turn the MENU/SEL knob
or touch-tap the scroll bar to scroll
through the available options. Press
the MENU/SEL knob or press Languages to display the
languages. Select the desired
language.
Time and Date Settings
From the Time and Date Settings
screen button, press to display the
Time and Date menu.
Automatic Clock Update:
When
enabled, this feature will set the
clock automatically.
Set Time: Press + or−to increase
or decrease the Hours and Minutes
displayed on the clock.
Set Date: Press + or−to increase
or decrease the day. Set Time Format:
Press the
12 Hour screen button for standard
time; press the 24 Hour screen
button for military time.
Press the Back screen button to
save the adjustments.
Radio Settings
Press the Config button on the
Home Page or the CONFIG button
on the faceplate to enter the menu
options. Turn the MENU/SEL knob
or press the scroll bar to scroll
through the available options. Press
the MENU/SEL knob or press Radio
Settings to display the Radio
Settings menu. Press this feature to
make changes for radio information
displayed, preset pages, Auto
Volume Control, and XM Categories
Restore. See Satellite Radio on
page 18 (if equipped), for more
information about XM Categories.
Page 65 of 98
Black plate (65,1)Chevrolet Orlando Infotainment System (GMNA-Localizing-Canada-
6081467) - 2014 - CRC - 6/13/13
Infotainment System 65
The Radio Settings are:
Auto Volume:Select OFF, Low,
Medium, or High sensitivity to
automatically adjust the volume to
minimize the effects of unwanted
background noise that can result
from changing road surfaces, driving
speeds, or open windows. This
feature works best at lower volume
settings where background noise is
typically louder than the sound
system volume.
Gracenote Options: Press to
enable/disable Normalization used
to improve voice recognition and
media groupings. See CD Player on
page 36, USB on page 37, Auxiliary
Devices on page 44, and Bluetooth
Audio on page 45.
XM Channel Graphics: Press to
enable/disable the XM Audio page
background on the XM Channel
display. Startup Volume:
Press to set the
maximum volume level for startup
that will be used even if a higher
volume had been set when the radio
was turned off.
Number of Favorite Pages: Press
to select the number of FAV pages
to be displayed.
XM Categories: Press to
customize which available XM
Categories are used and displayed.
Software Version Information:
Press to display information about
the system and update software if
available.
Phone Settings
See Bluetooth on page 79 in the
“Phone” section for more
information on phone settings.
Navigation Settings
(If Equipped)
Press the Config button on the
Home Page to enter the setup
menu. Turn the MENU/SEL knob or touch-tap the scroll bar until the
Navigation Settings option displays.
Select this feature to make changes
to Voice Prompt, Traffic Settings,
Guidance Alert, Bread Crumbs, and
Delete Saved Destinations.
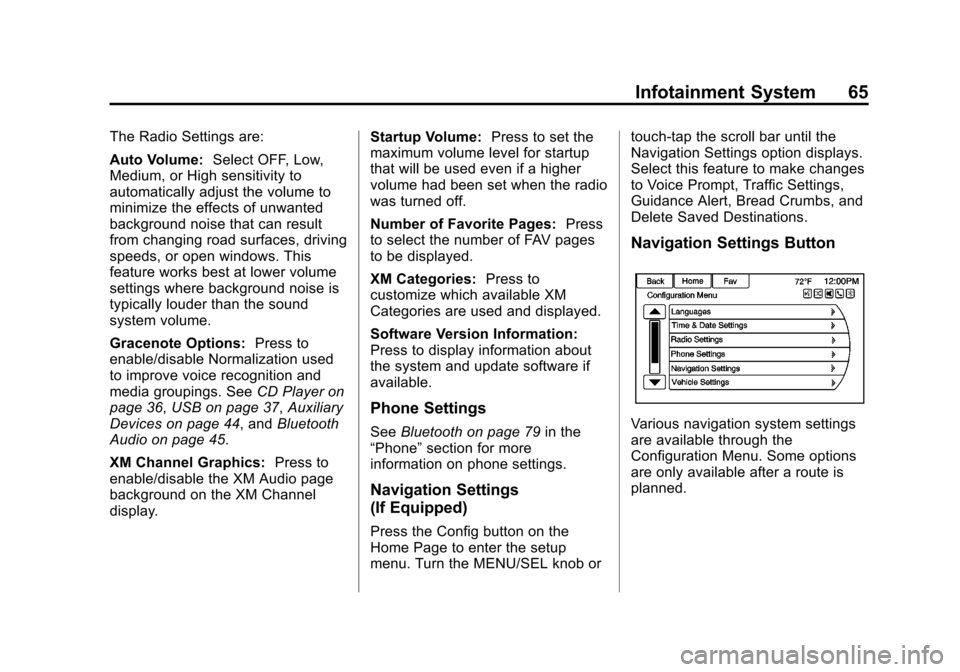
Navigation Settings Button
Various navigation system settings
are available through the
Configuration Menu. Some options
are only available after a route is
planned.
Page 66 of 98

Black plate (66,1)Chevrolet Orlando Infotainment System (GMNA-Localizing-Canada-
6081467) - 2014 - CRC - 6/13/13
66 Infotainment System
Press Navigation Settings to access
the navigation system settings.
Voice Prompt
The Voice Prompt Menu allows
changes to the voice prompt
features.Navigation Voice Prompts:
Checkmark to turn the navigation
voice prompts on. Checkmark to
turn the navigation voice prompts off
while traveling on a planned route.
Traffic Alert Prompts:
Select the
On or Off button to turn the traffic
voice prompt on or off while
traveling on a planned route.
Navigation Volume: Select to
change the volume of the navigation
prompts.
Traffic Settings
Press to display the Traffic
Settings menu. Traffic Events (On/Off):
Press to
enable or disable the traffic feature.
Traffic Alert Prompts (On/Off):
Press to enable or disable the traffic
voice prompts.
Alert if Better Route Available:
Press to prompt an alert if a better
route is available.
Sort Method: Press to display a
submenu of sort options.
.Sort by Distance: Press to
display traffic events in order of
distance with the closest event
shown first.
.Sort by Name: Press to display
traffic events in alphabetical
order.
Page 69 of 98
Black plate (69,1)Chevrolet Orlando Infotainment System (GMNA-Localizing-Canada-
6081467) - 2014 - CRC - 6/13/13
Infotainment System 69
Display Settings
Press the Config button on the
Home Page or the CONFIG button
on the faceplate, then select Display
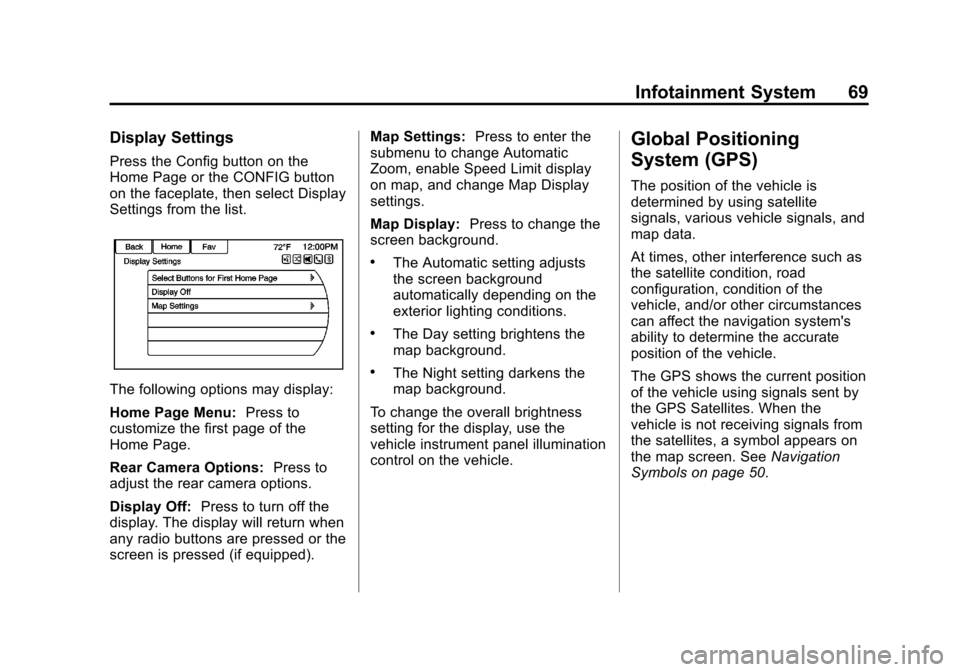
Settings from the list.
The following options may display:
Home Page Menu:Press to
customize the first page of the
Home Page.
Rear Camera Options: Press to
adjust the rear camera options.
Display Off: Press to turn off the
display. The display will return when
any radio buttons are pressed or the
screen is pressed (if equipped). Map Settings:
Press to enter the
submenu to change Automatic
Zoom, enable Speed Limit display
on map, and change Map Display
settings.
Map Display: Press to change the
screen background.
.The Automatic setting adjusts
the screen background
automatically depending on the
exterior lighting conditions.
.The Day setting brightens the
map background.
.The Night setting darkens the
map background.
To change the overall brightness
setting for the display, use the
vehicle instrument panel illumination
control on the vehicle.
Global Positioning
System (GPS)
The position of the vehicle is
determined by using satellite
signals, various vehicle signals, and
map data.
At times, other interference such as
the satellite condition, road
configuration, condition of the
vehicle, and/or other circumstances
can affect the navigation system's
ability to determine the accurate
position of the vehicle.
The GPS shows the current position
of the vehicle using signals sent by
the GPS Satellites. When the
vehicle is not receiving signals from
the satellites, a symbol appears on
the map screen. See Navigation
Symbols on page 50.
Page 79 of 98
Black plate (79,1)Chevrolet Orlando Infotainment System (GMNA-Localizing-Canada-
6081467) - 2014 - CRC - 6/13/13
Infotainment System 79
Voice Pass-Thru
Voice pass-thru allows access to the
voice recognition commands on the
cell phone, i.e. Siri or Voice
Command. See the cell phone
manufacturer's user guide to see if
the cell phone supports this feature.
To activate phone voice recognition
system, press and hold
b/gon
the steering wheel for approximately
two sec.
Bluetooth Phone/
Devices
Bluetooth
Overview
If equipped with Bluetooth capability,
the system can interact with many
cell phones and devices, allowing:
.Placing and receiving hands-free
calls.
.Sharing of the cell phone’s
address book or contact list with
the vehicle. The phone book will
only display when that phone is
connected.
.Placing outgoing calls by voice
recognition.
The system can be used while in
ON/RUN, ACC/ACCESSORY,
or Retained Accessory Power
(RAP). The range of the Bluetooth
system can be up to 9.1 m (30 ft).
The radio can connect to most Bluetooth-enabled phones.
Available features and functions
may be dependent on the device.
On a current phone call screen, an
image of the contact from your
phone's contact list can be
displayed. Not all phones are
compatible with this feature.
Bluetooth Controls
Use the buttons on the infotainment
system and the steering wheel to
operate the Bluetooth system.
Steering Wheel Controls
b/g(Push to Talk):
Press to
answer incoming calls and start
voice recognition.
$/i(Mute/End Call): Press to
end a call, decline an incoming call,
or cancel voice recognition.
+
x− (Volume): Press + or−to
increase or decrease the volume.
Page 81 of 98
Black plate (81,1)Chevrolet Orlando Infotainment System (GMNA-Localizing-Canada-
6081467) - 2014 - CRC - 6/13/13
Infotainment System 81
Pairing a Phone/Device
1. Press the CONFIG buttonor
5/>.
2. Select Phone Settings.
3. Select Pair Device (Phone). The radio displays “Please start
Bluetooth search on your phone.
Confirm or enter number:.” If the
device supports a four-digit
Personal Identification Number
(PIN), it will display. The PIN is
used in Step 5.
4. Start the pairing process on the cell phone to be paired to the
vehicle. See the cell phone
manufacturer's user guide.
5. Locate and select the device named after the vehicle make
and model in the list on the cell
phone. Follow the instructions
on the cell phone to enter the
PIN provided in Step 4, or to
confirm the six-digit code
matches. The system recognizes
the new connected phone after
the pairing process is complete. 6. If the phone prompts to accept
connection or allow phone book
download, select always accept
and allow. The phone book
may not be available if not
accepted. Some phones will
put connection request or
phonebook request in a pull
down task bar at the top of the
screen. Drag down the task bar
and look for connection/
phonebook request and accept.
7. Repeat to pair additional phones.
Listing All Paired and Connected
Phones/Devices
1. Press the CONFIG button.
2. Select Phone Settings.
3. Select Device List.
Deleting a Paired Phone/Device
1. Press the CONFIG button.
2. Select Phone Settings.
3. Select Device List. 4. Select the phone to delete and
follow the screen prompts.
Connecting to a Different Phone
To connect to a different phone, the
new phone must be in the vehicle
and available to be connected to the
Bluetooth system before the
process is started.
1. Press the CONFIG button.
2. Select Phone Settings.
3. Select Device List.
4. Select the new phone to connect to and follow the screen
prompts.
Pairing with Voice Recognition
A Bluetooth-enabled cell phone
must be paired and then connected
to the vehicle before it can be used.
See the cell phone manufacturer's
user guide for Bluetooth functions
before pairing the cell phone. If a
Bluetooth phone is not connected,
calls will be made using OnStar
Hands-Free Calling, if equipped.
See “OnStar” in the owner manual.
Page 82 of 98
Black plate (82,1)Chevrolet Orlando Infotainment System (GMNA-Localizing-Canada-
6081467) - 2014 - CRC - 6/13/13
82 Infotainment System
Pairing a Phone
1. Press
b/g. The system
responds “Please Say a
Command,” followed by a tone.
2. Say “Pair.”The system responds
with “Please search for
Bluetooth devices on your
phone. Confirm or enter
number.”
3. Start the pairing process on the phone to be paired.
4. Locate and select the device named after the vehicle make
and model in the list on the cell
phone. Follow the instructions
on the cell phone to enter the
PIN or to confirm the six-digit
code matches. The system
responds “successfully paired.”
5. Repeat Steps 1−4 to pair additional phones. Listing All Paired and Connected
Phones
The system can list all cell phones
paired to it. If a paired cell phone is
also connected to the vehicle, the
system responds with
“is connected”
after that phone name.
1. Press
b/g. The system
responds “Please Say a
Command,” followed by a tone.
2. Say “Device List.”
Deleting a Paired Phone
1. Press
b/g. The system
responds “Please Say a
Command,” followed by a tone.
2. Say “Device List.”
3. Say “Delete Device.”
4. The system responds with: “To
delete a device, please touch its
name on the screen.” Select the
device to delete on the display
and it will be removed. To cancel this command,
press
$/ion the steering
wheel control or press the BACK
button on the radio faceplate.
Connecting to a Different Phone
or Device
To connect to a different cell phone,
the system looks for the next
available cell phone. Depending on
the cell phone to be connected, this
command may need to be repeated.
1. Press
b/g. The system
responds “Please Say a
Command,” followed by a tone.
2. Say “Change Phone.”
.To select a device, press
the name on the display.
.If another cell phone is not
found, the original phone
remains connected.