Page 64 of 98

Black plate (64,1)Chevrolet Orlando Infotainment System (GMNA-Localizing-Canada-
6081467) - 2014 - CRC - 6/13/13
64 Infotainment System
2. Press the scroll bar until thedesired option displays. Select
the desired settings to change.
See the owner manual for
information on adjusting most
vehicle settings. See “Navigation
Settings” and“Navigation
Settings Button” later in this
section.
Languages
Press the Config button on the
Home Page or the CONFIG button
on the faceplate to enter the menu
options. Turn the MENU/SEL knob
or touch-tap the scroll bar to scroll
through the available options. Press
the MENU/SEL knob or press Languages to display the
languages. Select the desired
language.
Time and Date Settings
From the Time and Date Settings
screen button, press to display the
Time and Date menu.
Automatic Clock Update:
When
enabled, this feature will set the
clock automatically.
Set Time: Press + or−to increase
or decrease the Hours and Minutes
displayed on the clock.
Set Date: Press + or−to increase
or decrease the day. Set Time Format:
Press the
12 Hour screen button for standard
time; press the 24 Hour screen
button for military time.
Press the Back screen button to
save the adjustments.
Radio Settings
Press the Config button on the
Home Page or the CONFIG button
on the faceplate to enter the menu
options. Turn the MENU/SEL knob
or press the scroll bar to scroll
through the available options. Press
the MENU/SEL knob or press Radio
Settings to display the Radio
Settings menu. Press this feature to
make changes for radio information
displayed, preset pages, Auto
Volume Control, and XM Categories
Restore. See Satellite Radio on
page 18 (if equipped), for more
information about XM Categories.
Page 81 of 98

Black plate (81,1)Chevrolet Orlando Infotainment System (GMNA-Localizing-Canada-
6081467) - 2014 - CRC - 6/13/13
Infotainment System 81
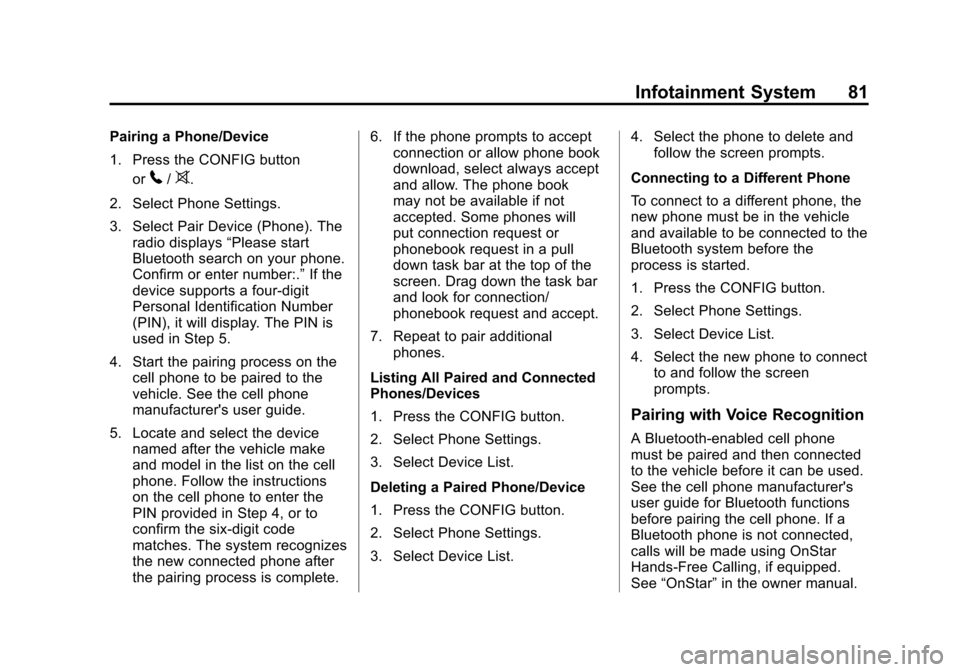
Pairing a Phone/Device
1. Press the CONFIG buttonor
5/>.
2. Select Phone Settings.
3. Select Pair Device (Phone). The radio displays “Please start
Bluetooth search on your phone.
Confirm or enter number:.” If the
device supports a four-digit
Personal Identification Number
(PIN), it will display. The PIN is
used in Step 5.
4. Start the pairing process on the cell phone to be paired to the
vehicle. See the cell phone
manufacturer's user guide.
5. Locate and select the device named after the vehicle make
and model in the list on the cell
phone. Follow the instructions
on the cell phone to enter the
PIN provided in Step 4, or to
confirm the six-digit code
matches. The system recognizes
the new connected phone after
the pairing process is complete. 6. If the phone prompts to accept
connection or allow phone book
download, select always accept
and allow. The phone book
may not be available if not
accepted. Some phones will
put connection request or
phonebook request in a pull
down task bar at the top of the
screen. Drag down the task bar
and look for connection/
phonebook request and accept.
7. Repeat to pair additional phones.
Listing All Paired and Connected
Phones/Devices
1. Press the CONFIG button.
2. Select Phone Settings.
3. Select Device List.
Deleting a Paired Phone/Device
1. Press the CONFIG button.
2. Select Phone Settings.
3. Select Device List. 4. Select the phone to delete and
follow the screen prompts.
Connecting to a Different Phone
To connect to a different phone, the
new phone must be in the vehicle
and available to be connected to the
Bluetooth system before the
process is started.
1. Press the CONFIG button.
2. Select Phone Settings.
3. Select Device List.
4. Select the new phone to connect to and follow the screen
prompts.
Pairing with Voice Recognition
A Bluetooth-enabled cell phone
must be paired and then connected
to the vehicle before it can be used.
See the cell phone manufacturer's
user guide for Bluetooth functions
before pairing the cell phone. If a
Bluetooth phone is not connected,
calls will be made using OnStar
Hands-Free Calling, if equipped.
See “OnStar” in the owner manual.
Page 89 of 98
Black plate (89,1)Chevrolet Orlando Infotainment System (GMNA-Localizing-Canada-
6081467) - 2014 - CRC - 6/13/13
Infotainment System 89
.Select Dismiss to close out the
incoming pop-up message
screen.
Text Messaging Settings
Text Message Settings are available
from the Text Message Inbox.
.Select Manage Predefined
Messages to create a user
defined message that can be
used later to reply to a text
message.
.Select Text Alerts to choose the
alert behavior for incoming text
messages:
‐ Text alert with tone
‐ Tone only
‐ Off
Trademarks and
License Agreements
FCC Information
See “Radio Frequency Statement”
in the owner manual.
“Made for iPod” and“Made for
iPhone” mean that an electronic
accessory has been designed to
connect specifically to iPod or
iPhone and has been certified by
the developer to meet Apple
performance standards.
iPod and iPhone are trademarks of
Apple Computer, Inc., registered in
the U.S. and other countries.