2014 CHEVROLET ORLANDO p button
[x] Cancel search: p buttonPage 39 of 98

Black plate (39,1)Chevrolet Orlando Infotainment System (GMNA-Localizing-Canada-
6081467) - 2014 - CRC - 6/13/13
Infotainment System 39
If no cover art is found Gracenote
will use generic genre graphics or
images of artists.
More Like This
The Gracenote database contains
attributes for Music, such as genre,
era of music, region, artist type,
mood, etc. Use this to create a
playlist of up to 30 songs "more
like" the currently listened to song.
This playlist will be stored in the
Playlist Menu when the device is
reconnected. If songs are removed
from the device, the system will
simply skip over those songs and
play the next available song.
Use the touch screen or voice
recognition to create a More Like
This Playlist. See“Voice
Recognition Commands” inVoice
Recognition on page 72.
Gracenote Indexing
While Gracenote is indexing,
infotainment features are available
including selecting music from the
menu. Voice recognition music will not be available until the radio has
completed indexing the device.
Devices with more music may take
longer to index. The device will
index when plugged into the radio
for the first time. When Indexing is
removed from the screen, the radio
is ready to support music search.
On the next connection or ignition
cycle, Indexing will show briefly on
the screen. The radio is searching
for changes to the device and
preparing the music list. If there are
no changes, the voice recognition
music search will be available.
The radio will index and store two
devices with up to 10,000 songs on
each device.
USB MP3 Player and USB Drives
.The USB MP3 players and USB
drives connected must comply
with the USB Mass Storage
Class specification (USB MSC).
.Hard disk drives are not
supported.
.The radio will not be able to play
back write-protected music.
.File systems supported: FAT32,
NTFS, Linux, and HFS+.
.The following restrictions apply
for the data stored on a USB
MP3 player or USB device:
‐
Maximum folder structure
depth: eight levels.
‐ Maximum number of MP3/
WMA files that can be
displayed: 10,000.
‐ Playlist entries must be in the
form of relative paths.
‐ The system attribute for
folders/files that contain audio
data must not be set.
To play a USB device, do one of the
following:
.Connect the USB and it begins
to play.
.Press the Now Playing screen
button on the Home Page.
.Press SOURCE, SRCE, or SRC
on the steering wheel controls to
scroll until the USB source
screen is available.
Page 45 of 98
Black plate (45,1)Chevrolet Orlando Infotainment System (GMNA-Localizing-Canada-
6081467) - 2014 - CRC - 6/13/13
Infotainment System 45
Bluetooth Audio
If equipped, music may be played
from a paired Bluetooth device. See
“Pairing a Phone/Device”under
Bluetooth on page 79.
To play music through a Bluetooth
device:
1. Power on the device, pair, and connect the device.
2. Music can be launched by doing one of the following:
.Press the Bluetooth Audio
screen button on the
Home Page.
.Press SOURCE or SRCE
until Bluetooth Audio is
selected.
.Press the SRC button on
the steering wheel controls
until Bluetooth Audio is
selected. See Steering
Wheel Controls on page 8.
.Use voice recognition. See
Voice Recognition on
page 72. The music can be controlled by
either the infotainment controls or
the controls on the device.
When a phone is connected to the
system through Bluetooth Audio, the
phone notifications and sounds may
not be heard on the phone until
Bluetooth is disconnected.
Notification features may vary based
on the phone. Check the phone
manufacturer
’s information for
notification support.
Bluetooth Audio Menu
Press the Menu screen button and
the following may display:
Shuffle: Press the MENU/SEL
knob to turn shuffle on or off. Not all
devices support the shuffle feature.
When selecting Bluetooth audio, the
Bluetooth device internal music
player may not open depending on
the status of the device. All devices
launch and play back audio
differently. Make sure the correct
audio source is playing on the
device for Bluetooth audio playback on the radio. When the vehicle is
not moving, use the device to begin
playback.
When selecting Bluetooth audio as
a source, the radio may source to
the Bluetooth Audio Paused screen
with no audio playing. Press play on
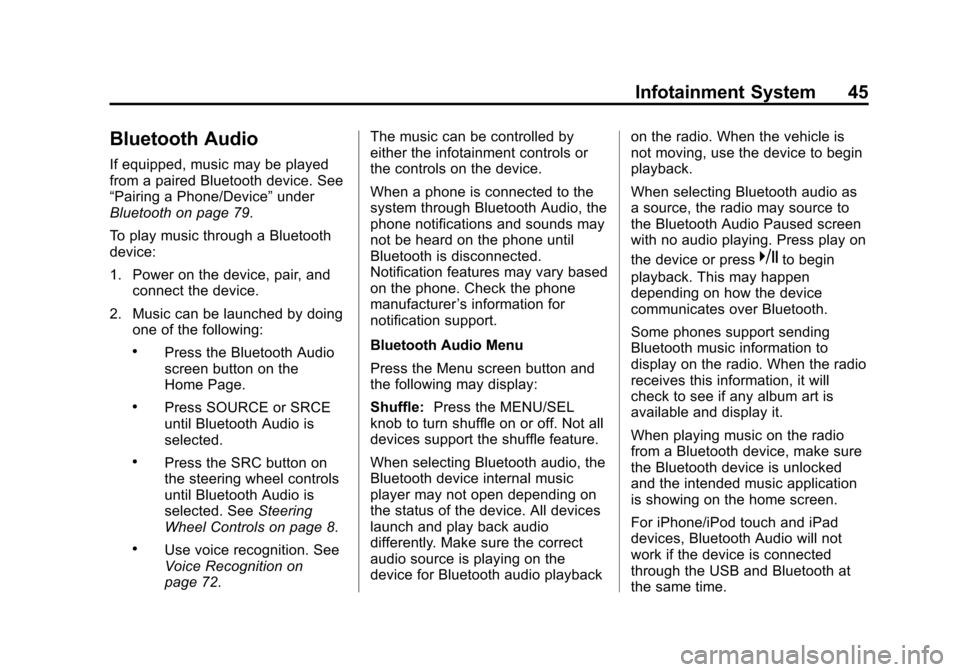
the device or press
kto begin
playback. This may happen
depending on how the device
communicates over Bluetooth.
Some phones support sending
Bluetooth music information to
display on the radio. When the radio
receives this information, it will
check to see if any album art is
available and display it.
When playing music on the radio
from a Bluetooth device, make sure
the Bluetooth device is unlocked
and the intended music application
is showing on the home screen.
For iPhone/iPod touch and iPad
devices, Bluetooth Audio will not
work if the device is connected
through the USB and Bluetooth at
the same time.
Page 46 of 98
Black plate (46,1)Chevrolet Orlando Infotainment System (GMNA-Localizing-Canada-
6081467) - 2014 - CRC - 6/13/13
46 Infotainment System
Navigation
Using the Navigation
System
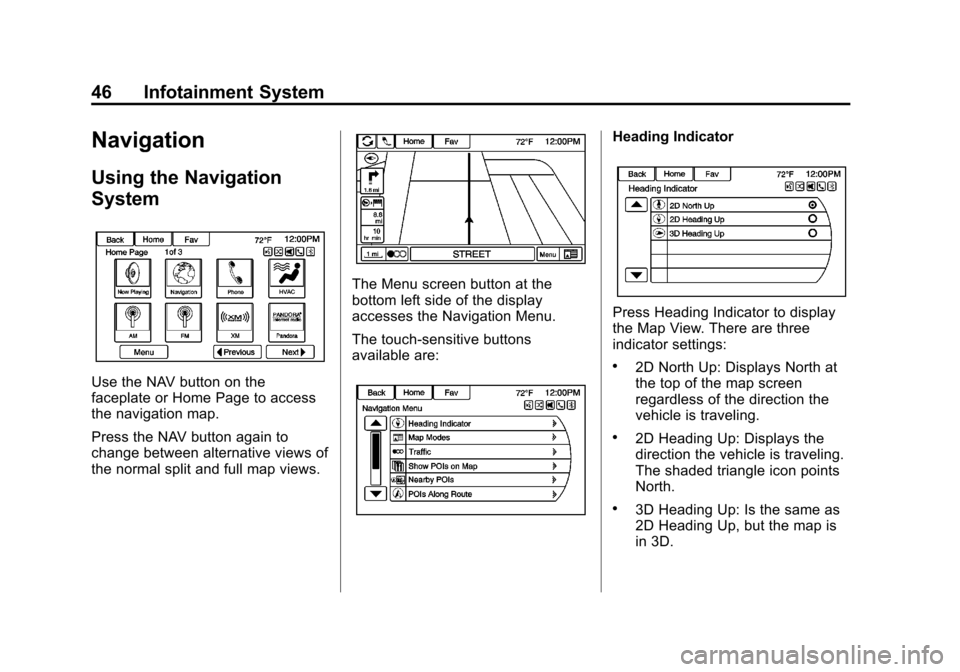
Use the NAV button on the
faceplate or Home Page to access
the navigation map.
Press the NAV button again to
change between alternative views of
the normal split and full map views.
The Menu screen button at the
bottom left side of the display
accesses the Navigation Menu.
The touch-sensitive buttons
available are:
Heading Indicator
Press Heading Indicator to display
the Map View. There are three
indicator settings:
.2D North Up: Displays North at
the top of the map screen
regardless of the direction the
vehicle is traveling.
.2D Heading Up: Displays the
direction the vehicle is traveling.
The shaded triangle icon points
North.
.3D Heading Up: Is the same as
2D Heading Up, but the map is
in 3D.
Page 47 of 98
Black plate (47,1)Chevrolet Orlando Infotainment System (GMNA-Localizing-Canada-
6081467) - 2014 - CRC - 6/13/13
Infotainment System 47
Map Modes
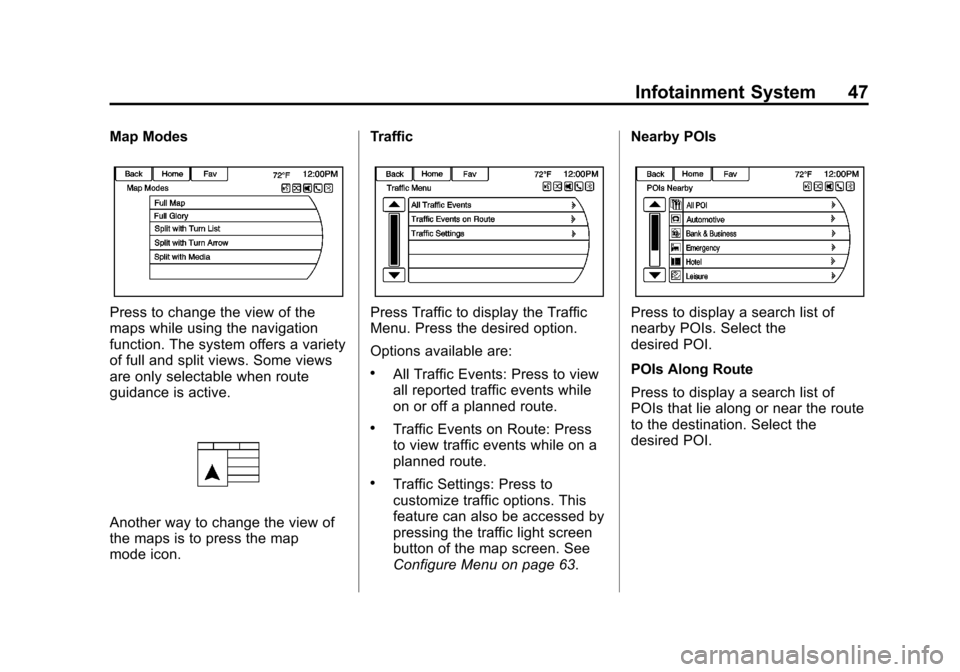
Press to change the view of the
maps while using the navigation
function. The system offers a variety
of full and split views. Some views
are only selectable when route
guidance is active.
Another way to change the view of
the maps is to press the map
mode icon.Traffic
Press Traffic to display the Traffic
Menu. Press the desired option.
Options available are:
.All Traffic Events: Press to view
all reported traffic events while
on or off a planned route.
.Traffic Events on Route: Press
to view traffic events while on a
planned route.
.Traffic Settings: Press to
customize traffic options. This
feature can also be accessed by
pressing the traffic light screen
button of the map screen. See
Configure Menu on page 63.Nearby POIs
Press to display a search list of
nearby POIs. Select the
desired POI.
POIs Along Route
Press to display a search list of
POIs that lie along or near the route
to the destination. Select the
desired POI.
Page 48 of 98
Black plate (48,1)Chevrolet Orlando Infotainment System (GMNA-Localizing-Canada-
6081467) - 2014 - CRC - 6/13/13
48 Infotainment System
Show POIs on Map
Press to customize which major POI
categories are displayed on
the map.
Switch Route Time/Destination
Press to customize the Arrival/
Travel time and Waypoint/
Destination information displayed in
the main map screen.Current Position Information
Press to display a split screen
showing detailed information about
the vehicle position. This feature
can also be accessed by pressing
the vehicle information tab on the
lower center of the display. The
location can be saved to the
Address Book by pressing Save in
the split screen.
Destination Information
Press to display a split map screen
showing the next waypoint/
destination. The location can be
saved to the Address Book by
pressing Save in the split screen.
Map Adjustments
The system lets you adjust the scale
of view on the map. Also, as you
drive, the map scrolls automatically
based on the direction of travel.
Map Scales
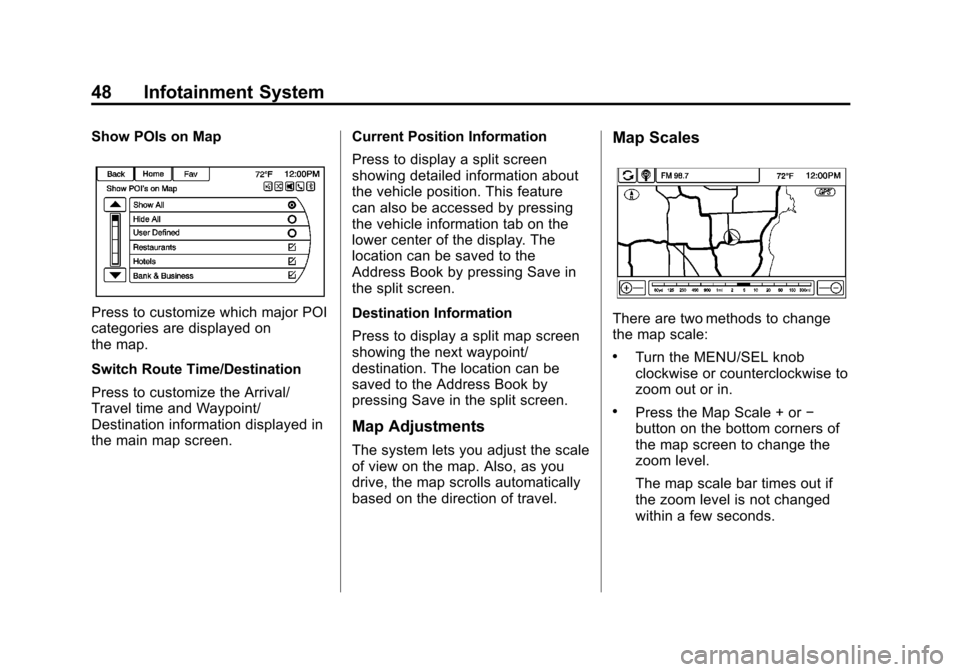
There are two methods to change
the map scale:
.Turn the MENU/SEL knob
clockwise or counterclockwise to
zoom out or in.
.Press the Map Scale + or
−
button on the bottom corners of
the map screen to change the
zoom level.
The map scale bar times out if
the zoom level is not changed
within a few seconds.
Page 52 of 98
Black plate (52,1)Chevrolet Orlando Infotainment System (GMNA-Localizing-Canada-
6081467) - 2014 - CRC - 6/13/13
52 Infotainment System
Destination
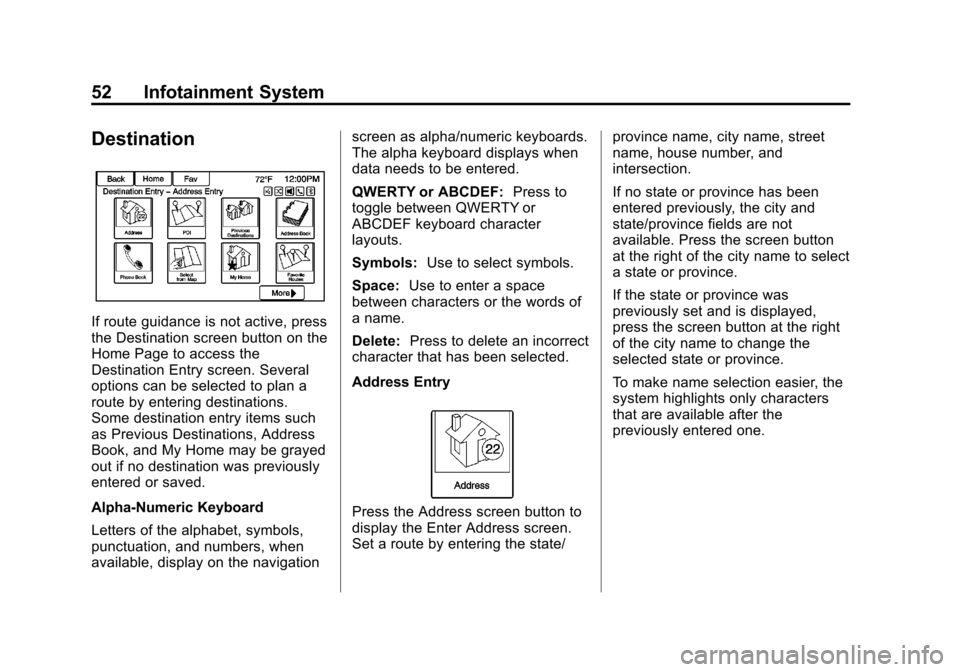
If route guidance is not active, press
the Destination screen button on the
Home Page to access the
Destination Entry screen. Several
options can be selected to plan a
route by entering destinations.
Some destination entry items such
as Previous Destinations, Address
Book, and My Home may be grayed
out if no destination was previously
entered or saved.
Alpha-Numeric Keyboard
Letters of the alphabet, symbols,
punctuation, and numbers, when
available, display on the navigationscreen as alpha/numeric keyboards.
The alpha keyboard displays when
data needs to be entered.
QWERTY or ABCDEF:
Press to
toggle between QWERTY or
ABCDEF keyboard character
layouts.
Symbols: Use to select symbols.
Space: Use to enter a space
between characters or the words of
a name.
Delete: Press to delete an incorrect
character that has been selected.
Address Entry
Press the Address screen button to
display the Enter Address screen.
Set a route by entering the state/ province name, city name, street
name, house number, and
intersection.
If no state or province has been
entered previously, the city and
state/province fields are not
available. Press the screen button
at the right of the city name to select
a state or province.
If the state or province was
previously set and is displayed,
press the screen button at the right
of the city name to change the
selected state or province.
To make name selection easier, the
system highlights only characters
that are available after the
previously entered one.
Page 53 of 98
Black plate (53,1)Chevrolet Orlando Infotainment System (GMNA-Localizing-Canada-
6081467) - 2014 - CRC - 6/13/13
Infotainment System 53
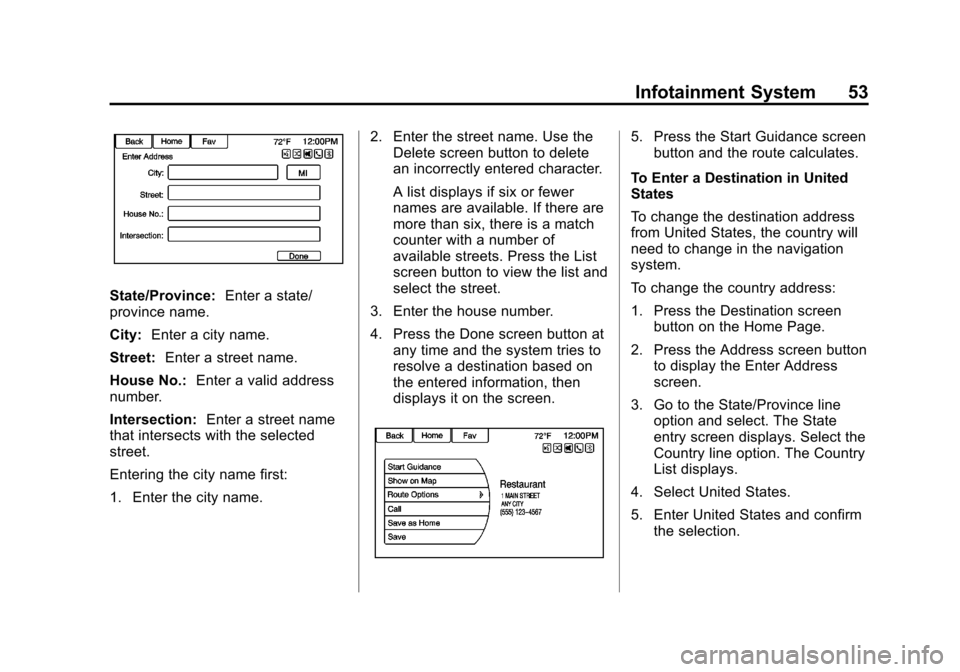
State/Province:Enter a state/
province name.
City: Enter a city name.
Street: Enter a street name.
House No.: Enter a valid address
number.
Intersection: Enter a street name
that intersects with the selected
street.
Entering the city name first:
1. Enter the city name. 2. Enter the street name. Use the
Delete screen button to delete
an incorrectly entered character.
A list displays if six or fewer
names are available. If there are
more than six, there is a match
counter with a number of
available streets. Press the List
screen button to view the list and
select the street.
3. Enter the house number.
4. Press the Done screen button at any time and the system tries to
resolve a destination based on
the entered information, then
displays it on the screen.
5. Press the Start Guidance screenbutton and the route calculates.
To Enter a Destination in United
States
To change the destination address
from United States, the country will
need to change in the navigation
system.
To change the country address:
1. Press the Destination screen button on the Home Page.
2. Press the Address screen button to display the Enter Address
screen.
3. Go to the State/Province line option and select. The State
entry screen displays. Select the
Country line option. The Country
List displays.
4. Select United States.
5. Enter United States and confirm the selection.
Page 54 of 98
Black plate (54,1)Chevrolet Orlando Infotainment System (GMNA-Localizing-Canada-
6081467) - 2014 - CRC - 6/13/13
54 Infotainment System
Entering a Destination in Other
Countries
To change the destination address
from Canada to another country, the
country will need to change in the
navigation system.
To change the country address:
1. Press the Destination screenbutton on the Home Page.
2. Press the Address screen button to display the Address Entry
screen.
3. Go to the State/Province line option and select. The State/
Province entry screen displays.
Select the Country line option.
The available Country List
displays.
4. Select the desired country. For example, select Canada as a
default country.
5. Enter State/Province. For example, enter Ontario and
confirm the selection. The destination in other countries
can also be changed using voice
recognition. See
Voice Recognition
on page 72.
Points of Interest (POI)
Press the Points of Interest screen
button on the Destination Entry
page. Several options can be
selected to plan a route.
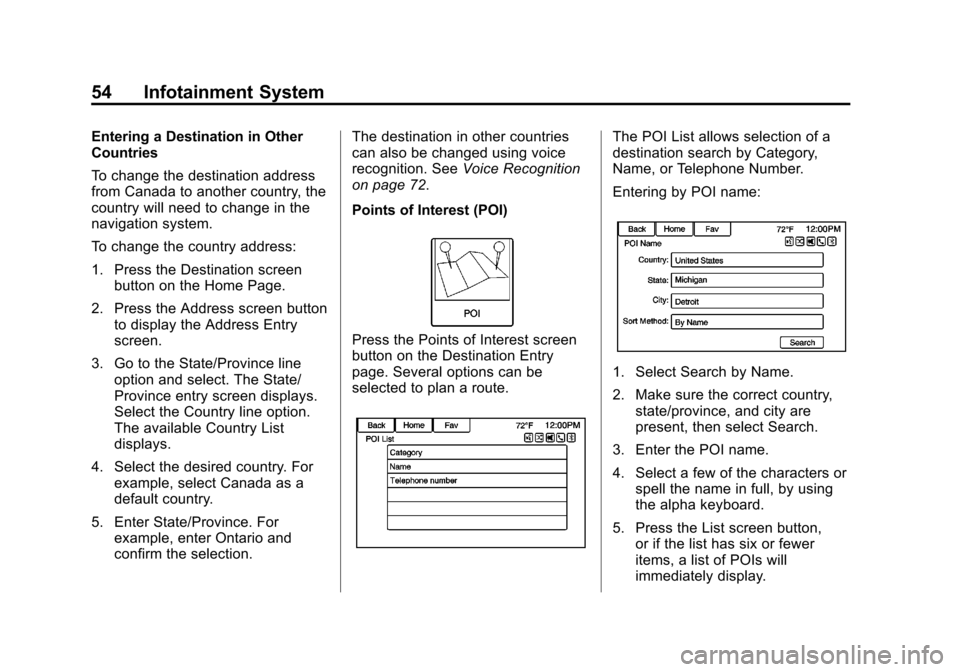
The POI List allows selection of a
destination search by Category,
Name, or Telephone Number.
Entering by POI name:
1. Select Search by Name.
2. Make sure the correct country, state/province, and city are
present, then select Search.
3. Enter the POI name.
4. Select a few of the characters or spell the name in full, by using
the alpha keyboard.
5. Press the List screen button, or if the list has six or fewer
items, a list of POIs will
immediately display.