2014 AUDI RS7 SPORTBACK warning
[x] Cancel search: warningPage 185 of 292
@ Tips
-In Canada, the terms "top tether" with
"lower universal anchorages" (or "lower
universal anchorage bars") are used to
describe the system.
- In other countries, the term "ISO FIX" is
used to describe the lower anchorages.
Location
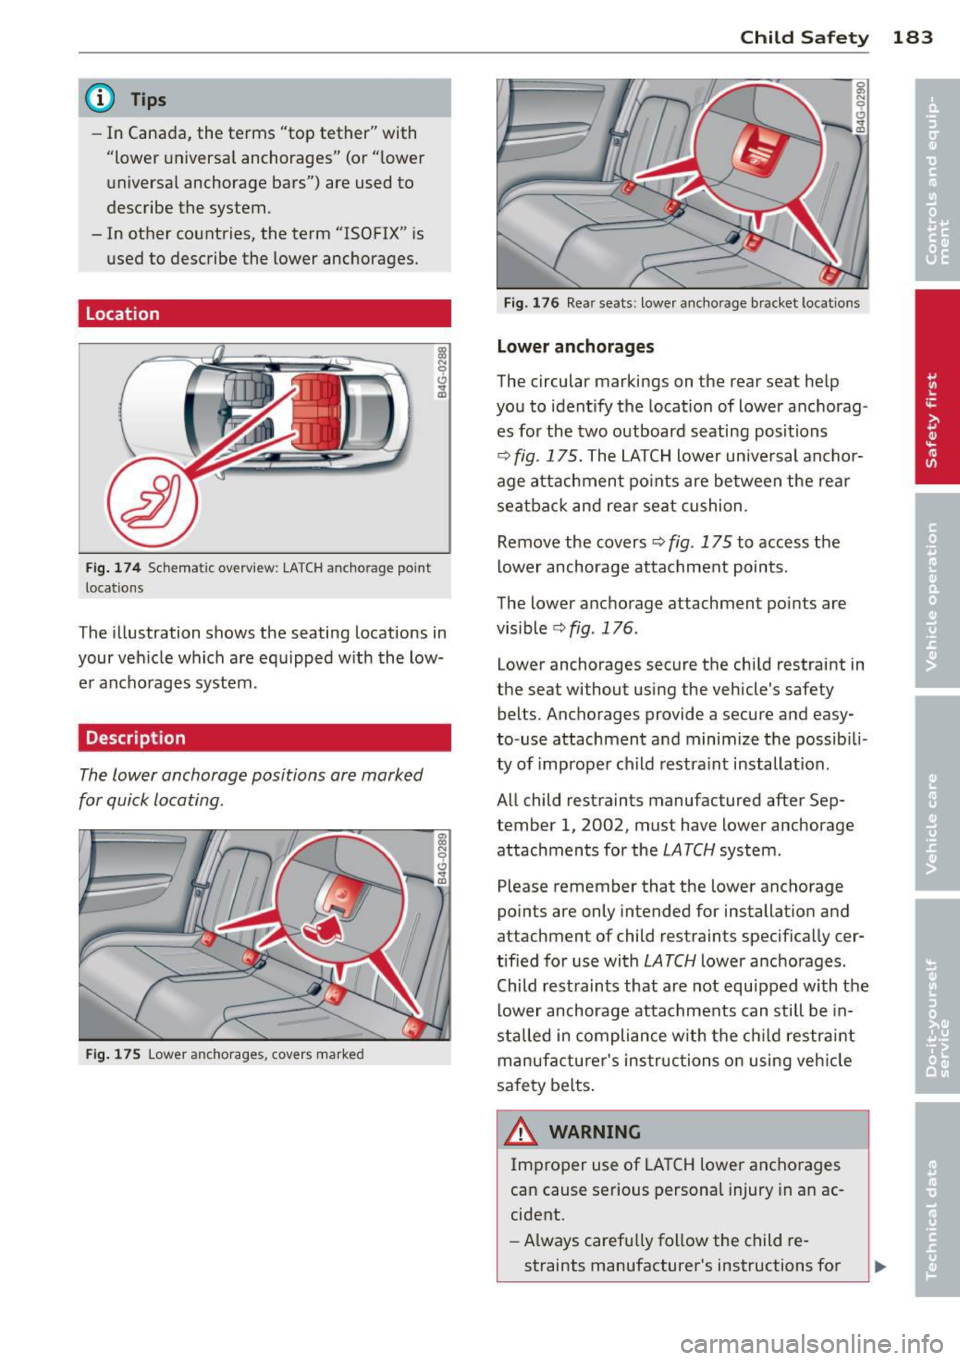
Fig . 174 Schematic overview: LA T CH ancho rage point
locations
The illustration shows the seating locations in
your veh icle which are equipped w ith the low
e r anchorages system .
Description
The lower anchorage positions are marked
for quick locating .
Fig. 175 Lower anchorages , covers marked
Child Safety 183
Fig. 176 Rea r seats: lower anchorage bra cket locat ions
Lower anchorages
The circular markings on the rear seat help
you to ident ify the location of lower anchorag
es for the two outboard seating positions
¢ fig. 175. The LATCH lower unive rsal anchor
age attachment points are between the rear
seatback and rear seat cushion .
Remove the covers¢
fig. 175 to access the
lower anchorage attachment points.
The lower anchorage attachment points are
vis ible ¢
fig . 176.
Lower anchorages secure the chi ld restraint in
the seat without using the vehicle's safety
belts. Anchorages provide a secure and easy
to-use attachment and minimize the possib ili
ty of improper child restraint installation.
All child restraints manufactured after Sep
tember 1, 2002, must have lower anchorage
attachments for the
LATCH system.
Please remember that the lower anchorage
points are only intended for installation and
attachment of child restraints specifically cer
tified for use with
LATCH lower anchorages .
Child rest raints that are not equipped with the
lower anchorage attachments can still be in
stalled in compliance with the child restraint
manufacturer's instructions on using veh icle
safety belts.
A WARNING ~
Improper use of LATCH Lower anchorages
can cause serious personal injury in an ac
cident.
- Always carefully follow the child re
straints manufacturer's instructions for
Page 186 of 292
184 Child Safet y
proper installation of the child restraint
and proper use of the lower anchorages or safety belts in your vehicle.
- Never secure or attach any luggage or
other items to the
LATCH lower ancho
rages.
- Always read and heed the important in format ion about child restra ints in this
chapter and WARNINGS
<=:>page 168,
Child Safety .
Installing a child restraint with LATCH
lower anchorages
Whenever you install a child restraint always
follow the child restraint manufacturer's in
structions.
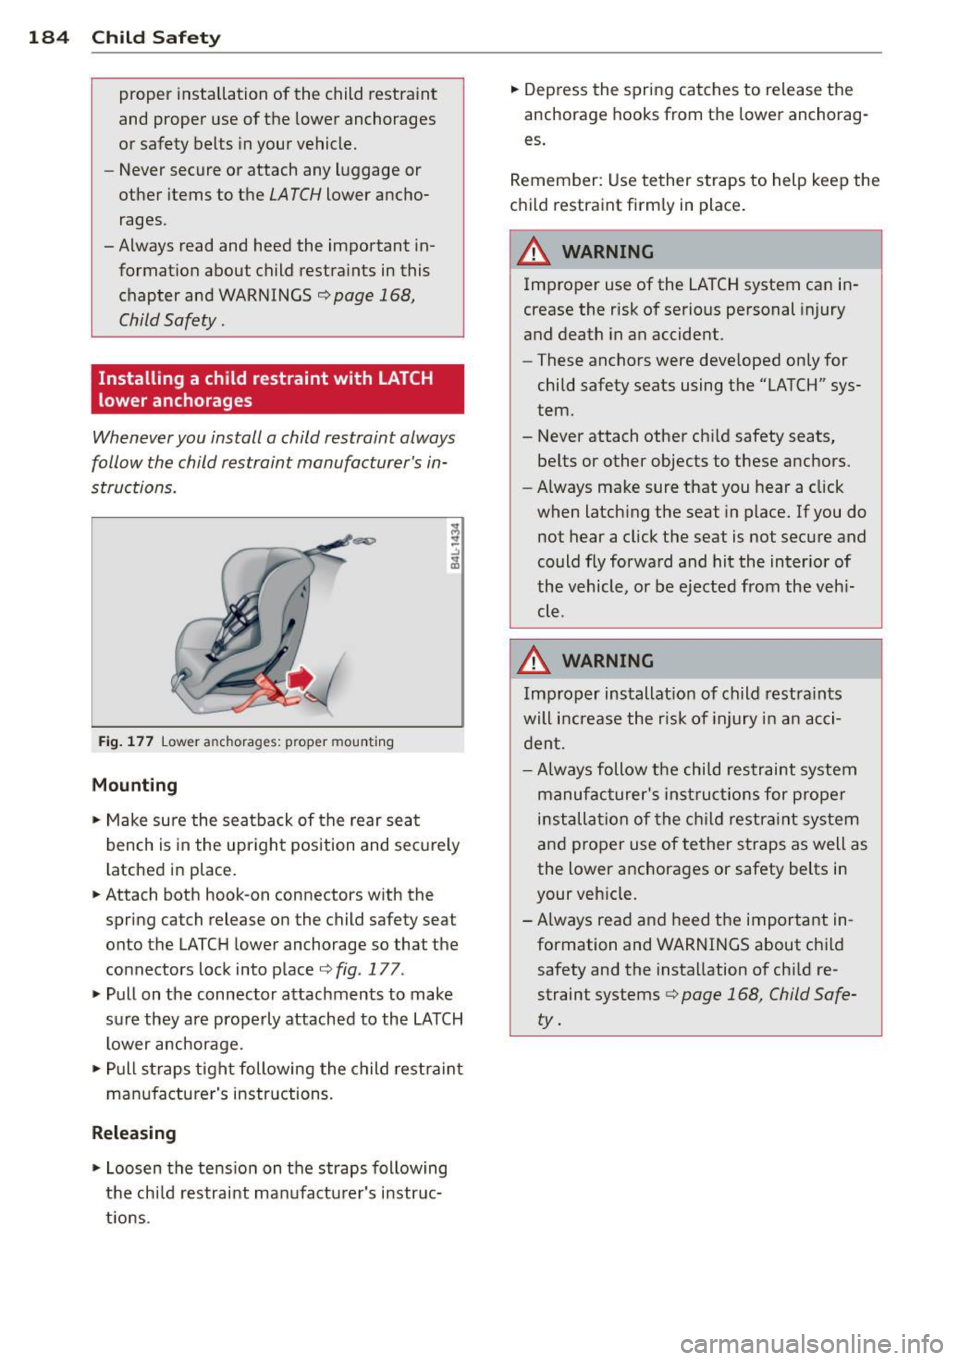
Fig. 177 Lower anchorages: proper mount ing
Mounting
.,. Make su re the seatback of the rear sea t
bench is in the upright pos ition and sec urely
latched in place.
.,. Attach both hook-on connectors w ith the
spring catch release on the child safety seat onto the LATC H lower anchorage so that the
connectors lock into place¢
fig. 177 .
.,. Pul l on the connector attachments to make
sure they are properly attached to the LATCH lower anchorage .
.,. Pull s traps tight following the child restra in t
m anuf acturer's instructions .
Releasing
.,. Loosen the te nsio n on the straps following
the ch ild restraint ma nufactu rer's i nstr uc
ti ons. .,.
Depress the spr ing catches to release the
anchorage hooks from the lower anchorag
es.
Remember: Use tether s traps to help keep the
c h ild restraint firm ly in place .
A WARNING ~
Improper use of the LATCH system can in-
crease the risk of serious personal in jury
and death in an accident.
- These anchors were deve loped on ly for
child safety seats using the "LATCH" sys
tem.
- Never attach other chi ld safety seats,
belts or other objects to these anchors.
- Always make sure that you hear a click
when latch ing the seat in p lace . If you do
not hear a click t he seat is not secu re and
could fly forwa rd and hit the inter ior of
the vehicle, or be ejected from the veh i
cle.
A WARNING
Imp roper installat ion of child restra ints
will increase the r isk of injury i n an acci
dent.
- Always follow the child restraint system
manufac turer' s inst ru cti ons for prope r
i n stalla tion of the c hild res trai nt system
and p roper use of te ther s traps as well as
the lower anchorages or safety belts in
your veh icle .
-A lways read and heed t he important in
formation and WARNINGS about ch ild
safety and the installation of ch ild re
straint systems¢
page 168, Child Safe
ty .
-
Page 187 of 292
Tether anchors and tether straps
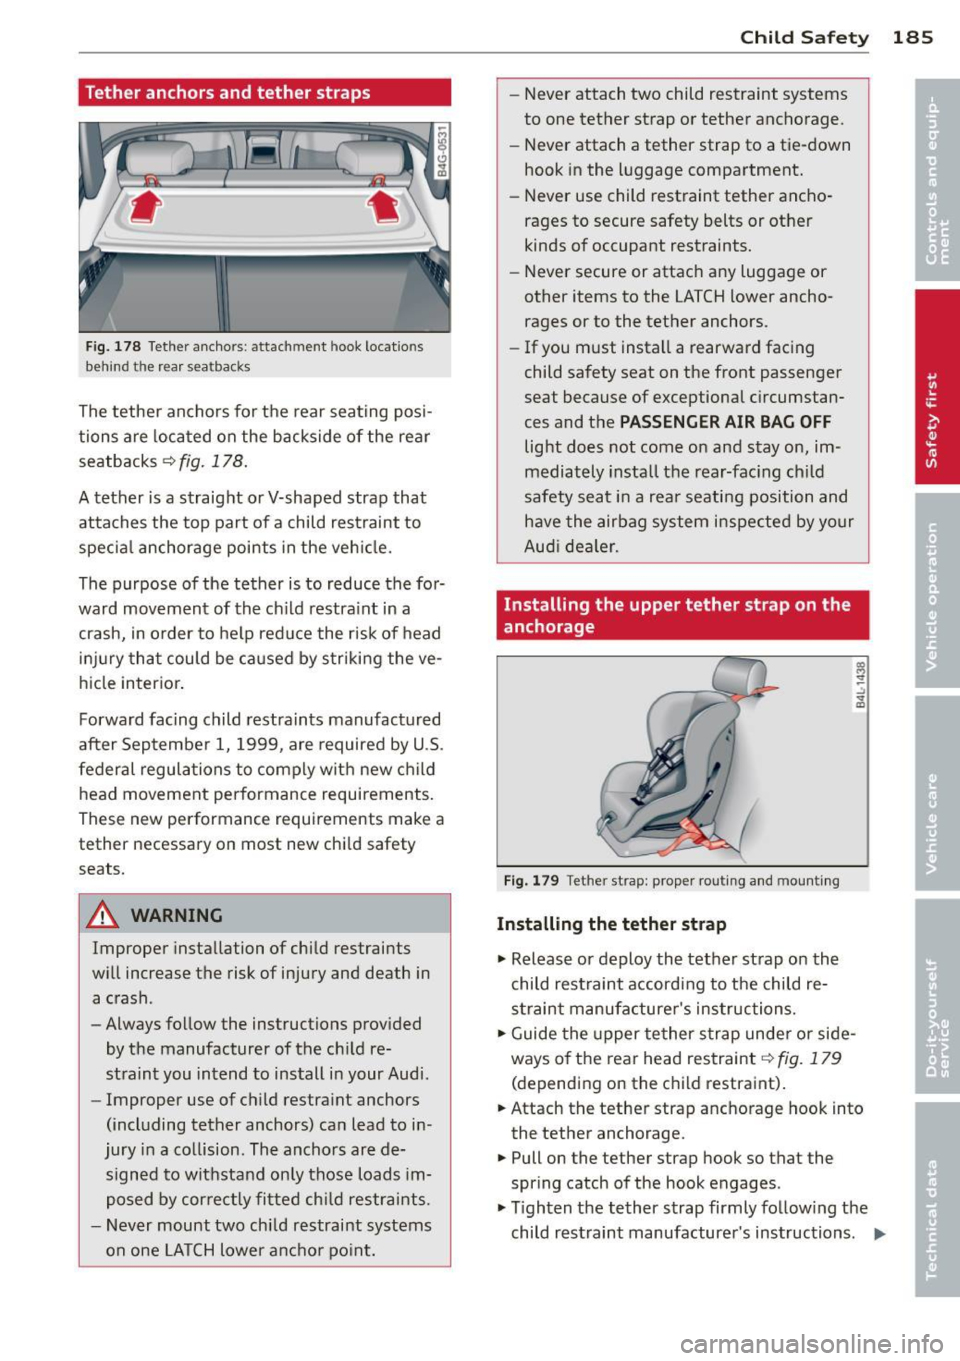
Fig. 178 Tether ancho rs: atta chment hook loc atio ns
behin d the rea r se a tb acks
The tethe r anchors for the rear seating posi
tions are located on the backside of the rear
seatbacks
q fig. 178.
A tether is a straight or V-sha ped strap that
attaches the top part of a child restraint to
specia l anchorage points in the veh icle.
The purpose of the tether is to reduce the for
ward movement of the ch ild restra int in a
crash, in o rder to he lp red uce the risk of head
i nj ury tha t could be ca used by striki ng the ve
hicle interior.
Forward facing child restraints manufactured
after September 1, 1999, a re required by U .S.
federal regulations to comply with new c hild
head movement performance requirements.
Thes e new performance requirements mak e a
tethe r necessary on most new chi ld safety
s eats.
A WARNING
Improper installation of child restraints
will increase the risk of injury and death in a crash .
- Always follow the instructions prov ided
by the manufacturer of the ch ild re
straint you intend to install in your Audi.
- Improper use of ch ild restra int anchors
(including tether anchors) ca n lead to i n
jury in a collision. The ancho rs are de
signed to wit hstand only those loads im
posed by correctly fitted ch ild restraints.
- Never mount two chi ld restraint systems
on one LA TCH lower ancho r po int . Child S
afety 185
- Never attach two child restraint systems
to one tether strap or tether ancho rage .
- Never attach a tether strap to a tie-down
hook in the luggage compartment.
- Never use child restraint tether a ncho
rages to secure safety belts or other
kinds o f occupant restraints.
- Never secure or attach any luggage or
other items to the LATCH lower ancho
rages or to the tether anchors .
- If you must insta ll a rearward fac ing
child safety seat on the front passenger
seat because of exceptional c ircumstan
ces and the
PASSENGER AIR BAG OFF
light does not come on and stay on, im
mediately insta ll the rea r-fac ing ch ild
safety seat i n a rea r seating position and
have the airbag system i nspected by your
Aud i dea ler.
Installing the upper tether strap on the
anchorage
F ig. 179 Tet her stra p: prop er r ou ting and moun ting
Installing the tether strap
.,. Release or deploy the tether strap o n the
child restraint according to the child re
s t raint manufa cture r's instructions.
... Guide the upper te ther s trap unde r or side
ways of the rear head restra int
Q fig . 179
(depending on the child restraint) .
... Attach the tether strap anchorage hook into
the tether anchorage.
.,. Pull on the te ther s trap hook so tha t the
spr ing catch of the hook engages .
.,. Tighten the tether strap firmly follow ing t he
child restraint manufacturer's instructions . .,.
Page 188 of 292
186 Child Saf ety
Re le asin g th e tethe r str ap
.. Loosen the tension following the child re
stra int manufacturer's instructions .
.. Depress the spring catch on the hook and re
lease it from the anchorage .
([) Note
If you leave the child restraint with the
tether strap firmly insta lled for several
days, this cou ld leave a mark on the up
holstery on the seat cushion and backrest
in the area where the tether strap was in
stalled . The upholstery wou ld a lso be per
manently stretched around the tethe r
strap. Th is applies especially to leather
seats.
Using tether straps on rearward-facing
child restraints
Currently, few rear-facing child restraint sys
tems come with a tether. P lease read and
heed the child restraint system manufactur
er's instructions carefully to determine how to
properly install the tether.
A WARNING
-
A child in a rearward-facing child safety
seat insta lled on the front passenger seat
w ill be seriously injured and can be k illed if
the fron t airbag inflates -even with an Ad
vanced Airbag System.
- T he inflating a irbag wi ll hit the child
sa fety seat or infant carrier with g reat
force and w ill smash the ch ild safety seat
and child against the backrest, center
armrest, or door.
- If you must install a rearward facing
child safety seat on the front passenger
seat because of exceptional circ umstan
ces and the
PASSENGER AIR BAG OFF
light does not come on and stay on, im
med iately install the rear-facing child
safety seat in a rear seating posit ion and
have t he a irbag system inspected by you r
Audi dealer.
Additional Information
Sources of information about child
restraints and their use
T he re a re a number o f sources of add itiona l
information about child rest raint selection, in
sta llation and use:
N HT SA advises that the best ch ild safety seat
is the one that fits your chi ld and fits in you r
vehicle, and that yo u will use correct ly and
consistently .
T ry before yo u buy!
U.S Nationa l Highw ay Traffic Safet y Admin
i s tration
T el.: 1-888-3 27-4236 (TIY: 1-800-424-91S3)
www.nhtsa.gov
National SAFE KIDS Campa ign
T el.: (202) 662-0600
www.safe kids.o rg
Saf ety Belt Saf e U.S .A
Tel.: (800) 745-SAFE (English)
T el.: (800) 747-SANO (Span ish)
www.carseat .org
Transport Canad a In formation C entre
Tel.: 1-800-333-0371 or call
1-613-998-86 16 if you are in the Ottawa area
http://www.tc.gc.ca/eng/ roadsafety/
men u.h tm
Audi Cu stom er R elation s
Tel.: (800) 822-2834
Page 189 of 292
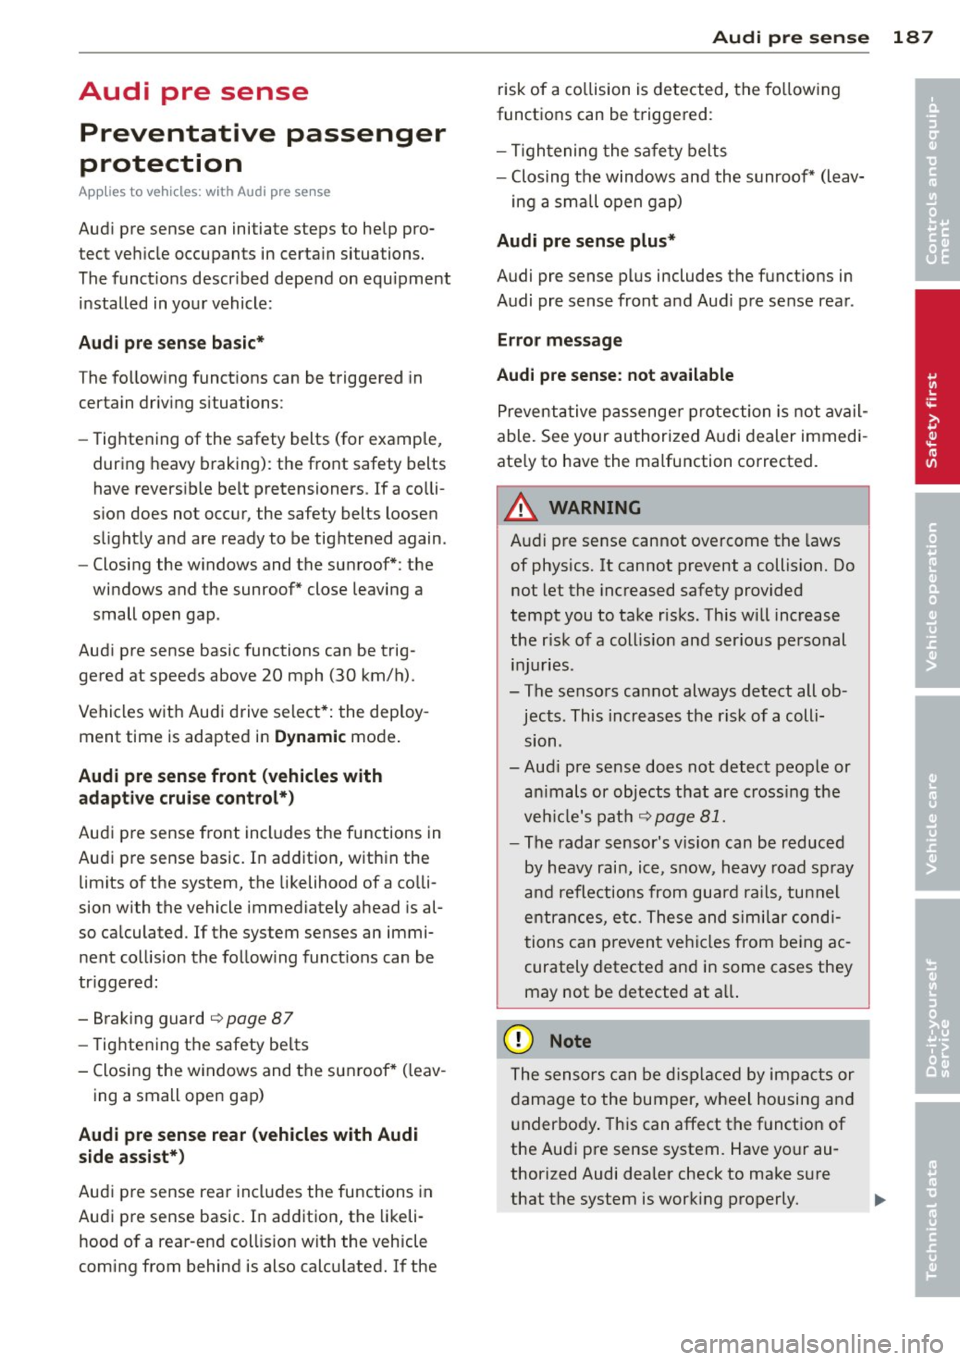
Audi pre sense Preventative passenger
protection
App lies to veh icles: with Audi p re se nse
Audi pre sense can initiate steps to help pro
tect vehicle occupants in certain situations.
The funct ions descr ibed depend on equipment
installed in your vehicle:
Audi pre sense basic*
The following functions can be triggered in
certain driving situations:
- Tightening of the safety belts (for example,
during heavy braking) : the front safety belts
have reversible belt pretensioners. If a colli
sion does not occur, the safety belts loosen
slightly and are ready to be tightened again.
- Closing the windows and the sunroof* : the
windows and the sunroof* close leaving a
small open gap .
Audi pre sense basic functions can be trig
gered at speeds above 20 mph (30 km/h).
Vehicles with Audi drive select*: the deploy
ment time is adapted in Dynamic mode.
Audi pre sense front (vehicles with
adaptive cruise control*)
Audi pre sense front includes the functions in
Audi pre sense basic. In addition, within the limits of the system, the likelihood of a colli
sion with the vehicle immediately ahead is al
so calculated . If the system senses an immi
nent collision the following functions can be
tr iggered:
- Braking guard
¢ page 87
-Tightening the safety belts
- Closing the windows and the sunroof* ( leav-
ing a small open gap)
Audi pre sense rear (vehicles with Audi
side assist*)
Audi pre sense rear includes the functions in
Audi pre sense basic. In addition, the likeli
hood of a rear-end col lision with the vehicle
coming from behind is also calculated. If the
Audi pre sense 187
risk of a collision is detected, the following
functions can be triggered:
- Tightening the safety belts
- Closing the windows and the sunroof* (leav-
ing a small open gap)
Audi pre sense plus*
Audi pre sense plus includes the functions in
Audi pre sense front and Aud i pre sense rear .
Error message
Audi pre sense: not available
Preventative passenger protection is not avail
able. See your authorized Audi dealer immedi
ate ly to have the malfunction corrected.
A WARNING
-=
Audi pre sense cannot overcome the laws
of physics. It cannot prevent a collision. Do
not let the increased safety provided
tempt you to take risks . This will increase
the risk of a coll is ion and serious personal
injuries .
- The sensors cannot always detect all ob jects. This increases the risk of a colli
s10n .
- Aud i pre sense does not detect people or
an imals or objects that are crossing the
veh icle's path
¢page 81.
-The radar sensor's v is ion can be reduced
by heavy rain, ice, snow, heavy road spray
and reflections from guard rails, tunnel
entrances, etc. These and similar condi
tions can prevent vehicles from being ac
curately detected and in some cases they may not be detected at all.
Q) Note
The sensors can be displaced by impacts or
damage to the bumper, wheel housing and
underbody. This can affect the function of
the Audi pre sense system. Have your au
thorized Audi dealer check to make sure
that the system is working properly.
•
•
Page 192 of 292
190 Intelligent technology
differential lock (EDL), dynamic steering* and
selective whee l torque control. ESC is switch
ed on all the t ime. In certa in situations when
you need less traction, you can switch off ASR
by pressing the button
[ill c> page 191,
fig. 180. Be sure to switch ASR on again when
you no longe r need less traction .
Anti-loc k br ak ing system (ABS)
ABS prevents the wheels from locking up
when braking. The vehicle can still be steered
even during hard brak ing. Apply steady pres
sure to the brake pedal. Do not pump the ped
al. A puls ing in the brake pedal ind icates that
the system is he lp ing you to b rake the vehicle.
B rake as sist sys tem
The brake assist system can decrease braking
d istance. It increases braking power when the
driver presses the brake pedal quick ly in emer
gency situations. You must p ress and hold the
b rake pedal until the situation is over. I n
vehicles w ith adaptive cru ise cont rol*, the
b rake assist system is more sens it ive if the
d istance detected to the vehicle ahead is too
smal l.
Anti-slip regulation (ASR)
ASR reduces engi ne power when the d rive
wheels begin to spin and ad apts the fo rce to
the road condit ions. This makes i t easier to
start, accelerate and drive up hills .
Electronic differential lock (EDL)
The EDL brakes wheels that are spinning and
transfers the d rive powe r to the other d rive
wheel o r whee ls if the vehi cle is equipped wi th
a ll-w hee l drive* . This function is available up
to about 75 mph (120 km/h).
I n extreme cases, ED L automat ica lly swit ches
off to help keep the brake o n the braked whee l
from overheating . EDL wi ll switch on again au
tomatically when conditions have returned to
norma l.
Dynamic steering*
On vehi cles w ith dy namic stee ring*, ESC helps
stabilize the steering i n critical s ituations.
Selective wheel torque control
T he sele ctive whee l torq ue con trol ope rates
when driving through c urves . The front whee l
on the inside of th e curve o r both wheels on
the inside of the curve are braked selectively
as needed. This minimizes sliding in the front
whee ls and allows for more precise driving
t hr ough curves. The appl icable system may
not act ivate when dr iv ing in wet or snowy con
ditions .
,&. WARNING
-ESC, ABS, ASR, EDL, dy namic steeri ng*
and the select ive wheel torq ue con trol
c a nnot ove rcome the laws of physics.
T his is especially important on slippery
or wet roads.
If the systems begin acting
to stabilize your veh icle, yo u should im
mediately change your speed to match
the road and traffic conditions. Do not
let the increased safety provided by
these systems tempt you to take r isks.
Doing so will increase the risk of a loss of
veh icle cont ro l, collision and ser ious per
sonal injur ies.
- Always adapt your speed to road, traffic
and wea ther conditions. The risk of los
ing con trol of t he vehicle increases when
d riving too fast, espec ially through
curves and on slippery or wet roads, and
when dr iving too close to vehicles up
ahead. ESC, ABS, the brake assist sys
tem, ASR, EDL, dynam ic steering* and
the selective wheel torque contro l can
not prevent collisions .
- Always accelerate with special care on
even, smooth su rfaces such as those that
are wet or covered with ice and snow .
The drive wheels can spin eve n w ith
these assistan ce systems that cannot al
ways he lp to re duce the risk of loss of ve
h icle control.
(D Tips
- ABS and ASR o nly wo rk correctly when
all four wheels are equipped with identi
cal tires. D iffe ren t tire si zes can lead to a
reduction in engine power.
-
...
Page 193 of 292
-You may hear noises when the systems
described are working.
- If the indicator ligh t
DJ or flB (USA
models) @ (Canada models) appears,
Switching on and off
Intelligen t technolog y 191
there may be a malfunc tion c> page 19,
c> page 18 .
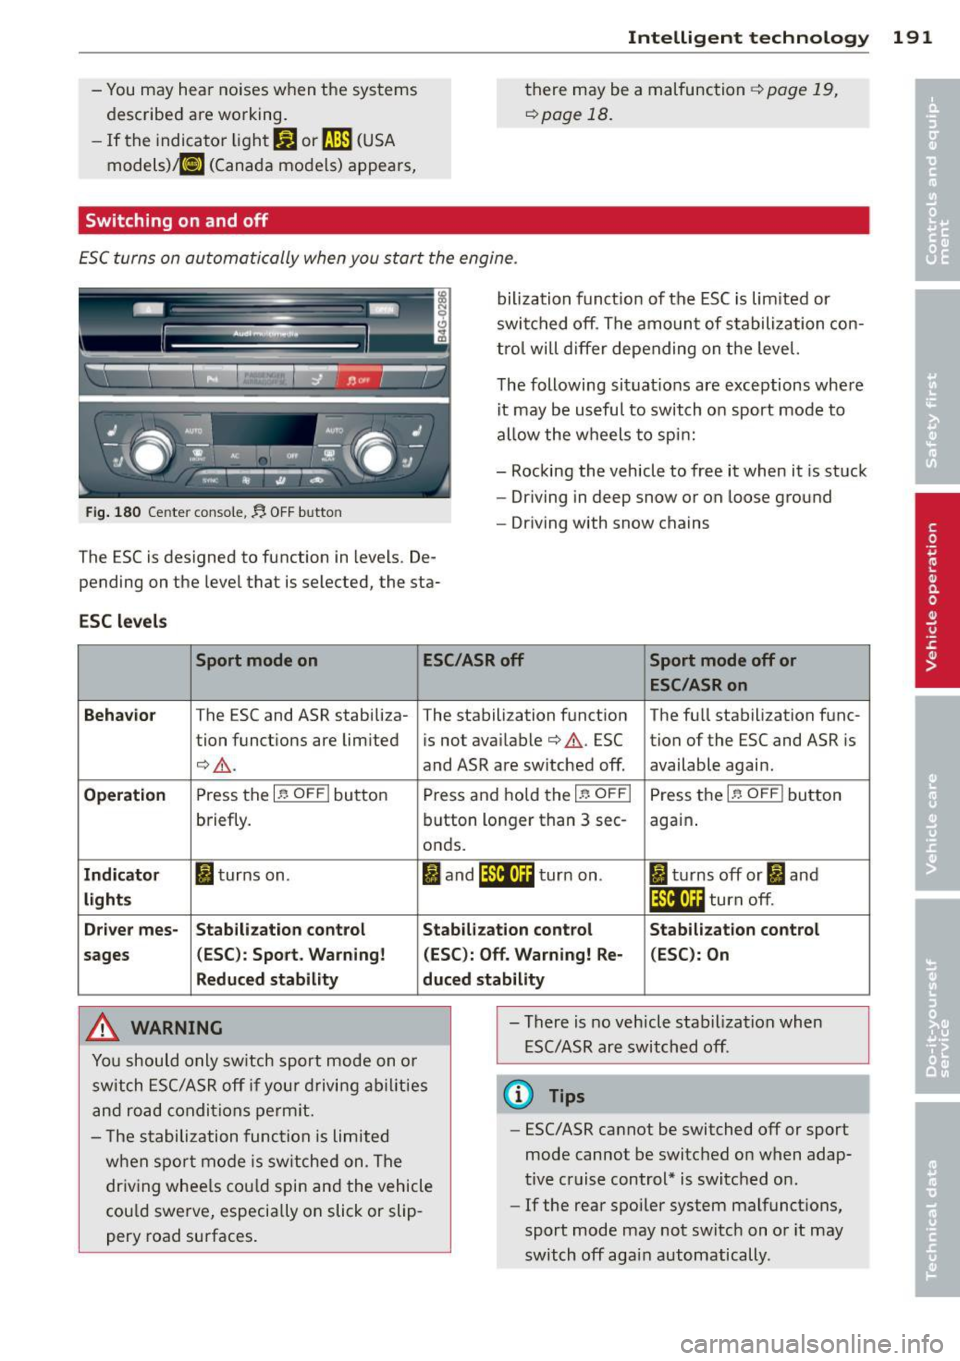
ESC turns on automatically when you s tart the engine .
Fig. 180 Cente r con sole,.$ OFF b utto n
The ESC is des igned to function in levels . De
pend ing on the leve l that is selected, the sta-
ESC l evels
bilization funct ion of the ESC is lim ited or
swi tched off . The amoun t of s tabilization con
tro l will d iffer depending on the level.
T he following situat ions are exceptions where
it may be usefu l to switch on sport mode to
allow the w heels to spi n:
- Rocking the vehicle to free it when it is stuck
- Dr iving in deep snow or on loose ground
- Driving with snow chains
Sport mode on ESC/ASR off Sport mode off or
ESC/ASRon
Behavior
T he ESC and ASR stabili za- The stabili zation function The fu ll stabili zation f unc -
tion funct ions are lim ited is not ava ilable
c> & . ESC tion of the ESC and ASR is
¢ & . and ASR are sw itched off. available agai n.
Operati on Press the I~ O FF I button Press and hold the 1-~ O FFI Press the 1-~ O FF I button
briefly. button longer than 3 sec-again .
o nds.
Ind ic a to r I turns on . I and ifil•)H turn on . II turns off or II and
light s If i4•)ii turn off.
Dr iver mes- Stab ilization control Stabilization control Stabilization control
s ages (
ESC ): Spo rt. Warning! (ESC ): Off. Warning! Re· (ESC) : On
Reduced stabil ity duc ed stab ility
A WARNING
.
You should only sw itch sport mode on o r
switch ESC/ASR off if your drivi ng ab il ities
and road condi tions perm it. -
There is no vehicle stabilization when
ESC/ASR are switched off .
@ Tips
-The s tabilization func tion is limited
w he n spor t mode is sw itched on . The
dr iv ing whee ls cou ld spin and the vehicle
cou ld swe rve, especially on slick or slip
pery road surfaces. -
ESC/ASR cannot be switched off or sport
mode cannot be switched on when adap·
tive cruise control* is switched on .
-If the rear spoiler system malfunctions,
sport mode may not switch on o r it may
switch off again automatically .
Page 194 of 292
192 Intelligent technology
Rear spoiler
The rear spoiler improves vehicle handling
and enhances driver control.
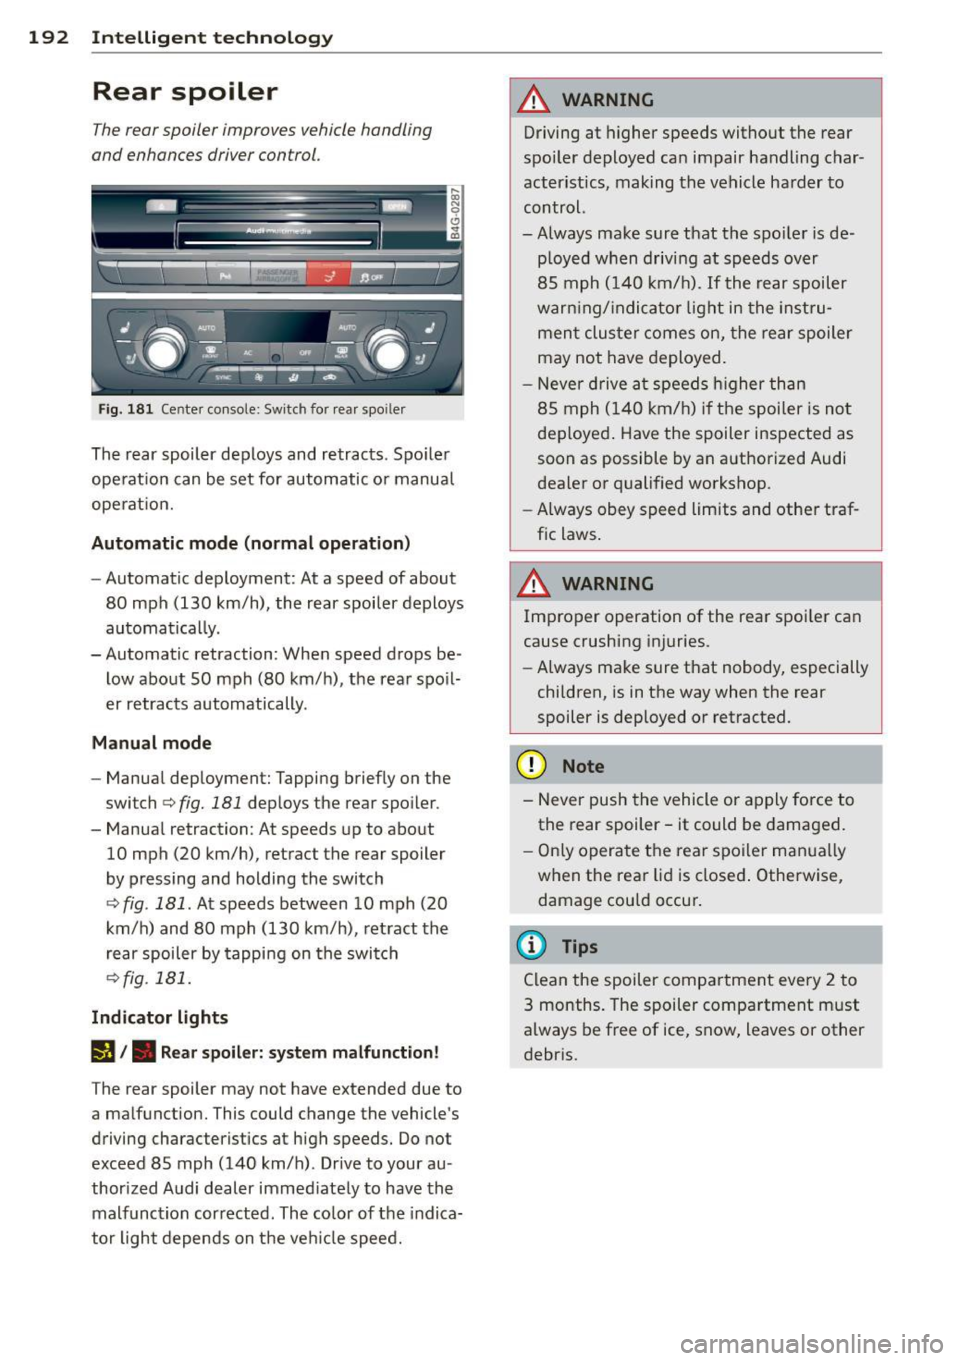
Fig. 181 Center console: Switch for rear spo iler
The rear spoiler deploys and retracts. Spoiler
operation can be set for automatic or manual
operat ion.
Automatic mode (normal operation)
-Automatic deployment: At a speed of about
80 mph (130 km/h), the rear spoiler deploys
automatically.
- Automatic retraction: When speed drops be
low about SO mph (80 km/h), the rear spoil
er retracts automatically.
Manual mode
- Manual deployment: Tapping briefly on the
switch
c:> fig. 181 deploys the rear spoiler .
- Manual retraction: At speeds up to about
10 mph (20 km/h), retract the rear spoiler
by pressing and holding the switch
c:> fig. 181 . At speeds between 10 mph (20
km/h) and 80 mph (130 km/h), retract the
rear spoiler by tapping on the switch
<=?fig. 181.
Indicator lights
I§!/. Rear spoiler: system malfunction!
The rear spoiler may not have extended due to
a malfunction. This could change the vehicle's
driving characteristics at high speeds. Do not
exceed 85 mph (140 km/h). Drive to your au
thorized Audi dealer immed iately to have the
malfunction corrected . The co lor of the indica
tor light depends on the veh icle speed.
A WARNING
-Driving at higher speeds without the rear
spoiler deployed can impair handling char
acteristics, making the vehicle harder to
control.
-Always make sure that the spo iler is de
p loyed when driving at speeds over
85 mph (140 km/h) . If the rear spoiler
warn ing/ indicator light in the instru
ment cluster comes on, the rear spoiler
may not have deployed.
- Never drive at speeds higher than
85 mph (140 km/h) if the spoiler is not
deployed. Have the spoiler inspected as
soon as possible by an authorized Audi
dealer or qualified workshop.
- Always obey speed limits and other traf
fic laws.
A WARNING
Improper operation of the rear spoi ler can
cause crushing injuries.
- Always make sure that nobody, especially
children, is in the way when the rear
spoiler is deployed or retracted.
(D Note
- Never push the vehicle or apply force to
the rear spoiler -it could be damaged.
- Only operate the rear spoiler manua lly
when the rear lid is closed . Otherwise,
damage could occur.
(I} Tips
Clean the spoiler compartment every 2 to
3 months. The spoiler compartment must
always be free of ice, snow, leaves or other
debris.