Page 97 of 188
7-9
6. Check if the seat belt shoulder positionsuits the size of the driver and passen-
ger.
To lower the belt, insert the belt into the
seat belt height adjuster slot as shown.
To raise the belt, remove the belt from
the height adjuster slot.1. Seat belt height adjuster 2. Seat belt
3. Slot7. To release the buckle, firmly press the re-lease button. Doors
The doors are designed to reduce the likeli-
hood that you will stick your leg out to stop the
vehicle from tipping over or for any other rea-
son in a rollover. The doors may also reduce
intrusion of objects into the occupant area.
Make sure the doors are securely latched be-
fore operation. Do not place your arm or hand
on the door during operation. Your hand or
arm may be struck by objects or crushed
against outside objects or the ground during a
rollover.
1
2
3
1RB7A_EE.book Page 9 Tuesday, April 24, 2012 9:07 AM
Page 98 of 188
7-10
Passenger handholds
Handholds are provided to grip during opera-
tion to maintain proper position and balance.
Holding onto the handholds helps to reduce
the likelihood that the passenger puts a hand
outside the vehicle if the vehicle begins to tip.
There are two handholds on the protective
structure and two handholds on the passen-
ger’s left side, for the right and left hands.
The driver should make sure the passenger is
holding onto the handholds with both hands
before operating the vehicle.1RB7A_EE.book Page 10 Tuesday, April 24, 2012 9:07 AM
Page 99 of 188
7-11
Seat and hip restraints
The seat and hip restraints are designed to
help keep you in the vehicle. Do not hold onto
hip restraint when the vehicle is moving. Your
hand or arm may be struck by objects or
crushed against outside objects or the ground
during a rollover.Floorboard
The floorboard allows you to brace your feet,
which helps you keep your body in the vehicle
in the event of an accident or rollover. Keep
your feet on the floorboard during operation.1RB7A_EE.book Page 11 Tuesday, April 24, 2012 9:07 AM
Page 100 of 188
7-12
Steering wheel
Keep both hands on the steering wheel. Do
not hold the steering wheel with your thumbs
inside the rim. Keep your palms on the out-
side of the steering wheel. Similar to other off-
road vehicles, if the Rhino hits a deep rut or
large obstacle, the steering wheel could brief-
ly jerk in one direction or back and forth as the
tires and vehicle respond to the obstacle. This
quick motion could injure your thumbs or wrist
if your thumbs or hand(s) are inside the steer-
ing wheel. Grip the steering wheel so that
your thumbs will not be hit by the spokes. As
an example, see the illustration.
CORRECT GRIP EXAMPLE
INCORRECT GRIP EXAMPLE
1RB7A_EE.book Page 12 Tuesday, April 24, 2012 9:07 AM
Page 101 of 188
7-13
LEARNING TO OPERATE YOUR VEHICLE
Personal protective equipment1. Approved motorcycle helmet
2. Eye protection 3. Long-sleeved shirt or jacket
4. Gloves 5. Long pants
6. Over-the-ankle boots
Both driver and passenger should wear the
following to reduce risk of injury in an acci-
dent:●
Approved motorcycle helmet that fits prop-
erly
●
Eye protection (goggles, helmet face
shield, or protective eyewear)
●
Over-the-ankle boots, gloves, long-sleeved
shirt or jacket, and long pants
An approved helmet and other personal pro-
tective equipment can help in a variety of
ways, including:
●
Reduce the severity of injuries if any part of
you is outside the vehicle cage/frame pro-
tective structure during a rollover.
●
Help protect you if outside objects intrude
inside the vehicle during operation.
●
Help protect you in the event of vehicle im-
pact with an obstacle.
1 2
3
4
5
6
1RB7A_EE.book Page 13 Tuesday, April 24, 2012 9:07 AM
Page 102 of 188

7-14
Wear eye protection when operating or riding
the vehicle to reduce the risk of a serious ac-
cident or injury. Eye protection, such as a face
shield or goggles, may reduce the risk of for-
eign material getting in your eyes and help
prevent loss of vision.
Practice for new Rhino users
You should become familiar with the perfor-
mance characteristics of the vehicle in a large,
flat area that is free of obstacles and other ve-
hicles. Practice controlling the accelerator
pedal, brakes, steering, and drive select lever.
Drive at slow speeds with gradual accelera-
tion and turning. Practice smooth throttle ap-
plication. Practice slowing down before
turning. Practice maintaining a steady throttle
through the turn. Avoid higher speeds until
you are thoroughly familiar with the operation
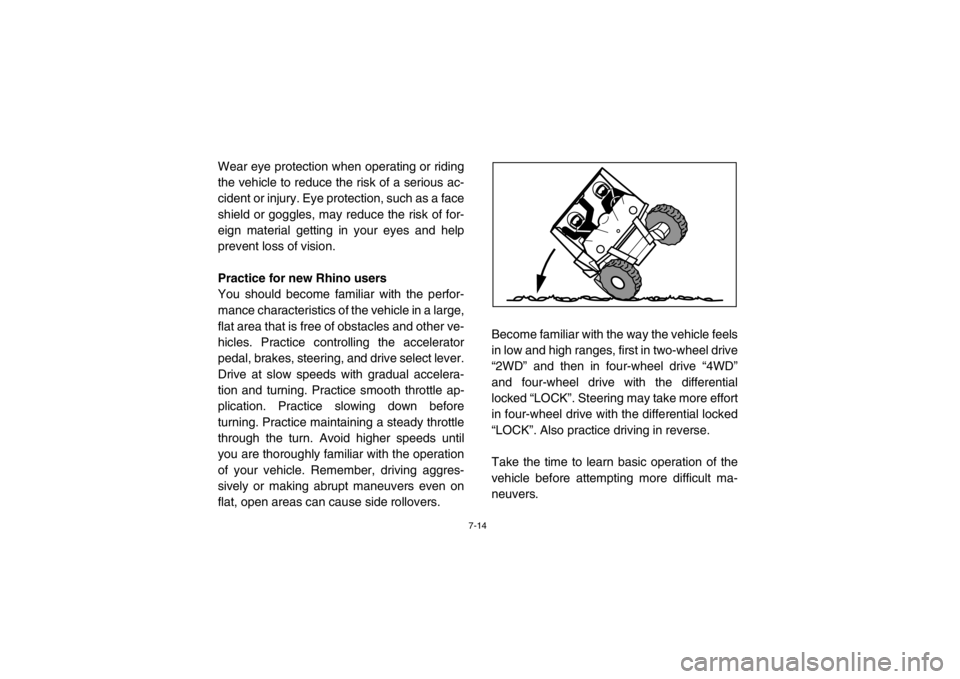
of your vehicle. Remember, driving aggres-
sively or making abrupt maneuvers even on
flat, open areas can cause side rollovers.Become familiar with the way the vehicle feels
in low and high ranges, first in two-wheel drive
“2WD” and then in four-wheel drive “4WD”
and four-wheel drive with the differential
locked “LOCK”. Steering may take more effort
in four-wheel drive with the differential locked
“LOCK”. Also practice driving in reverse.
Take the time to learn basic operation of the
vehicle before attempting more difficult ma-
neuvers.1RB7A_EE.book Page 14 Tuesday, April 24, 2012 9:07 AM
Page 103 of 188
7-15
Getting ready to ride
Perform the Pre-Operation Checks on pages
5-1–5-10. Follow the instructions starting on
pages 6-2–6-3 to start the engine.Turning
Use care in turns – turning the steering wheel
too far or too fast can result in loss of control
or a rollover. Slow down before entering turns.
When making tight turns from a standstill or at
slow speeds, avoid sudden or hard accelera-
tion. Driving aggressively or making abrupt
maneuvers even on flat, open areas can
cause side rollovers. Avoid sideways sliding,
skidding, or back-wheel sliding, and never do
donuts. If you feel the Rhino begin to slide
sideways or the back wheels slide during a
turn, steer into the direction of the slide, if pos-
sible, and gradually let off the accelerator ped-
al to regain directional control and avoid
rollover. For example, if you feel the back of
the vehicle start to slide to your right, steer to
the right.1RB7A_EE.book Page 15 Tuesday, April 24, 2012 9:07 AM
Page 104 of 188

7-16
If you think or feel that the vehicle may tip or
roll, keep your body completely inside the pro-
tective structure of the vehicle:●
Brace yourself by pressing your feet firmly
on the floorboards and keep a firm grip on
the steering wheel or handholds.
●
Do not put your hands or feet outside of the
vehicle for any reason. Do not try to stop a
tipover using your arm or leg.Accelerating
With the engine idling in neutral and your foot
on the brake, shift the drive select lever into
low or high.
NOTICE: Do not shift from low
to high or vice versa without coming to a
complete stop and waiting for the engine
to return to normal idle speed – damage to
the engine or drive train may occur. Then
release the parking brake. Press the accel-
erator pedal slowly and smoothly. The centrif-
ugal clutch will engage and the vehicle will
begin to accelerate.
Avoid higher speeds and sudden or hard ac-
celeration until you are thoroughly familiar
with the operation of your vehicle. Avoid sud-
den or hard acceleration in any turn.
1RB7A_EE.book Page 16 Tuesday, April 24, 2012 9:07 AM