2013 VOLVO V60 child lock
[x] Cancel search: child lockPage 4 of 422

Table of contents
2* Option/accessory, for more information, see Introduction.
00
00 Introduction
Important information................................. 6
Volvo and the environment....................... 11
01
01 Safety
Seatbelts .................................................. 16
Airbags...................................................... 19
Activating/deactivating the airbag*........... 22
Side airbags (SIPS bags) ......................... 24
Inflatable Curtain (IC) ............................... 26
WHIPS ...................................................... 27
When the systems deploy ........................ 29
Safety mode.............................................. 30
Child safety............................................... 31
02
02 Locks and alarm
Remote control key/key blade.................. 44
Privacy locking*......................................... 49
Battery replacement, remote control key/
PCC*.........................................................51
Keyless drive*............................................ 53
Locking/unlocking..................................... 57
Child safety locks...................................... 62
Alarm*....................................................... 63
ProCarManuals.com
Page 38 of 422
01 Safety
Child safety 01
36* Option/accessory, for more information, see Introduction.
Integrated two-stage booster
cushions*
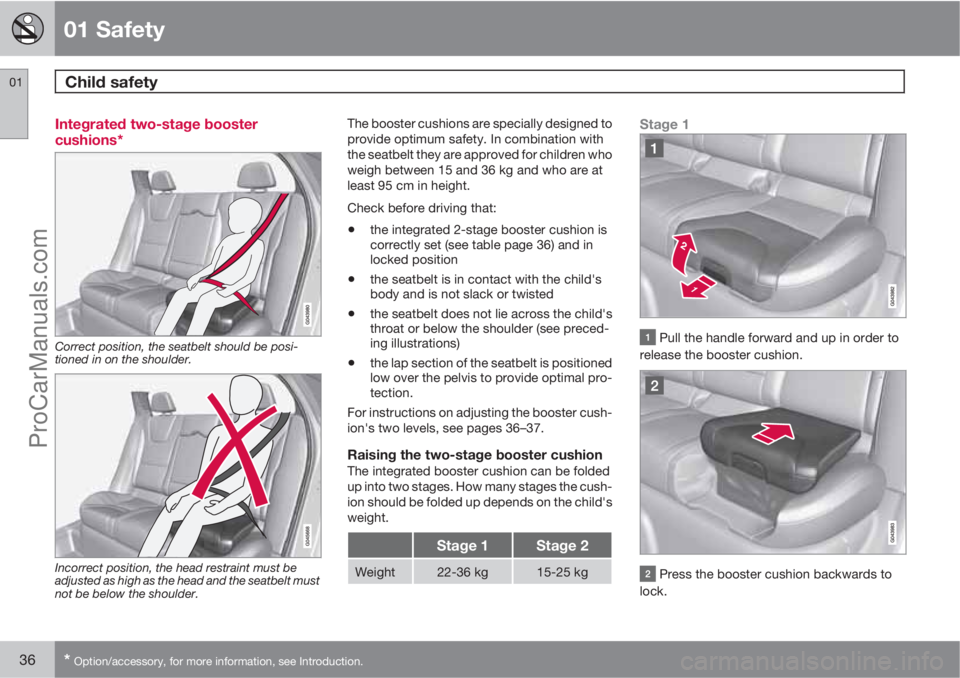
Correct position, the seatbelt should be posi-
tioned in on the shoulder.
Incorrect position, the head restraint must be
adjusted as high as the head and the seatbelt must
not be below the shoulder.
The booster cushions are specially designed to
provide optimum safety. In combination with
the seatbelt they are approved for children who
weigh between 15 and 36 kg and who are at
least 95 cm in height.
Check before driving that:
•the integrated 2-stage booster cushion is
correctly set (see table page 36) and in
locked position
•the seatbelt is in contact with the child's
body and is not slack or twisted
•the seatbelt does not lie across the child's
throat or below the shoulder (see preced-
ing illustrations)
•the lap section of the seatbelt is positioned
low over the pelvis to provide optimal pro-
tection.
For instructions on adjusting the booster cush-
ion's two levels, see pages 36–37.
Raising the two-stage booster cushionThe integrated booster cushion can be folded
up into two stages. How many stages the cush-
ion should be folded up depends on the child's
weight.
Stage 1Stage 2
Weight22-36 kg15-25 kg
Stage 1
Pull the handle forward and up in order to
release the booster cushion.
Press the booster cushion backwards to
lock.
ProCarManuals.com
Page 39 of 422
01 Safety
Child safety01
37
Stage 2
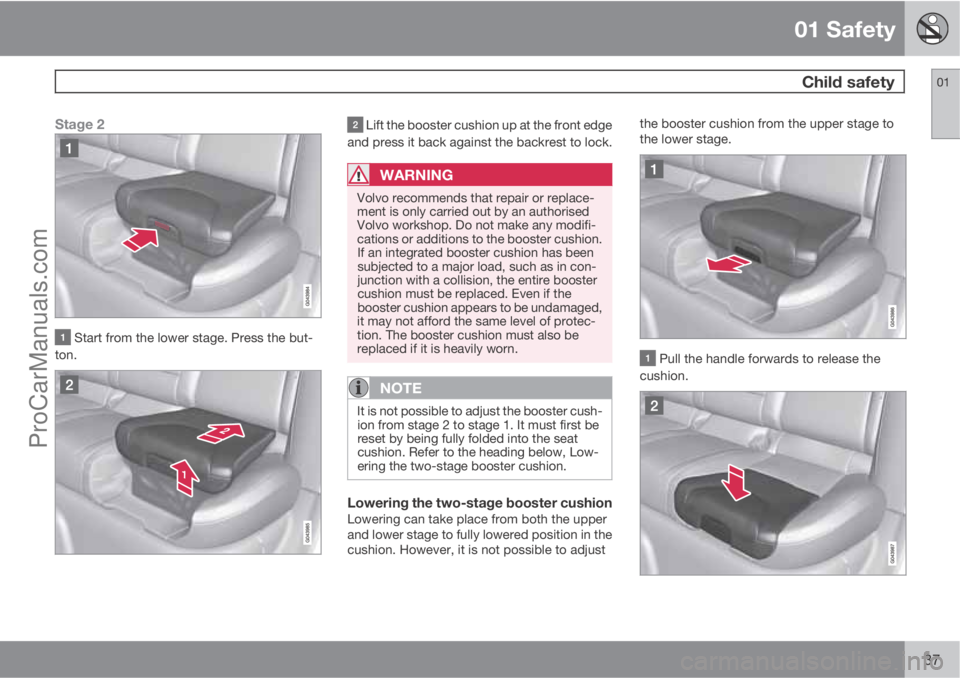
Start from the lower stage. Press the but-
ton.
Lift the booster cushion up at the front edge
and press it back against the backrest to lock.
WARNING
Volvo recommends that repair or replace-
ment is only carried out by an authorised
Volvo workshop. Do not make any modifi-
cations or additions to the booster cushion.
If an integrated booster cushion has been
subjected to a major load, such as in con-
junction with a collision, the entire booster
cushion must be replaced. Even if the
booster cushion appears to be undamaged,
it may not afford the same level of protec-
tion. The booster cushion must also be
replaced if it is heavily worn.
NOTE
It is not possible to adjust the booster cush-
ion from stage 2 to stage 1. It must first be
reset by being fully folded into the seat
cushion. Refer to the heading below, Low-
ering the two-stage booster cushion.
Lowering the two-stage booster cushionLowering can take place from both the upper
and lower stage to fully lowered position in the
cushion. However, it is not possible to adjustthe booster cushion from the upper stage to
the lower stage.
Pull the handle forwards to release the
cushion.
ProCarManuals.com
Page 40 of 422
01 Safety
Child safety 01
38
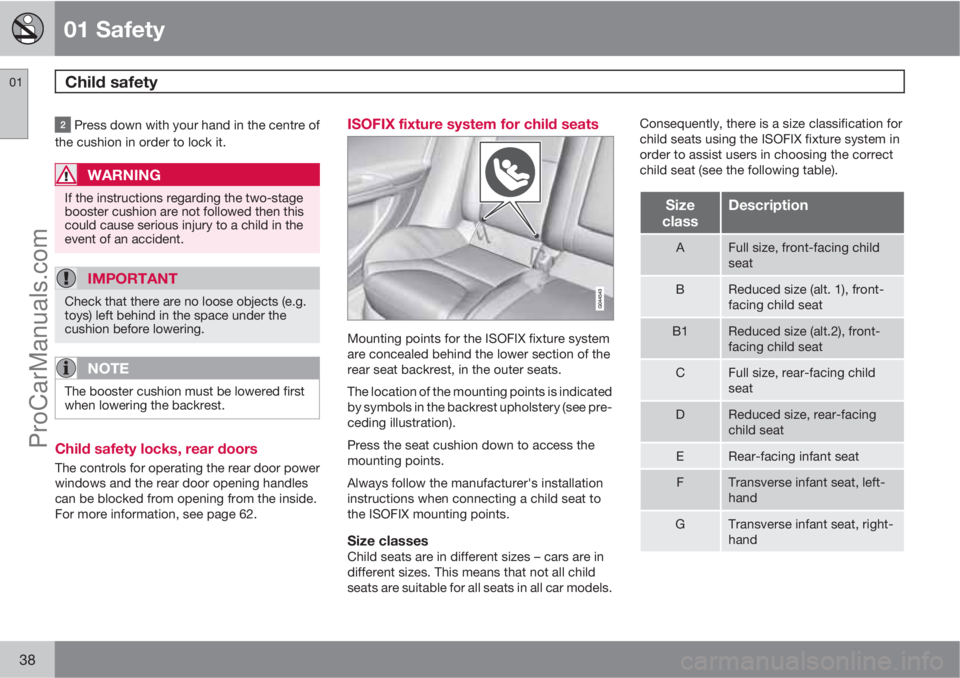
Press down with your hand in the centre of
the cushion in order to lock it.
WARNING
If the instructions regarding the two-stage
booster cushion are not followed then this
could cause serious injury to a child in the
event of an accident.
IMPORTANT
Check that there are no loose objects (e.g.
toys) left behind in the space under the
cushion before lowering.
NOTE
The booster cushion must be lowered first
when lowering the backrest.
Child safety locks, rear doors
The controls for operating the rear door power
windows and the rear door opening handles
can be blocked from opening from the inside.
For more information, see page 62.
ISOFIX fixture system for child seats
Mounting points for the ISOFIX fixture system
are concealed behind the lower section of the
rear seat backrest, in the outer seats.
The location of the mounting points is indicated
by symbols in the backrest upholstery (see pre-
ceding illustration).
Press the seat cushion down to access the
mounting points.
Always follow the manufacturer's installation
instructions when connecting a child seat to
the ISOFIX mounting points.
Size classesChild seats are in different sizes – cars are in
different sizes. This means that not all child
seats are suitable for all seats in all car models.Consequently, there is a size classification for
child seats using the ISOFIX fixture system in
order to assist users in choosing the correct
child seat (see the following table).
Size
classDescription
AFull size, front-facing child
seat
BReduced size (alt. 1), front-
facing child seat
B1Reduced size (alt.2), front-
facing child seat
CFull size, rear-facing child
seat
DReduced size, rear-facing
child seat
ERear-facing infant seat
FTransverse infant seat, left-
hand
GTransverse infant seat, right-
hand
ProCarManuals.com
Page 44 of 422

42* Option/accessory, for more information, see Introduction.
Remote control key/key blade................................................................ 44
Privacy locking*....................................................................................... 49
Battery replacement, remote control key/PCC*...................................... 51
Keyless drive*.......................................................................................... 53
Locking/unlocking................................................................................... 57
Child safety locks.................................................................................... 62
Alarm*...................................................................................................... 63
ProCarManuals.com
Page 46 of 422
02 Locks and alarm
Remote control key/key blade
02
44
General
The car is supplied with 2 remote control keys
or PCCs (Personal Car Communicator). They
are used to start the car and for locking and
unlocking.
Additional remote control keys can be ordered
- up to 6 can be programmed and used for the
same car.
The remote control key contains a removable
key blade made of metal. The visible section is
available in two versions so that it is possible
to distinguish between the remote control
keys.
The PCC has increased functionality com-
pared with the remote control key. The contin-
uation of this chapter describes the functions
available in both the PCC and the remote con-
trol key.
WARNING
If there are children in the car:
Remember to switch off the supply to the
power windows and sunroof by removing
the remote control key if the driver leaves
the car.
Loss of a remote control keyIf you lose a remote control key then a new one
can be ordered at a workshop - an authorised
Volvo workshop is recommended. The remain-
ing remote control keys must then be taken to
the workshop. The code of the missing remote
control key must be erased from the system as
a theft prevention measure.
The current number of keys registered to the
car can be checked in the menu system MY
CAR under Information
Number of keys.
For a description of the menu system, see
page 202.
Key memory1 – door mirrors and driver's
seat
The settings are automatically connected to
each respective remote control key, see pages
81 and 103.
The function can be activated/deactivated in
the menu system MY CAR under Settings
Car settingsCar key memory.
For a description of the menu system, see
page 202.
For cars with the Keyless drive system, see
page 53.
Indicator for locking/unlockingWhen the car is locked or unlocked using the
remote control key, the direction indicators
confirm that locking/unlocking was correctly
performed.
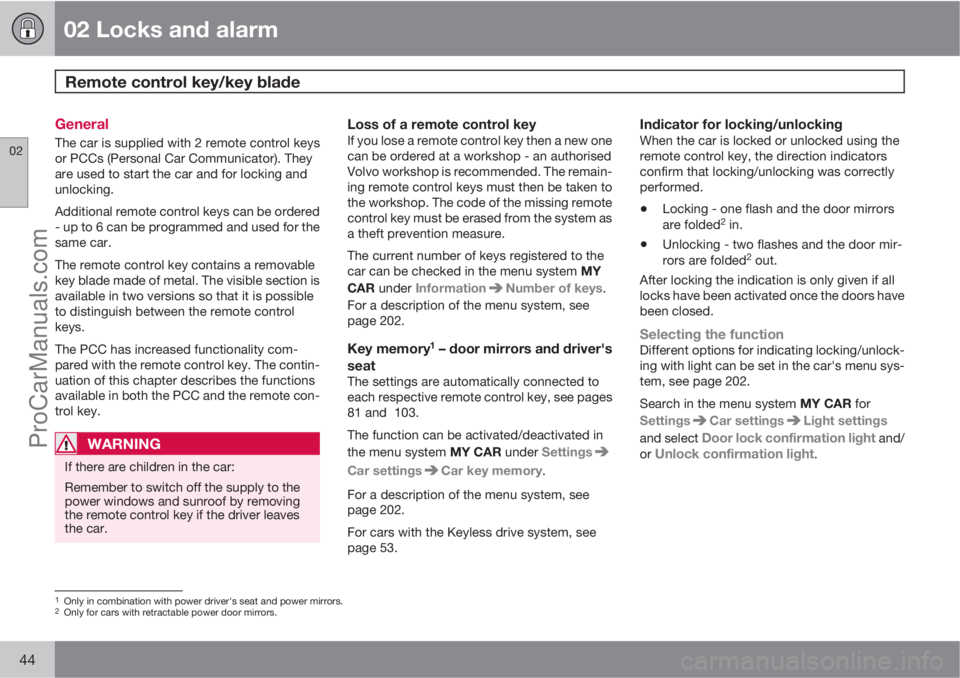
•Locking - one flash and the door mirrors
are folded2 in.
•Unlocking - two flashes and the door mir-
rors are folded2 out.
After locking the indication is only given if all
locks have been activated once the doors have
been closed.
Selecting the functionDifferent options for indicating locking/unlock-
ing with light can be set in the car's menu sys-
tem, see page 202.
Search in the menu system MY CAR for
Settings
Car settingsLight settings
and select
Door lock confirmation light and/
or Unlock confirmation light.
1Only in combination with power driver's seat and power mirrors.2Only for cars with retractable power door mirrors.
ProCarManuals.com
Page 50 of 422
02 Locks and alarm
Remote control key/key blade
02
48* Option/accessory, for more information, see Introduction.
NOTE
If no indicator lamps illuminate when
the information button is used within range
then this may be because the last commu-
nication between the PCC and the car was
disrupted by surrounding radio waves,
buildings, topographical conditions etc.
Detachable key blade
A remote control key contains a detachable
key blade of metal with which some functions
can be activated and some operations carried
out.
The key blade's unique code is provided by
authorised Volvo workshops, which are rec-
ommended when ordering new key blades.
Key blade functionsUsing the remote control key's detachable key
blade:
•the left-hand front door can be opened
manually if central locking cannot be acti-
vated with the remote control key, see
page 54.
•the rear doors' mechanical child safety
locks can be activated/deactivated, see
page 62.
•the right-hand front door and the rear
doors can be locked manually, e.g. in the
event of power failure, see page 57.
•access to the glovebox and cargo area
(privacy locking*) can be blocked, see
page 49.
•the airbag for front passenger seat
(PACOS)* can be activated/deactivated,
see page 22.
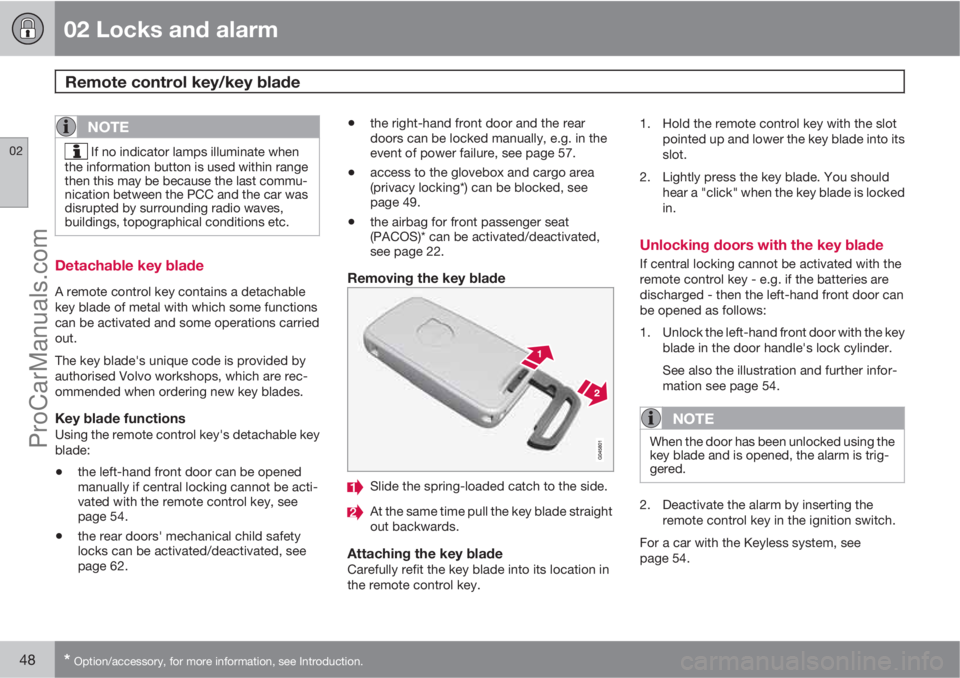
Removing the key blade
Slide the spring-loaded catch to the side.
At the same time pull the key blade straight
out backwards.
Attaching the key bladeCarefully refit the key blade into its location in
the remote control key.1. Hold the remote control key with the slot
pointed up and lower the key blade into its
slot.
2. Lightly press the key blade. You should
hear a "click" when the key blade is locked
in.
Unlocking doors with the key blade
If central locking cannot be activated with the
remote control key - e.g. if the batteries are
discharged - then the left-hand front door can
be opened as follows:
1. Unlock the left-hand front door with the key
blade in the door handle's lock cylinder.
See also the illustration and further infor-
mation see page 54.
NOTE
When the door has been unlocked using the
key blade and is opened, the alarm is trig-
gered.
2. Deactivate the alarm by inserting the
remote control key in the ignition switch.
For a car with the Keyless system, see
page 54.
ProCarManuals.com
Page 59 of 422
02 Locks and alarm
Locking/unlocking
02
* Option/accessory, for more information, see Introduction.57 From the outside
The remote control key can lock/unlock all
doors and the tailgate simultaneously. Different
sequences for unlocking can be selected, see
"Unlocking with the remote control key" page
46.
In order that the lock sequence can be acti-
vated, the driver's door must be closed - if any
of the other doors or the tailgate is open, then
it/they is/are locked and the alarm is activated
only when it/they are closed. With the Key-
less* system all the doors and tailgate must be
closed.
NOTE
Be aware of the risk of locking the remote
control key in the car.
If it is not possible to lock/unlock with the
remote control key, the battery may be dis-
charged - lock or unlock the left-hand front
door with the detachable key blade, see
page 48.
NOTE
Remember that the alarm is triggered when
the door is opened after being unlocked
with the key blade - the alarm is switched
off when the remote control key is inserted
into the ignition switch.
WARNING
Be aware of the risk of being locked in the
car when it is locked from the outside using
the remote control key - it is then not pos-
sible to open any of the doors from the
inside with the door controls. Read more
about this in the section "Deadlocks" later
on.
Automatic relockingIf none of the doors or the tailgate is opened
within 2 minutes of unlocking, all are locked
again automatically. This function reduces the
risk that the car is left unlocked unintentionally.
(For cars with alarm, see page 63.)
Manual lockingIn certain situations the car must be lockable
manually, e.g. in the event of power failure.
The left-hand front door can be locked with its
lock cylinder and the remote control key's
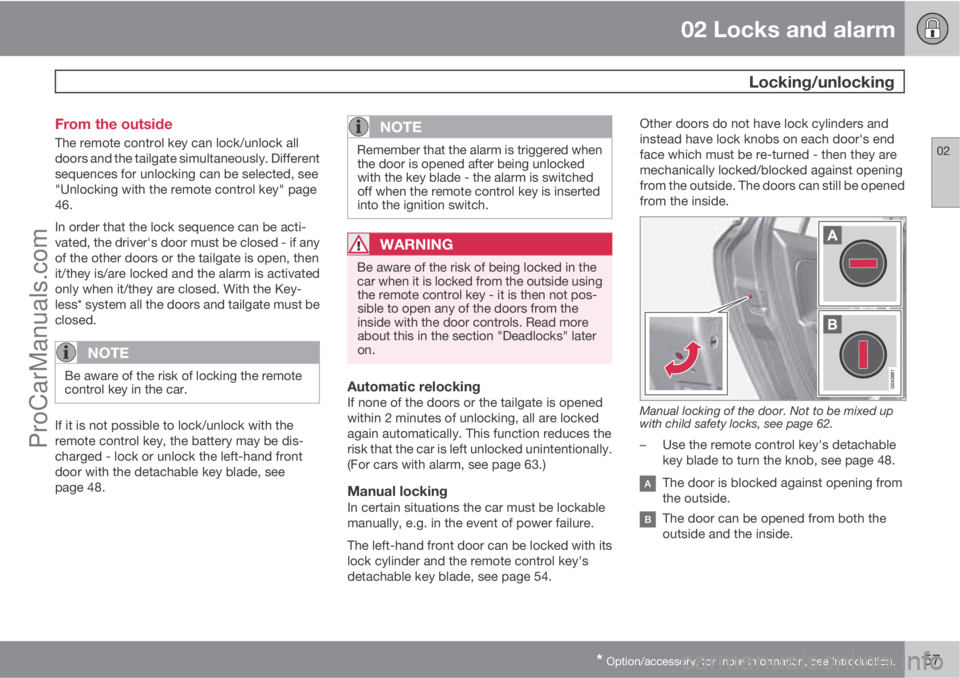
detachable key blade, see page 54.Other doors do not have lock cylinders and
instead have lock knobs on each door's end
face which must be re-turned - then they are
mechanically locked/blocked against opening
from the outside. The doors can still be opened
from the inside.
Manual locking of the door. Not to be mixed up
with child safety locks, see page 62.
–Use the remote control key's detachable
key blade to turn the knob, see page 48.
The door is blocked against opening from
the outside.
The door can be opened from both the
outside and the inside.
ProCarManuals.com