2013 SUZUKI ERTIGA engine
[x] Cancel search: enginePage 57 of 207

Downloaded from www.Manualslib.com manuals search engine 2-42
BEFORE DRIVING
60MK0-14E
Low Fuel Warning Light
54G343
If this light comes on, fill the fuel tank
immediately.
When this light comes on, a ding sounds
once to remind you to fill the fuel.
If you do not fill the fuel, a ding sounds
every time when the ignition switch is
turned to the “ON” position.
NOTE:
The activation point of this light varies
depending on road conditions (for exam-
ple, slope or curve) and driving conditions
because of fuel moving in the tank.
Electric Power Steering Light
79J039
This light comes on when the ignition
switch is turned to the “ON” position, and
goes out when the engine is started.
If this light comes on while driving, the
power steering system may not work prop-
erly. Have the system inspected by your
SUZUKI dealer.
NOTE:
If the power steering system does not work
properly, you will feel heavier to steer but
you still will be able to steer.
NOTE:
If the steering is operated, you may hear a
rubbing noise. This is normal and indicates
that the power steering system works
properly.
Turn Signal Indicators
50G055
When you turn on the left or right turn sig-
nals, the corresponding green arrow on the
instrument panel will blink along with the
respective turn signal lights. When you
turn on the hazard warning switch, both
arrows will blink along with all of the turn
signal lights.Main Beam (high beam) Indicator
Light
50G056
This indicator comes on when headlight
main beams (high beams) are turned on.
Page 58 of 207

Downloaded from www.Manualslib.com manuals search engine 2-43BEFORE DRIVING
60MK0-14E
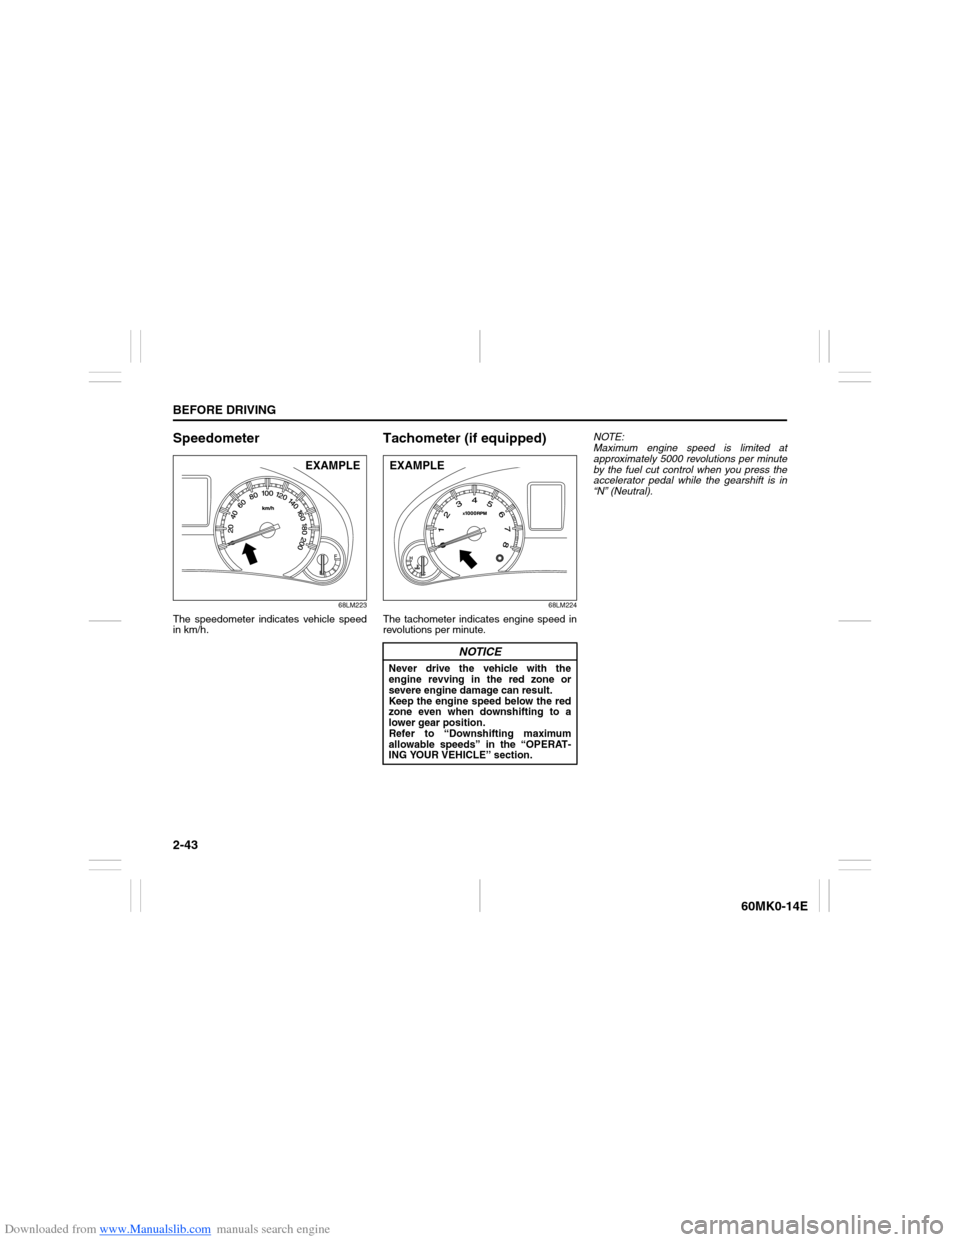
Speedometer
68LM223
The speedometer indicates vehicle speed
in km/h.
Tachometer (if equipped)
68LM224
The tachometer indicates engine speed in
revolutions per minute.NOTE:
Maximum engine speed is limited at
approximately 5000 revolutions per minute
by the fuel cut control when you press the
accelerator pedal while the gearshift is in
“N” (Neutral).
EXAMPLE
NOTICE
Never drive the vehicle with the
engine revving in the red zone or
severe engine damage can result.
Keep the engine speed below the red
zone even when downshifting to a
lower gear position.
Refer to “Downshifting maximum
allowable speeds” in the “OPERAT-
ING YOUR VEHICLE” section.EXAMPLE
Page 59 of 207

Downloaded from www.Manualslib.com manuals search engine 2-44
BEFORE DRIVING
60MK0-14E
Fuel Gauge
74LHT0220
When the ignition switch is in the “ON”
position, this gauge gives an approximate
indication of the amount of fuel in the fuel
tank. “F” stands for full and “E” stands for
empty.
If the indicator gets off the graduation of
“E” (not character “E”), refill the tank as
soon as possible.
NOTE:
The indicator moves a little depending on
road conditions (for example, slope or
curve) and driving conditions because of
fuel moving in the tank.
If the low fuel warning light (1) comes on,
fill the fuel tank immediately.When the low fuel warning light (1) comes
on, a ding sounds once to remind you to fill
the fuel.
If you do not fill the fuel, a ding sounds
every time when the ignition switch is
turned to “ON” position.
NOTE:
The activation point of the low fuel warning
light (1) varies depending on road condi-
tions (for example, slope or curve) and
driving conditions because of fuel moving
in the tank.
The mark (2) indicates that the fuel filler
door is located on the left side of the vehi-
cle.
Temperature Gauge
74LHT0221
When the ignition switch is in the “ON”
position, this gauge indicates the engine
coolant temperature. Under normal driving
conditions, the indicator should stay within
the normal, acceptable temperature range
between “H” and “C”. If the indicator
approaches “H”, overheating is indicated.
Follow the instructions for engine overheat-
ing in the “EMERGENCY SERVICE” sec-
tion.
(1)(2)
EXAMPLE
NOTICE
Continuing to drive the vehicle when
engine overheating is indicated can
result in severe engine damage.EXAMPLE
Page 60 of 207

Downloaded from www.Manualslib.com manuals search engine 2-45BEFORE DRIVING
60MK0-14E
Brightness Control
68LM227
When the ignition switch is turned to the
“ON” position, the pointer lights come on.
Your vehicle has a system to automatically
dim the brightness of the instrument panel
lights when the position lights or headlights
are on.
When the position lights and/or headlights
are ON, you can control the meter illumina-
tion intensity.
To increase the brightness of the instru-
ment panel lights, turn the brightness con-
trol knob (1) clockwise.
To reduce the brightness of the instrument
panel lights, turn the brightness control
knob (1) counterclockwise.
60MH025
NOTE:
If you do not turn the brightness control
knob within about 10 seconds of activat-
ing the brightness control display, the
brightness control display will be can-
celed automatically.
When you reconnect the battery, the
brightness of the instrument panel lights
will be reinitialized. Readjust the bright-
ness according to your preference.
(1)
EXAMPLE
WARNING
If you attempt to adjust the display
while driving, you could lose control
of the vehicle.
Do not attempt to adjust the display
while driving.EXAMPLE
(Brightest)
(Initial setting)
(Dimmest)
Page 61 of 207

Downloaded from www.Manualslib.com manuals search engine 2-46
BEFORE DRIVING
60MK0-14E
Information Displaywith tachometer
60MK028
without tachometer
60MK029
(1) Trip meter selector knob
(2) Indicator selector knob
(3) Information display
When the ignition switch is in the “ON”
position, the information display shows the
following information.
Display (A)
Thermometer (if equipped)
Display (B)
(for automatic transaxle vehicle)
Transaxle selector position indicator
Display (C)
Trip meter / Instantaneous fuel consump-
tion / Average fuel consumption / Driving
range
Display (D)
Odometer
Display (E)
Clock
Thermometer (if equipped)When the ignition switch is in the “ON”
position, the display (A) shows the ther-
mometer.
The thermometer indicates the outside
temperature.
68LM258
If the outside temperature nears freezing,
the mark (a) will appear on the display.
NOTE:
The outside temperature indication is not
the actual outside temperature when
driving at low speed, or when stopped.
If there is something wrong with the ther-
mometer, or just after the ignition switch
is turned to the “ON” position, the display
may not indicate the outside tempera-
ture.
(1) (2)(3)
(D)(B) (A)
(C)(E)
EXAMPLE(1)
(2)
(3)(C)
(D)
(E)
EXAMPLE
(a)
EXAMPLE
Page 62 of 207

Downloaded from www.Manualslib.com manuals search engine 2-47BEFORE DRIVING
60MK0-14E
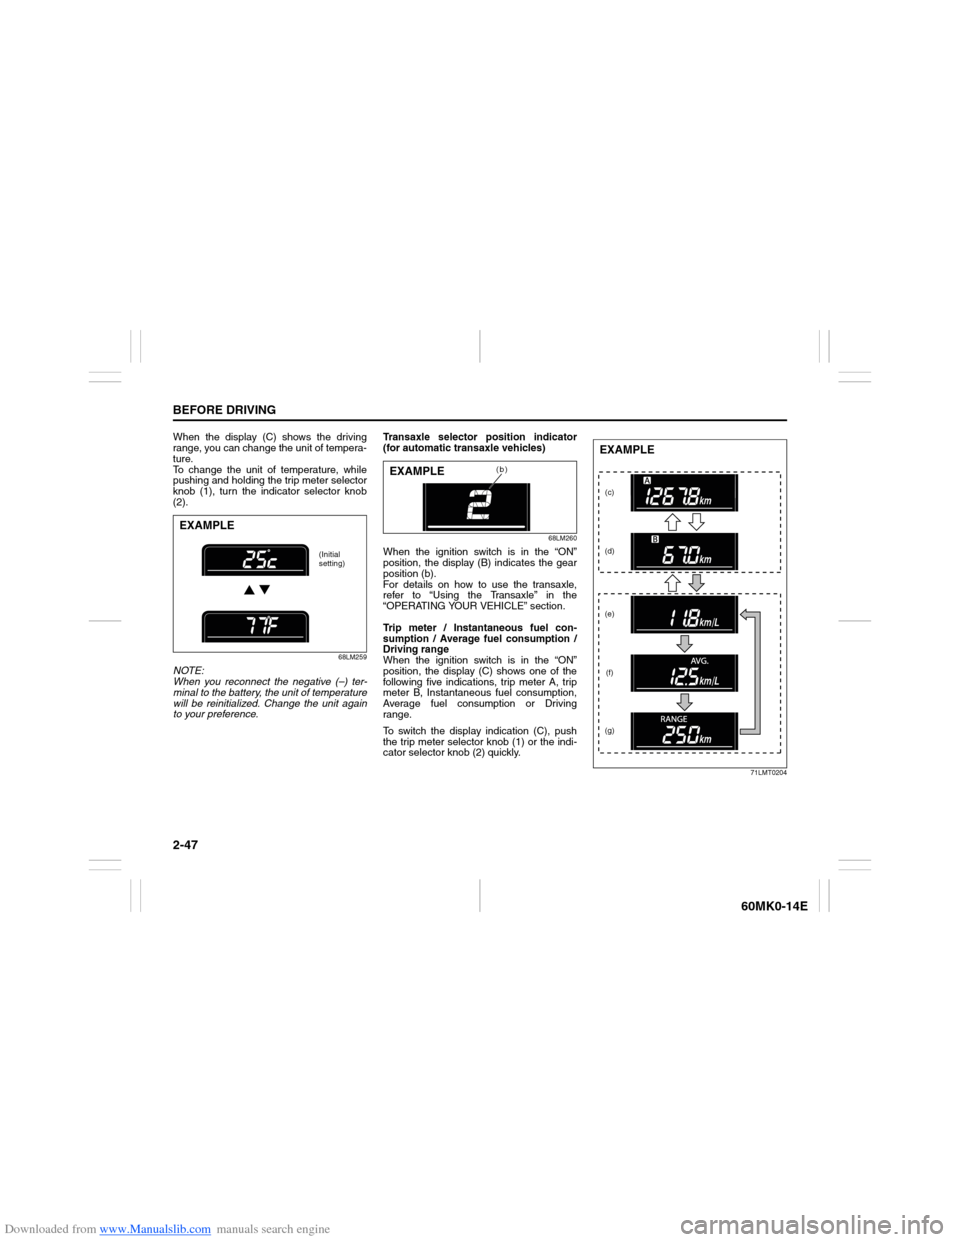
When the display (C) shows the driving
range, you can change the unit of tempera-
ture.
To change the unit of temperature, while
pushing and holding the trip meter selector
knob (1), turn the indicator selector knob
(2).
68LM259
NOTE:
When you reconnect the negative (–) ter-
minal to the battery, the unit of temperature
will be reinitialized. Change the unit again
to your preference.Transaxle selector position indicator
(for automatic transaxle vehicles)
68LM260
When the ignition switch is in the “ON”
position, the display (B) indicates the gear
position (b).
For details on how to use the transaxle,
refer to “Using the Transaxle” in the
“OPERATING YOUR VEHICLE” section.
Trip meter / Instantaneous fuel con-
sumption / Average fuel consumption /
Driving range
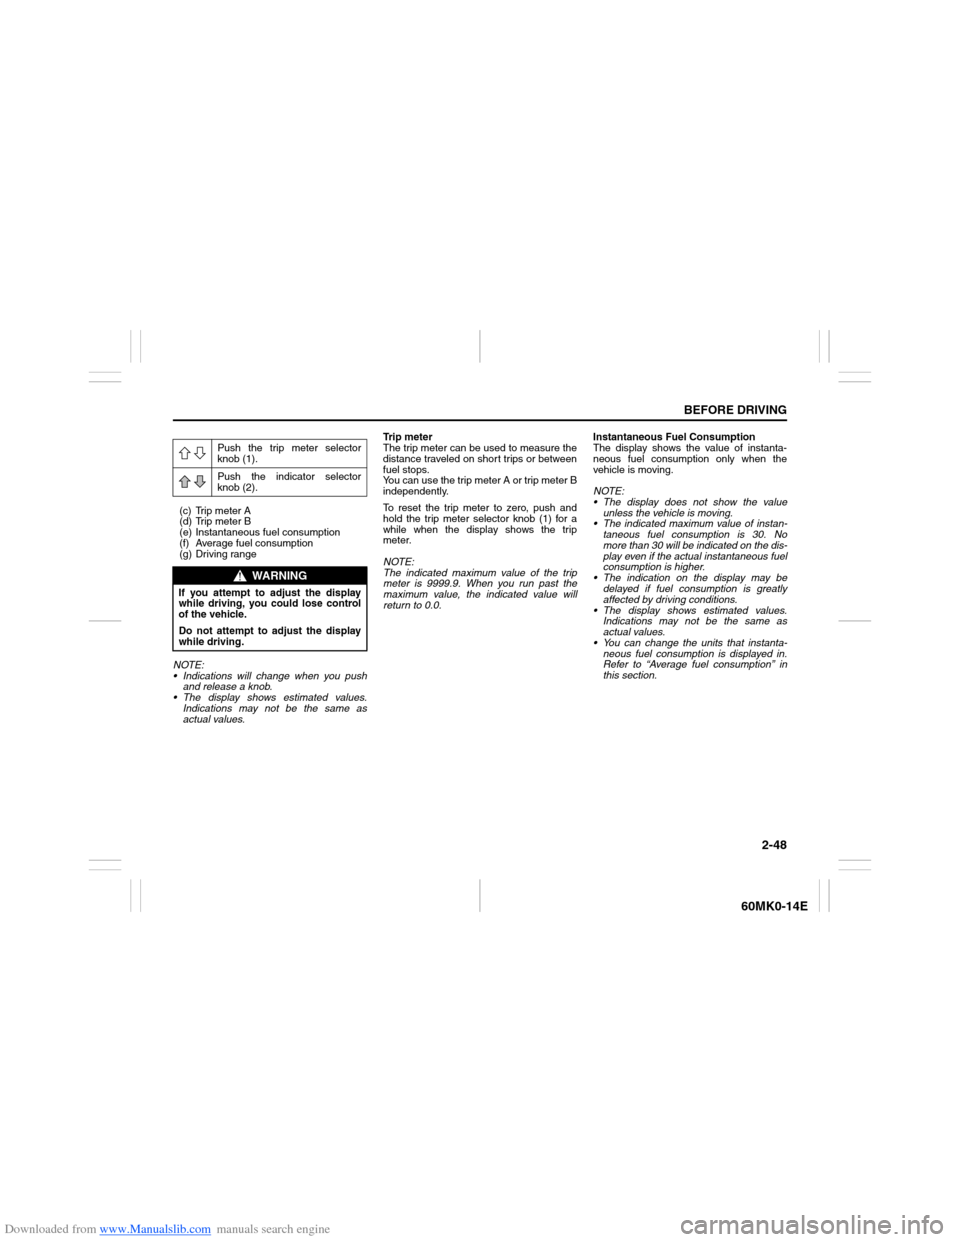
When the ignition switch is in the “ON”
position, the display (C) shows one of the
following five indications, trip meter A, trip
meter B, Instantaneous fuel consumption,
Average fuel consumption or Driving
range.
To switch the display indication (C), push
the trip meter selector knob (1) or the indi-
cator selector knob (2) quickly.
71LMT0204
EXAMPLE
(Initial
setting)
(b)
EXAMPLE
(c)
(d)
(e)
(f)
(g)EXAMPLE
Page 63 of 207

Downloaded from www.Manualslib.com manuals search engine 2-48
BEFORE DRIVING
60MK0-14E
(c) Trip meter A
(d) Trip meter B
(e) Instantaneous fuel consumption
(f) Average fuel consumption
(g) Driving range
NOTE:
Indications will change when you push
and release a knob.
The display shows estimated values.
Indications may not be the same as
actual values.Trip meter
The trip meter can be used to measure the
distance traveled on short trips or between
fuel stops.
You can use the trip meter A or trip meter B
independently.
To reset the trip meter to zero, push and
hold the trip meter selector knob (1) for a
while when the display shows the trip
meter.
NOTE:
The indicated maximum value of the trip
meter is 9999.9. When you run past the
maximum value, the indicated value will
return to 0.0.Instantaneous Fuel Consumption
The display shows the value of instanta-
neous fuel consumption only when the
vehicle is moving.
NOTE:
The display does not show the value
unless the vehicle is moving.
The indicated maximum value of instan-
taneous fuel consumption is 30. No
more than 30 will be indicated on the dis-
play even if the actual instantaneous fuel
consumption is higher.
The indication on the display may be
delayed if fuel consumption is greatly
affected by driving conditions.
The display shows estimated values.
Indications may not be the same as
actual values.
You can change the units that instanta-
neous fuel consumption is displayed in.
Refer to “Average fuel consumption” in
this section. Push the trip meter selector
knob (1).
Push the indicator selector
knob (2).
WARNING
If you attempt to adjust the display
while driving, you could lose control
of the vehicle.
Do not attempt to adjust the display
while driving.
Page 64 of 207

Downloaded from www.Manualslib.com manuals search engine 2-49BEFORE DRIVING
60MK0-14E
Average fuel consumption
If you selected average fuel consumption
the last time you drove the vehicle, the dis-
play shows the last value of average fuel
consumption from previous driving when
the ignition switch is turned to the “ON”
position. Unless you reset the value of
average fuel consumption, the display indi-
cates the value of average fuel consump-
tion which includes average fuel
consumption during previous driving.
To reset the average fuel consumption to
zero, push and hold the indicator selector
knob (2) for a while when the display
shows the average fuel consumption.
NOTE:
When you reset the indication or reconnect
the negative (–) terminal to the battery, the
value of average fuel consumption will be
shown after driving for a while.To change the unit of average fuel con-
sumption, while pushing and holding the
trip meter selector knob (1), turn the indi-
cator selector knob (2).
68LM262
NOTE:
When you change the units that average
fuel consumption is displayed in, the
instantaneous fuel consumption units
will be changed automatically.
When you reconnect the negative (–) ter-
minal to the battery, the unit of the aver-
age fuel consumption will be reinitialized.
Change the unit again to your prefer-
ence.Driving range
If you selected driving range the last time
you drove the vehicle, the display indicates
“---” for a few seconds and then indicates
the current driving range when the ignition
switch is turned to the “ON” position.
The driving range shown in the display is
the approximate distance you can drive
until the fuel gauge indicates “E”, based on
current driving conditions.
When the low fuel warning light comes on,
the display “---” will appear.
If the low fuel warning light comes on, fill
the fuel tank immediately regardless of the
value of driving range shown in the display.
As the driving range after refueling is cal-
culated based on the most recent driving
condition, the value is different each time
you refuel.
NOTE:
If you refuel when the ignition switch is in
the “ON” position, the driving range may
not indicate the correct value.
When you reconnect the negative (–) ter-
minal to the battery, the value of driving
range will be shown after driving for a
while.EXAMPLE
(Initial
setting)