Page 25 of 207

Downloaded from www.Manualslib.com manuals search engine 2-10
BEFORE DRIVING
60MK0-14E
60MK034
(2) UNLOCK
(3) LOCK
60MK035
1) With the ignition switch in the “ON”
position, close all the doors and turn
the lock knob (1) on the driver’s door in
the unlocking direction (2) (rearward).
Turn the knob on the lighting control
lever to the OFF position (5).
NOTE:
All operations included in the following
steps 2) and 3) must be completed within
15 seconds.
2) Turn the knob on the lighting control
lever to the position (6) and then to
the OFF position (5). Repeat this opera-
tion 4 times with the control finally lever
set to the OFF position.
3) Push the lock end (3) (forward end) of
the power door lock switch (4) to lock
the doors, and then the unlock end (2)
(backward end) to unlock the doors.
Repeat these operations 3 times and
finally push the lock end of the switch.Every time you perform the series of the
above steps, the state of the theft deterrent
alarm system changes from the currently
selected one to the other. You can check
whether the system is enabled or disabled
by the number of interior buzzer beeps at
the end of the procedure as follows.
NOTE:
You cannot disable the theft deterrent
alarm system while it is in the armed
condition.
If you fail to complete the operations in
step 2) and 3) within 15 seconds, per-
form the procedure again from the
beginning.
Make sure all doors are closed when
performing the above procedure.
(2) (3)
(4)
EXAMPLE
(5) (6)
EXAMPLE
System state Number of beeps
DisabledOnce
Enabled 4 times
Page 26 of 207
Downloaded from www.Manualslib.com manuals search engine 2-11BEFORE DRIVING
60MK0-14E
WindowsManual Window Control
(if equipped)
60G010
Raise or lower the door windows by turning
the handle located on the door panel.
Electric Window Controls
(if equipped)The electric windows can only be operated
when the ignition switch is in the “ON” posi-
tion.
Driver’s side
74LHT0204
The driver’s door has a switch (1) to oper-
ate the driver’s window, and a switch (2) to
operate the front passenger’s window or
there are switches (3), (4), to operate the
rear right and left passenger windows,
respectively.Passenger’s door
74LHT0205
The passenger’s door has a switch (5) to
operate the passenger’s window.
EXAMPLE
(1)
(2)
(4)
(3)
EXAMPLE
(5)
EXAMPLE
Page 27 of 207

Downloaded from www.Manualslib.com manuals search engine 2-12
BEFORE DRIVING
60MK0-14E
81A009
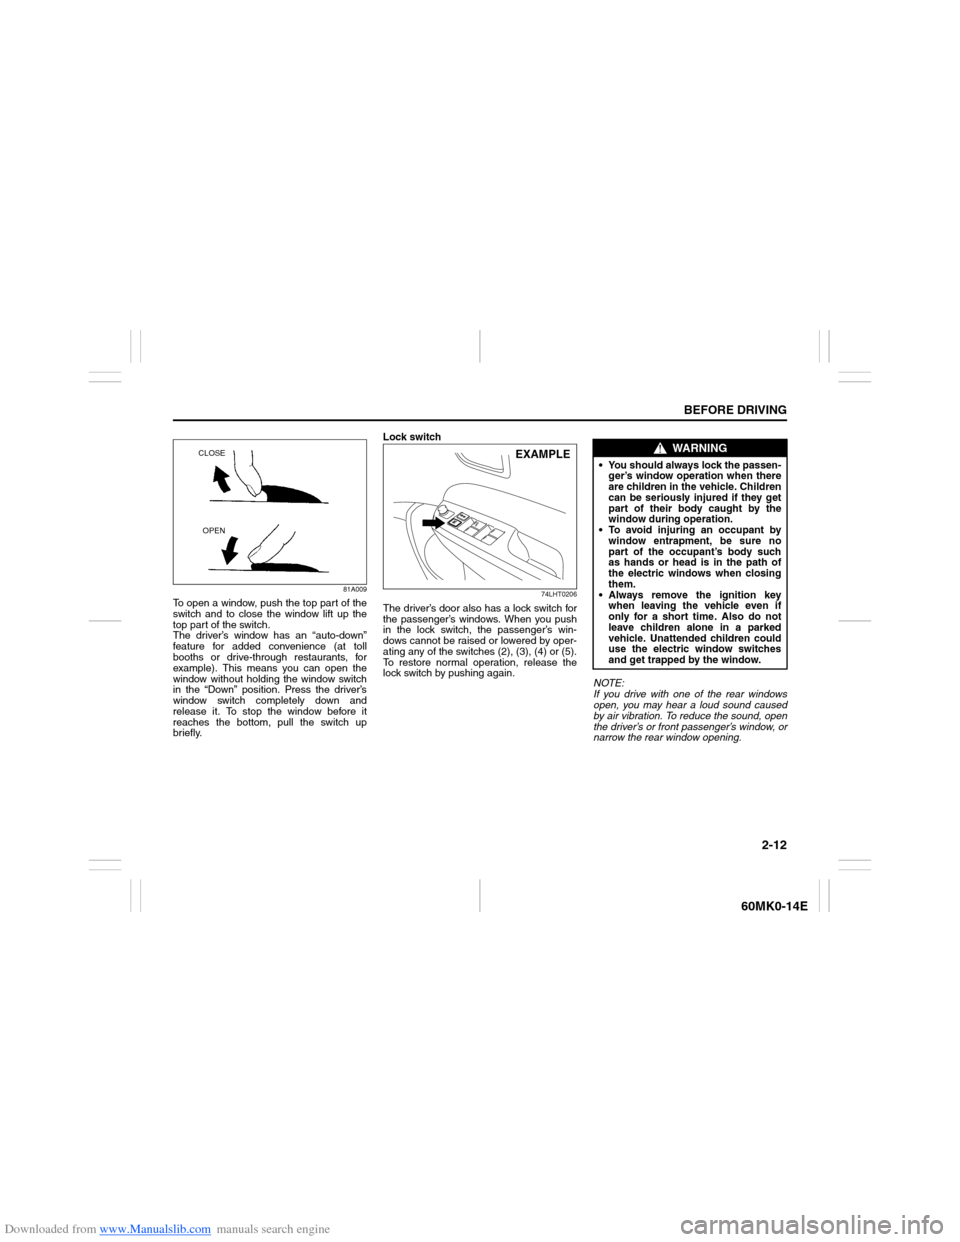
To open a window, push the top part of the
switch and to close the window lift up the
top part of the switch.
The driver’s window has an “auto-down”
feature for added convenience (at toll
booths or drive-through restaurants, for
example). This means you can open the
window without holding the window switch
in the “Down” position. Press the driver’s
window switch completely down and
release it. To stop the window before it
reaches the bottom, pull the switch up
briefly.Lock switch
74LHT0206
The driver’s door also has a lock switch for
the passenger’s windows. When you push
in the lock switch, the passenger’s win-
dows cannot be raised or lowered by oper-
ating any of the switches (2), (3), (4) or (5).
To restore normal operation, release the
lock switch by pushing again.
NOTE:
If you drive with one of the rear windows
open, you may hear a loud sound caused
by air vibration. To reduce the sound, open
the driver’s or front passenger’s window, or
narrow the rear window opening.
CLOSE
OPEN
EXAMPLE
WARNING
You should always lock the passen-
ger’s window operation when there
are children in the vehicle. Children
can be seriously injured if they get
part of their body caught by the
window during operation.
To avoid injuring an occupant by
window entrapment, be sure no
part of the occupant’s body such
as hands or head is in the path of
the electric windows when closing
them.
Always remove the ignition key
when leaving the vehicle even if
only for a short time. Also do not
leave children alone in a parked
vehicle. Unattended children could
use the electric window switches
and get trapped by the window.
Page 28 of 207

Downloaded from www.Manualslib.com manuals search engine 2-13BEFORE DRIVING
60MK0-14E
MirrorsInside Rearview MirrorYou can adjust the inside rearview mirror
by hand so as to see the rear of your vehi-
cle in the mirror.
74LHT0235
Outside Rearview MirrorsAdjust the outside rearview mirrors so you
can just see the side of your vehicle in the
mirrors.
Ty p e 1
77J009
You can adjust the outside rearview mir-
rors by hand with the knob (1) located on
the driver’s or front passenger’s door
panel.Ty p e 2
60MH010
The switch to control the electric mirrors is
located on the driver’s door panel. You can
adjust the mirrors when the ignition switch
is in the “ACC” or “ON” position. To adjust
the mirrors:
1) Move the selector switch to the left or
right to select the mirror you wish to
adjust.
2) Press the outer part of the switch that
corresponds to the direction in which
you wish to move the mirror.
3) Return the selector switch to the center
position to help prevent unintended
adjustment.
WARNING
Be careful when judging the size or
distance of a vehicle or other object
seen in the side convex mirror. Be
aware that objects look smaller and
appear farther away than when seen
in a flat mirror.
(1)
EXAMPLE
(1)
(1)
(4) (4)(2)
(2) (3)
(3)
Page 29 of 207

Downloaded from www.Manualslib.com manuals search engine 2-14
BEFORE DRIVING
60MK0-14E
Front SeatsSeat AdjustmentAdjusting Seat Position
60MH011
The adjustment lever for each front seat is
located under the front of the seat. To
adjust the seat position, pull up on the
adjustment lever and slide the seat forward
or rearward.
After adjustment, try to move the seat for-
ward and rearward to ensure that it is
securely latched.
60MH012
If the driver’s seat is equipped with a seat
height adjuster lever on the outboard side
of the seat, raise or lower the seat by pull-
ing up or down the adjuster lever.
WARNING
Never attempt to adjust the driver’s
seat or seatback while driving. The
seat or seatback could move unex-
pectedly, causing loss of control.
Make sure that the driver’s seat and
seatback are properly adjusted
before you start driving.
WARNING
To avoid excessive seat belt slack,
which reduces the effectiveness of
the seat belts as a safety device,
make sure that the seats are adjusted
before the seat belts are fastened.
EXAMPLE
EXAMPLE
Page 30 of 207

Downloaded from www.Manualslib.com manuals search engine 2-15BEFORE DRIVING
60MK0-14E
Adjusting Seatbacks
60MH013
To adjust the seatback angle of front seats,
pull up the lever on the outboard side of
the seat, move the seatback to the desired
position, and release the lever to lock the
seatback in place.
Head Restraints
63J246
Head restraints are designed to help
reduce the risk of neck injuries in the case
of an accident. Adjust the head restraint to
the position which places the center of the
head restraint closest to the top of your
ears. If this is not possible for very tall pas-
sengers, adjust the head restraint as high
as possible.
NOTE:
It may be necessary to recline the seat-
back to provide enough overhead clear-
ance to remove the head restraint.Front
80JS082
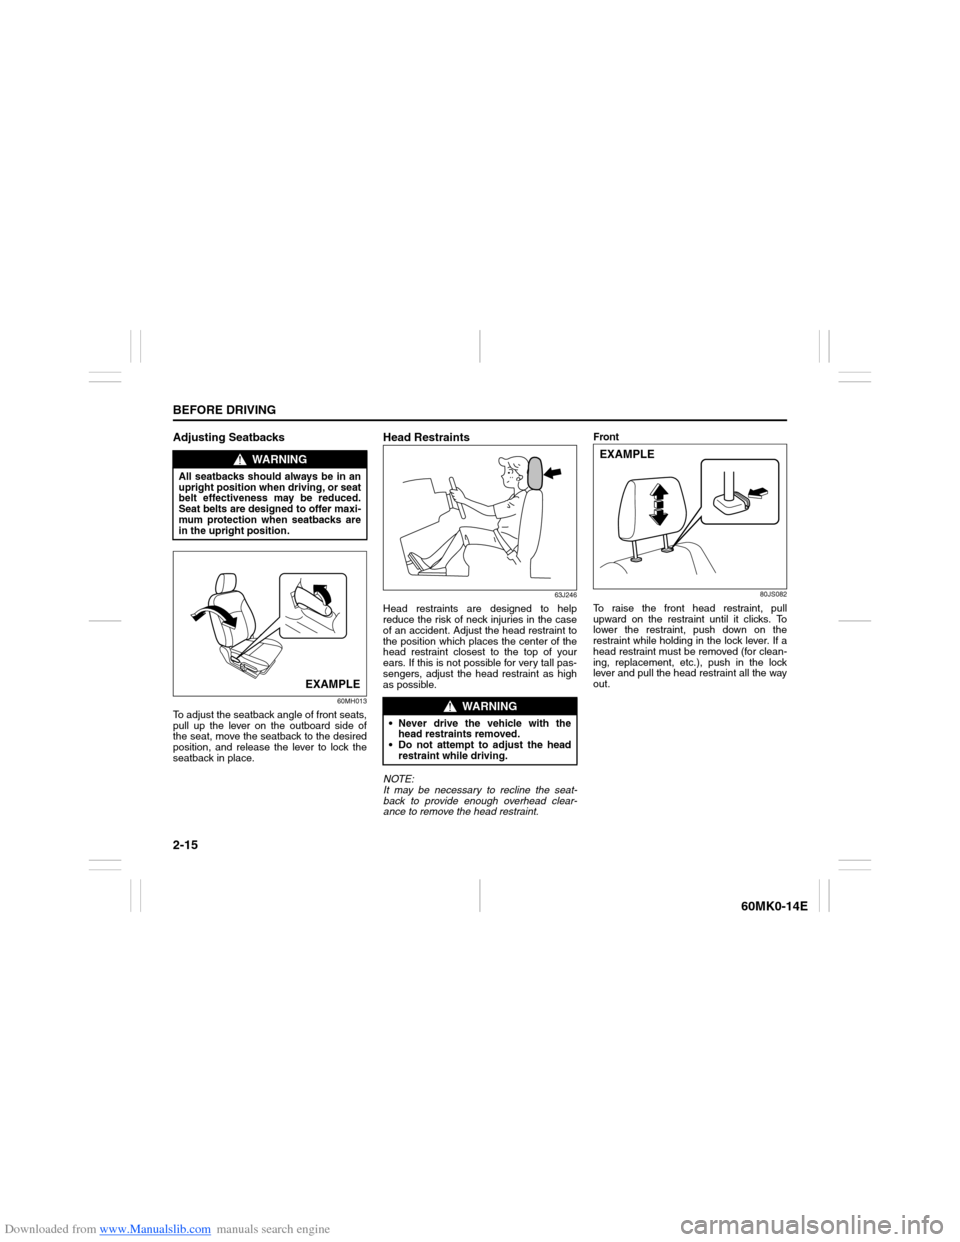
To raise the front head restraint, pull
upward on the restraint until it clicks. To
lower the restraint, push down on the
restraint while holding in the lock lever. If a
head restraint must be removed (for clean-
ing, replacement, etc.), push in the lock
lever and pull the head restraint all the way
out.
WARNING
All seatbacks should always be in an
upright position when driving, or seat
belt effectiveness may be reduced.
Seat belts are designed to offer maxi-
mum protection when seatbacks are
in the upright position.
EXAMPLE
WARNING
Never drive the vehicle with the
head restraints removed.
Do not attempt to adjust the head
restraint while driving.
EXAMPLE
Page 31 of 207

Downloaded from www.Manualslib.com manuals search engine 2-16
BEFORE DRIVING
60MK0-14E
Rear SeatsSeat AdjustmentAdjusting Seat Position
(for 2nd row seats)
60MH014
The adjustment levers for 2nd row seats
are located under the front of the seats. To
adjust the seat position, pull up on the
adjustment lever and slide the seat forward
or rearward.
After adjustment, try to move the seat for-
ward and rearward to ensure that it is
securely latched.
Adjusting SeatbacksFor 2nd row seats
60MH015
To adjust the seatback angle of 2nd row
seats, pull up the lever on the outboard
side of the seat, move the seatback to the
desired position, and release the lever to
lock the seatback in place.
WARNING
To avoid excessive seat belt slack,
which reduces the effectiveness of
the seat belts as a safety device,
make sure that the seats are adjusted
before the seat belts are fastened.
NOTICE
When the 3rd row seat is folded for-
ward, adjust the 2nd row seat not to
reach the 3rd row seat.
EXAMPLE
WARNING
All seatbacks should always be in an
upright position when driving, or seat
belt effectiveness may be reduced.
Seat belts are designed to offer maxi-
mum protection when seatbacks are
in the upright position.
EXAMPLE
Page 32 of 207

Downloaded from www.Manualslib.com manuals search engine 2-17BEFORE DRIVING
60MK0-14E
Walk-in Type Seats
(for 2nd row seats)
60MH016
NOTE:
To enter to or exit from the 3rd row seat,
hook the webbing of the outboard lap-
shoulder belt of 2nd row seat before mov-
ing the 2nd row seat.
60MH017
The walk-in type seat can be moved to pro-
vide easy entry to and exit from the 3rd row
seats. You can move a walk-in seat by pull-
ing up the lever on the outboard side of the
seatback and pushing the seatback for-
ward.
Head Restraints (if equipped)Head restraints are designed to help
reduce the risk of neck injuries in the case
of an accident.
NOTE:
It may be necessary to fold forward the
seatback to provide enough overhead
clearance to remove the head restraint.
Adjust the head restraint to the position
which places the center of the head
restraint closest to the top of your ears. If
this is not possible for very tall passengers,
adjust the head restraint as high as possi-
ble.
WARNING
After using the walk-in function, be
sure to return the folded seat back
to an upright position.
Before returning a walk-in seat to
its normal seating position, make
sure that the feet of the passenger
in the 3rd row seat are out of the
way.
After returning the seat to its nor-
mal seating position, make sure it
is securely latched.EXAMPLE
WARNING
Never drive the vehicle with the
head restraints removed.
Do not attempt to adjust the head
restraint while driving.