Page 94 of 207

Downloaded from www.Manualslib.com manuals search engine 4-5DRIVING TIPS
60MK0-14E
If Your Vehicle Gets StuckIf your vehicle gets stuck in snow, mud, or
sand, follow the directions below:
1) Shift the transaxle back and forth
between a forward range (or first gear
for manual transaxle) and reverse. This
will create a rocking motion which may
give you enough momentum to free the
vehicle. Press gently on the accelerator
to keep wheel spinning to a minimum
wheel rpm. Remove your foot from the
accelerator while shifting.
Do not race the engine. Excessive
wheel spin will cause the tires to dig
deeper, making it more difficult to free
the vehicle.
2) If your vehicle remains stuck after a few
minutes of rocking, get another vehicle
to pull your vehicle out.
54G638S
WARNING
Do not allow anyone to stand near the
vehicle when you are rocking it, and
do not spin the wheels faster than an
indicated 40 km/h (25 mph) on the
speedometer. Personal injury and/ or
vehicle damage may result from spin-
ning the wheels too fast.
NOTICE
Do not continue rocking the vehicle
for more than a few minutes. Pro-
longed rocking can cause engine
overheating or transaxle damage.
WARNING
In addition to following the driving
tips in this section, it is important to
observe the following precautions.
Make sure your tires are in good
condition and always maintain the
specified tire pressure. Refer to
“Tires” in the “INSPECTION AND
MAINTENANCE” section for
details.
(Continued)
WARNING
(Continued)
Do not use tires other than those
specified by SUZUKI. Never use dif-
ferent sizes or types of tires on the
front and rear wheels. For informa-
tion regarding the specified tires,
refer to the Tire Information Label
located on the driver’s door lock
pillar.
Never use oversized tires or special
shock absorbers and springs to
raise (jack up) your vehicle. This
will change the handling character-
istics. Oversized tires may also rub
against the fender over bumps,
causing vehicle damage or tire fail-
ure.
After driving through water, test the
brakes while driving at a slow
speed to see if they have main-
tained their normal effectiveness. If
the brakes are less effective than
normal, dry them by repeatedly
applying the brakes while driving
slowly until the brakes have
regained their normal effective-
ness.
Page 101 of 207
Downloaded from www.Manualslib.com manuals search engine 5-6
OTHER CONTROLS AND EQUIPMENT
60MK0-14E
Radio Antenna
68KH052
The radio antenna on the roof is remov-
able. To remove the antenna, turn it coun-
terclockwise. To reinstall the antenna, turn
it clockwise firmly by hand.
NOTICE
To avoid damage to the radio
antenna:
Remove the antenna when using an
automatic car wash.
Remove the antenna when the
antenna hits anything such as a
low ceiling in a parking garage or
putting a car cover over your vehi-
cle.
EXAMPLE
Page 107 of 207

Downloaded from www.Manualslib.com manuals search engine 5-12
OTHER CONTROLS AND EQUIPMENT
60MK0-14E
Turning power on/off
Press the VOL PUSH POWER knob (1).
The unit starts in the function mode it was
in when the power was turned off last.
Adjusting the volume
Turn the VOL PUSH POWER knob (1).
Turning it clockwise increases the volume;
turning it counterclockwise decreases the
volume.
NOTE:
While driving, adjust the volume to an
extent that sound and/or noise coming
from outside the vehicle can be heard.
Mute
Press the MUTE button (3) to mute the
sound. To cancel the mute, press the
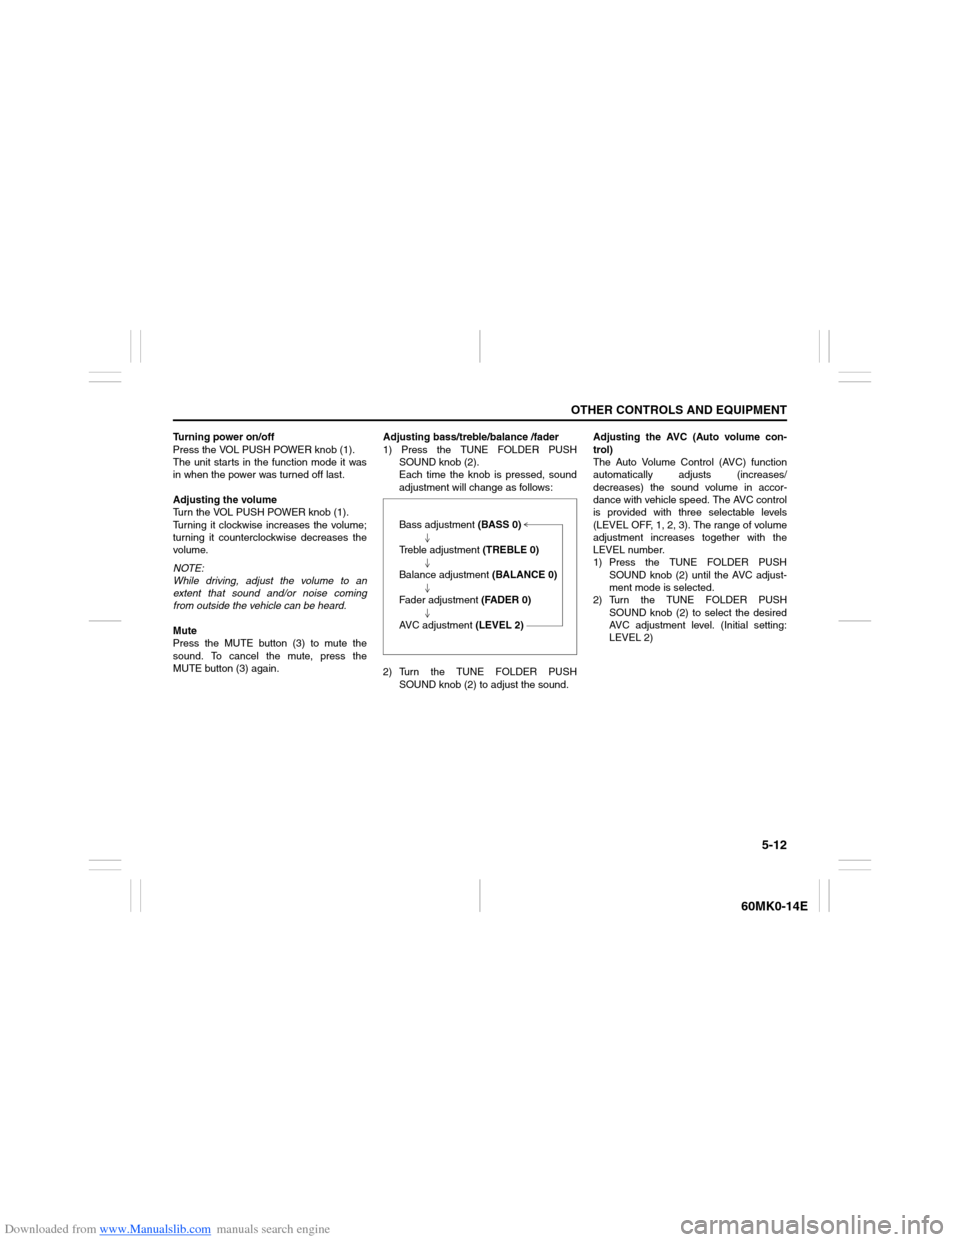
MUTE button (3) again.Adjusting bass/treble/balance /fader
1) Press the TUNE FOLDER PUSH
SOUND knob (2).
Each time the knob is pressed, sound
adjustment will change as follows:
2) Turn the TUNE FOLDER PUSH
SOUND knob (2) to adjust the sound.Adjusting the AVC (Auto volume con-
trol)
The Auto Volume Control (AVC) function
automatically adjusts (increases/
decreases) the sound volume in accor-
dance with vehicle speed. The AVC control
is provided with three selectable levels
(LEVEL OFF, 1, 2, 3). The range of volume
adjustment increases together with the
LEVEL number.
1) Press the TUNE FOLDER PUSH
SOUND knob (2) until the AVC adjust-
ment mode is selected.
2) Turn the TUNE FOLDER PUSH
SOUND knob (2) to select the desired
AVC adjustment level. (Initial setting:
LEVEL 2) Bass adjustment (BASS 0)
Treble adjustment (TREBLE 0)
Balance adjustment (BALANCE 0)
Fader adjustment (FADER 0)
AVC adjustment (LEVEL 2)
Page 111 of 207

Downloaded from www.Manualslib.com manuals search engine 5-16
OTHER CONTROLS AND EQUIPMENT
60MK0-14E
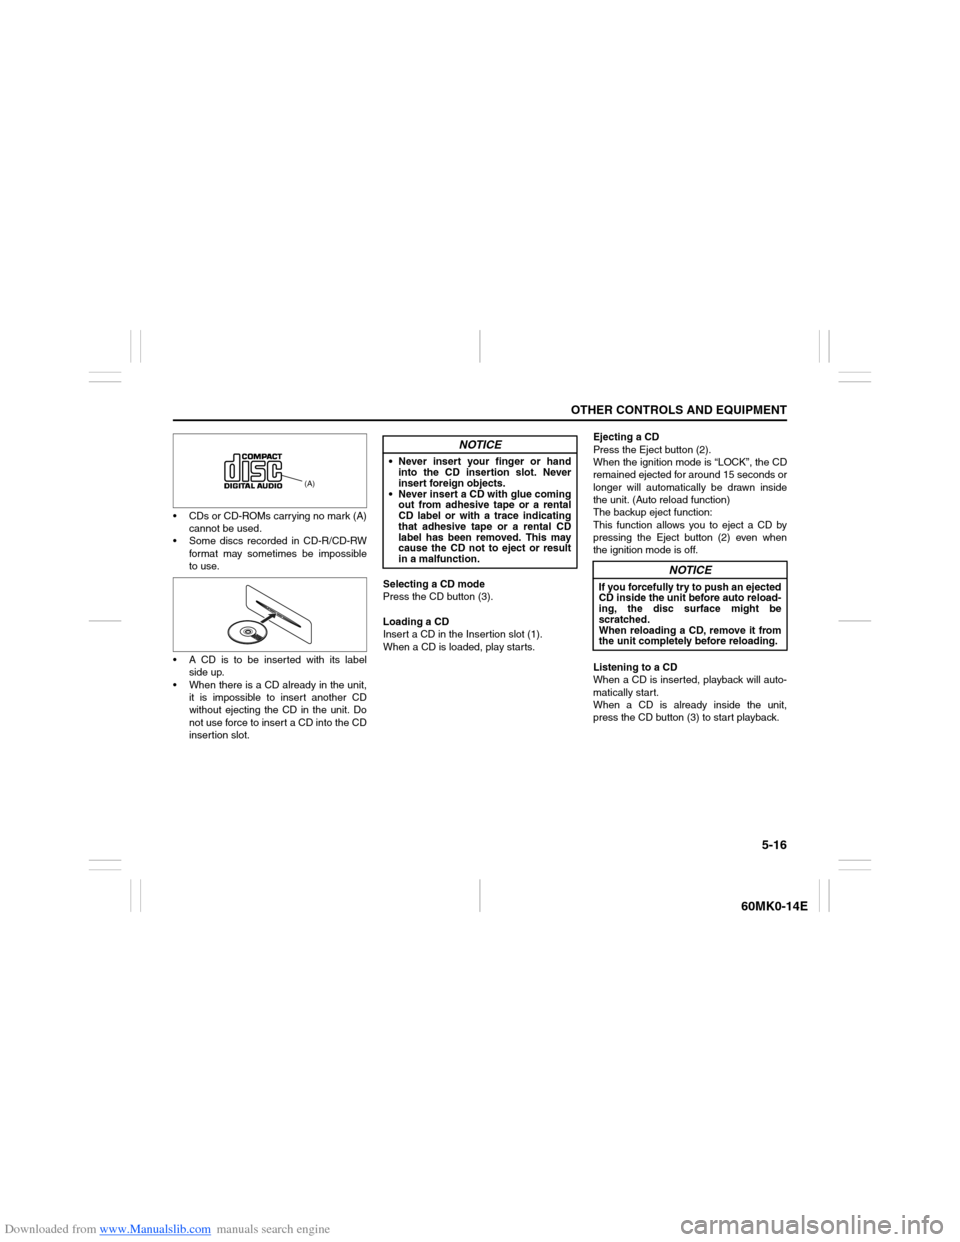
CDs or CD-ROMs carrying no mark (A)
cannot be used.
Some discs recorded in CD-R/CD-RW
format may sometimes be impossible
to use.
A CD is to be inserted with its label
side up.
When there is a CD already in the unit,
it is impossible to insert another CD
without ejecting the CD in the unit. Do
not use force to insert a CD into the CD
insertion slot.Selecting a CD mode
Press the CD button (3).
Loading a CD
Insert a CD in the Insertion slot (1).
When a CD is loaded, play starts.Ejecting a CD
Press the Eject button (2).
When the ignition mode is “LOCK”, the CD
remained ejected for around 15 seconds or
longer will automatically be drawn inside
the unit. (Auto reload function)
The backup eject function:
This function allows you to eject a CD by
pressing the Eject button (2) even when
the ignition mode is off.
Listening to a CD
When a CD is inserted, playback will auto-
matically start.
When a CD is already inside the unit,
press the CD button (3) to start playback.
(A)
NOTICE
Never insert your finger or hand
into the CD insertion slot. Never
insert foreign objects.
Never insert a CD with glue coming
out from adhesive tape or a rental
CD label or with a trace indicating
that adhesive tape or a rental CD
label has been removed. This may
cause the CD not to eject or result
in a malfunction.
NOTICE
If you forcefully try to push an ejected
CD inside the unit before auto reload-
ing, the disc surface might be
scratched.
When reloading a CD, remove it from
the unit completely before reloading.
Page 124 of 207
Downloaded from www.Manualslib.com manuals search engine 5-29OTHER CONTROLS AND EQUIPMENT
60MK0-14E
iPod
® connection
Make sure to detach the iPod
® after
pressing the engine switch to change
the ignition mode to LOCK. The iPod
®
may not be shut down when it is being
connected and may result in battery
depletion.
Please do not connect iPod
® accesso-
ries such as an iPod
® remote control or
headphones while connecting the
iPod
® with the unit. The unit may not
operate correctly.
Page 132 of 207
Downloaded from www.Manualslib.com manuals search engine 5-37OTHER CONTROLS AND EQUIPMENT
60MK0-14E
Fuel Filler Cap
60MH030
74LHT0511
The fuel filler cap is located on the left rear
side of the vehicle. The fuel filler door can
be unlocked by pulling up the opener lever
located on the outboard side of the driver’s
seat and locked by simply closing the door.
57L51093
To remove the fuel filler cap:
1) Open the fuel filler door.
2) Remove the cap by turning it counter-
clockwise.
EXAMPLEEXAMPLE
CAUTION
Remove the fuel filler cap slowly. The
fuel may be under pressure and may
spray out, causing injury.Open CloseEXAMPLE
60MH066
NOTE:
If the hook (1) is equipped with the fuel
filler door, hold the fuel filler cap when refu-
eling.
(1)
EXAMPLE
Page 133 of 207
Downloaded from www.Manualslib.com manuals search engine 5-38
OTHER CONTROLS AND EQUIPMENT
60MK0-14E
60MH031
NOTE:
You can also use the cap holder (2) to hold
the fuel filler cap (3) by hooking the groove
(4) when refueling.
To reinstall the fuel filler cap:
1) Turn the cap clockwise until you hear
several clicks.
2) Close the fuel filler door.
Engine Hood
74LHT0533
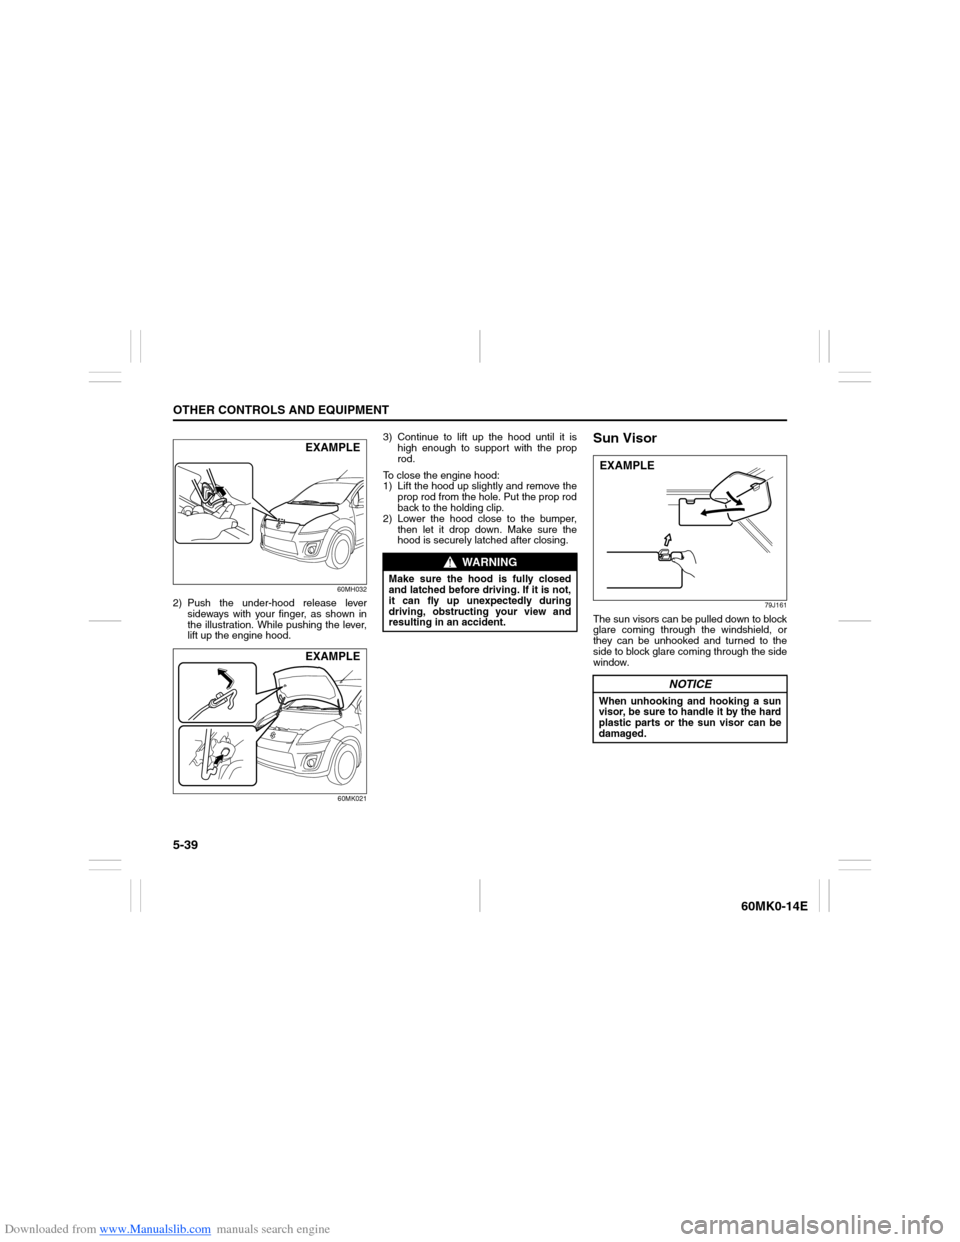
To open the engine hood:
1) Pull the hood release handle located on
the outboard side of the driver’s side of
the instrument panel. This will disen-
gage the engine hood lock halfway.
WARNING
Fuel is extremely flammable. Do not
smoke when refueling, and make
sure there are no open flames or
sparks in the area.
(2)
(3)(4) (2)
(2)
EXAMPLE
WARNING
If you need to replace the fuel cap,
use a genuine SUZUKI cap. Use of an
improper cap can result in a malfunc-
tion of the fuel system or emission
control system. It may also result in
fuel leakage in the event of an acci-
dent.
EXAMPLE
Page 134 of 207

Downloaded from www.Manualslib.com manuals search engine 5-39OTHER CONTROLS AND EQUIPMENT
60MK0-14E
60MH032
2) Push the under-hood release lever
sideways with your finger, as shown in
the illustration. While pushing the lever,
lift up the engine hood.
60MK021
3) Continue to lift up the hood until it is
high enough to support with the prop
rod.
To close the engine hood:
1) Lift the hood up slightly and remove the
prop rod from the hole. Put the prop rod
back to the holding clip.
2) Lower the hood close to the bumper,
then let it drop down. Make sure the
hood is securely latched after closing.
Sun Visor
79J161
The sun visors can be pulled down to block
glare coming through the windshield, or
they can be unhooked and turned to the
side to block glare coming through the side
window.
EXAMPLEEXAMPLE
WARNING
Make sure the hood is fully closed
and latched before driving. If it is not,
it can fly up unexpectedly during
driving, obstructing your view and
resulting in an accident.
NOTICE
When unhooking and hooking a sun
visor, be sure to handle it by the hard
plastic parts or the sun visor can be
damaged.EXAMPLE