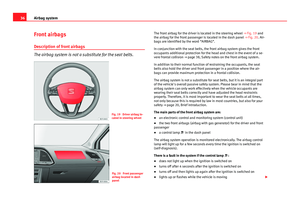
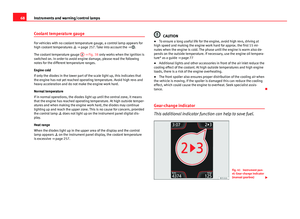
Page 265 of 339

263
Checking and refilling levels
The windscreen washer reservoir contains the cleaning fluid for the wind-
screen, the rear window and the headlight washer system* ⇒ Fig. 158. Res-
ervoir capacity: ⇒ page 323.
To prevent the nozzles from becoming blocked with chalk deposits, fill res-
ervoir with water with a low calcium content (distilled water). Always add
washer fluid to the water (with anti-freeze additive in winter).
CAUTION
● Never put radiator anti-freeze or other additives into the windscreen
washer fluid.
● Never use washer fluid which contains paint thinners or solvents as it
can damage the paintwork.
Cleaning and changing the wiper blades of the windscreen
and rear window
Fig. 159 Changing the
windscreen wiper blades
Fig. 160 Changing the
rear wiper blade
The windscreen wiper blades are supplied as standard with a layer of graph-
ite. This layer is responsible for ensuring that the wipe is silent. If the graph-
ite layer is damaged, the noise of the water as it is wiped across the wind-
screen will be louder.
Check the condition of the wiper blades regularly. If the wipers scrape
across the glass they should be changed if they are damaged, or cleaned if
they are dirty ⇒
.
Damaged wiper blades should be replaced immediately. Wiper blades are
available from specialised workshops.
Raising/lowering windscreen wiper arms
For windscreen wipers, please note: the wiper should be in service position
before being lowering ⇒ page 122. When raising or lowering an arm, it should only be held at the blade fasten-
ing point.
Safety FirstOperating instructionsPractical TipsTechnical specifications
Page 266 of 339

264Checking and refilling levels
Cleaning windscreen wiper blades
● Raising the wiper arms.
● Use a soft cloth to remove dust and dirt from the windscreen wiper
blades.
● If the blades are very dirty, a sponge or damp cloth may be used ⇒
.
Changing the windscreen wiper blades
● Raising/lowering wiper arms
● Hold down the release button ⇒ Fig. 159 1
while gently pulling the
blade in the direction of the arrow.
● Fit a new wiper blade of the same length and design on to the wiper arm
and hook it into place.
● Rest the wiper arms back onto the windscreen.
Changing the rear wiper blade
● Raising/lowering the wiper arm.
● Turn the blade slightly ⇒ Fig. 160 (arrow A
).
● Hold down the release button 1 while gently pulling the blade in the
direction of the arrow B.
● Insert a new blade of the same length and type in the rear wiper arm in
the opposite direction to the arrow B
and hook into place button 1.
● Replace the wiper arm on the rear window.
WARNING
Worn or dirty wiper blades reduce visibility and increase the risk of acci-
dent and serious injury.
● Always replace damaged or worn blades or blades which do not clean
the windscreen correctly.
CAUTION
● Damaged or dirty windscreen wipers could scratch the glass.
● If products containing solvents, rough sponges or sharp objects are
used to clean the blades, the graphite layer will be damaged.
● Never use fuel, nail varnish remover, paint thinner or similar products to
clean the windows.
Page 267 of 339

265
Wheels and tyres
Wheels and tyres
Wheels
General notes
– When driving with new tyres, be especially careful during the
first 500 km (300 miles).
– If you have to drive over a kerb or similar obstacle, drive very
slowly and as near as possible at a right angle to the obstacle.
– Check from time to time if the tyres are damaged (punctures,
cuts, cracks or dents). Remove any foreign objects embedded in
the treads.
– Damaged wheels and tyres must be replaced immediately.
– Keep grease, oil and fuel off the tyres.
– Replace any missing valve caps as soon as possible.
– Mark the wheels before taking them off so that they rotate in
the same direction when put back.
– When removed, the wheels or tyres should be stored in a cool,
dry and preferably dark place.
New tyres
New tyres do not give maximum grip straight away and should therefore be
“run in” by driving carefully and at moderate speeds for about the first 500
km (300 miles). This will also increase the useful life of the tyres. The tread depth of new tyres may
vary, according to the type and make of
tyre and the tread pattern.
Concealed damage
Damage to tyres and rims is often not readily visible. If you notice unusual
vibration or the car pulling to one side, this may indicate that one of the
tyres is damaged. Reduce speed immediately if there is any reason to sus-
pect that damage may have occurred. Inspect the tyres for damage. If no ex-
ternal damage is visible, drive slowly and carefully to the nearest special-
ised workshop and have the car inspected.
Tyres with directional tread pattern
An arrow on the tyre sidewall indicates the direction of rotation on single
drive tyres. Always note the direction of rotation indicated when mounting
the wheel. This guarantees optimum grip and helps to avoid aquaplaning,
excessive noise and wear.
Retrofitting Accessories
If you wish to change or fit wheels, rims or wheel trims, we recommend that
you consult with a SEAT Official Service centre for advice regarding current
techniques.
Useful life of tyres
Correct inflation pressures and sensible driving habits will
increase the useful life of your tyres.
– Check tyre pressure at least once a month, and also prior to any
long trip.
Safety FirstOperating instructionsPractical TipsTechnical specifications
Page 268 of 339

266Wheels and tyres
–The tyre pressure should only be checked when the tyres are
cold. The slightly raised pressures of warm tyres must not be re-
duced.
– Adjust tyre pressure to the load being carried by the vehicle.
– In vehicles with a tyre pressure indicator, save the pressure of
modified tyres ⇒ page 214, ⇒ page 265.
– Avoid fast cornering and hard acceleration.
– Inspect the tyres for irregular wear from time to time.
The useful life of your tyres depends on the following factors:
Tyre pressure
Tyre pressure values are indicated on the inside of the fuel tank flap.
Insufficient or excessive pressure greatly reduces the useful life of the tyres
and adversely affects vehicle performance and ride. Correct inflation pres-
sures are very important, especially at high speeds.
If you want a more comfortable ride, you can inflate tyres to the pressure
corresponding to the normal vehicle load (up to 3 people) if the vehicle is
carrying a normal load. If the vehicle is going to carry the maximum load,
the tyre pressure should be increased to maximum value indicated.
The tyre pressure must be adjusted according to the load the vehicle is car-
rying. We recommend adhering to the tyre pressure specifications for a max-
imum load.
Do not forget the spare wheel when checking the tyre pressures: Keep the
spare wheel inflated to the highest pressure required for the road wheels.
In the case of a minimised temporary spare wheel (125/70 R16 or 125/70
R18) inflate to a pressure of 4.2 bar as indicated on the tyre pressure label
on the fuel tank flap. Driving style
Fast cornering, heavy acceleration and hard braking (squealing tyres) all in-
crease tyre wear.
Wheel balance
The wheels on new vehicles are balanced. However, certain circumstances
may lead to imbalance (run-out), which is detected as vibrations in the
steering wheel.
Unbalanced wheels should be rebalanced, as they otherwise cause exces-
sive wear on steering, suspension and tyres. A wheel must also be reba-
lanced when a new tyre is fitted or if a tyre is repaired.
Incorrect wheel alignment
Incorrect wheel alignment causes excessive tyre wear, impairing the safety
of the vehicle. If you notice excessive tyre wear, you should check wheel
alignment at a SEAT Official Service.
WARNING
● Always adapt the tyre pressure accordingly when the vehicle load
changes.
● A tyre with low air pressure has to flex a lot more when the vehicle is
heavily loaded or at high speeds, therefore causing overheating to occur.
Under these conditions, the tyre bead may be released or the tyre may
burst. Risk of accident!
For the sake of the environment
Under-inflated tyres will increase fuel consumption.
Page 269 of 339

267
Wheels and tyres
Indications of wear
Tread wear indicators indicate if a tyre is worn.
Fig. 161 Tyre tread:
tread wear indicators
The original tyres on your vehicle have 1.6 mm high “tread wear indicators”
running across the tread. Depending on the manufacturer, there will be 6 to
8 of them spaced at equal distances around the tyre. Markings on the tyre
sidewall (for instance the letters “TWI” or a triangle) indicate the positions
of the tread wear indicators.
The minimum tread depth required by law is 1.6 mm (measured in the tread
grooves next to the tread wear indicators). (Different figures may apply in
other countries.)
WARNING
The tyres must be replaced at the latest when the tread is worn down to
the tread wear indicators. Failure to do so could result in an accident.
● Especially in difficult driving conditions such as wet or icy roads, it is
important that the tyres have sufficient tread depth. The tread depth
should same on the tyres of both the front and the rear axles.
● The decrease in driving safety due to insufficient tread depth is par-
ticularly evident in handling of the vehicle, when there is a risk of “aqua-
planing” over deep puddles and when driving around corners. Braking is
also adversely affected.
● The speed has to be adapted accordingly, otherwise there is a risk of
losing control over the vehicle.
Changing wheels
Fig. 162 Changing
wheels around
Safety FirstOperating instructionsPractical TipsTechnical specifications
Page 270 of 339

268Wheels and tyres
To ensure that the wear is equal on all tyres the wheels should be changed
round from time to time according to the system ⇒ Fig. 162. The useful life
of all the tyres will then be about the same time.
Replacing wheels and tyres
It is important to use the correct wheels and tyres when re-
placement is necessary.
– All four wheels must be fitted with tyres of the same type, size
(rolling circumference) and preferably the same tread pattern.
– Tyres should be replaced at least in pairs and not individually
(i.e. both front tyres or both rear tyres together).
– Do not use tyres whose effective size exceeds the dimensions
of the factory-approved makes of tyre.
– If you wish to fit the vehicle with rims or tyres that are different
to those installed in manufacture, it is advisable to consult a
SEAT Official Service before purchasing them.
The tyres and wheel rims are an essential part of the vehicle's design. The
tyres and rims approved by SEAT are specially matched to the characteris-
tics of the vehicle and make a major contribution to good roadholding and
safe handling ⇒
.
The sizes of the rims and tyres approved for your vehicle are listed in the
vehicle documentation (e.g. EC Certificate of Conformity or COC docu-
ment 1)
). The vehicle documentation varies depending on the country of resi-
dence. A knowledge of tyre designations makes it easier to choose the correct
tyres. The following wording can be read on the sides of the tyre:
205/55 R16 91V
This contains the following information:
205Tyre width in mm55Height/width ratio in %RTyre construction: Radial16Rim diameter in inches91Load rating codeVSpeed index
The manufacturing date is also indicated on the tyre sidewall (possibly only
on the inner side of the wheel): DOT... 2212...
means that the tyre was produced in the 22nd week of 2012.
Please note that with some types of tyre, the actual tyre size can differ from
the nominal size marked on the tyre (for instance 205/55 R 16 91 W), and
there may be significant differences in the contours of the tyres, even
though the tyres are marked with the same nominal size designation.
When replacing the tyres, it is therefore important to make sure that the
actual size of the new tyres does not exceed the dimensions of the factory-
approved makes of tyre.
Failure to observe this requirement can affect the clearance needed for the
tyres. This could result in contact between the tyres and suspension com-
ponents or bodywork causing damage. The brake lines could also be dam-
aged and vehicle safety could be severely impaired ⇒
.
1)
COC = certificate of conformity
Page 271 of 339

269
Wheels and tyres
If you use tyres that are approved by SEAT you can be sure that the actual
tyre dimensions will be correct for your vehicle. If you decide to fit a differ-
ent type of tyre, you must obtain the appropriate manufacturer's certificate
from the tyre retailer to confirm that the tyres are suitable for your vehicle.
Keep this certificate in a safe place.
Your SEAT Official Service will be able to advise you on which tyres may be
fitted to your vehicle.
It is best to have all servicing of wheels and tyres performed by a special-
ised workshop. They are familiar with the procedure and have the necessary
special tools and spare parts as well as the proper facilities for disposing of
the old tyres.
WARNING
● It is very important to ensure that the tyres you have chosen have ad-
equate clearance. When selecting replacement tyres, do not rely entirely
on the nominal tyre size marked on the tyre; with some makes of tyre the
effective tyre size can differ significantly from the nominal dimensions,
even though the tyres have the same size designation. Inadequate tyre
clearance can result in damage to the tyres or the vehicle, causing a seri-
ous safety risk. It may also invalidate the vehicle's registration for use on
public roads.
● Avoid running the vehicle on tyres that are more than 6 years old. If
you have no alternative, you should drive slowly and with extra care at all
times.
● If wheel trims are fitted after the car is purchased, ensure that there
is an adequate flow of air for cooling the brake system.
For the sake of the environment
Old tyres must be disposed of according to the laws in the country con-
cerned.
Note
● Never mount used tyres if you are not sure of their “previous history”.
● For technical reasons, it is not generally possible to use the wheels from
other vehicles. In some cases, this may also be true for the same model of
wheel.
Wheel bolts
The wheel bolts are designed to suit the rims on your car.
The wheel bolts are matched to the rims. When installing different wheels
(for instance alloy wheels or wheels with winter tyres) it is important to use
the correct wheel bolts with the right length and correctly shaped bolt
heads. This ensures that wheels are fitted securely and that the brake sys-
tem functions correctly.
The wheel bolts must be clean and turn easily.
A special adapter is required to turn the anti-theft wheel bolts*
⇒ page 279.
Winter tyres
Winter tyres will improve the vehicles handling on snow and
ice.
– Winter tyres must be fitted on all four wheels.
– Only use winter tyres that are approved for your vehicle.
– Please note that the maximum permissible speed for winter
tyres may be lower than for summer tyres.
Safety FirstOperating instructionsPractical TipsTechnical specifications
Page 272 of 339

270Wheels and tyres
–Also note that winter tyres are no longer effective when the
tread is worn down.
– After fitting the wheels you must always check the tyre pres-
sures. The correct tyre pressures are listed on the sticker on the
inside of the fuel tank flap ⇒ page 265.
In winter road conditions winter tyres will considerably improve vehicle han-
dling. The design of summer tyres (width, rubber compound, tread pattern)
gives less grip on ice and snow. This applies particularly to vehicles equip-
ped with wide section tyres or high speed tyres (code letters H, V or Y on
the sidewall).
Only use winter tyres of the correct type approved for your vehicle. The sizes
of the winter tyres approved for your vehicle are listed in the vehicle docu-
mentation (e.g. EC Certificate of Conformity or COC document 1)
). The vehicle
documentation varies depending on the country of residence. See also
⇒ page 268.
Winter tyres lose a great deal of their properties when the tread is worn
down to a depth of 4 mm.
The performance of winter tyres is also severely impaired by ageing, even if
the tread is still much deeper than 4 mm.
Winter tyres are subject to the following maximum speed limits according to
speed rating code letter: ⇒
Speed rating code letter
⇒ page 268Maximum speed limit
Q160 km/h (140 mph)S180 km/h (140 mph)T190 km/h (140 mph)
Speed rating code letter
⇒ page 268Maximum speed limit
H210 km/h (140 mph)
V240 km/h (150 mph)
(note restrictions)
Vehicles capable of exceeding these speeds must have an appropriate
sticker attached so that it is visible to the driver. Suitable stickers are availa-
ble from the SEAT Official Service and specialised workshop. Please note
regulations to this effect in your country.
“All-weather” tyres can also be used instead of winter tyres.
Using winter tyres with V-rating
Please note that the generally applicable 240 km/h (150 mph) speed rating
for winter tyres with the letter V is subject to technical restrictions; the max-
imum permissible speed for your vehicle may be significantly lower . The
maximum speed limit for tyres with a V-rating depends directly on the maxi-
mum axle weights for your car and on the listed weight rating of the tyres
being used.
It is best to contact a SEAT Official Service to check the maximum speed
which is permissible for the V-rated tyres fitted on your car on the basis of
this information.
WARNING
Exceeding the maximum speed permitted for the winter tyres fitted on
your car can cause tyre failure, resulting in a loss of control of the vehicle
– risk of accident.
1)
COC = certificate of conformity