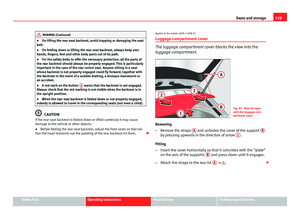
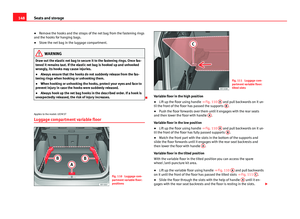
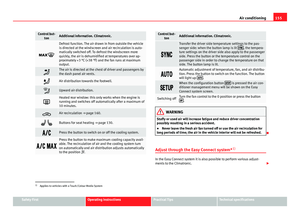
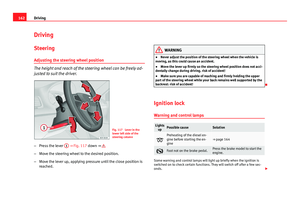
Page 217 of 339

215
Driver assistance systems
For the sake of the environment
Under-inflated tyres lead to increased fuel consumption and tyre wear.
Note
● Driving for the first time with new tyres at a high speed can cause them
to slightly expand, which could then produce an air pressure warning.
● Only replace used tyres with those authorised by SEAT for the corre-
sponding type vehicle.
● Do not only rely on the tyre monitoring system. Regularly check your
tyres to ensure that the tyre pressure is correct and that the tyres are not
damaged due to puncture, cuts, tears and impacts/dents. Remove objects
from the tyres only when they have not pierced the tyres.
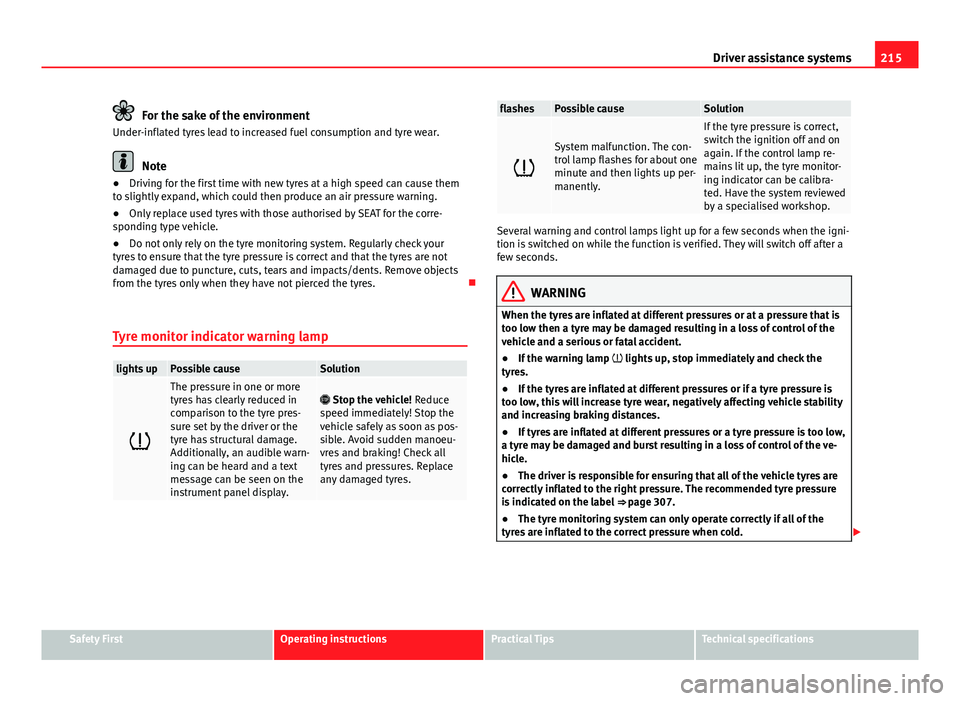
Tyre monitor indicator warning lamp
lights upPossible causeSolution
The pressure in one or more
tyres has clearly reduced in
comparison to the tyre pres-
sure set by the driver or the
tyre has structural damage.
Additionally, an audible warn-
ing can be heard and a text
message can be seen on the
instrument panel display. Stop the vehicle! Reduce
speed immediately! Stop the
vehicle safely as soon as pos-
sible. Avoid sudden manoeu-
vres and braking! Check all
tyres and pressures. Replace
any damaged tyres.
flashesPossible causeSolution
System malfunction. The con-
trol lamp flashes for about one
minute and then lights up per-
manently.
If the tyre pressure is correct,
switch the ignition off and on
again. If the control lamp re-
mains lit up, the tyre monitor-
ing indicator can be calibra-
ted. Have the system reviewed
by a specialised workshop.
Several warning and control lamps light up for a few seconds when the igni-
tion is switched on while the function is verified. They will switch off after a
few seconds.
WARNING
When the tyres are inflated at different pressures or at a pressure that is
too low then a tyre may be damaged resulting in a loss of control of the
vehicle and a serious or fatal accident.
● If the warning lamp lights up, stop immediately and check the
tyres.
● If the tyres are inflated at different pressures or if a tyre pressure is
too low, this will increase tyre wear, negatively affecting vehicle stability
and increasing braking distances.
● If tyres are inflated at different pressures or a tyre pressure is too low,
a tyre may be damaged and burst resulting in a loss of control of the ve-
hicle.
● The driver is responsible for ensuring that all of the vehicle tyres are
correctly inflated to the right pressure. The recommended tyre pressure
is indicated on the label ⇒ page 307.
● The tyre monitoring system can only operate correctly if all of the
tyres are inflated to the correct pressure when cold.
Safety FirstOperating instructionsPractical TipsTechnical specifications
Page 218 of 339

216Driver assistance systems
WARNING (Continued)
● Driving with tyres at the wrong pressure can cause them damage and
result in an accident. Ensure that the tyre pressures of all the tyres corre-
spond to the vehicle load.
● Before starting a journey, always inflate tyres to the correct pressure.
● Tyres with insufficient pressure are subjected to more flexing. Due to
this, the tyre could become excessively hot, causing tread separation
and also tyre blow-out.
● With an overloaded vehicle at high speed, the tyres can overheat and
burst resulting in a loss of vehicle control.
● Tyre pressures which are too high or too low reduce the useful life of
the tyre, affecting vehicle performance.
● If a tyre has not been punctured then it does not have to be changed
immediately; drive to the nearest specialised workshop at a moderate
speed and have the tyre checked and inflated to the correct pressure.
WARNING
If the warning lamps and messages are ignored, the vehicle may stall in
traffic, or may cause accidents and severe injuries.
● Never ignore the warning lamps or text messages.
● Stop the vehicle safely as soon as possible.
CAUTION
Failure to heed the control lamps and text messages when they appear may
result in faults in the vehicle.
Note
● If excessively low tyre pressure is detected with the ignition on, an audi-
ble warning will sound. In the event that there is a fault in the system, an
audible warning will sound.
● Driving on dirt tracks for a long period of time or driving in a sporty style
can temporarily deactivate the TPMS. The control lamp shows a fault, but
disappears when road conditions or the driving style change.
Tyre monitoring indicator
Fig. 146 Instrument
panel: warning of loss of
tyre pressure
The tyre monitor indicator compares wheel revolutions and, with this infor-
mation, the tread of each wheel using the ABS sensors. If the rolling circum-
ference of one or more wheels has changed, the tyre monitoring indicator
will indicate this on the instrument panel through a warning lamp and a
warning to the driver ⇒ Fig. 146. When only one specific tyre is affected, its
position within the vehicle will be indicated. Loss of pressure: Check left tyre pressure!
Page 219 of 339

217
Driver assistance systems
Wheel tread change
The wheel tread changes when:
● Tyre pressure is manually changed
● Tyre pressure is insufficient
● Tyre structure is damaged
● The vehicle is unbalanced because of a load
● The wheels on an axle are subject to a heavier load (e.g. when towing a
heavy load)
● The vehicle is fitted with snow chains
● The temporary spare wheel is fitted
● The wheel on one axle is changed
There may be a delay in the reaction of the tyre monitoring indicator or it
may not indicate anything under certain circumstances (e.g. sporty driving,
snow-covered or unpaved roads, or when driving with snow chains).
Calibrating the tyre monitoring indicator
Fig. 147 Glove compart-
ment: tyre control switch After changing the tyre pressure or replacing one or more wheels, the tyre
monitoring indicator must be recalibrated. Do the same, for example, when
the front and rear wheels are swapped.
●
Switch the ignition on.
● Store the new tyre pressure in the Easy Connect system with the button
and the function button Setup ⇒ page 80 or using the switch located in
the glove compartment* ⇒ Fig. 147.
When driving, the system self-calibrates the tyre pressure provided by the
driver and the wheels fitted. After a long journey with varied speeds the pro-
grammed values are collected and monitored.
With the wheels under very heavy loads, the tyre pressure must be in-
creased to the total recommended tyre pressure before the calibration
⇒ page 307.
Note
● The tyre monitoring indicator does not function when there is a fault in
the ESC or ABS ⇒ page 222.
● An erroneous indication may be given when snow chains are in use be-
cause the chains increase the tread of the wheel.
Parking aid General information
Various systems are available to help you when parking or manoeuvring in
tight spaces, depending on the equipment fitted on your vehicle.
The rear parking aid is an audible assistant that warns about obstacles lo-
cated behind the vehicle ⇒ page 218.
Safety FirstOperating instructionsPractical TipsTechnical specifications
Page 220 of 339

218Driver assistance systems
During parking, the parking system plus assists you visually and audibly
about obstacles detected in front and behind the vehicle ⇒ page 219.
WARNING
● Always pay attention (also when looking straight ahead) to traffic and
the vehicle surroundings. The assistance systems are not a replacement
for driver awareness. When inserting or removing the vehicle from a park-
ing space, or when performing similar manoeuvres the driver always as-
sumes the responsibility.
● Take into account that the system is not always in conditions to rec-
ognise or represent certain surfaces, such as dress fabric: Risk of causing
an accident!
● The sensors and cameras have blind spots, making the detection of
people and objects impossible. Pay special attention to children and ani-
mals: Risk of causing an accident!
● Always keep visual control of the vehicle surroundings: use the rear
vision mirrors for additional help.
CAUTION
● Under certain circumstances, the system does not detect or display cer-
tain objects:
–Objects such as snow chains, trailer draw bars, bars or fences
– Objects that are located above the sensors, such as protrusions in a
wall.
– Objects with certain surfaces or structures, such as wire mesh fences
or powder snow.
● When the vehicle approaches a low obstacle, it could disappear from
the angle of measurement. In this case, take into account that the system
will no longer warn about this obstacle.
● The knocks or damage on the radiator grille, bumper, wheel arch and ve-
hicle underbody can adjust the orientation of the sensors. This can affect
the parking aid function. Have the function checked by a specialised work-
shop.
Note
● In certain situations, the system can give a warning even though there is
no obstacle in the detected area, e.g:
–for roads with certain surfaces, or with long grass
– for external ultrasound sources, such as cleaning vehicles
– In downpours, intense snow or dense exhaust gases
● In order to familiarise yourself with the system, it is advised that you
practice parking in an area or car park that is free from traffic. There must be
good weather and light conditions.
● The volume and tone of the warnings can be modified, in addition to the
indications ⇒ page 221.
● In vehicles without a driver information system, these parameters can be
modified in a SEAT Official Service or in a specialised workshop.
● Please observe information on towing a trailer ⇒ page 221.
● The display on the Easy Connect screen shows a slight time delay.
● To ensure that the parking aid works properly, the sensors must be kept
clean and free of ice and snow.
Rear parking aid*
The rear parking aid is an audible assistant. Description
There are sensors integrated in the rear bumper. When the sensors detect
an obstacle, you are alerted by audible warnings.
Make sure that the sensors are not covered by adhesives, residues and the
like, given that this could affect the system operation. Cleaning instructions
⇒ page 239.
The approximate measurement range of the sensors is:
Page 221 of 339

219
Driver assistance systems
rearside0.90 mcentre1.60 m
As you approach the obstacle, the time interval between the audible warn-
ings will be reduced. When you reach around 0.30 m the warning will be
constant: Do not continue to move forward (or backward) ⇒
in General
information on page 218, ⇒ in General information on page 218 !
If you maintain separation from the obstacle, the volume of the warning be-
gins to reduce after four seconds (does not affect the tone of the constant
warning).
Activate
When engaging reverse gear, the parking aid is automatically switched on.
This is confirmed with a short warning.
Parking system plus*
Parking system plus assists you audibly and visually when
parking.
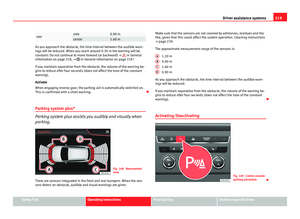
Fig. 148 Represented
area
There are sensors integrated in the front and rear bumpers. When the sen-
sors detect an obstacle, audible and visual warnings are given. Make sure that the sensors are not covered by adhesives, residues and the
like, given that this could affect the system operation. Cleaning instructions
⇒ page 239.
The approximate measurement range of the sensors is:
1.20 m
0.90 m
1.60 m
0.90 m
As you approach the obstacle, the time interval between the audible warn-
ings will be reduced.
If you maintain separation from the obstacle, the volume of the warning be-
gins to reduce after four seconds (does not affect the tone of the constant
warning).
Activating/Deactivating
Fig. 149 Centre console:
parking aid button
A
BCD
Safety FirstOperating instructionsPractical TipsTechnical specifications
Page 222 of 339

220Driver assistance systems
Switching on
–Engage reverse gear or
– Press the button on the centre console ⇒ Fig. 149. A short
confirmation signal will be heard and the button symbol will
light up yellow.
With certain equipment (Adaptive Cruise Control), the system will
be switched on automatically when the vehicle reverses a given
distance (approx. 10 cm if an obstacle is detected at the rear and
approx. 20 cm if no obstacle is detected at the rear).
Switching off
– Drive forwards at more than 10 km/h (6 mph), or
– Press the button, or
– Switch the ignition off
Segments of the visual indication
The distance of separation from the obstacle can be estimated using the
segments around the vehicle. With certain equipment (Radio Standard), the
yellow lines* mark the estimated path, depending on the angle of the
turned steering wheel. A white segment is seen when an obstacle is detec-
ted out of the path of the vehicle. The red segments represent obstacles de-
tected within the path. As the vehicle approaches an obstacle, the seg-
ments are displayed closer to the vehicle. When the penultimate segment is
displayed, this means that the vehicle has reached the collision zone. In the
collision zone, obstacles are represented in red, including those out of the
path. Do not continue to move forward (or backward) ⇒
in General infor-
mation on page 218, ⇒ in General information on page 218 ! Automatic activation
1)
When the parking aid (ParkPilot) is automatically switched on this is shown
in miniature on the left side of the display.
When slowly approaching an obstacle located in front of the vehicle, the au-
tomatic activation only functions each time the speed is reduced below ap-
proximately 10 km/h (6 mph) for the first time. If the parking aid is deactiva-
ted using the button, the following actions must be carried out in order
for it to automatically reactivate:
● Switch off the ignition and switch it on again.
● OR: Accelerate above 10 km/h (6 mph) before reducing speed below
this number again.
● OR: Place the selector lever in position P and then move it from this po-
sition.
● OR: Switch on and off the automatic activation in the Easy Connect sys-
tem menu.
The automatic activation with parking aid miniature indication can be
switched on and off from the Easy Connect system menu ⇒ page 81:
● Switch the ignition on.
● Press button
.
● Press the Setup function button.
● Press the Parking and Manoeuvring function button.
● Select the parking aid (ParkPilot) from the list.
● Automatic activation.
When the function button check box is activated , the function is on.
1)
Available only with certain equipment.
Page 223 of 339

221
Driver assistance systems
Adjusting the display and audible warnings
The settings for the display and audible warnings are con-
trolled via the Easy Connect*.
Requirements: the parking aid must be switched on.
– Select: button CAR
> control button Car* Systems > Driver assis-
tant > Parking aid ⇒ page 81.
Automatic activation 1)
on – activates the Automatic activation option ⇒ page 220
off – deactivates the Automatic activation option ⇒ page 220.
Front volume
Volume in the front and rear area.
Front sound settings
Frequency (tone) of the sound in the front area.
Rear volume
Volume in the rear area
Rear sound settings
Frequency (tone) of the sound in the rear area.
Adjust volume
With the parking aid switched on, the active audio/video source volume will
be reduced to the intensity of the selected setting.
You will hear a short test tone from the corresponding speaker each time
you make a new setting. Error messages
When the parking aid is activated or when switching it on, if a continuous
warning can be heard over several seconds (additionally, in the case of
Parking system plus the LED of the
button flashes), there is a fault in the
system. If the fault does not disappear before switching off the ignition, the
next time the parking aid is switched on by engaging reverse gear the fault
will only be indicated with the flashing LED on the button.
Parking system plus*
If there is a fault in a sensor, the symbol is displayed on the Easy Con-
nect display in front of/behind the vehicle. If a rear sensor is faulty, only the
obstacles in the areas A
and B are displayed ⇒ Fig. 148. If a front sensor
is faulty, only the obstacles in the areas C and D are displayed.
Have the fault corrected by a specialised workshop without delay.
Towing bracket
If the trailer power socket is occupied, the rear parking aid sensors will not
activate when reverse gear is engaged, or when the button is pressed.
This function may not be covered under warranty if the towing bracket is not
factory-fitted. This causes the following limitations:
Parking system plus*
There will be no warning about the presence of obstacles in the rear area.
The monitoring in the front area remains active. The optical display changes
to towing mode.
1)
available only with certain equipment - Radio Standard
Safety FirstOperating instructionsPractical TipsTechnical specifications
Page 224 of 339

222Intelligent technology
Practical Tips
Intelligent technology
Electronic Stability Control (ESC)
Description
The ESC helps to improve safety. It reduces the tendency to skid and im-
proves the stability and roadholding of the vehicle. The ESC detects critical
handling situations, such as vehicle understeer or oversteer, or wheelspin
on the driving wheels. It stabilises the vehicle by braking individual wheels
or by reducing the engine torque. The warning lamp will flash on the instru-
ment panel when the ESC is intervening .
ESC includes the Anti-lock brake system (ABS), the brake assist system, the
traction control system (ASR), electronic differential lock (EDL), electronic
self-locking*, selective torque control* and tractor-trailer sway mitigation*.
ESC also helps stabilise the vehicle by changing the torque.
Anti-lock brake system (ABS)
ABS prevents the wheels from locking up under braking until the vehicle
has reached a virtual standstill. You can continue to steer the vehicle even
when the brakes are on full. Keep your foot on the brake pedal and do not
pump the brakes. You will feel the brake pedal pulsate while the ABS is
working.
Brake assist system
The brake assist system can reduce the required braking distance. The brak-
ing force is automatically boosted if you press the brake pedal quickly in an
emergency. You must keep pressing the brake pedal until the danger has
passed. Traction control system (ASR)
In the event of wheelspin, the traction control system reduces the engine
torque to match the amount of grip available. This helps the car to start
moving, accelerate or climb a gradient.
Electronic differential lock (EDL)
When the EDL detects wheelspin, it brakes the spinning wheel and directs
the power to the other driven wheel. This function is available up to a speed
of around 100 km/h, 62 mph).
To prevent the disc brake of the braked wheel from overheating, the EDL
cuts out automatically if subjected to excessive loads. The vehicle can still
be driven. The EDL will switch on again automatically when the brake has
cooled down.
Tractor-trailer sway mitigation*
If the vehicle is pulling a trailer, it will control the following: Tractor-trailers
tend to sway. When the swaying of the trailer is felt by the vehicle and de-
tected by the ESC, it will automatically brake the towing vehicle within the
limits of the system and mitigate the sway. Tractor-trailer sway mitigation is
not available in all countries.
Electronic self-locking*/Selective torque control*
When driving around bends, an electronic self-locking intervenes. The front
wheel on the inside of the curve, or the two inside wheels, respectively, are
selectively braked as required. This minimises the traction of the front
wheels, allowing you to take bends with greater precision and neutrality. In
certain circumstances, where roads are wet or snow-covered, the respective
system may not intervene.