Page 9 of 28

w
ITH ea SY FILL TI
r
e a L er T
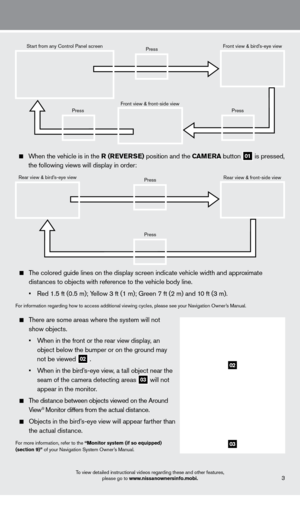
A CHECK TIRE PRESSURE warning message will
appear in the dot matrix liquid cryst
al display
01 and
t")
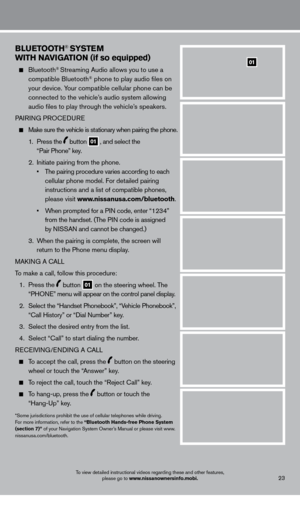
TIre P reS Su re MONITO rI NG SYST eM (TPM S)
w
ITH ea SY FILL TI
r
e a L er T
A CHECK TIRE PRESSURE warning message will
appear in the dot matrix liquid cryst
al display
01 and
the low tire pressure warning light 02 will illuminate
when one or more tires are low on pressure a nd air
is needed
.
When adding air to an under-inflated tire, the TPMS
with Easy Fill T
ire Alert system provides visual and
audible signals to help you inflate the tires to the
recommended C
OLD tire pressure .
To use the Easy Fill Tire Alert system:
1.
Apply the parking brake and press the
P (P
arK)
button on the shift lever
.
2
.
Place the power switc
h in the ON position . Do not
place in the
rea DY to drive mode .
3
.
Add air to the underinflated tire and within a few
seconds, the hazard warning lights will flash.
4.
W
hen the designated tire pressure is reached, the horn will beep once and the hazard
warning lights will stop flashing
.
5
.
Repeat this procedure for any additional underinflated tires
.
After tire pressures are adjusted, drive the vehicle at s peeds above 16 MPH (25km/h) and the
w
arning and indicator light will disappear
.
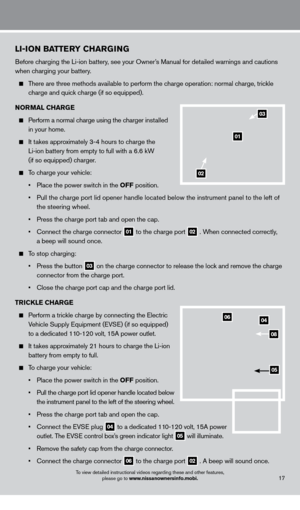
POwer LIMITaTI ON INDICaT O r LIGHT
When the power limitation indicator light illuminates,
power provided to the traction motor is reduced .
This light illuminates in the following conditions:
• T
he Li-ion battery available charge is extremely low.
• T
he Li-ion battery temperature is very low.
•
T
he temperature of the Electric Vehicle (EV)
system is high (motor, inverter, coolant system,
Li -ion battery, etc.).
• T
he EV system has a malfunction.
If the power limit ation indicator light is illuminated, follow the instructions provided o\
n the
navigation display
.
For more information, refer to the “Instruments and Controls (section 2)” of your Owner’s Manual .
01
02
To view detailed instructional videos regarding these and other features, please go to www.nissanownersinfo.mobi.7
1275820_13_Leaf_QRG_Text-Insert_121912.indd 712/19/12 10:10 AM
Page 10 of 28

8To view detailed instructional videos regarding these and other features, please go to www.nissanownersinfo.mobi.
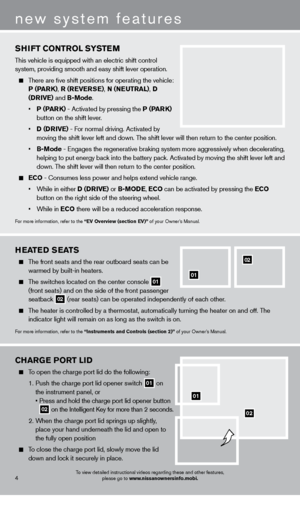
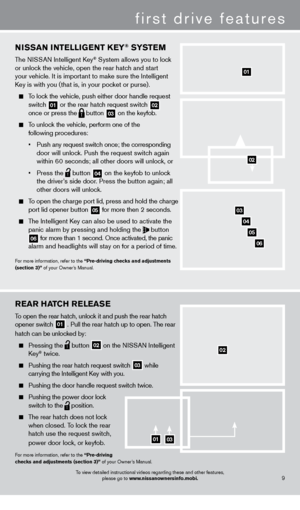
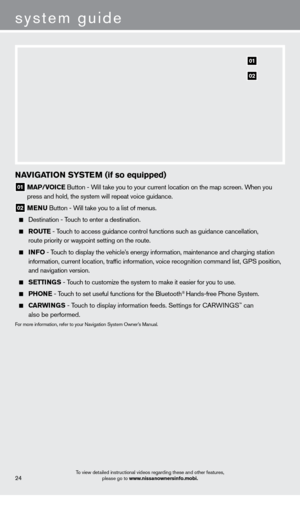
INSTruMeNT Pa NeL CL OCK
To adjust the instrument panel clock
01 , use
the Settings menu in the dot matrix liquid crystal
display
02 .
The Settings menu is accessed by pressing
the
button
03 on the left side of the
instrument panel
.
Press the button
04 to cycle through the
various Settings modes .
This clock is linked to GPS (if so equipped) through the center display clock .
•
W
ithout any adjustments the correct time will be
displayed based on the vehicle’s current location.
•
T
here are also controls in the center display to
compensate for daylight savings time
.
For more information, refer to the “Instruments and Controls (section
2)” of your Owner’s Manual .
0403
02
01
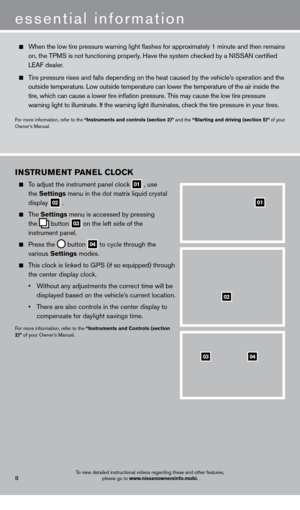
When the low tire pressure warning light flashes for approximately 1 minute and then remains
on, the TPMS is not functioning properly. Have the system checked by a NISSAN certified
LEAF dealer
.
Tire pressure rises and falls depending on the heat caused by the vehicle’s operation and the
o
utside temperature . Low outside temperature can lower the temperature of the air inside the\
tire, whic
h can cause a lower tire inflation pressure . This may cause the low tire pressure
warning light to illuminate
. If the warning light illuminates, check the tire pressure in your tires
.
For more information, refer to the “Instruments and controls (section 2)” and the “Starting and driving (section 5)” of your
Owner’s Manual .
essential information
1275820_13_Leaf_QRG_Text-Insert_121912.indd 812/19/12 10:10 AM
Page 11 of 28

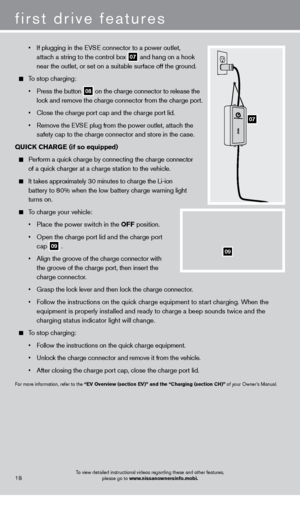
rear HaTCH reL ea Se
To open the rear hatch, unlock it and push the rear hatch
opener switch
01 . Pull the rear hatch up to open . The rear
hatch can be unlocked by:
Pressing the button
02 on the NISSAN Intelligent
Key® twice .
Pushing the rear hatc h request switch
03 while
carrying the Intelligent Key with you
.
Pushing the door handle request switc h twice .
Pushing the power door loc k
switch to the
position .
The rear hatch does not lock when closed . To lock the rear
hatch use the request switch,
power door lock, or keyfob.
For more information, refer to the “Pre-driving
checks and adjustments (section 3)” of your Owner’s Manual
.
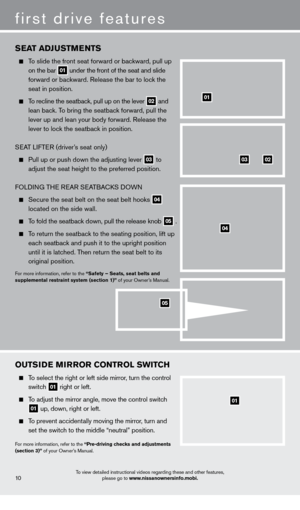
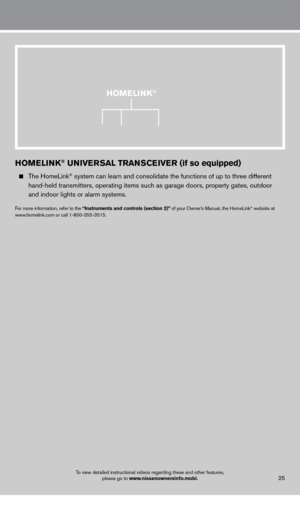
NISSaN INTeLLIGeNT Ke Y® SYSTeM
The NISSAN Intelligent Key® System allows you to lock
or unlock the vehicle, open the rear hatch and start
your vehicle
.
It is important to make sure the Intelligent
Key is with you (that is, in your pocket or purse)
.
To lock the vehicle, push either door handle request switc
h
01 or the rear hatch request switch
02 once or press the button
03 on the keyfob.
To unlock the vehicle, perform one of the
following procedures:
•
Push any request switc
h once; the corresponding
door will unloc
k . Push the request switch again
within 6
0 seconds; all other doors will unlock, or
• Press the button
04 on the keyfob to unlock
the driver
’s side door. Press the button again; all
other doors will unloc
k
.
To open the charge port lid, press and hold the charge
port lid opener button 05 for more then 2 seconds .
The Intelligent Key can also be used to activate the
panic alarm by pressing and holding the button
06 for more than 1 second . Once activated, the panic
alarm and headlights will st ay on for a period of time .
For more information, refer to the “Pre-driving checks and adjustments
(section 3)” of your Owner’s Manual
.
01
0103
02
03
04
06
02
first drive features
9To view detailed instructional videos regarding these and other features, please go to www.nissanownersinfo.mobi.
05
1275820_13_Leaf_QRG_Text-Insert_121912.indd 912/19/12 10:10 AM
Page 12 of 28

To view detailed instructional videos regarding these and other features, please go to www.nissanownersinfo.mobi.
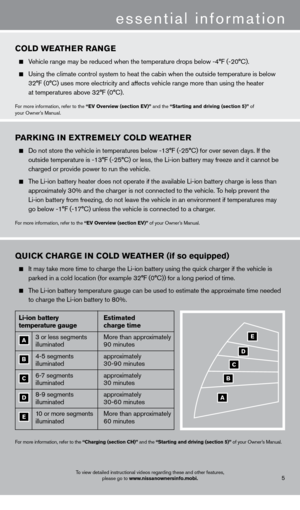
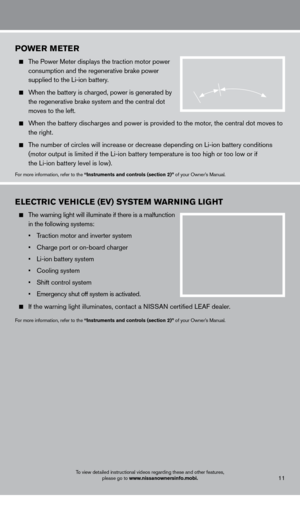
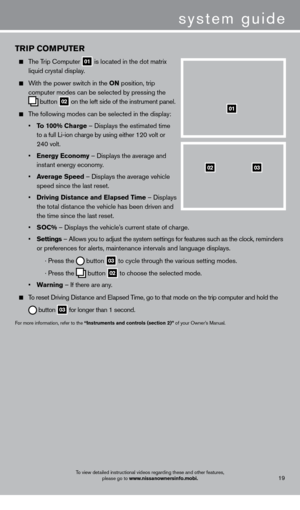
SeaT a DJuSTMeNTS
To slide the front seat forward or backward, pull up
on the bar 01 under the front of the seat and slide
forward or bac kward. Release the bar to lock the
seat in position
.
To recline the seatback, pull up on the lever 02 and
lean bac
k. To bring the seatback forward, pull the
lever up and lean your body forward. Release the
lever to loc
k the seatback in position.
SEAT LIFTER (driver’s seat only)
Pull up or push down the adjusting lever 03 to
adjust the seat height to the preferred position .
FO
LDING THE REAR SEATBACKS DOWN
Secure the seat belt on the seat belt hooks 04
located on the side wall
.
To fold the seatback down, pull the release knob 05 .
To return the seatback to the seating position, lift up
eac
h seatback and push it to the upright position
until it is latc
hed. Then return the seat belt to its
original position
.
For more information, refer to the “Safety – Seats, seat belts and
supplemental restraint system (section 1)” of your Owner’s Manual .
01
0203
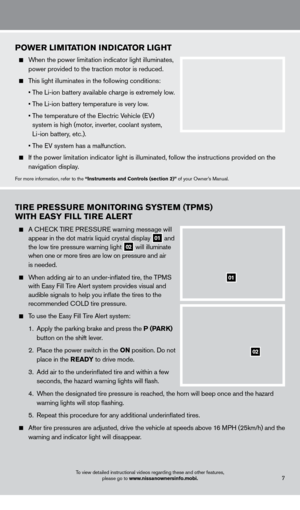
OuTSIDe MIr rO r CONT rOL S w ITCH
To select the right or left side mirror, turn the control
switc
h
01 right or left .
To adjust the mirror angle, move the control switch
01 up, down, right or left .
To prevent accidentally moving the mirror, turn and
set the switc
h to the middle “neutral” position .
For more information, refer to the “Pre-driving checks and adjustments
(section 3)” of your Owner’s Manual .
01
10
first drive features
04
05
1275820_13_Leaf_QRG_Text-Insert_121912.indd 1012/19/12 10:10 AM
Page 13 of 28

To view detailed instructional videos regarding these and other features, please go to www.nissanownersinfo.mobi.
POwer Me T er
The Power Meter displays the traction motor power
consumption and the regenerative brake power
supplied to the Li-ion battery
.
When the battery is charged, power is generated by
the regenerative brake system and the central dot
moves to the left
.
When the battery discharges and power is provided to the motor, the central dot moves to
the right
.
The number of circles will increase or decrease depending on Li-ion battery conditions
(
motor output is limited if the Li-ion battery temperature is too high or too low or if
the Li-ion battery level is low).
For more information, refer to the “Instruments and controls (section 2)” of your Owner’s Manual .
eL eCT rIC V eH ICL e ( e V) SYST eM warN ING LIGHT
The warning light will illuminate if there is a malfunction
in the following systems:
•
T
raction motor and inverter system
•
Charge port or on-board c
harger
•
Li-ion battery system
•
Cooling system
•
Shift control system
•
Emergency shut off system is activated.
If the warning light illuminates, cont act a NISSAN certified LEAF dealer .
For more information, refer to the “Instruments and controls (section 2)” of your Owner’s Manual .
11
1275820_13_Leaf_QRG_Text-Insert_121912.indd 1112/19/12 10:10 AM
Page 14 of 28

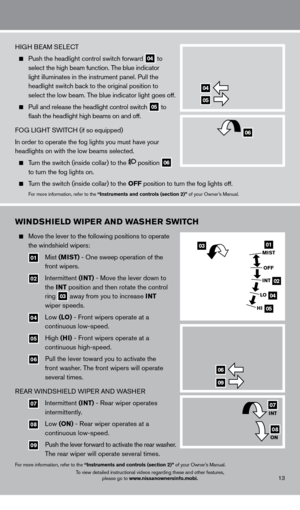
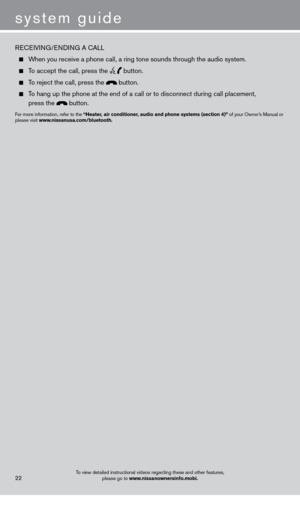
HeaDLIGHT CONT rOL Sw ITCH
HEADLIGHT CONTROL
Turn the headlight control switch to the
position
01 to turn on the front parking, side marker, tail, license
plate and instrument panel lights . Turn the switch to the
position
02 to turn on the headlights .
A
UTOLIGHT SYSTEM
The autolight system will automatically turn the headlights on when it is\
dark and off when it is
light
. The system will keep the headlights on for a period of time after you tur\
n the ignition off
and all doors are closed
.
To activate the autolight system, turn the headlight control switch to the auT O position
03
t
hen turn the ignition switch to ON
.
To deactivate the autolight system, turn the headlight
control switc
h to the OFF,
01 or
position
02 .
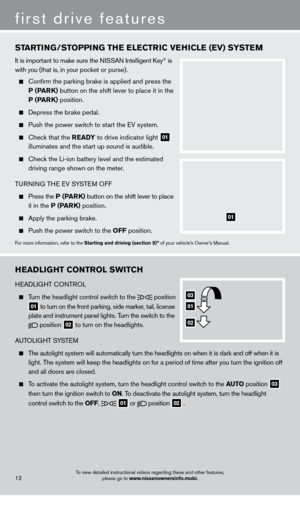
STar
TING/STOPPING THe eL eC T rI C V eH ICL e ( e V) SYST eM
It is important to make sure the NISSAN Intelligent Key® is
with you (that is, in your pocket or purse)
.
Confirm the parking brake is applied and press the
P (ParK)
button on the shift lever to place it in the
P (ParK)
position .
Depress the brake pedal.
Push the power switc h to start the EV system .
Check that the rea DY to drive indicator light
01
illuminates and the st
art up sound is audible.
Check the Li-ion battery level and the estimated
driving range shown on the meter .
TURNING THE EV SYSTEM OFF
Press the P (ParK) button on the shift lever to place
it in the
P (P
arK)
position .
Apply the parking brake.
Push the power switc h to the OFF position .
For more information, refer to the Starting and driving (section 5)” of your vehicle’s Owner’s Manual .
01
03
01
02
12
first drive features
To view detailed instructional videos regarding these and other features,
please go to www.nissanownersinfo.mobi.
1275820_13_Leaf_QRG_Text-Insert_121912.indd 1212/19/12 10:10 AM
Page 15 of 28

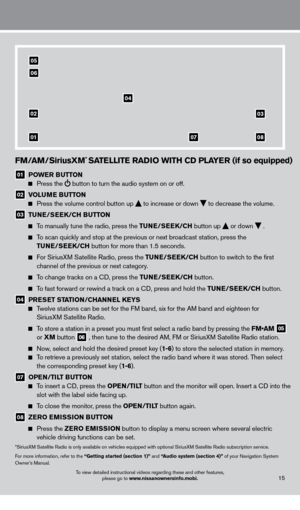
HIGH BEAM SELECT
Push the headlight control switch forward
04 to
select the high beam function. The blue indicator
light illuminates in the instrument panel
.
Pull the
headlight switch back to the original position to
select the low beam. The blue indicator light goes off.
Pull and release the headlight control switc h
05 to
flash the headlight high beams on and off.
FOG LIGHT SWITCH (if so equipped)
In order to operate the fog lights you must have your
headlights on with the low beams selected.
Turn the switch (inside collar) to the position 06
to turn the fog lights on
.
Turn the switch (inside collar) to the OFF position to turn the fog lights off
.
For more information, refer to the “Instruments and controls (section 2)” of your Owner’s Manual .
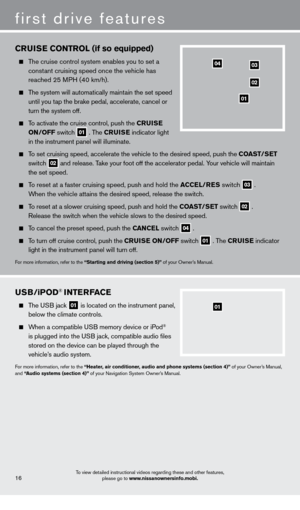
wINDSHIeLD w IP er a ND wa SHe r S w ITCH
Move the lever to the following positions to operate
the windshield wipers:
01 Mist (MIST) - One sweep operation of the
front wipers .
02 Intermittent (I NT) - Move the lever down to
the INT position and then rotate the control
ring
03 away from you to increase INT
wiper speeds .
04 Low (LO) - Front wipers operate at a
continuous low-speed .
05 High (HI) - Front wipers operate at a
continuous high-speed .
06 Pull the lever toward you to activate the
front washer
.
The front wipers will operate
several times
.
RE
AR WINDSHIELD WIPER AND WASHER
07 Intermittent (I NT) - Rear wiper operates
intermittently
.
08 Low (ON) - Rear wiper operates at a
continuous low-speed .
09 Push the lever forward to activate the rear washer .
T he rear wiper will operate several times .
For more information, refer to the “Instruments and controls (section 2)” of your Owner’s Manual .
13To view detailed instructional videos regarding these and other features, please go to www.nissanownersinfo.mobi.
04
05
0301
02
04
05
MIST
OFF
INT
INT
LO
ON
HI
06
09
07
08
06
1275820_13_Leaf_QRG_Text-Insert_121912.indd 1312/19/12 10:11 AM
Page 16 of 28

03
01
11
02
05
04
14
first drive features
To view detailed instructional videos regarding these and other features, please go to www.nissanownersinfo.mobi.
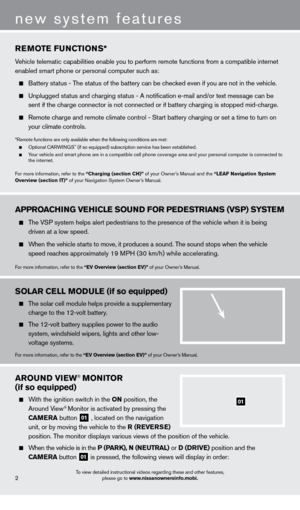
auTOMaTIC CLIM aT e CONT rOLS (if so equipped)
01 ON-OFF BuTTON Press the
ON-OFF button to turn the climate control system on or off.
02 au TO Bu TTON The
auTO mode may be used year-round. Press the auT O button and the system will
automatically control the inside temperature (automatic cooling and/or \
dehumidified heating),
air flow distribution and fan speed.
03 T eM P eraT ure CONT rOL Bu TTON Press the temperature control button up
for warmer air or down
for cooler air .
04 Fa N SP eeD CONT rOL Bu TTON Press the fan speed control button to manually adjust the fan s
peed
up
or
down
.
05 MODe Bu TTON Press the MODe
button to manually control air flow outlets. Air will flow from the center vents, side
vents, foot outlets and defroster outlets as indicated by the icons on your control panel display screen.
06 HeaT Bu TTON Press the
He a T button to manually turn on and off the heater.
07 a /C Bu TTON Press the
a /C button when you want to manually turn the A/C on or off.
08 a Ir reCIrC uL aTI ON Bu TTON Press the air recirculation button to recirculate air inside the vehicle . The indicator light
on the button will illuminate. T
his system is used to avoid certain outside odors and helps to
adjust the inside vehicle temperature more effectively
.
Press the air recirculation button again to turn air recirculation off . This allows outside air to
be drawn into the passenger compartment to prevent fogging in d efrost, floor, or defrost/floor modes.
The air recirculation mode can only be selected if the air flow control mode is in the ,
or position .
09 DeF rOSTI NG/DeF OGGING F rONT a ND SIDe w INDOw S Press the front window defroster button
to turn the system on . The A/C automatically
turns on when the defroster mode is selected . This feature removes humidity from the air .
Set the temperature control buttons and the fan speed control b uttons to their maximum settings.
10 rear w INDOw a ND O u TSIDe MIr rO r DeF rOST er S w ITCH Push the rear window defroster button to turn the system on or off .
The rear window defroster automatically turns off after approximately 15 minutes .
11 CLIM aT e CONT rOL TI Me r INDICaT O r
The climate control timer indicator light will illuminate when the timer has been set to
operate at a specific time of day and date .
For more information, refer to the “Heater, air conditioner, audio and phone systems (section 4)” of your Owner’s Manual .
0710
08
0609
1275820_13_Leaf_QRG_Text-Insert_121912.indd 1412/19/12 10:11 AM