Page 9 of 20
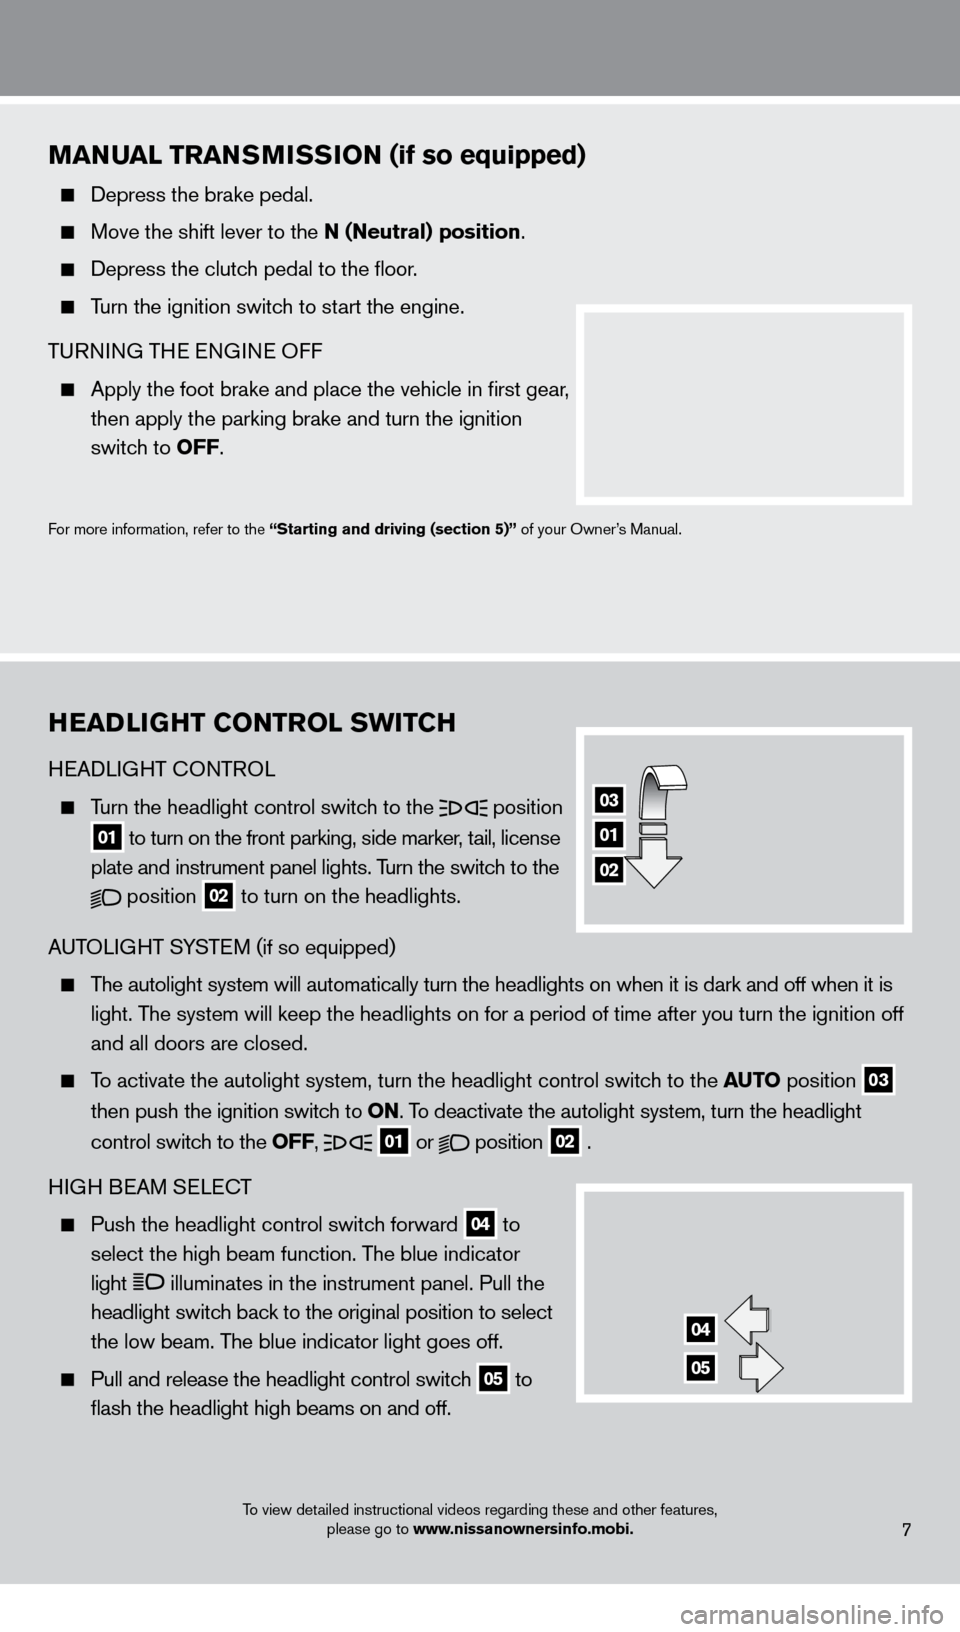
HeaDLIGHT CONTrOL SwITCH
HEADLIGHT
cONTR
OL
Turn the headlight control switch to the
position
01 to turn on the front parking, side marker, tail, license plate and instrument panel lights. Turn the switc
h to the
position
02 to turn on the headlights.
A UTOLIGHT SYSTEM (if so equipped)
The autolight system will automatically turn the headlights on when it is\
dark and off when it is
light. The system will keep the headlights on for a period of time after you tur\
n the ignition off
and all doors are closed.
To activate the autolight system, turn the headlight control switch to the auTO position
03
th
en push the ignition switch to ON. To deactivate the autolight system, turn the headlight
control switch to the
OFF,
01 or
position
02 .
HIGH BEAM SELE
cT
Push the headlight control switch forward
04 to
select the high beam function. The blue indicator
light
illuminates in the instrument panel. Pull the
headlight switch back to the original position to select
the low beam. The blue indicator light goes off.
Pull and release the headlight control switch 05 to flash the headlight high beams on and off.
7
MaNuaL TraNSMISSION (if so equipped)
Depress the brake pedal.
Move the shift lever to the N (Neutral) position .
Depress the clutch pedal to the floor.
Turn the ignition switch to start the engine.
T
URNING THE ENGINE OFF
Apply the foot brake and place the vehicle in first gear,
then apply the parking brake and turn the ignition
switch to
OFF.
For more information, refer to the “Starting and driving (section 5)” of your Owner’s Manual.
To view detailed instructional videos regarding these and other features, please go to www.nissanownersinfo.mobi.
03
01
02
04
05
1221378_13a_Cube_QRG_092112.indd 1110/2/12 9:26 AM
Page 10 of 20
first drive features
8
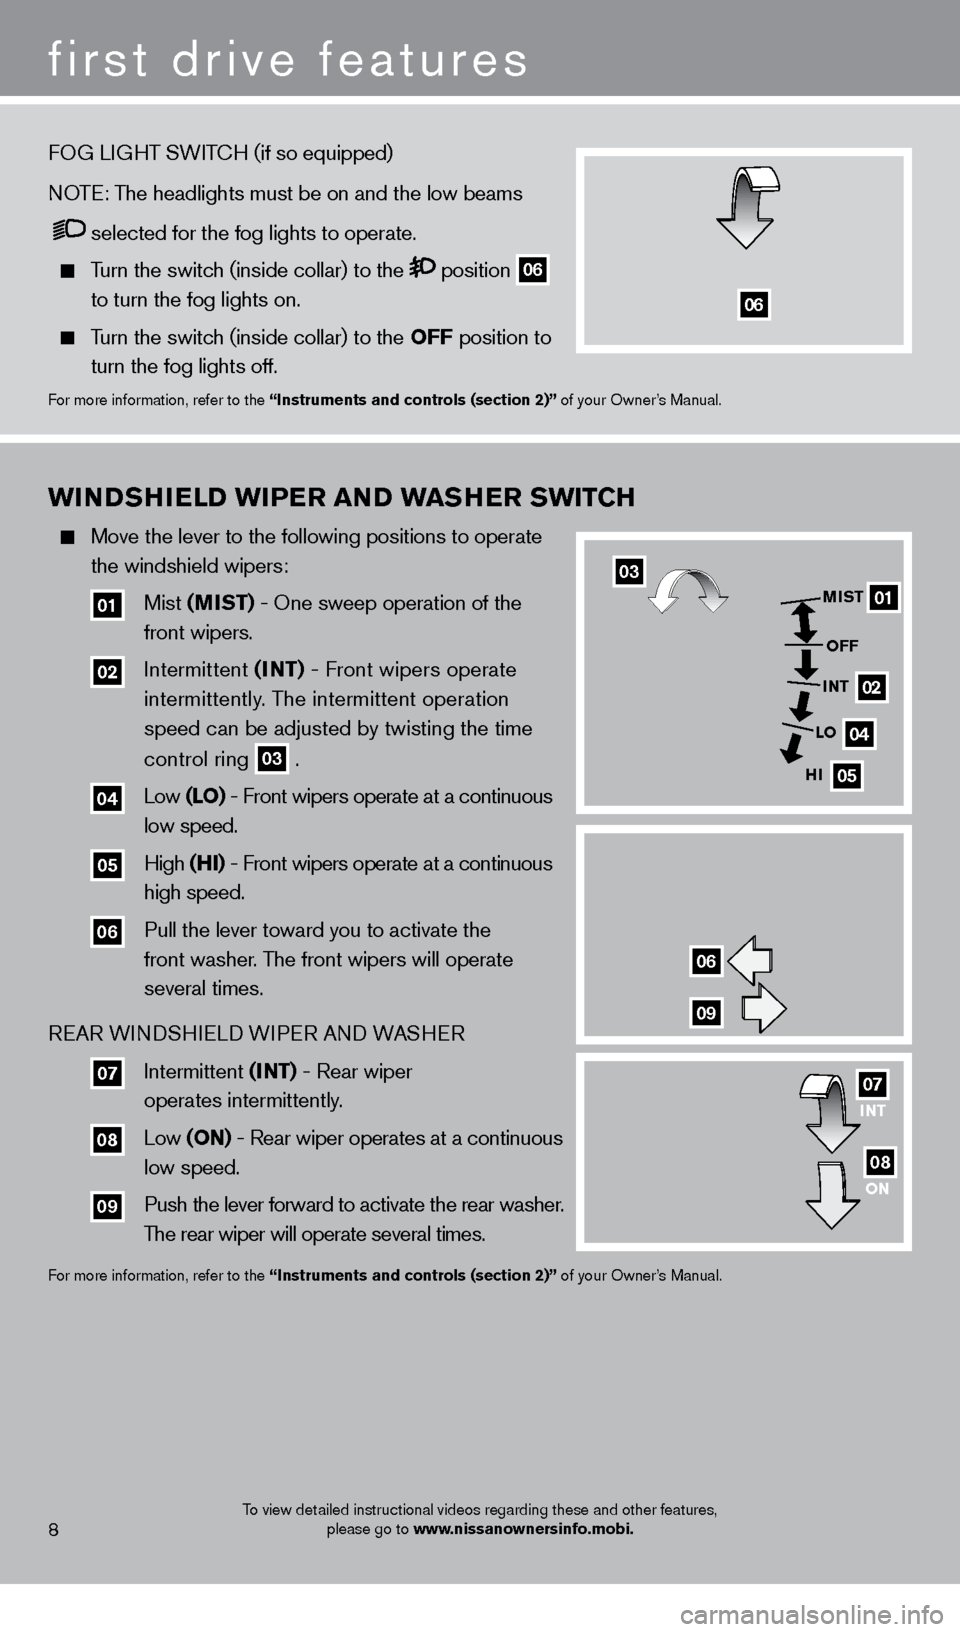
wINDSHIeLD wIPe r aN D w aS Her SwIT CH
Move the lever to the following positions to operate
the windshield wipers:
01 Mist (MIST) - One sweep operation of the
front
wipers.
02 Intermittent (INT) - Front wipers operate
intermittently. T
he intermittent operation
speed can be adjusted by twisting the time
control
ring
03 .
04 Low (LO) - Front wipers operate at a continuous
low
speed.
05 High (HI) - Front wipers operate at a continuous
high
speed.
06 Pull the lever toward you to activate the
front washer. T
he front wipers will operate
several
times.
REAR WINDSHIELD WIPER AND WASHER
07 Intermittent (INT) - Rear wiper
operates
intermittently.
08 Low (ON) - Rear wiper operates at a continuous
low
speed.
09 Push the lever forward to activate the rear washer.
The rear wiper will operate several times.
For more information, refer to the “Instruments and controls (section 2)” of your Owner’s Manual.
01
02
04
05
MIST
OFF
INT
INT
LO
ON
HI
06
09
07
08
To view detailed instructional videos regarding these and other features,
please go to www.nissanownersinfo.mobi.
FOG LIGHT SWITcH (if so equipped)
NO TE: The headlights must be on and the low beams
selected for the fog lights to operate.
Turn the switch (inside collar) to the position
06
to turn the fog lights on.
Turn the switch (inside collar) to the
OFF position to
turn the fog lights off.
For more information, refer to the “Instruments and controls (section 2)” of your Owner’s Manual.
06
03
1221378_13a_Cube_QRG_092112.indd 1610/2/12 9:26 AM
Page 11 of 20
9
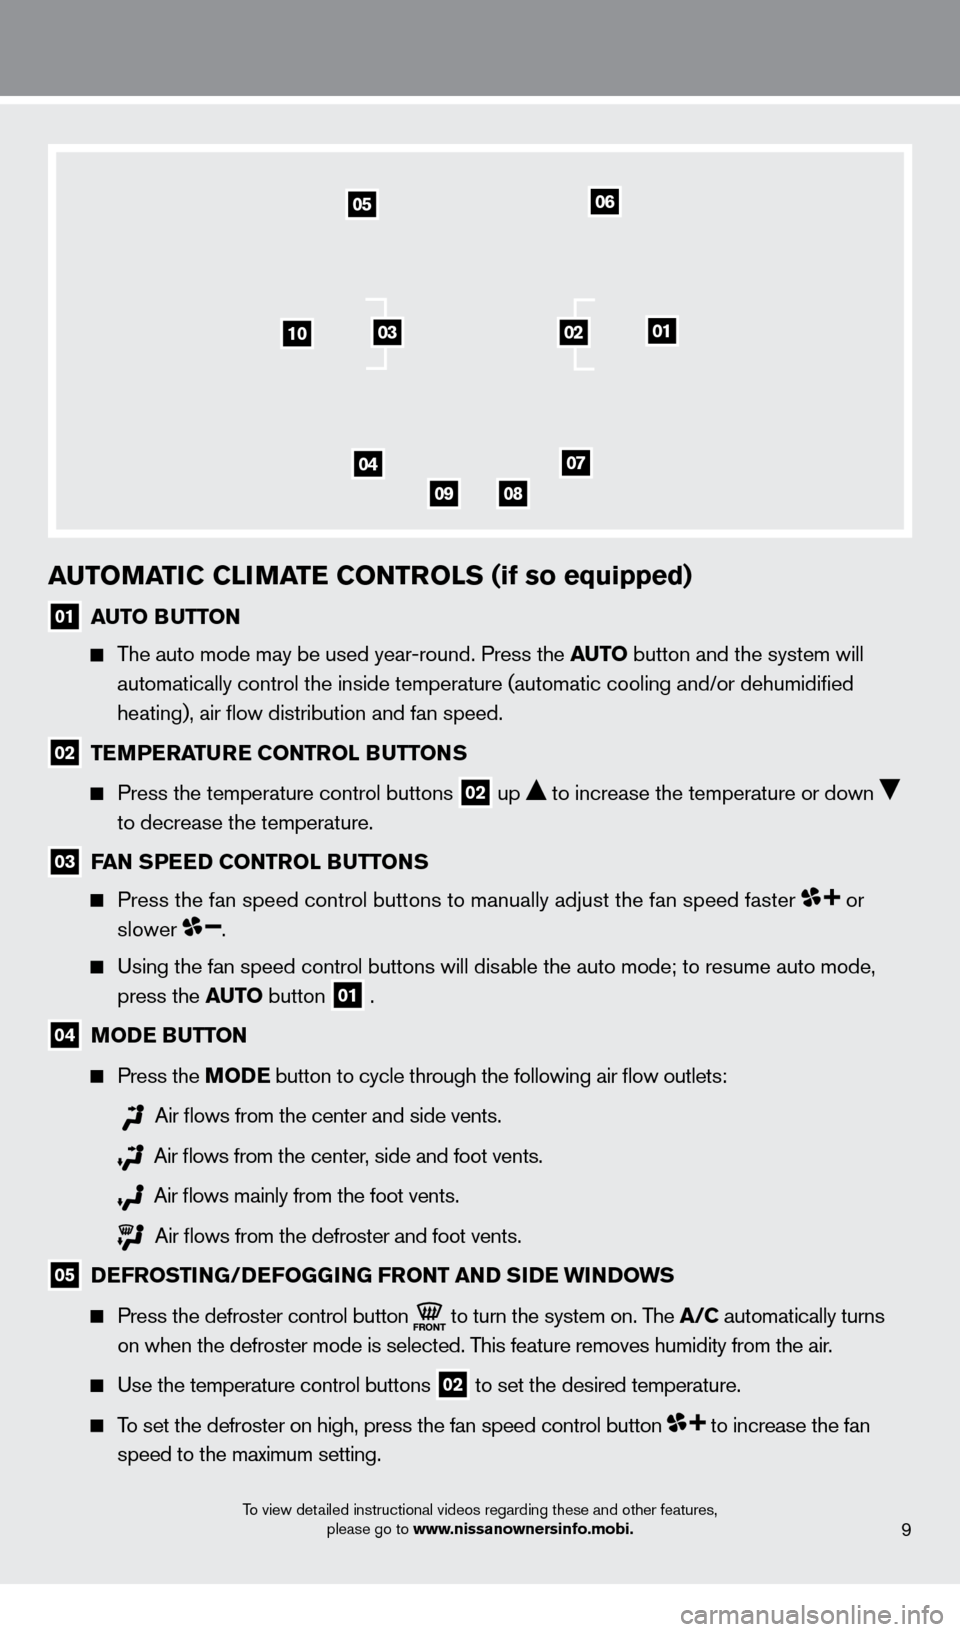
auTOMaTIC CLIMaTe CONTrOLS (if so equipped)
01 auT O BuTT ON
The auto mode may be used year-round. Press the auTO button and the system will
automatically control the inside temperature (automatic cooling and/or \
dehumidified
heating), air flow distribution and fan speed.
02 TeMPe raTu re CONTrOL BuTT ONS
Press the temperature control buttons
02 up to increase the temperature or down
to decrease the temperature.
03 FaN S Pe eD CONTrOL BuTT ONS
Press the fan speed control buttons to manually adjust the fan speed fas\
ter or
slower .
Using the fan speed control buttons will disable the auto mode; to resume auto mode,
press the auTO button
01 .
04 MODe BuTT ON
Press the M
ODe button
to cycle through the following air flow outlets:
Air flows from the center and side vents.
Air flows from the center, side and foot vents.
Air flows mainly from the foot vents.
Air flows from the defroster and foot vents.
05 DeFrOSTING/DeFOG GING FrONT aN D SIDe wI NDOwS
Press the defroster control button
to turn the system on. The a/C automatically turns
on when the defroster mode is selected. This feature removes humidity from the air .
Use the temperature control buttons 02 to set the desired temperature.
To set the defroster on high, press the fan speed control button to increase the fan
speed to the maximum setting.
01
05
10
04
0908
07
06
0302
To view detailed instructional videos regarding these and other features, please go to www.nissanownersinfo.mobi.
1221378_13a_Cube_QRG_092112.indd 1710/2/12 9:26 AM
Page 12 of 20
To view detailed instructional videos regarding these and other features, please go to www.nissanownersinfo.mobi.10
first drive features
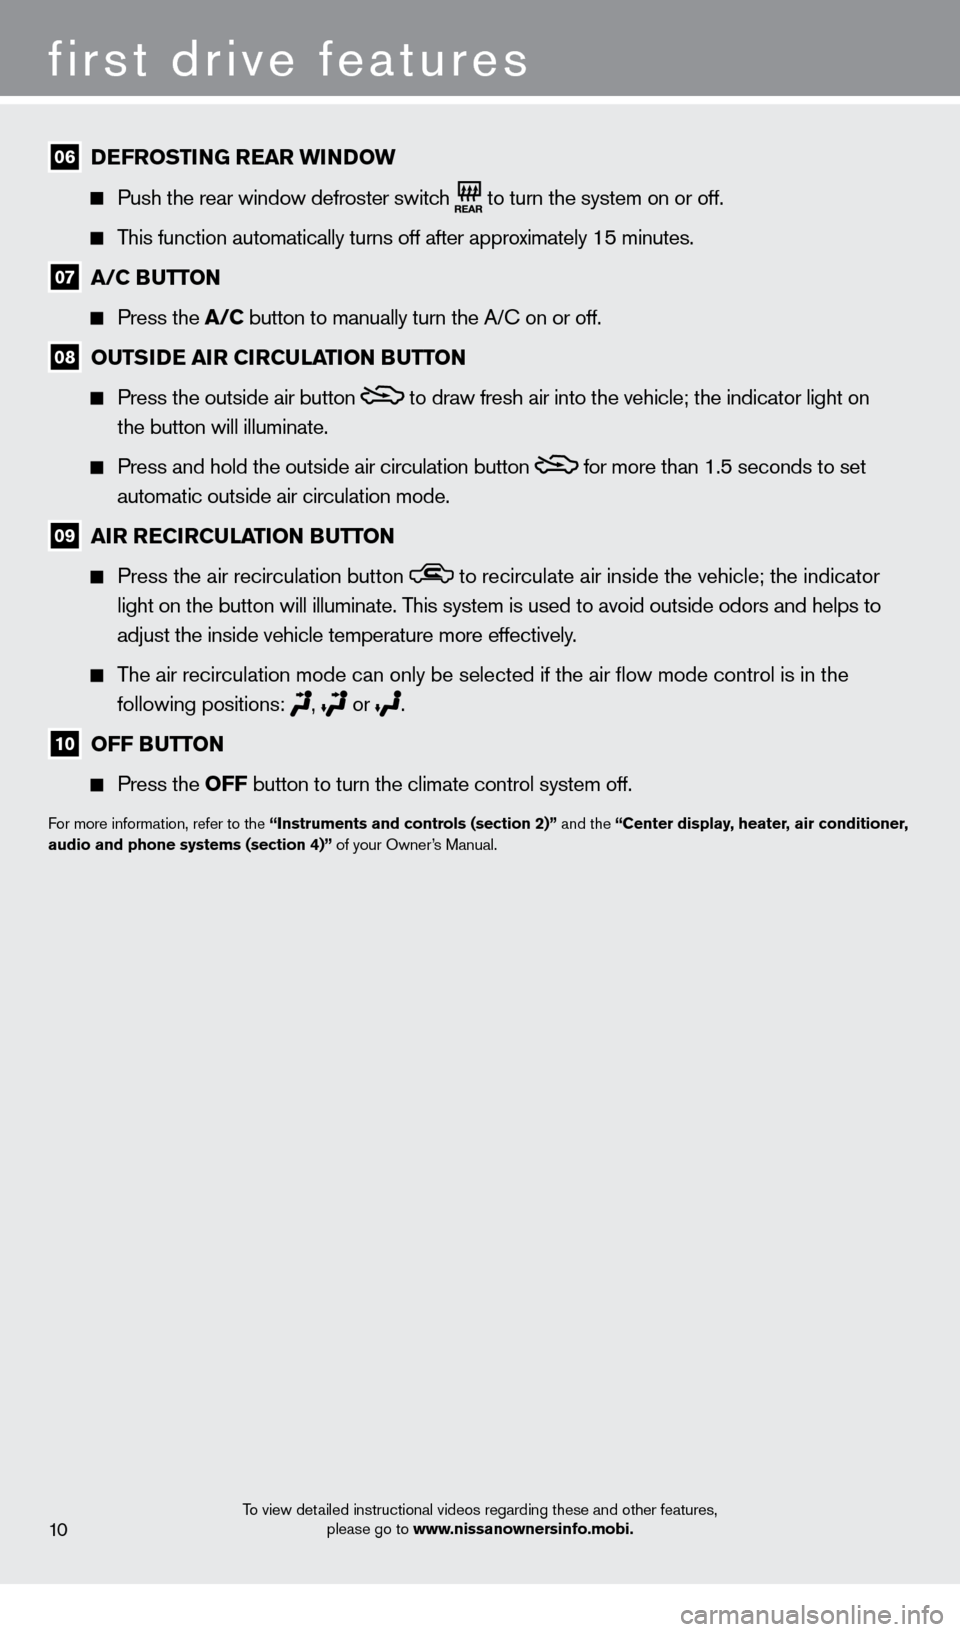
06 DeFrOSTIN G r ear wI NDOw
Push the rear window defroster switch to turn the system on or off.
This function automatically turns off after approximately 15 minutes.
07 a/C BuTT ON
Press the a/C
button to manually turn the A/c on or off.
08 OuTSIDe aIr CIrCuLaTION BuTT ON
Press the outside air button to draw fresh air into the vehicle; the indicator light on
the button will illuminate.
Press and hold the outside air circulation button for more than 1.5 seconds to set
automatic outside air circulation mode.
09 aIr r eCIrCuLaTION BuTT ON
Press the air recirculation button to recirculate air inside the vehicle; the indicator
light on the button will illuminate. This system is used to avoid outside odors and helps to
adjust the inside vehicle temperature more effectively.
The air recirculation mode can only be selected if the air flow mode co\
ntrol is in the
fo
llowing positions:
, or .
10 OFF BuTT ON
Press the OFF
button to turn the climate control system off.
For more information, refer to the “Instruments and controls (section 2)” and the “Center display, heater, air conditioner,
audio and phone systems (section 4)” of your Owner’s Manual.
1221378_13a_Cube_QRG_092112.indd 1810/2/12 9:26 AM
Page 13 of 20
To view detailed instructional videos regarding these and other features, please go to www.nissanownersinfo.mobi.11
0506
03
0102
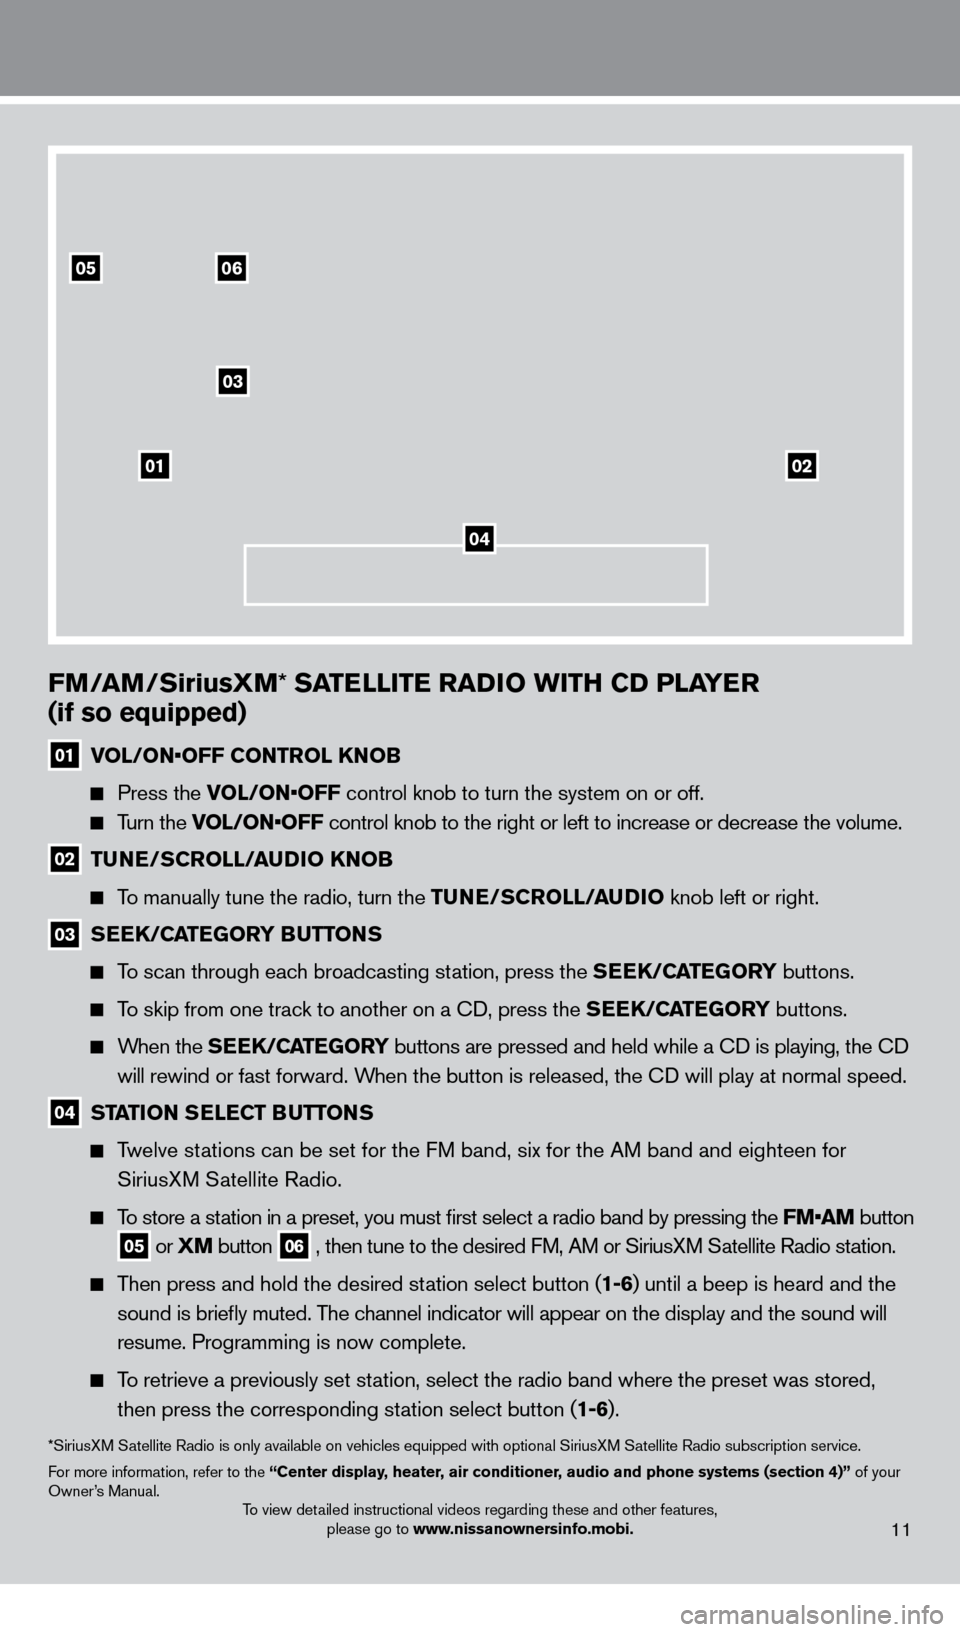
FM/aM/SiriusXM* SaTeLLITe raD IO wITH CD PLaYe r
(if so equipped)
01 VOL/ON•OFF CONTR OL KNOB
Press the V
OL/ON•OFF control knob to turn the system on or off.
Turn the VOL/ON•OFF control knob to the right or left to increase or decrease the volume.
02 TuNe/SCrOLL/auDI O KNOB
To manually tune the radio, turn the TuNe/S
CrOLL/auDI O knob left or right.
03 SeeK/CaTeGOrY BuTT ONS
To scan through each broadcasting station, press the SeeK/CaTeGOrY buttons.
To skip from one track to another on a cD, press the SeeK/CaTeGOrY buttons.
When the SeeK/CaTeGOrY buttons are pressed and held while a cD is playing, the cD
w ill rewind or fast forward. When the button is released, the
cD will play at normal speed.
04 STaTION SeLeCT BuTT ONS
Twelve stations can be set for the FM band, six for the AM band and eighteen for
SiriusX
M Satellite Radio.
To store a station in a preset, you must first select a radio band by pressing the \
FM•AM button
05 or XM button
06 , then tune to the desired FM, AM or SiriusXM Satellite Radio station.
Then press and hold the desired station select button (1-6) until a beep is heard and the
sound is briefly muted. T
he channel indicator will appear on the display and the sound will
resume. Programming is now complete.
To retrieve a previously set station, select the radio band where the preset was stored,
then press the corresponding st ation select button (1-6).
*SiriusXM Satellite Radio is only available on vehicles equipped with optional Siri\
usXM Satellite Radio subscription service.
For more information, refer to the “Center display, heater, air conditioner, audio and phone systems (section 4)” of your
Owner’s Manual.
04
1221378_13a_Cube_QRG_092112.indd 1910/2/12 9:26 AM
Page 14 of 20
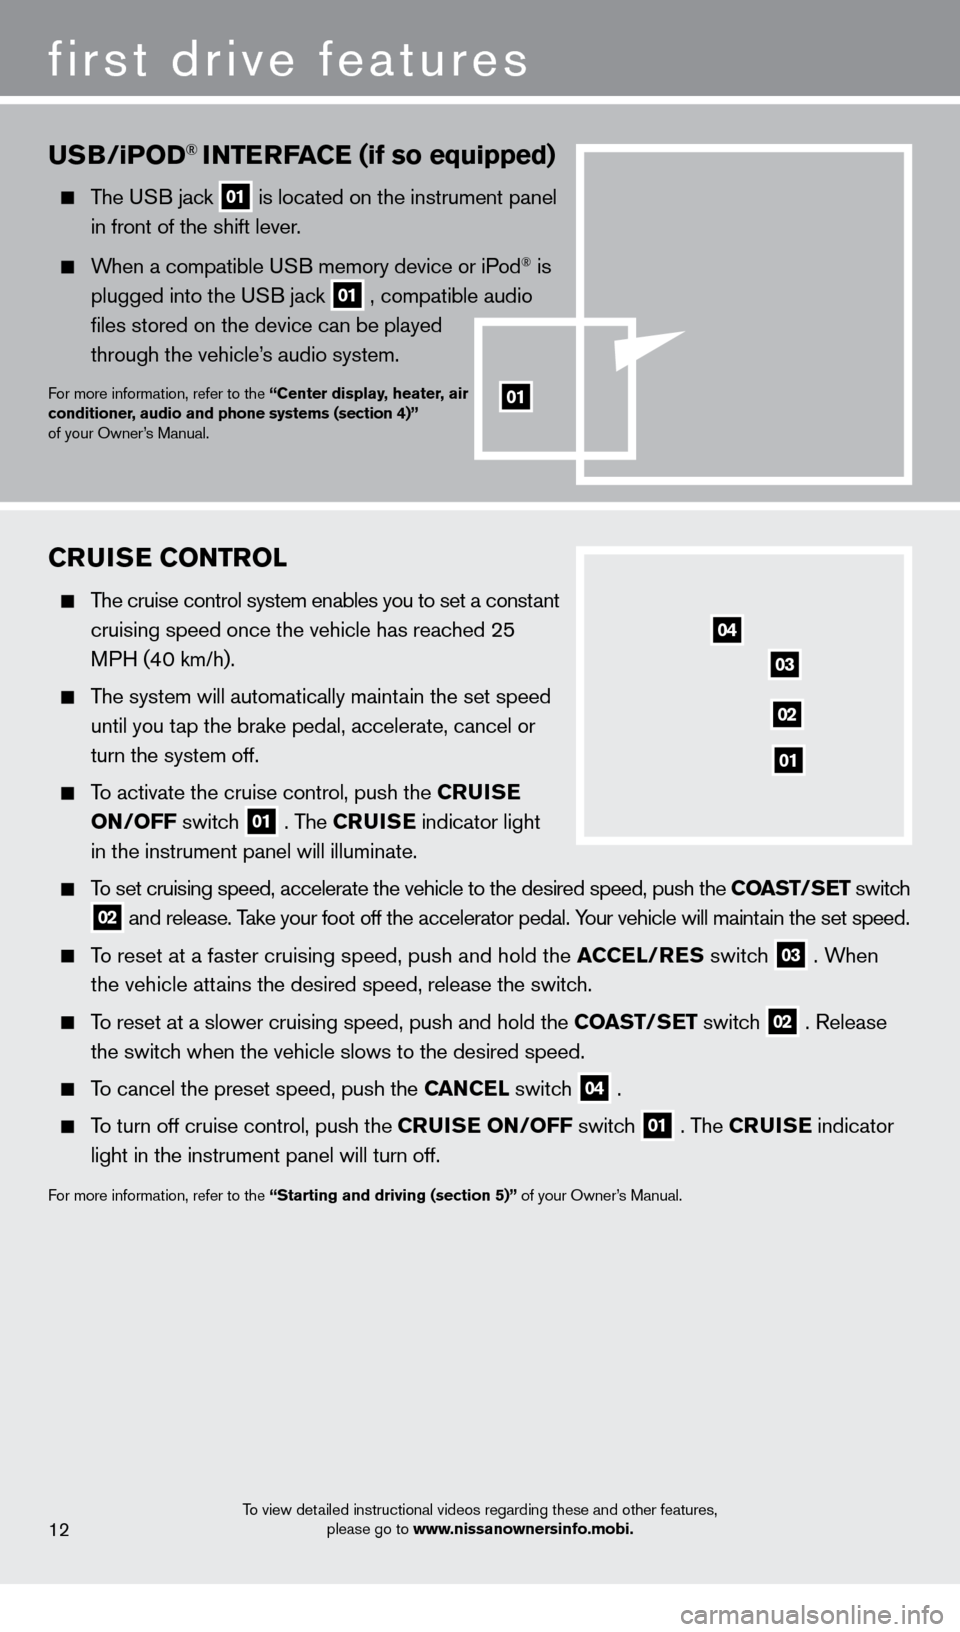
CruISe CONTrOL
The cruise control system enables you to set a constant
cruising speed once the vehicle has reached 25
MPH (40 km/h).
The system will automatically maintain the set speed
until you t ap the brake pedal, accelerate, cancel or
turn the system off.
To activate the cruise control, push the CruISe
ON/OFF switch
01 . The CruISe indicator light
in the instrument panel will illuminate.
To set cruising speed, accelerate the vehicle to the desired speed, push \
the COaST/ SeT switch
02 and release. Take your foot off the accelerator pedal. Your vehicle will maintain the set speed.
To reset at a faster cruising speed, push and hold the aCCeL
/reS switc h
03 . When
the vehicle attains the desired speed, release the switch.
To reset at a slower cruising speed, push and hold the COaST/ SeT switch
02 . Release
the switch when the vehicle slows to the desired speed.
To cancel the preset speed, push the CaN CeL switc h
04 .
To turn off cruise control, push the Cr uISe ON /OFF switch
01 . The CruISe indicator
light in the instrument panel will turn off.
For more information, refer to the “Starting and driving (section 5)” of your Owner’s Manual.
uSB/iPOD® INTerFaCe (if so equipped)
The USB jack 01 is located on the instrument panel in front of the shift lever.
When a compatible USB memory device or iPod® is
plugged into the US
B jack
01 , compatible audio files stored on the device can be played
through the vehicle’s audio system.
For more information, refer to the “Center display, heater, air
conditioner, audio and phone systems (section 4)”
of your Owner’s Manual.
04
03
02
01
To view detailed instructional videos regarding these and other features, please go to www.nissanownersinfo.mobi.12
first drive features
01
1221378_13a_Cube_QRG_092112.indd 2010/2/12 9:26 AM
Page 15 of 20
FueL-FILLer D OOr
To open the fuel-filler door, pull the release
01
located on the driver’
s side instrument panel.
The fuel-filler door is located on the right, rear side of
the vehicle.
For more information, refer to the “Pre-driving checks and adjustments
(section 3)” of your Owner’s Manual.
01
To view detailed instructional videos regarding these and other features,
please go to www.nissanownersinfo.mobi.13
1221378_13a_Cube_QRG_092112.indd 2110/2/12 9:26 AM
Page 16 of 20
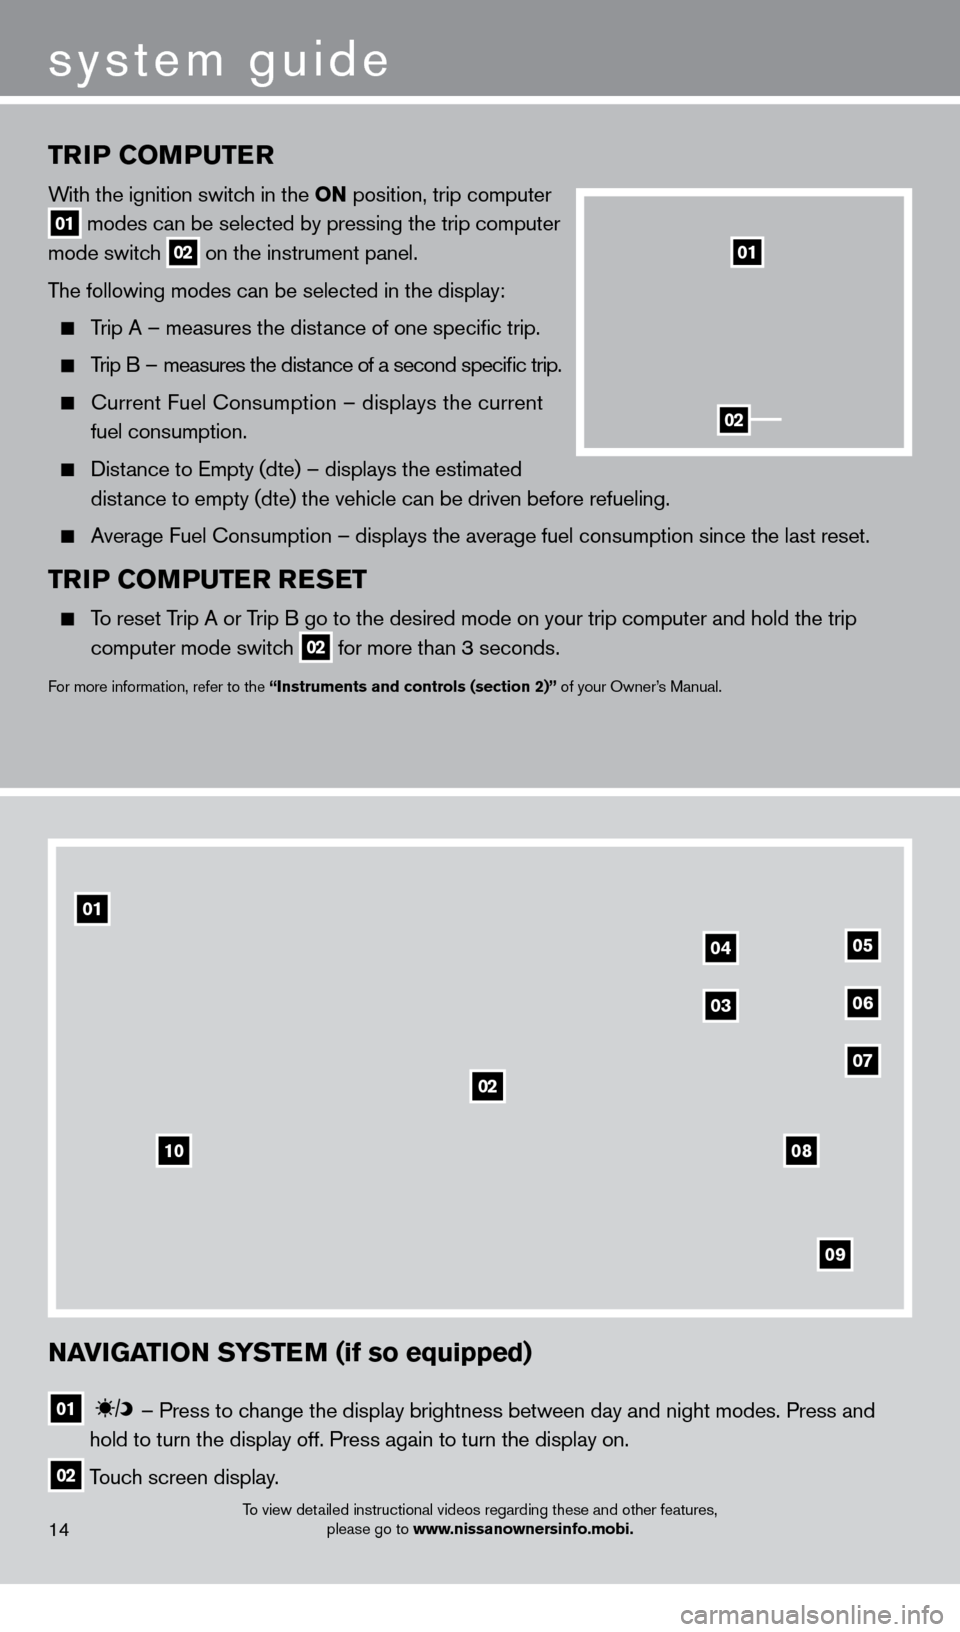
TrIP COMPuTer
With the ignition switch in the ON position, trip computer
01 modes can be selected by pressing the trip computer
mode switch 02 on the instrument panel.
The following modes can be selected in the display:
Trip A – measures the distance of one specific trip.
Trip B – measures the distance of a second specific trip.
current Fuel consumption – displays the current
fuel consumption.
Distance to Empty (dte) – displays the estimated
dist ance to empty (dte) the vehicle can be driven before refueling.
Average Fuel consumption – displays the average fuel consumption since the last res\
et.
TrIP COMPuTer r eSeT
To reset Trip A or Trip B go to the desired mode on your trip computer and hold the trip
computer mode switc
h
02 for more than 3 seconds.
For more information, refer to the “Instruments and controls (section 2)” of your Owner’s Manual.
01
02
To view detailed instructional videos regarding these and other features, please go to www.nissanownersinfo.mobi.14
system guide
NaVIGaTION SYSTeM (if so equipped)
01 –
Press to change the display brightness between day and night modes. Press and
hold to turn the display off. Press again to turn the display on.
02 Touch screen display.
10
02
0405
0306
07
09
08
01
1221378_13a_Cube_QRG_092112.indd 2210/2/12 9:26 AM