Page 17 of 233
Store speed 90Resume speed 92, 97Set speed 92, 96Reduce distance 96Increase distance 906Steering column stalk, leftTurn signals 49High beams, head‐
lamp flasher 49Roadside parking lamps 66Computer 637Instrument cluster 568Steering column stalk, rightWindshield wipers 49Rain sensor 50Clean the windshields and head‐
lamps 51Rear window wiper 51Cleaning rear window 519Steering wheel buttons, rightTelephone 152Confirm the selection 63Move selection up 63Move selection down 63Increase volumeReduce volume10Horn11Adjust the steering wheel 3912Unlock hood 178Seite 13CockpitAt a glance13
Online Edition for Part no. 01 40 2 925 116 - X/13
Page 18 of 233
All around the center console1Headliner 152Hazard warning system 198Intelligent Safety 793Radio 1394Glove compartment 1185Climate control 1046PDC Park Distance Control 98DSC Dynamic Stability Con‐
trol 86Start/stop the engine and switch
the ignition on/off 47Auto Start/Stop function 467Automatic transmission selector lever 52
Manual transmission selector lever 528Parking brake 489Driving Dynamics Control 88Seite 14At a glanceCockpit14
Online Edition for Part no. 01 40 2 925 116 - X/13
Page 19 of 233
All around the headliner1Emergency Request2Indicator lamp, front passenger
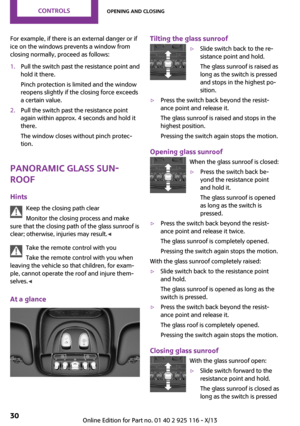
airbag 733Reading lamps 704Ambient light 705Glass sunroof 306Interior lamps 70Seite 15CockpitAt a glance15
Online Edition for Part no. 01 40 2 925 116 - X/13
Page 20 of 233
RadioVehicle equipment
All standard, country-specific and optional
equipment that is offered in the model series is
described in this chapter. Therefore, equipmentis also described that is not available in a vehi‐
cle, e. g., because of the selected optional
equipment or country variant. This also applies
for safety-related functions and systems.
At a glance
1Change waveband2Volume, on/off3Display4Opening the main menu5Menu level back6Selecting menu items▷Turn: highlight the menu item in the
display or adjust the value.▷Press: select the highlighted menu item
or store the setting.7Open the options for the respective menu.8"Telephone": open the menu.9Programmable memory buttons10"Media": open the menu.11"Radio": open the menu.12Change the station or track.Functions
Audio functions and vehicle functions can be
operated, adjusted and displayed on the radio.▷Radio.▷Multimedia.Seite 16At a glanceRadio16
Online Edition for Part no. 01 40 2 925 116 - X/13
Page 21 of 233

▷Telephone▷Vehicle settings.▷Check Control messages.
Menu navigationAll functions of the radio can be called up via
the main menu. Some menus can also be called
up directly via the buttons on the radio.
Selecting menu items
Menu items can be selected if they are lightly
highlighted.
1. Press the button.2.Turn the right-hand knob until the desired
menu item is highlighted, e.g.,"Radio".3.Press the right-hand knob again to confirm
the highlighted menu item.
Representation in the Owner's Manual
In the Owner's Manual, menu items that can be
selected are set in quotation marks, e.g.,
"Radio".
Symbols in the status field
Audio source
SymbolMeaningFM, AMRadio waveband HD radioSATSatellite radio Satellite radio not available Aux In Playback via USB audio interface. Microphone muted Tone output mutedTelephoneSymbolMeaning Missed call Wireless network reception strength
Symbol flashes: network search
Traffic bulletins
SymbolMeaningTPTraffic bulletins switched on Traffic bulletins switched on, no traffic
bulletin stations available. Traffic Jump
Changing settings
To set number values or values on a scale:
1.Select the desired menu item.2.Turn the right-hand knob to set the value.3.Press the right-hand knob to store the
value.
Example: setting the clock
1. Press the button.2. "Settings"3."Time/Date"4."Time:"5.Turn the right-hand knob until the desired
hour is set.6.Press the right-hand knob to store the set‐
ting.7.Turn the right-hand knob to set the mi‐
nutes and press the right-hand knob to
save the setting.Seite 17RadioAt a glance17
Online Edition for Part no. 01 40 2 925 116 - X/13
Page 22 of 233
HANDLE ME.
Online Edition for Part no. 01 40 2 925 116 - X/13
Page 23 of 233
At a glanceControlsDriving tipsEntertainmentCommunicationMobilityReferenceOnline Edition for Part no. 01 40 2 925 116 - X/13
Page 24 of 233

Opening and closingVehicle equipmentAll standard, country-specific and optional
equipment that is offered in the model series is
described in this chapter. Therefore, equipment
is also described that is not available in a vehi‐
cle, e. g., because of the selected optional
equipment or country variant. This also applies
for safety-related functions and systems.
Remote control/key General information
The vehicle is supplied with two remote con‐
trols with integrated keys.
Every remote control contains a replaceable
battery.
Depending on the equipment package and
country-specific variant, the functions of the
keys can be set. Settings, refer to page 26.
For every remote control, personal settings are
stored in the vehicle. Personal Profile, refer to
page 21.
Information on the required maintenance is
stored in the remote controls. Service data in
the remote control, refer to page 184
At a glance1Unlocking2Locking3Unlock the tailgate4Panic mode
Integrated key
Press the button on the remote control, ar‐
row 1, and pull out the key, arrow 2.
The integrated key fits the driver's door lock.
Replacing the battery
1.Take the integrated key out of the remote
control.2.Slide the key into the opening and raise the
cover, arrow.
The battery compartment is accessible.Seite 20ControlsOpening and closing20
Online Edition for Part no. 01 40 2 925 116 - X/13