2013 MERCEDES-BENZ SL-CLASS ROADSTER warning light
[x] Cancel search: warning lightPage 131 of 572
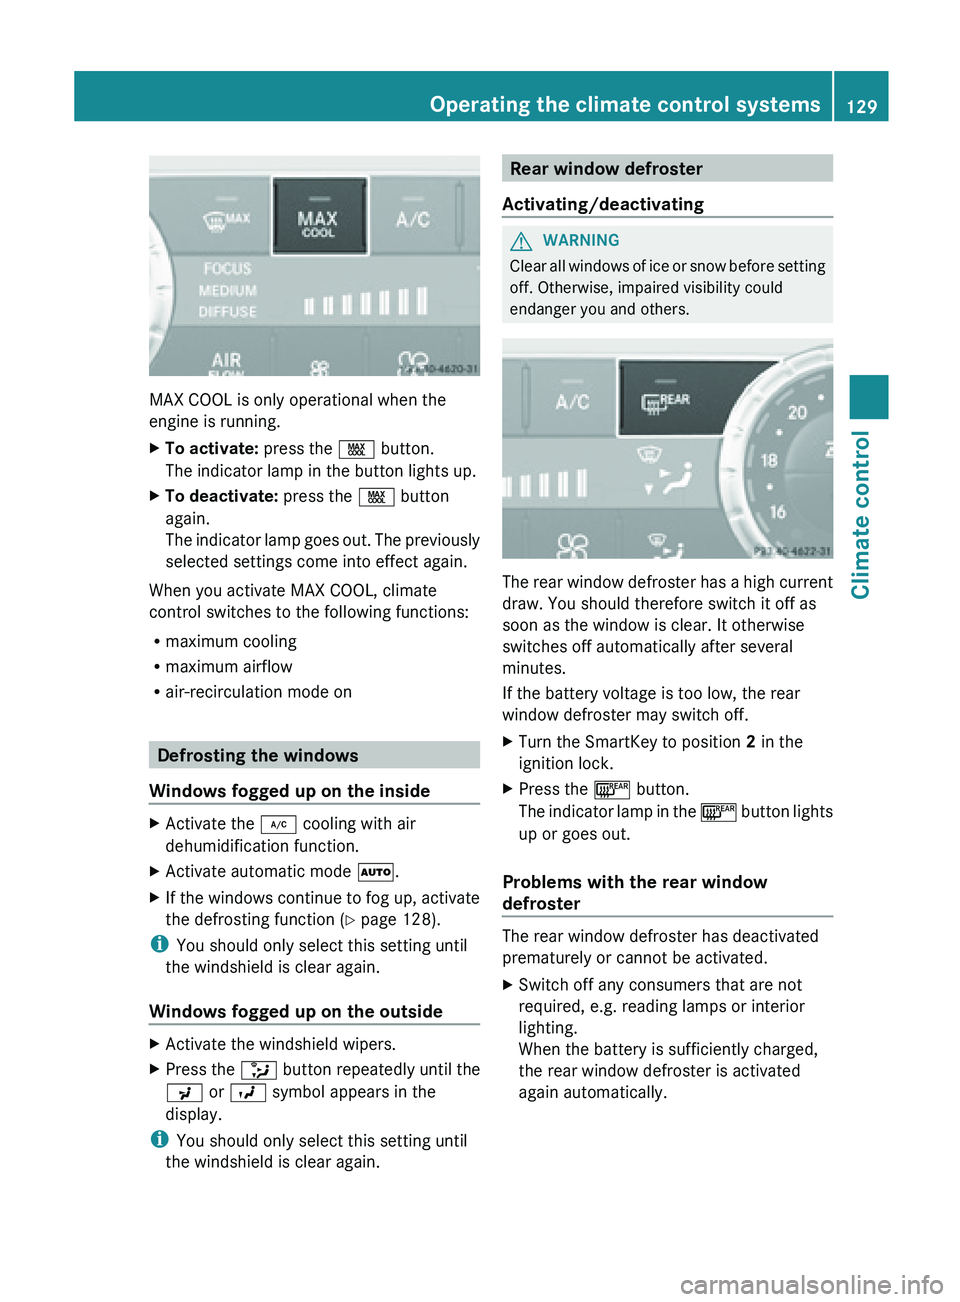
MAX COOL is only operational when the
engine is running.
X
To activate: press the Ù button.
The indicator lamp in the button lights up.
X To deactivate: press the Ù button
again.
The indicator
lamp goes out. The previously
selected settings come into effect again.
When you activate MAX COOL, climate
control switches to the following functions:
R maximum cooling
R maximum airflow
R air-recirculation mode on Defrosting the windows
Windows fogged up on the inside X
Activate the ¿ cooling with air
dehumidification function.
X Activate automatic mode Ã.
X If the windows continue to fog up, activate
the defrosting function (Y
page 128).
i You should only select this setting until
the windshield is clear again.
Windows fogged up on the outside X
Activate the windshield wipers.
X Press the _ button repeatedly until the
P or O symbol appears in the
display.
i You should only select this setting until
the windshield is clear again. Rear window defroster
Activating/deactivating G
WARNING
Clear all windows of ice or snow before setting
off. Otherwise, impaired visibility could
endanger you and others. The rear window defroster has a high current
draw. You should therefore switch it off as
soon as the window is clear. It otherwise
switches off automatically after several
minutes.
If the battery voltage is too low, the rear
window defroster may switch off.
X
Turn the SmartKey to position 2 in the
ignition lock.
X Press the ¤ button.
The indicator
lamp in the ¤ button lights
up or goes out.
Problems with the rear window
defroster The rear window defroster has deactivated
prematurely or cannot be activated.
X
Switch off any consumers that are not
required, e.g. reading lamps or interior
lighting.
When the battery is sufficiently charged,
the rear window defroster is activated
again automatically. Operating the climate control systems
129
Climate control Z
Page 132 of 572
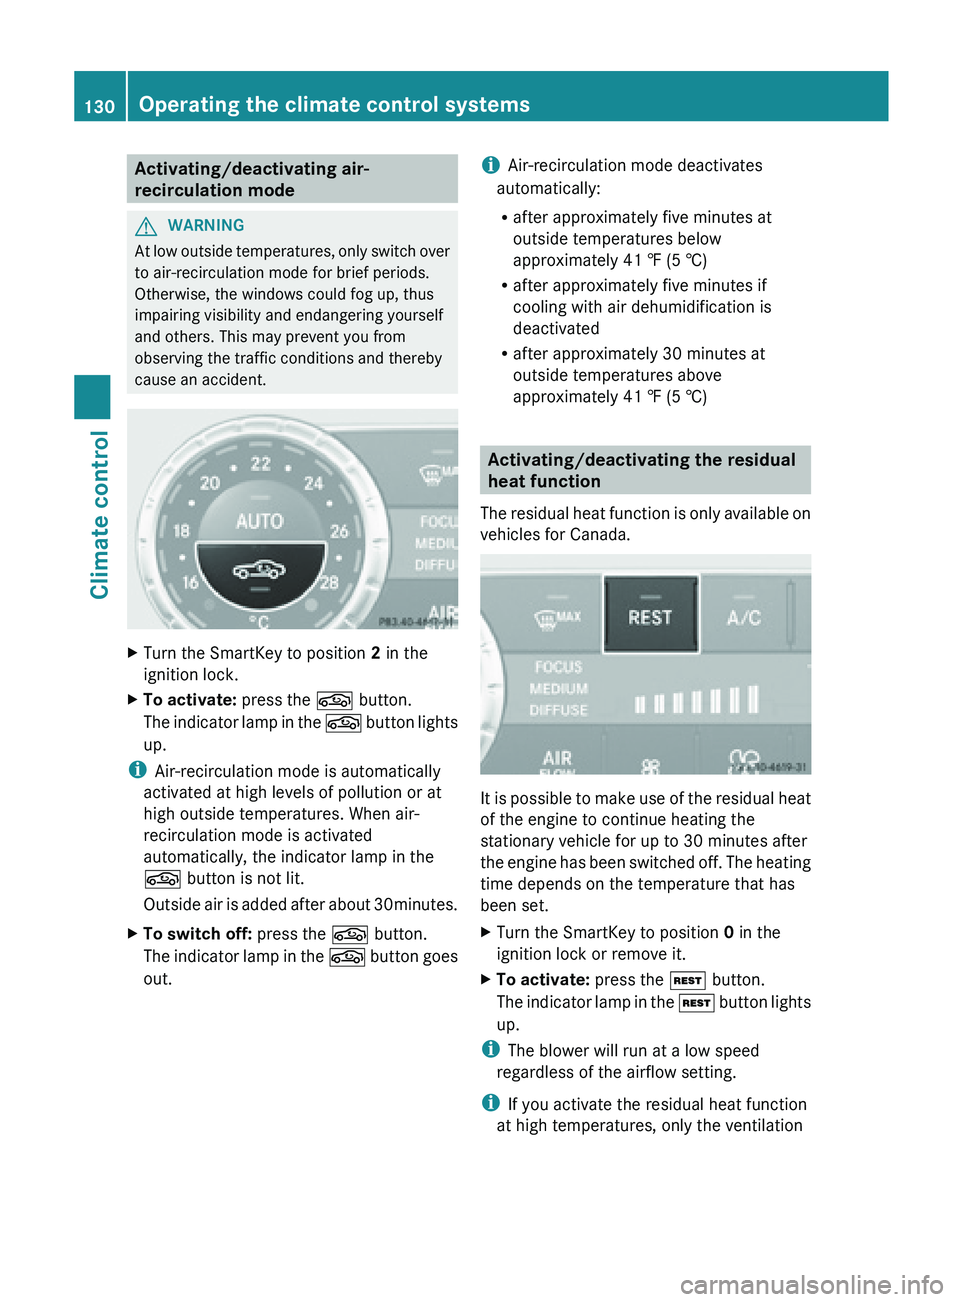
Activating/deactivating air-
recirculation mode
G
WARNING
At low outside temperatures, only switch over
to air-recirculation mode for brief periods.
Otherwise, the windows could fog up, thus
impairing visibility and endangering yourself
and others. This may prevent you from
observing the traffic conditions and thereby
cause an accident. X
Turn the SmartKey to position 2 in the
ignition lock.
X To activate: press the g button.
The indicator
lamp in the g button lights
up.
i Air-recirculation mode is automatically
activated at high levels of pollution or at
high outside temperatures. When air-
recirculation mode is activated
automatically, the indicator lamp in the
g button is not lit.
Outside air
is added after about 30minutes.
X To switch off: press the g button.
The indicator
lamp in the g button goes
out. i
Air-recirculation mode deactivates
automatically:
R after approximately five minutes at
outside temperatures below
approximately 41 ‡ (5 †)
R after approximately five minutes if
cooling with air dehumidification is
deactivated
R after approximately
30 minutes at
outside temperatures above
approximately 41 ‡ (5 †) Activating/deactivating the residual
heat function
The residual
heat function is only available on
vehicles for Canada. It
is possible to make use of the residual heat
of the engine to continue heating the
stationary vehicle for up to 30 minutes after
the engine
has been switched off. The heating
time depends on the temperature that has
been set.
X Turn the SmartKey to position 0 in the
ignition lock or remove it.
X To activate: press the Ì button.
The indicator
lamp in the Ì button lights
up.
i The blower will run at a low speed
regardless of the airflow setting.
i If you activate the residual heat function
at high temperatures, only the ventilation 130
Operating the climate control systems
Climate control
Page 155 of 572

For further information on fuel and fuel quality
(Y page 561).
Refueling
Fuel filler flap :
To open the fuel filler flap
; To insert the fuel filler cap
= Tire pressure table
? Fuel type to be used
The fuel filler flap is unlocked or locked
automatically when you open or close the
vehicle with
the SmartKey or using KEYLESS-
GO.
The position of the fuel filler cap is displayed
8 in the instrument cluster. The arrow
next to the filling pump indicates the side of
the vehicle.
Opening X
Switch off the engine.
X Remove the SmartKey from the ignition
lock.
X KEYLESS-GO: open the driver’s door.
This corresponds to SmartKey position 0,
"key removed".
The driver’s door can be closed again.
X Press the fuel filler flap in the direction of
arrow :.
The fuel filler flap opens slightly.
X Open the fuel filler flap fully.
X Turn the fuel filler flap counter-clockwise
and remove it. X
Insert the fuel filler cap into the holder
bracket on the inside of filler flap ;.
X Completely insert the filler neck of the fuel
pump nozzle into the tank and refuel.
X Only fill the tank until the pump nozzle
switches off.
i Do not add any more fuel after the pump
stops filling for the first time. Otherwise,
fuel could leak out.
Closing X
Place fuel filler cap on the fuel filler neck
and turn clockwise until it engages.
X Close the fuel filler flap.
i Close the
fuel filler flap before locking the
vehicle.
i If you drive with the fuel filler cap open,
the reserve fuel warning lamp flashes. In
addition, the ; engine diagnostics
warning lamp may light up. A message
appears in the multifunction display
(Y page 240).
For further information on warning and
indicator lamps in the instrument cluster,
see ( Y page 263). Refueling
153
Driving and parking Z
Page 157 of 572
Vehicles with automatic transmission
X
Vehicles with a SmartKey: move the
transmission to position P.
X Turn the SmartKey to position 0 in the
ignition lock and remove it.
The immobilizer is activated.
X Vehicles with KEYLESS-GO: press the
Start/Stop button (
Y page 135).
The engine stops and all the indicator
lamps in the instrument cluster go out.
When the driver's door is closed, this
corresponds to key position 1. When the
driver's door is open, this corresponds to
key position 0(Y page 135).
If you try to switch off the engine when the
transmission is not in position P, a message
appears in
the multifunction display. A signal
sounds.
i The engine can be turned off while the
vehicle is in motion by pressing and holding
the Start/Stop button for three seconds.
This function operates independently from
the ECO start/stop automatic engine
switch-off function. Electric parking brake
General notes G
WARNING
When leaving the vehicle, always remove the
SmartKey from
the starter switch, take it with
you, and lock the vehicle. Do not leave
children unattended in the vehicle, or with
access to an unlocked vehicle. Children could
release the parking brake and/or shift the
automatic transmission out of park position
P, either of which could result in an accident
and/or serious personal injury.
i The electric parking brake performs a
function test at regular intervals while the
engine is switched off. The sounds that can
be heard while this is occurring are normal. Engaging and releasing manually
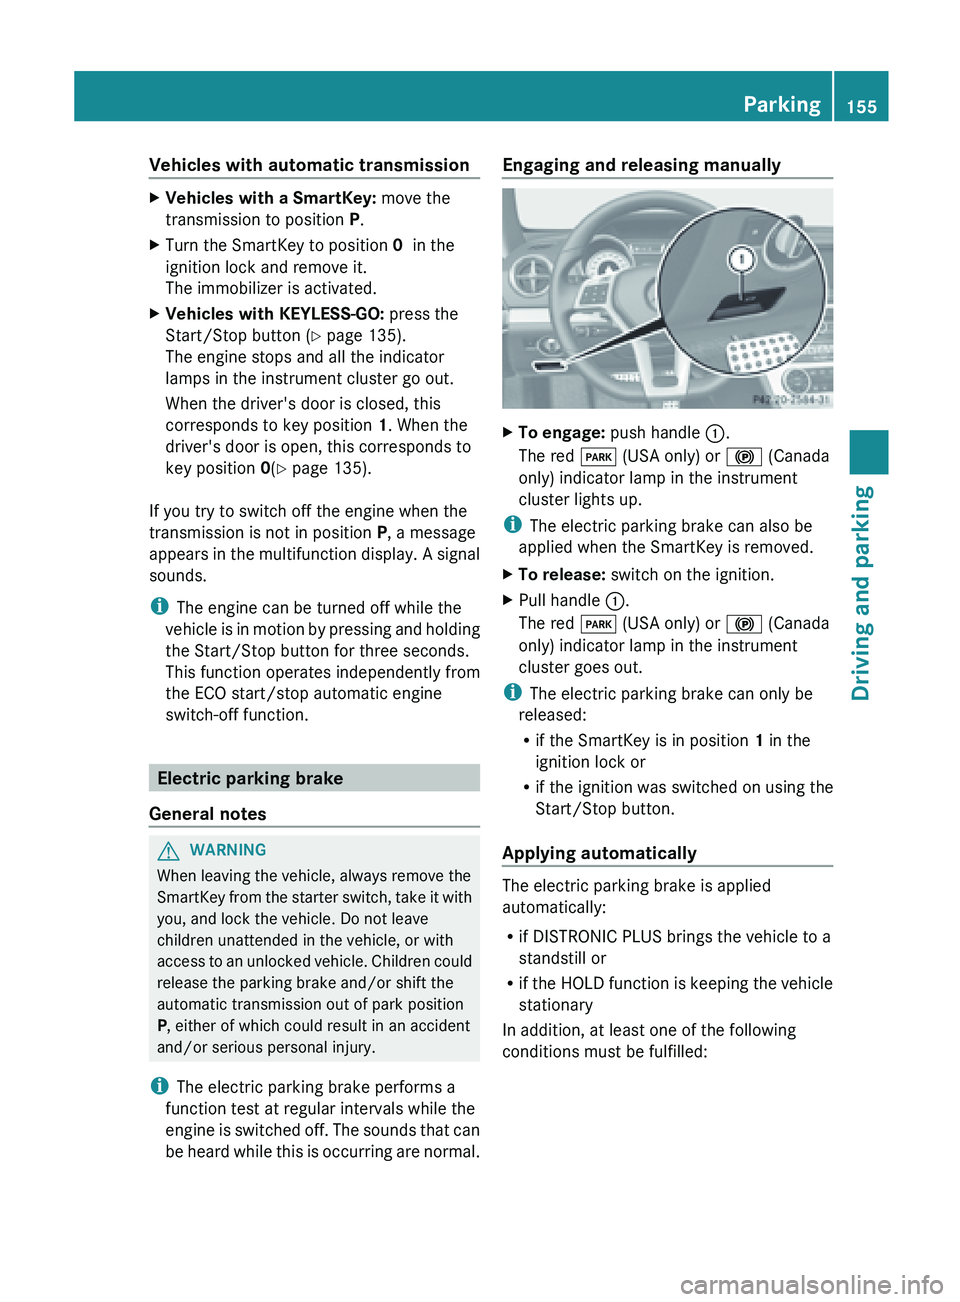
X
To engage: push handle :.
The red F (USA only) or ! (Canada
only) indicator lamp in the instrument
cluster lights up.
i The electric parking brake can also be
applied when the SmartKey is removed.
X To release: switch on the ignition.
X Pull handle :.
The red F (USA only) or ! (Canada
only) indicator lamp in the instrument
cluster goes out.
i The electric parking brake can only be
released:
R if the SmartKey is in position 1 in the
ignition lock or
R if the ignition was switched on using the
Start/Stop button.
Applying automatically The electric parking brake is applied
automatically:
R
if DISTRONIC PLUS brings the vehicle to a
standstill or
R if the
HOLD function is keeping the vehicle
stationary
In addition, at least one of the following
conditions must be fulfilled: Parking
155
Driving and parking Z
Page 158 of 572
R
the engine is switched off, unless it is
automatically switched off by the ECO
start/stop function.
R the driver's seat belt is not inserted in the
belt buckle and the driver's door is open.
R the vehicle is stationary for a lengthy
period.
The red F (USA only) or ! (Canada
only) indicator
lamp in the instrument cluster
lights up.
Releasing automatically The electric parking brake is released
automatically when all of the following
conditions are fulfilled:
R
the engine is running.
R the transmission is in position D or R.
R the driver's seat belt is fastened.
R you depress the accelerator pedal.
If the transmission is in position R, the trunk
lid must be closed.
For the parking brake to be released
automatically if
your seat belt is not fastened,
the following conditions must be fulfilled:
R the driver's door is closed.
R you have shifted out of P or you have
previously driven faster than 2 mph
(3 km/h).
Emergency braking The vehicle can also be braked during an
emergency by using the electric parking
brake.
X
While driving, push handle : of
the electric
parking brake.
i The vehicle is braked for as long as the
handle of the electric parking brake is
pressed. The longer the electric parking
brake handle
is depressed, the greater the
braking force. During braking:
R
a warning tone sounds.
R the Please Release Parking Brake
message appears.
R the red F (USA only) or ! (Canada
only) indicator lamp in the instrument
cluster flashes.
When the vehicle has been braked to a
standstill, the electric parking brake is
engaged. Parking the vehicle for a long period
X Connect a trickle charger.
If you leave the vehicle parked up for longer
than four
weeks, the battery may be damaged
by exhaustive discharging.
i You can obtain information about trickle
chargers from a qualified specialist
workshop.
If you leave the vehicle parked for longer than
six weeks, the vehicle may suffer damage as
a result of lack of use. Consult a qualified
specialist workshop. Driving tips
General notes
Important safety notes G
WARNING
Always remember that you must concentrate
primarily on driving the vehicle. The driver's
concentration must always be directed
primarily at road traffic. For your own safety
and that of others, we recommend that you
stop the vehicle at a safe place and in
accordance with
the traffic conditions before
making or accepting a phone call.
Comply with all legal requirements if you use
the telephone while driving. Use the hands-
free system and only use the telephone when
road, weather and traffic conditions permit. In 156
Driving tips
Driving and parking
Page 160 of 572

Exhaust check
G
WARNING
Inhalation of exhaust gas is hazardous to your
health. All exhaust gas contains carbon
monoxide (CO), and inhaling it can cause
unconsciousness and possible death.
Do not
run the engine in confined areas (such
as a garage) which are not properly ventilated.
If you think that exhaust gas fumes are
entering the vehicle while driving, have the
cause determined and corrected
immediately. If you must drive under these
conditions, drive only with at least one
window fully open at all times.
Certain engine systems are designed to keep
the level of poisonous components in exhaust
fumes within legal limits.
These systems only work at peak efficiency if
they are serviced exactly in accordance with
the manufacturer's specifications. All work
on the engine must be carried out by qualified
and authorized Mercedes-Benz technicians.
The engine settings must not be changed
under any circumstances. Furthermore, all
specific service work must be carried out at
regular intervals and in accordance with the
Mercedes-Benz service requirements. Details
can be found in the Maintenance Booklet. Brakes
Important safety notes G
WARNING
On slippery road surfaces, never downshift in
order to obtain braking action. This could
result in
drive wheel slip and reduced vehicle
control. Your vehicle's ABS will not prevent
this type of loss of control. G
WARNING
Make sure that you do not endanger other
road users when you apply the brakes. Downhill gradients !
On long, steep gradients, you must
reduce the load on the brakes. In order to
use engine
braking effect, restrict the shift
range in good time. This helps you to avoid
overheating the brakes and wearing them
out excessively.
When making use of the engine braking
effect, it is possible that a drive wheel may
not turn for some time, e.g. in the case of
suddenly changing or slippery road surface
conditions. This could cause damage to the
drive train. This type of damage is not
covered by the Mercedes-Benz warranty.
Heavy and light loads G
WARNING
Depressing the brake pedal constantly results
in excessive
and premature wear to the brake
pads.
It may also cause the brakes to overheat,
seriously impairing their effectiveness. It may
then not be possible to stop the vehicle in
sufficient time to avoid an accident.
If the brakes have been subjected to a heavy
load, do not stop the vehicle immediately, but
drive on for a short while. This allows the
airflow to cool the brakes more quickly.
Wet roads G
WARNING
After driving in heavy rain for some time
without applying
the brakes or through water
deep enough to wet brake components, the
first braking action may be somewhat
reduced. You have to depress the brake pedal
more firmly. Maintain a safe distance from
vehicles in front.
After driving on a wet road or having the
vehicle washed, brake firmly while paying
attention to the traffic conditions. This will
warm up the brake discs, thereby drying them 158
Driving tips
Driving and parking
Page 161 of 572
more quickly and protecting them against
corrosion.
Limited braking performance on salt-
treated roads
G
WARNING
The layer of salt on the brake discs and the
brake pads/linings may cause a delay in the
braking effect, resulting in a significantly
longer braking distance, which could lead to
an accident.
To avoid this danger, you should:
R occasionally brake carefully, without
putting other road users at risk, when you
are driving on salted roads. This helps to
remove any salt that may have started to
build up on the brake discs and the brake
pads/linings.
R maintain a greater distance to the vehicle
ahead and drive with particular care.
R carefully apply the brakes at the end of a
trip and immediately after commencing a
new trip,
so that salt residues are removed
from the brake discs.
High-performance brake system for
AMG vehicles G
WARNING
New vehicle brake pads and discs, and
replacement brake pads and discs may take
several hundred miles of driving until they
provide optimum
braking efficiency. Until that
time, you may need to use increased brake
pedal pressure while braking. Please be aware
of this and adjust your driving and braking
accordingly during this break-in period.
Excessive high-demand braking will cause
correspondingly high brake wear. Please be
attentive to the brake warning lamp in the
instrument cluster and brake condition
messages in the multifunction display.
Especially for high performance driving, it is
important to maintain and have the brake
system checked regularly. The AMG brake systems are designed for
heavy loads. This may lead to noise when
braking. This will depend on:
R
speed
R braking force
R ambient conditions, e.g. temperature and
humidity
The wear of individual components of the
brake system,
such as the brake pads/linings
or brake discs, depends on the individual
driving style and operating conditions.
For this reason, it is impossible to state a
mileage that will be valid under all
circumstances. An aggressive driving style
will lead to high wear. You can obtain more
information on this from a qualified specialist
workshop.
Servicing the brakes G
WARNING
If brake pads or brake fluid other than those
recommended are used, the braking
properties of the vehicle can be degraded to
an extent that safe braking is substantially
impaired. This could result in an accident. G
WARNING
Make sure that you do not endanger other
road users when you apply the brakes.
! If the
brake warning lamp lights up in the
instrument cluster and you hear a warning
tone even though the parking brake has
been released, the brake fluid level may be
too low. Observe additional warning
messages in the multifunction display.
The brake fluid level may be too low due to
brake pad wear or leaking brake lines.
Have the brake system checked
immediately. This work should be carried
out at a qualified specialist workshop. Driving tips
159
Driving and parking Z
Page 163 of 572

X
Hold test gauge A vertically on brake
disc : and slide measuring pin ; onto
brake disc :.
X Check which color field ? the arrow on
measuring pin ; is pointing to.
Green: the brake pad/lining thickness is
sufficient.
Red: the brake pad/lining thickness is not
sufficient. Have the brake pads/lining
checked at
a qualified specialist workshop.
i To avoid an inaccurate measurement:
R make sure you position the wheels
suitably
R do not
put the measuring pin on a recess
in the brake disc Driving on wet roads
Hydroplaning If water has accumulated to a certain depth
on the road surface, there is a danger of
hydroplaning occurring, even if:
R
you drive at low speeds.
R the tires have adequate tread depth.
For this reason, in the event of heavy rain or
in conditions in which hydroplaning can
occur, you must drive in the following
manner:
R lower your speed.
R avoid ruts.
R brake carefully.
Driving on flooded roads !
Do not drive through flooded areas.
Check the
depth of any water before driving
through it. Drive slowly through standing
water. Otherwise, water may enter the
vehicle interior or the engine compartment.
This can damage the electronic
components in the engine or the automatic
transmission. Water can also be drawn in
by the engine's air suction nozzles and this
can cause engine damage. Winter driving
Important safety notes G
WARNING
If the vehicle becomes trapped in snow,
ensure that snow is kept away from the
exhaust pipe and from around the vehicle as
long as the engine is running. Otherwise,
poisonous carbon monoxide (CO) may enter
the vehicle,
resulting in loss of consciousness
and even death.
To assure sufficient fresh air ventilation, open
a window slightly on the side of the vehicle
not facing the wind.
Have your vehicle winterproofed at a qualified
specialist workshop at the onset of winter.
Observe the notes in the "Winter operation"
section ( Y page 528).
Driving with summer tires Observe the notes in the "Winter operation"
section (
Y page 528).
Slippery road surfaces G
WARNING
The outside temperature indicator is not
designed to serve as an ice-warning device
and is therefore unsuitable for that purpose.
Indicated temperatures just above the
freezing point
do not guarantee that the road
surface is free of ice. The road may still be icy,
especially in wooded areas or on bridges. G
WARNING
On slippery road surfaces, never downshift in
order to obtain braking action. This could
result in
drive wheel slip and reduced vehicle
control. Your vehicle's ABS will not prevent
this type of loss of control. G
WARNING
Make sure that you do not endanger other
road users when you apply the brakes. Driving tips
161
Driving and parking Z