2013 MERCEDES-BENZ SL-CLASS ROADSTER transmission
[x] Cancel search: transmissionPage 294 of 572

X
Press W.
X Select Settings by turning cVd the
COMAND controller and press W to
confirm.
X Select Voice Control and press W to
confirm.
X Select Help Window and press W to
confirm.
You have switched the help window on
O or off ª.
Individualization Using individualization, you can fine-tune the
Voice Control System to your own voice and
thus improve voice recognition; see the
separate operating instructions.
Bluetooth
®
settings
General information about Bluetooth ®Bluetooth
®
-capable devices, e.g. mobile
phones, have
to comply with a certain profile
in order to be connected to COMAND. Every
Bluetooth ®
device has its own specific
Bluetooth ®
name.
Bluetooth ®
technology is the standard for
short-range wireless data transmission of up
to approximately 10 meters. Bluetooth ®
allows, for example, the exchange of vCards. Bluetooth
®
is a registered trademark of
Bluetooth Special Interest Group (SIG) Inc.
Activating/deactivating Bluetooth ® X
Press W.
The system menu appears.
X Select Settings by turning cVd the
COMAND controller and press W to
confirm.
X Select Activate Bluetooth and press
W to confirm.
This switches Bluetooth ®
on O or off ª. Setting the system language
This function allows you to determine the
language for the menu displays and the
navigation announcements. The selected
language affects the characters available for
entry.
The navigation announcements are not
available in
all languages. If a language is not
available, the navigation announcements will
be in English.
When you set the system language, the
language of the Voice Control System will
change accordingly. If the selected language
is not supported by the Voice Control System,
English will be selected.
X Press the W button.
X Select Settings by turning cVd the
COMAND controller and press W to
confirm.
X Select Language and press W to confirm.
The list of languages appears. The # dot
indicates the current setting. 292
System settings
COMAND
Page 366 of 572
from the Bluetooth
®
phone must have been
completed. The menu item is otherwise
grayed out. Further information on SMS
(Y page 375).
If you have an unread text message, the 1
mail symbol is displayed. The symbol
disappears once you have read the text
message. The ú mail symbol is displayed
as soon as the text message memory is full.
The symbol disappears once you delete at
least one text message. Reception and transmission volume
Once the
mobile phone has been authorized,
you can optimize the transmission and
reception volume settings. Find out more
about the optimum settings for your mobile
phone online at
http://www.mbusa-mobile.com.
Alternatively, call the Mercedes-Benz
Customer Assistance Center at
1-800-FOR-MERCedes(1-800-367-6372)
(USA) or Customer Relations at
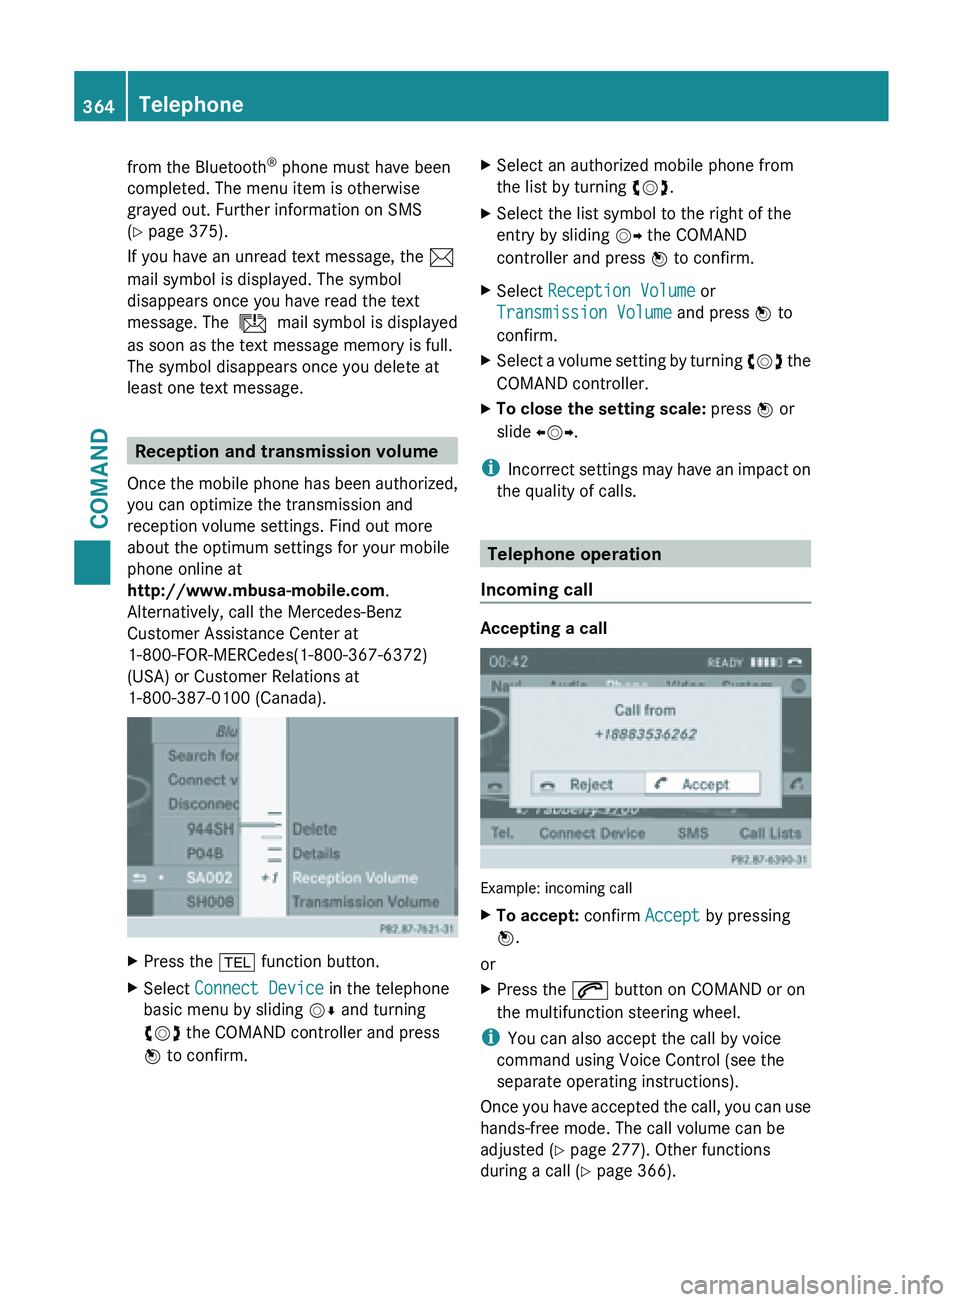
1-800-387-0100 (Canada). X
Press the % function button.
X Select Connect Device in the telephone
basic menu by sliding VÆ and turning
cVd the COMAND controller and press
W to confirm. X
Select an authorized mobile phone from
the list by turning cVd.
X Select the list symbol to the right of the
entry by sliding VY the COMAND
controller and press W to confirm.
X Select Reception Volume or
Transmission Volume and press W to
confirm.
X Select a volume setting by turning cVd the
COMAND controller.
X To close the setting scale: press
W or
slide XVY.
i Incorrect settings
may have an impact on
the quality of calls. Telephone operation
Incoming call Accepting a call
Example: incoming call
X
To accept: confirm Accept by pressing
W.
or
X Press the 6 button on COMAND or on
the multifunction steering wheel.
i You can also accept the call by voice
command using Voice Control (see the
separate operating instructions).
Once you
have accepted the call, you can use
hands-free mode. The call volume can be
adjusted ( Y page 277). Other functions
during a call ( Y page 366).364
Telephone
COMAND
Page 414 of 572
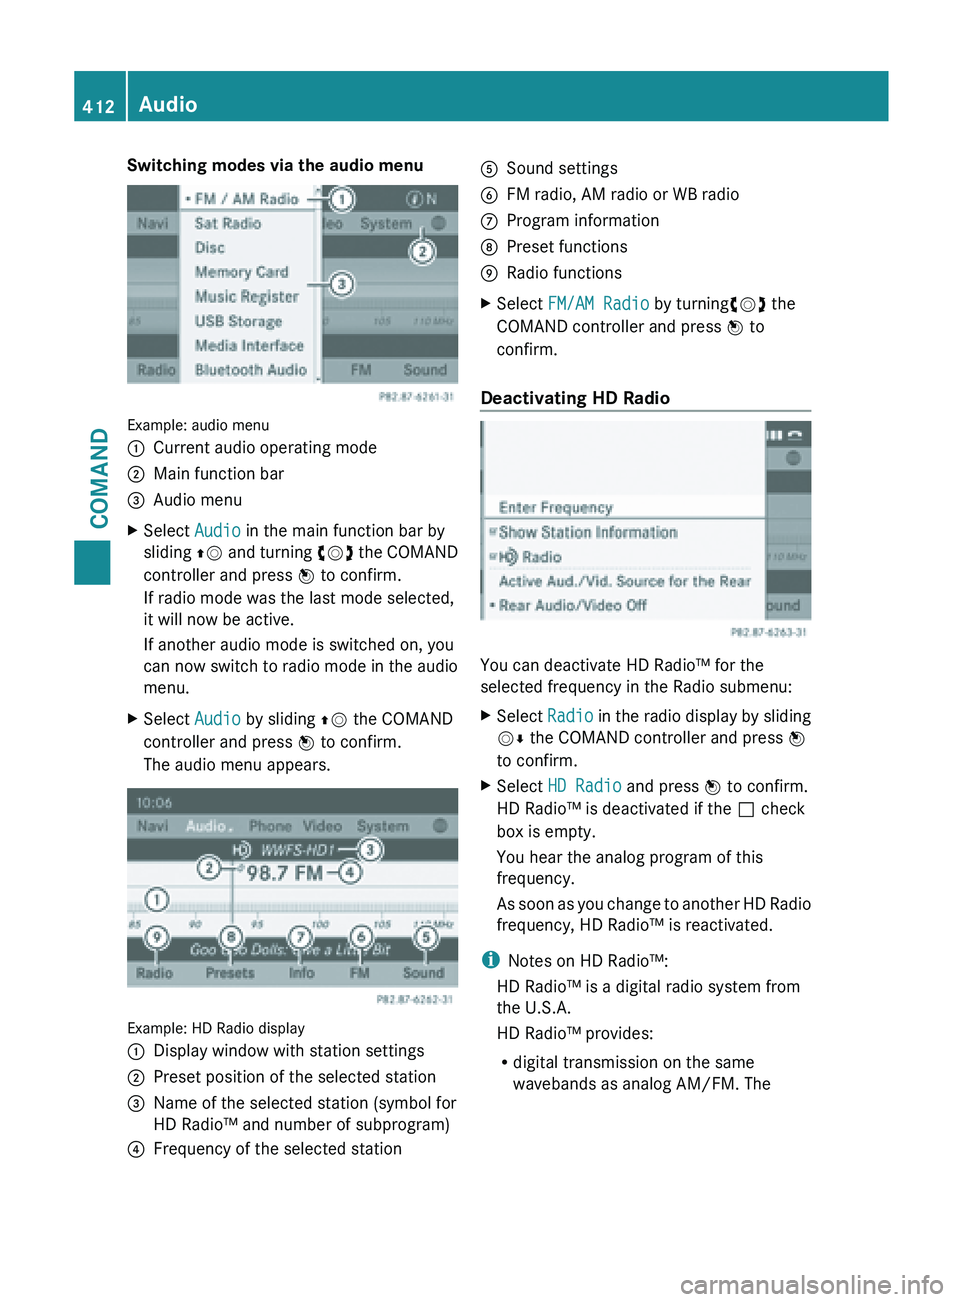
Switching modes via the audio menu
Example: audio menu
:
Current audio operating mode
; Main function bar
= Audio menu
X Select Audio in the main function bar by
sliding ZV and
turning cVd the COMAND
controller and press W to confirm.
If radio mode was the last mode selected,
it will now be active.
If another audio mode is switched on, you
can now switch to radio mode in the audio
menu.
X Select Audio by sliding ZV the COMAND
controller and press W to confirm.
The audio menu appears. Example: HD Radio display
:
Display window with station settings
; Preset position of the selected station
= Name of the selected station (symbol for
HD Radio™ and number of subprogram)
? Frequency of the selected station A
Sound settings
B FM radio, AM radio or WB radio
C Program information
D Preset functions
E Radio functions
X Select FM/AM Radio by turningcVd the
COMAND controller and press W to
confirm.
Deactivating HD Radio You can deactivate HD Radio™ for the
selected frequency in the Radio submenu:
X
Select Radio in
the radio display by sliding
VÆ the COMAND controller and press W
to confirm.
X Select HD Radio and press W to confirm.
HD Radio™ is deactivated if the ª check
box is empty.
You hear the analog program of this
frequency.
As soon
as you change to another HD Radio
frequency, HD Radio™ is reactivated.
i Notes on HD Radio™:
HD Radio™ is a digital radio system from
the U.S.A.
HD Radio™ provides:
R digital transmission on the same
wavebands as analog AM/FM. The412
Audio
COMAND
Page 442 of 572
The Bluetooth
®
audio device must support
the A2DP and AVRCP Bluetooth ®
audio
profiles.
R Bluetooth ®
visibility
Certain Bluetooth ®
audio devices do not
just require activation of the Bluetooth ®
function. In addition, your device must be
made "visible" to other devices.
R Bluetooth ®
device name
This device name is predetermined but can
usually be changed. To make a clear
selection of the Bluetooth ®
device
possible, Mercedes-Benz recommends
that you customize the device name.
i A2DP ( Advanced Audio Distribution
Profile): Bluetooth ®
audio profile for audio
data transmission
AVRCP ( Audio Video Remote Control
Profile): Bluetooth ®
audio profile for audio
data playback
i Not all Bluetooth ®
audio devices available
on the market are equally suitable. To
obtain more information about suitable
Bluetooth ®
audio devices and about
connecting Bluetooth ®
audio devices to
COMAND, visit
http://www.mbusa-mobile.com (USA).
Alternatively, call the Mercedes-Benz
Customer Assistance Center at
1-800-FOR-MERCedes(1-800-367-6372)
(USA) or Customer Relations at
1-800-387-0100 (Canada).
X Activate Bluetooth ®
and Bluetooth ®
visibility on the Bluetooth ®
audio device.
Preconditions in COMAND X
Activate the Bluetooth ®
function in
COMAND (Y page 292). Connecting Bluetooth
®
audio devices General information
Before using your Bluetooth
®
audio device
with COMAND
for the first time, you will need
to authorize it.
When you authorize a new Bluetooth ®
audio
device, it is connected automatically.
Connection involves first searching for a
Bluetooth ®
audio device and then authorizing
it.
You can authorize up to fifteen Bluetooth ®
devices.
i If you authorize a mobile phone that
supports Bluetooth ®
audio, the A2DP and
AVRCP Bluetooth ®
audio profiles are
connected automatically.
The mobile phone is then entered:
R in the Bluetooth ®
telephone list
(Y page 360)
R in the Bluetooth ®
device list
(Y page 440).
Mercedes-Benz recommends authorizing a
mobile phone in Bluetooth ®
telephony
(Y page 360).
Searching for and authorizing a
Bluetooth ®
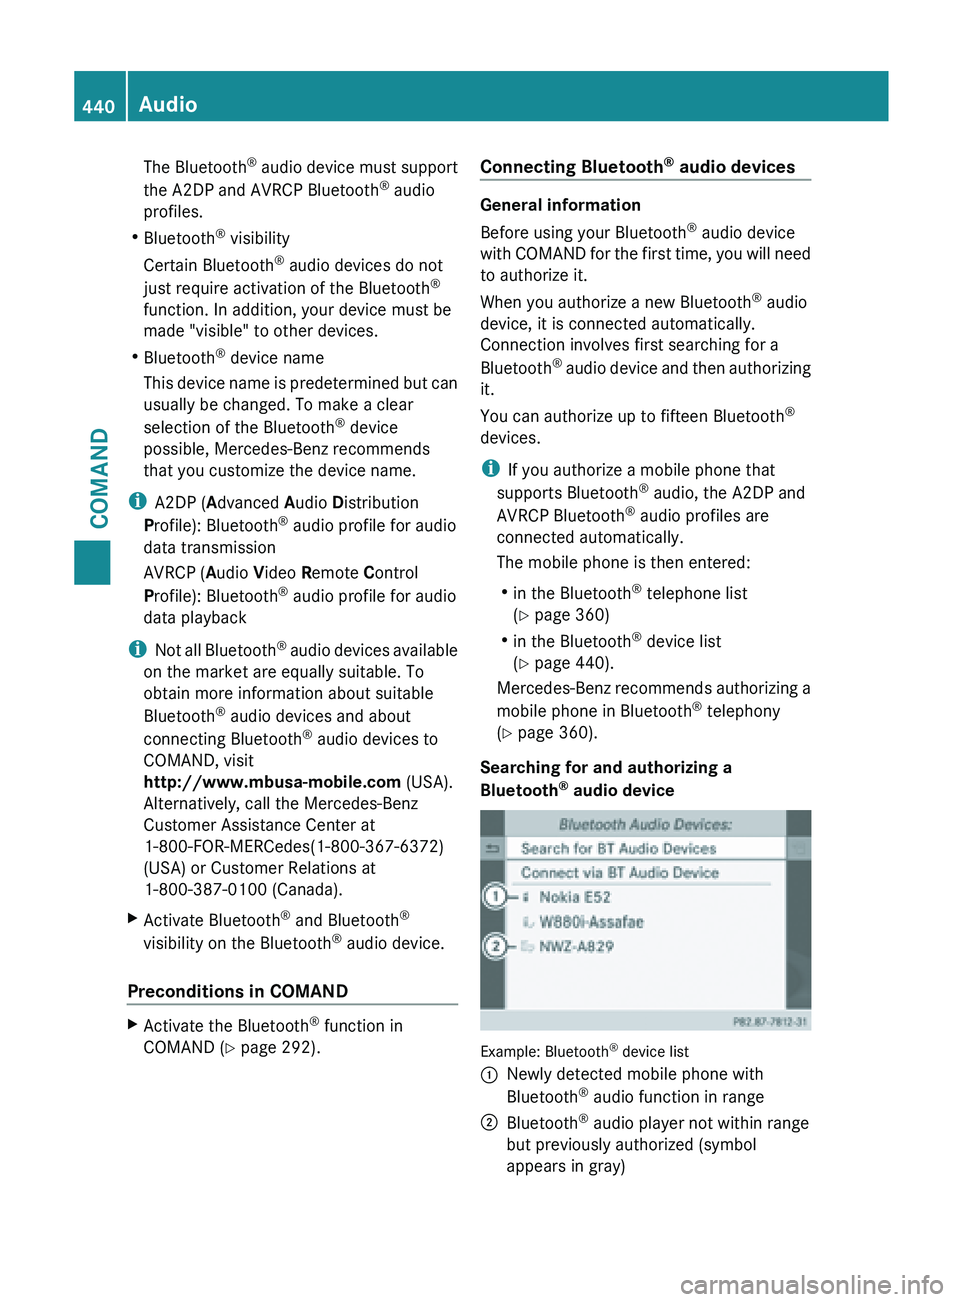
audio device Example: Bluetooth
®
device list
: Newly detected mobile phone with
Bluetooth ®
audio function in range
; Bluetooth ®
audio player not within range
but previously authorized (symbol
appears in gray) 440
Audio
COMAND
Page 454 of 572
If another audio source is switched on, you
can now switch to audio AUX mode in the
audio menu.
X Select Audio using ZV and press W to
confirm.
The audio menu appears.
X Select Aux using cVd and press W to
confirm.
The audio
AUX menu appears. The medium
in the external audio source is played if the
source is connected and playback
selected. Please see the respective operating
instructions for how to operate the external
audio source.
Information on:
R
Volume settings (Y page 277)
R Sound settings ( Y page 278)
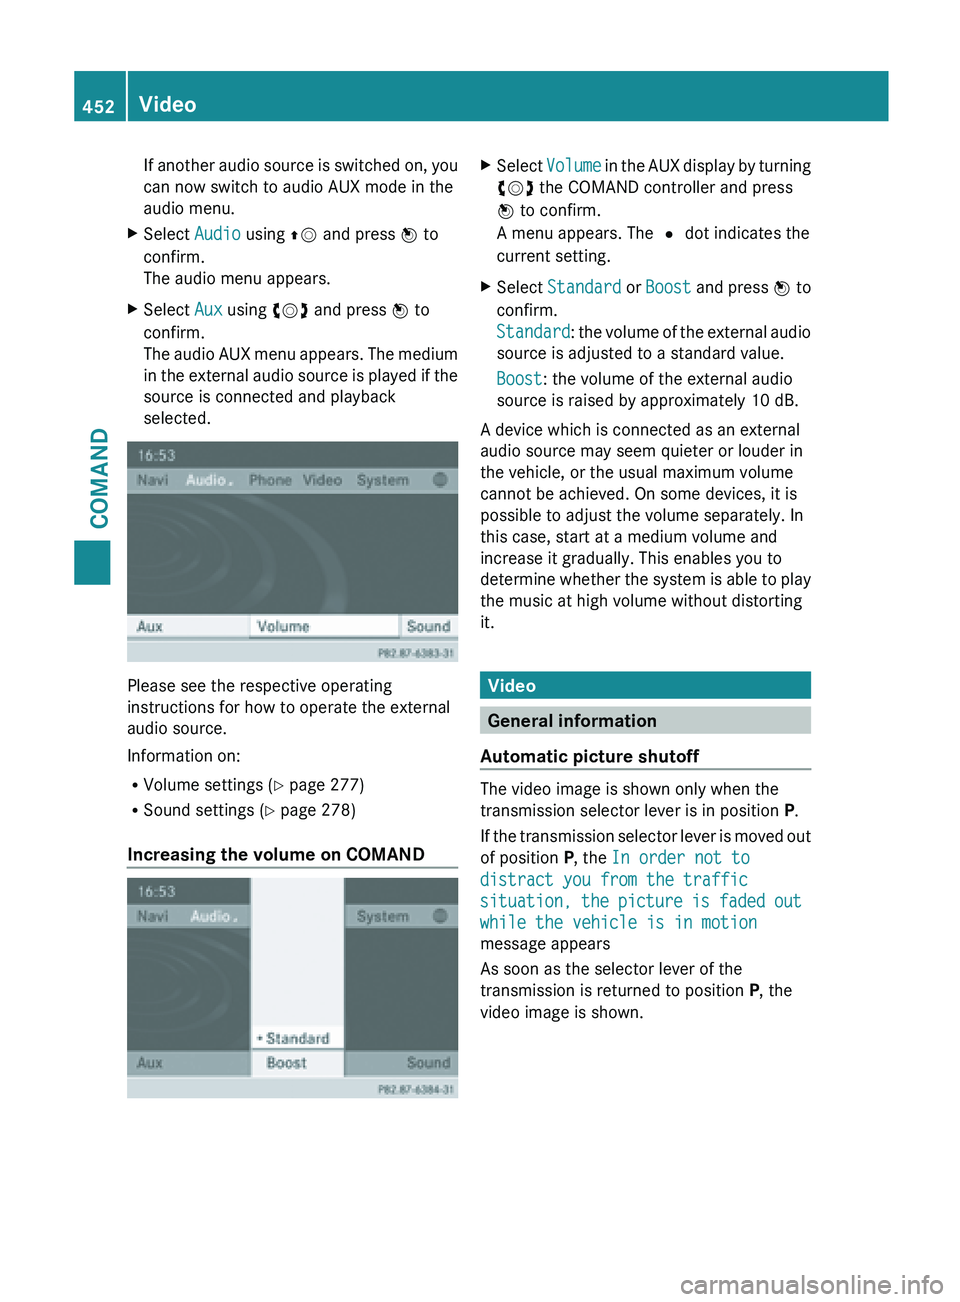
Increasing the volume on COMAND X
Select Volume in
the AUX display by turning
cVd the COMAND controller and press
W to confirm.
A menu appears. The # dot indicates the
current setting.
X Select Standard or Boost and
press W to
confirm.
Standard: the volume of the external audio
source is adjusted to a standard value.
Boost: the volume of the external audio
source is raised by approximately 10 dB.
A device which is connected as an external
audio source may seem quieter or louder in
the vehicle, or the usual maximum volume
cannot be achieved. On some devices, it is
possible to adjust the volume separately. In
this case, start at a medium volume and
increase it gradually. This enables you to
determine whether
the system is able to play
the music at high volume without distorting
it. Video
General information
Automatic picture shutoff The video image is shown only when the
transmission selector lever is in position P.
If
the
transmission selector lever is moved out
of position P, the In order not to
distract you from the traffic
situation, the picture is faded out
while the vehicle is in motion
message appears
As soon as the selector lever of the
transmission is returned to position P, the
video image is shown. 452
Video
COMAND
Page 486 of 572

i
Usually, you now have 30seconds to
initiate the next step.
X Press previously programmed button ;
,
= or ? of the integrated garage door
opener until the door starts to move.
The rolling code synchronization is then
complete.
Notes on programming the remote
control
Canadian radio frequency laws require a
"break" (or interruption) of the transmission
signals after
broadcasting for a few seconds.
Therefore, these signals may not last long
enough for the integrated garage door
opener. The signal is not recognized during
programming. Comparable with Canadian
law, some U.S. garage door openers are
designed to "time-out" in the same manner.
Proceed as follows:
R if you live in Canada
R if you have difficulties programming the
garage door opener (regardless of where
you live) when using the programming
steps
X Press and hold one of buttons ; to ? on
the integrated garage door opener.
After a
short time, indicator lamp : starts
flashing yellow.
X Release the button.
X Press button B of garage door remote
control A for
two seconds, then release it
for two seconds.
X Press button B again for two seconds.
X Repeat this sequence on button B of
remote control A until indicator lamp :
lights up green.
If indicator lamp : turns red, repeat the
process.
X Continue with the other programming
steps (see above). Problems when programming
If you are experiencing problems
programming the integrated garage door
opener on the rear-view mirror, take note of
the following instructions:
R
Check the
transmitter frequency of garage
door drive remote control A. This can
usually be found on the back of the remote
control.
The integrated garage door opener is
compatible with devices that have units
which operate in the frequency range of
280to 390MHz.
R Replace the batteries in garage door
remote control A. This increases the
likelihood that garage door remote control
A will transmit a strong and precise signal
to the integrated garage door opener in the
rear-view mirror.
R When programming, hold remote control
A at varying distances and angles from the
button that you are programming. Try
various angles at a distance between 2and
12 inches (5to 30 cm) or at the same angle
but at varying distances.
R If another remote control for the same
garage door drive is available, repeat the
same programming steps with this remote
control. Before performing these steps,
make sure that new batteries have been
installed in garage door drive remote
control A.
R Note that some remote controls only
transmit for a limited amount of time (the
indicator lamp on the remote control goes
out). Press button B on remote control
A again before transmission ends.
R Align the antenna cable of the garage door
opener unit. This can improve signal
reception/transmission.484
Features
Stowage and features
Page 487 of 572
Opening/closing the garage door
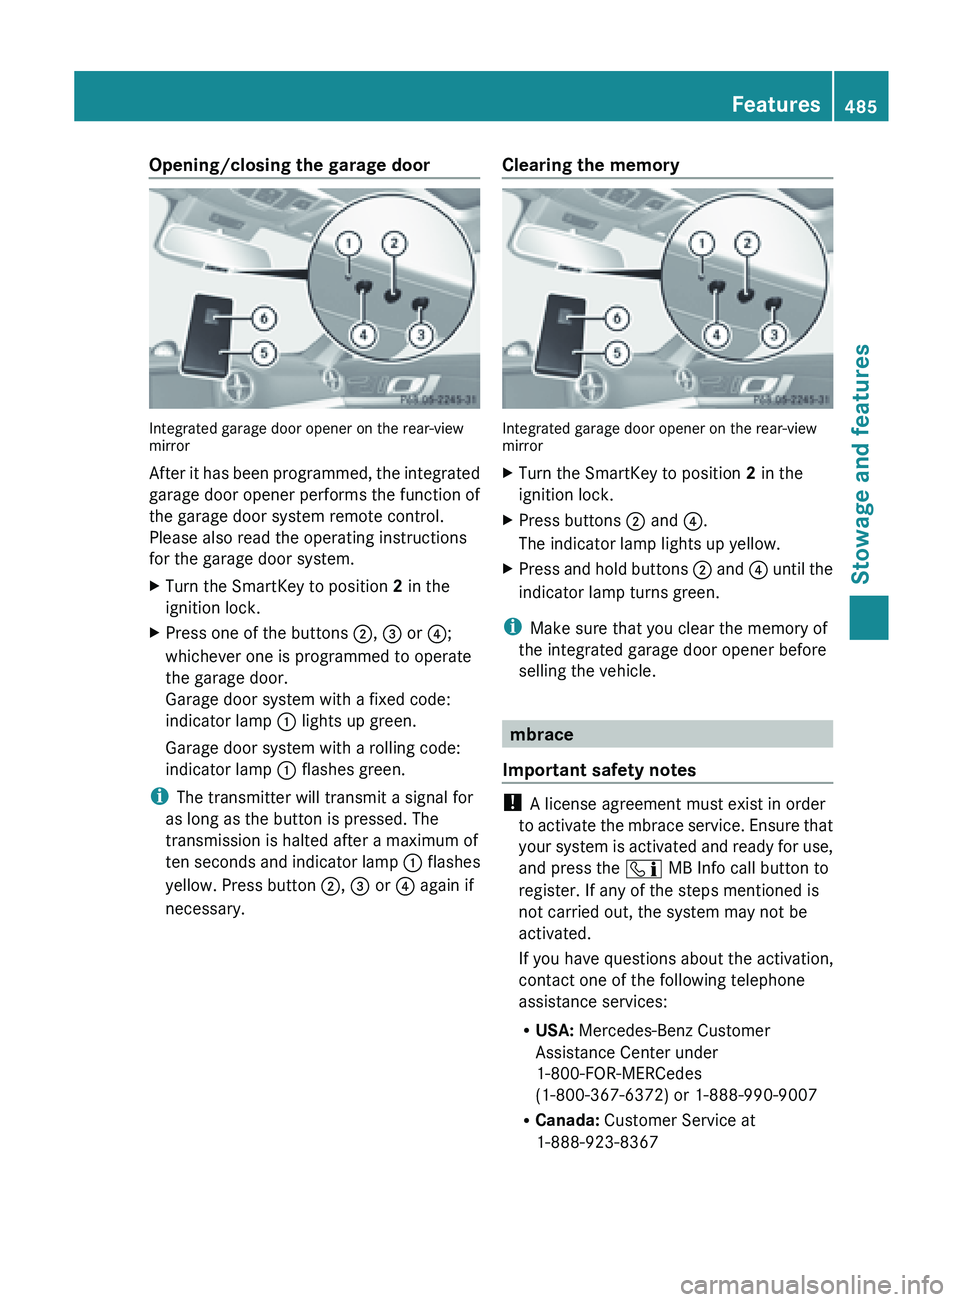
Integrated garage door opener on the rear-view
mirror
After
it
has been programmed, the integrated
garage door opener performs the function of
the garage door system remote control.
Please also read the operating instructions
for the garage door system.
X Turn the SmartKey to position 2 in the
ignition lock.
X Press one of the buttons ;, = or ?;
whichever one is programmed to operate
the garage door.
Garage door system with a fixed code:
indicator lamp : lights up green.
Garage door system with a rolling code:
indicator lamp : flashes green.
i The transmitter will transmit a signal for
as long as the button is pressed. The
transmission is halted after a maximum of
ten seconds
and indicator lamp : flashes
yellow. Press button ;, = or ? again if
necessary. Clearing the memory Integrated garage door opener on the rear-view
mirror
X
Turn the SmartKey to position 2 in the
ignition lock.
X Press buttons ; and ?.
The indicator lamp lights up yellow.
X Press and hold buttons ; and
?
until the
indicator lamp turns green.
i Make sure that you clear the memory of
the integrated garage door opener before
selling the vehicle. mbrace
Important safety notes !
A license agreement must exist in order
to activate
the mbrace service. Ensure that
your system is activated and ready for use,
and press the ï MB Info call button to
register. If any of the steps mentioned is
not carried out, the system may not be
activated.
If you have questions about the activation,
contact one of the following telephone
assistance services:
R USA: Mercedes-Benz Customer
Assistance Center under
1-800-FOR-MERCedes
(1-800-367-6372) or 1-888-990-9007
R Canada: Customer Service at
1-888-923-8367 Features
485
Stowage and features Z
Page 503 of 572
cleaning agents. These cleaning agents can
damage the paintwork or plastic parts.
! Make sure that the automatic
transmission is
in position N when washing
your vehicle in a tow-through car wash. The
vehicle could be damaged if the
transmission is in another position.
! Make sure that:
R the side windows are fully closed.
R the ventilation/heating is switched off
(the OFF button has been pressed).
R the windshield wiper switch is in position
0.
Otherwise, the vehicle might be damaged.
You can wash the vehicle in an automatic car
wash from the very start.
If the vehicle is very dirty, pre-wash it before
cleaning it in an automatic car wash.
After using an automatic car wash, wipe off
wax from the windshield and the wiper
blades. This will prevent smears and reduce
wiping noises caused by residue on the
windshield.
Washing by hand In some countries, washing by hand is only
allowed at specially equipped washing bays.
Observe the legal requirements in all
countries concerned.
X
Do not use hot water and do not wash the
vehicle in direct sunlight.
X Use a soft sponge to clean.
X Use a mild cleaning agent, such as a car
shampoo approved by Mercedes-Benz.
X Thoroughly hose down the vehicle with a
gentle jet of water.
X Do not point the water jet directly towards
the air inlets.
X Use plenty of water and rinse out the
sponge frequently. X
Rinse the vehicle with clean water and dry
thoroughly with a chamois.
X Do not let the cleaning agent dry on the
paintwork.
When using the vehicle in winter, remove all
traces of road salt deposits carefully and as
soon as possible.
Power washers G
WARNING
Do not use power washers with circular-jet
nozzles (dirt
grinders) to clean your vehicle, in
particular the tires. You could otherwise
damage the tires and cause an accident.
! Always maintain a distance of at least
11.8 in (30 cm) between the vehicle and the
power washer nozzle. Information about
the correct distance is available from the
equipment manufacturer.
Move the power washer nozzle around
when cleaning your vehicle.
Do not aim directly at any of the following:
R tires
R door gaps, roof gaps, joints, etc.
R electrical components
R battery
R connectors
R lights
R seals
R trim
R ventilation slots
Damaged seals or electrical components
can lead to leaks or failures.
Cleaning the paintwork !
Do not affix:
R stickers
R films
R magnetic plates or similar items
to painted surfaces. You could otherwise
damage the paintwork. Care
501
Maintenance and care Z