2013 MERCEDES-BENZ SL-CLASS ROADSTER reset
[x] Cancel search: resetPage 197 of 572

R
if you are predominantly driving slower
than 50 mph (80 km/h) or faster than
112 mph (180 km/h
)
R if you are currently using COMAND or
making a telephone call with it
R if the time has been set incorrectly
R in active driving situations, such as when
you change lanes or change your speed
Warning and display messages in the
multifunction display X
Activate ATTENTION ASSIST using the on-
board computer ( Y page 214).
Symbol : appears in the multifunction
display.
X The Attention Assist: Take a
Break! message appears in the
multifunction display. If necessary, take
a break.
X Press the a or % button to confirm
the message.
If ATTENTION ASSIST is active, you will be
warned no
sooner than 20 minutes after your
journey has begun. In addition to the message
shown in the multifunction display, you will
then hear an intermittent warning tone twice.
On long journeys, take regular breaks in good
time to allow yourself to rest properly. If you
do not take a break and ATTENTION ASSIST
still detects increasing lapses in
concentration, you will be warned again after
15 minutes at the earliest. ATTENTION ASSIST is reset when you
continue your journey and starts assessing
your tiredness again if:
R
you switch off the engine.
R you take off your seat belt and open the
driver's door,
e.g. for a change of drivers or
to take a break. Active Driving Assistance package
General notes The Active Driving Assistance package
consists of DISTRONIC PLUS
(
Y page 164),
Active Blind Spot Assist (Y page 195) and
Active Lane Keeping Assist (Y page 199).
Active Blind Spot Assist Important safety notes
G
WARNING
Active Blind Spot Assist is only an aid, and
may detect vehicles/obstacles incorrectly or
not at all.
The system may be impaired or may not
function if:
R there is poor visibility, e.g. due to snow,
rain, fog or spray.
R the rear and/or front sensors are dirty.
Active Blind Spot Assist may not detect
narrow vehicles, such as motorcycles or
bicycles, or may only detect them too late. It
cannot detect vehicles that are overtaken at
a small
distance and then enter the blind spot
area.
Active Blind Spot Assist cannot detect road
and traffic conditions. It is not a substitute for
attentive driving. You are responsible for the
vehicle's speed, braking in good time, and
steering correctly. Always adapt your driving
style to suit the prevailing road and weather
conditions. Always pay attention to traffic
conditions and your surroundings. Otherwise,
you may fail to recognize dangers in time, Driving systems
195
Driving and parking
Z
Page 211 of 572
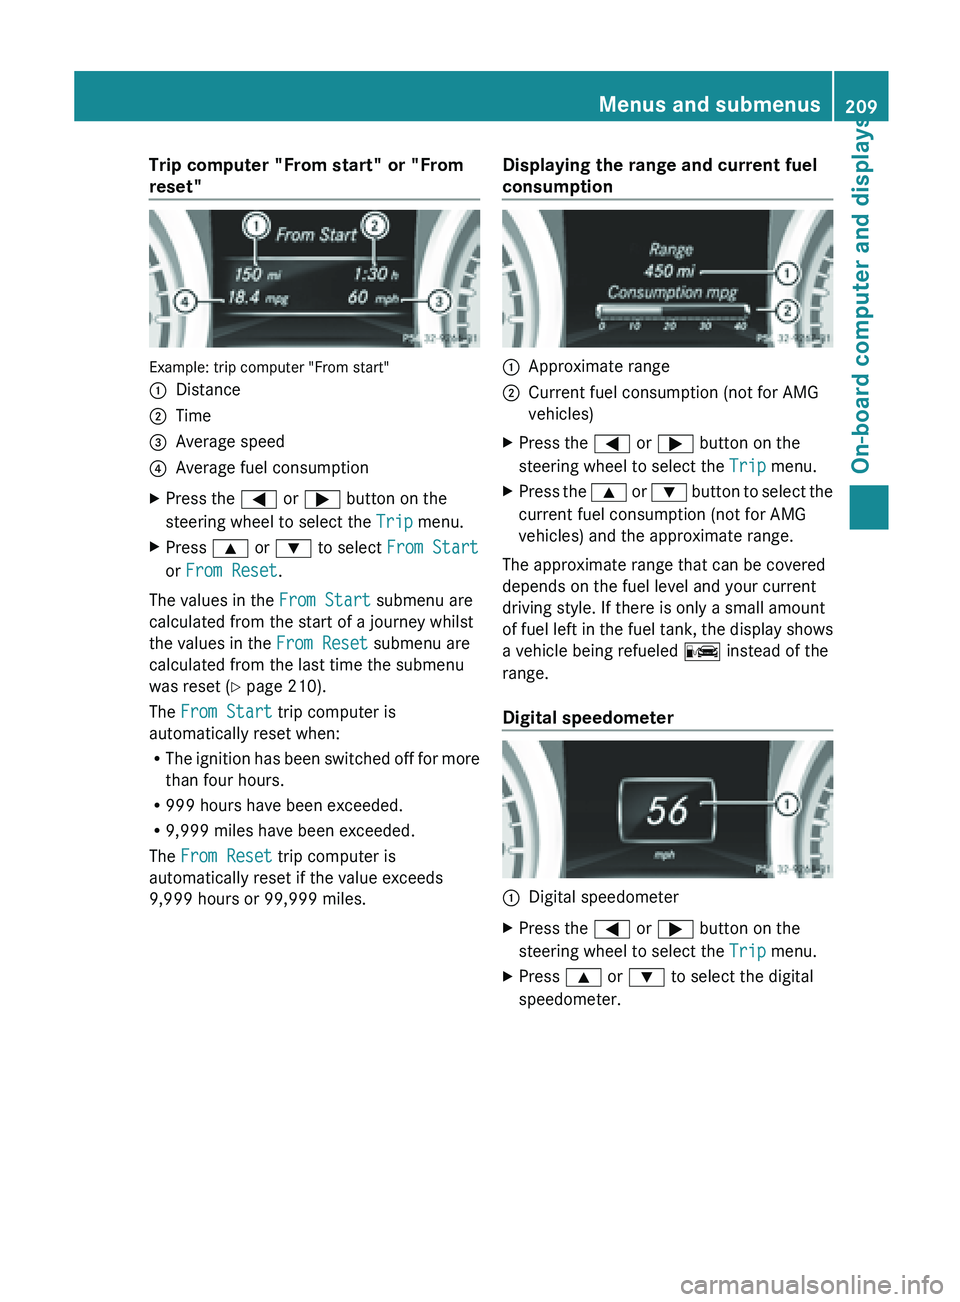
Trip computer "From start" or "From
reset"
Example: trip computer "From start"
:
Distance
; Time
= Average speed
? Average fuel consumption
X Press the = or ; button on the
steering wheel to select the Trip menu.
X Press 9 or : to select From Start
or From Reset.
The values in the From Start submenu are
calculated from the start of a journey whilst
the values in the From Reset submenu are
calculated from the last time the submenu
was reset ( Y page 210).
The From Start trip computer is
automatically reset when:
R The ignition
has been switched off for more
than four hours.
R 999 hours have been exceeded.
R 9,999 miles have been exceeded.
The From Reset trip computer is
automatically reset if the value exceeds
9,999 hours or 99,999 miles. Displaying the range and current fuel
consumption :
Approximate range
; Current fuel consumption (not for AMG
vehicles)
X Press the = or ; button on the
steering wheel to select the Trip menu.
X Press the 9 or :
button to select the
current fuel consumption (not for AMG
vehicles) and the approximate range.
The approximate range that can be covered
depends on the fuel level and your current
driving style. If there is only a small amount
of fuel
left in the fuel tank, the display shows
a vehicle being refueled C instead of the
range.
Digital speedometer :
Digital speedometer
X Press the = or ; button on the
steering wheel to select the Trip menu.
X Press 9 or : to select the digital
speedometer. Menus and submenus
209
On-board computer and displays Z
Page 212 of 572
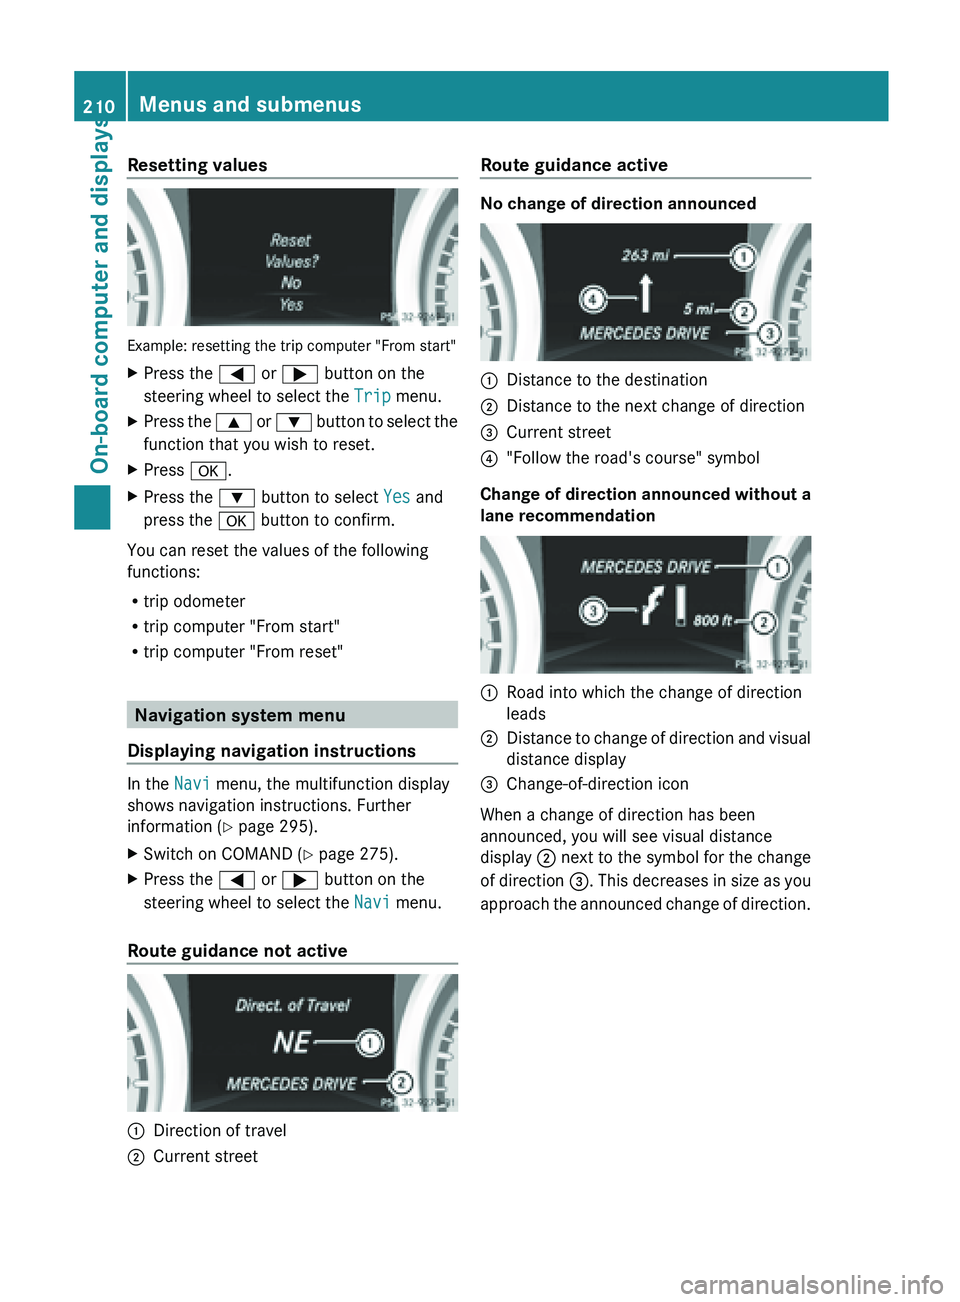
Resetting values
Example: resetting the trip computer "From start"
X
Press the = or ; button on the
steering wheel to select the Trip menu.
X Press the 9 or : button to select the
function that you wish to reset.
X Press a.
X Press the : button to select Yes and
press the a button to confirm.
You can reset the values of the following
functions:
R trip odometer
R trip computer "From start"
R trip computer "From reset" Navigation system menu
Displaying navigation instructions In the
Navi menu, the multifunction display
shows navigation instructions. Further
information (Y page 295).
X Switch on COMAND (Y page 275).
X Press the = or ; button on the
steering wheel to select the Navi menu.
Route guidance not active :
Direction of travel
; Current street Route guidance active No change of direction announced
:
Distance to the destination
; Distance to the next change of direction
= Current street
? "Follow the road's course" symbol
Change of direction announced without a
lane recommendation :
Road into which the change of direction
leads
; Distance to change of direction and visual
distance display
= Change-of-direction icon
When a change of direction has been
announced, you will see visual distance
display ; next
to the symbol for the change
of direction =. This decreases in size as you
approach the announced change of direction. 210
Menus and submenus
On-board computer and displays
Page 221 of 572
FCC. Do not tamper with, alter, or use in
any non-approved way.
Any unauthorized modification to this
device could void the user’s authority to
operate the equipment.
i Canada only:
This device complies with the RSS-210
Rules of Industry Canada. Operation is
subject to the following two conditions:
1. This device may not cause harmful
interference, and
2. this
device must accept any interference
received, including interference that may
cause undesired operation of the device.
Any unauthorized modification to this
device could void the user’s authority to
operate the equipment.
Convenience submenu Activating/deactivating the EASY-
ENTRY/EXIT feature
G
WARNING
You must make sure no one can become
trapped or injured by the moving steering
wheel when the easy-entry/exit feature is
activated.
To stop steering wheel movement, move
steering wheel
adjustment lever or press one
of the memory position buttons.
Do not leave children unattended in the
vehicle, or with access to an unlocked vehicle.
Children could open the driver's door and
unintentionally activate the easy-entry/exit
feature, which could result in an accident
and/or serious personal injury.
X Press the = or ; button on the
steering wheel to select the Sett. menu.
X Press the :
or 9
button to select the
Convenience submenu.
X Press the a button to confirm. X
Press : or 9 to select the Easy
Entry/Exit function.
If the Easy Entry/Exit function is
activated, the vehicle steering wheel is
displayed in red in the multifunction
display.
X Press the a button to save the setting.
Further information on the EASY-ENTRY/EXIT
feature ( Y page 102).
Switching the belt adjustment on/off
X Press the = or ; button on the
steering wheel to select the Sett. menu.
X Press the : or 9
button to select the
Convenience submenu.
X Press the a button to confirm.
X Press the :
or 9
button to select the
Belt Adjustment function.
When the Belt Adjustment function is
activated, the vehicle seat belt is displayed
in red in the multifunction display.
X Press the a button to save the setting.
For further information on belt adjustment,
see ( Y page 52).
Restoring the factory settings X
Press the = or ; button on the
steering wheel to select the Sett. menu.
X Press the : or 9
button to select the
Factory Setting submenu.
X Press the a button to confirm.
The Reset All Settings? message
appears.
X Press the : or 9 button to select
No or Yes.
X Press the a button to confirm the
selection.
If you
have selected Yes, the multifunction
display shows a confirmation message.
For safety reasons, the Daytime Running
Lights function in the Lights submenu is
only reset if the vehicle is stationary. Menus and submenus
219
On-board computer and displays Z
Page 223 of 572
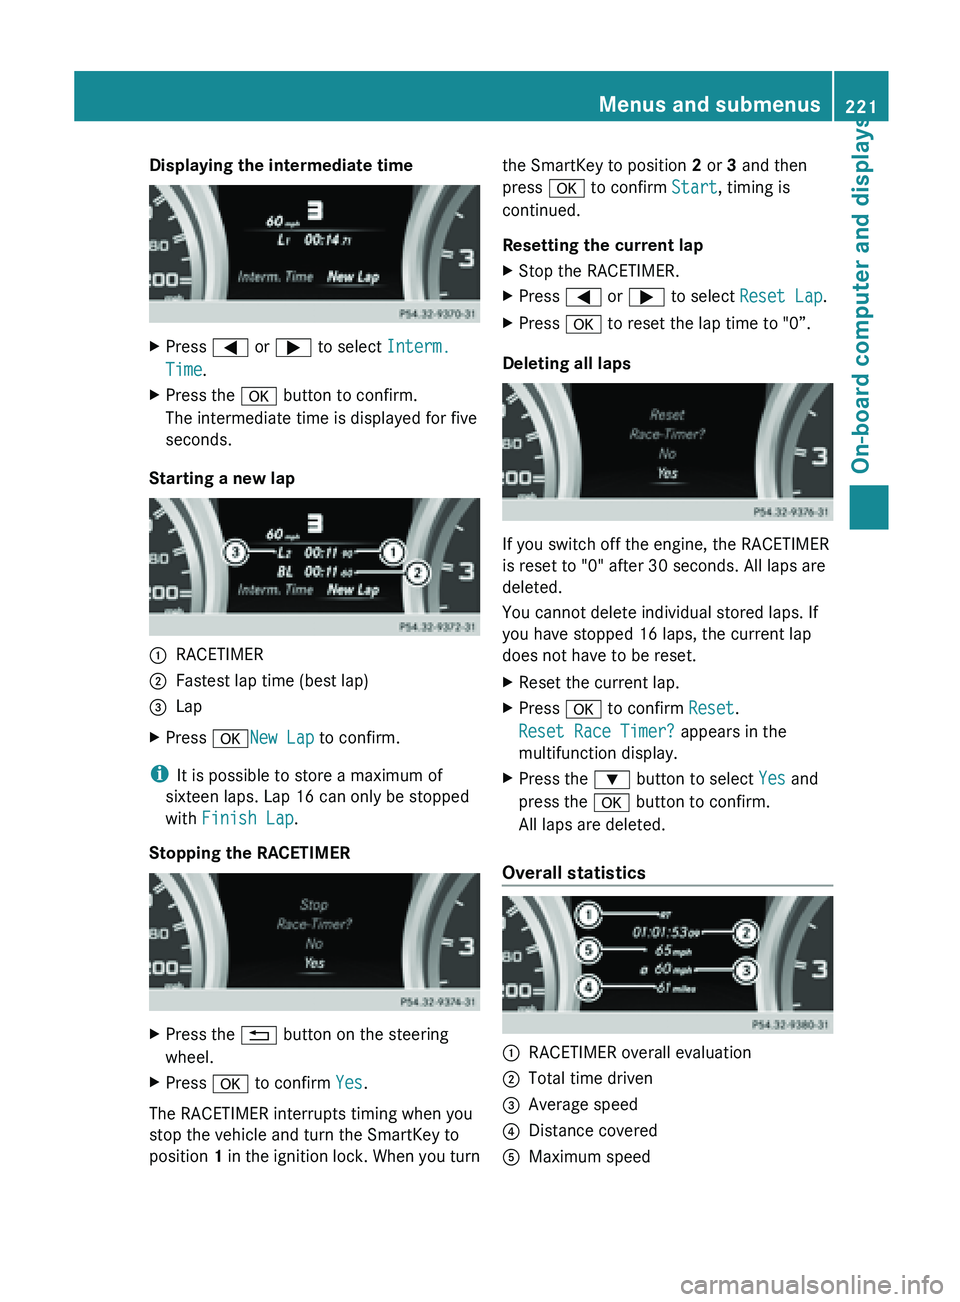
Displaying the intermediate time
X
Press = or ; to select Interm.
Time.
X Press the a button to confirm.
The intermediate time is displayed for five
seconds.
Starting a new lap :
RACETIMER
; Fastest lap time (best lap)
= Lap
X Press aNew Lap to confirm.
i It is possible to store a maximum of
sixteen laps. Lap 16 can only be stopped
with Finish Lap.
Stopping the RACETIMER X
Press the % button on the steering
wheel.
X Press a to confirm Yes.
The RACETIMER interrupts timing when you
stop the vehicle and turn the SmartKey to
position 1 in
the ignition lock. When you turn the SmartKey to position
2 or 3 and then
press a to confirm Start, timing is
continued.
Resetting the current lap
X Stop the RACETIMER.
X Press = or ; to select Reset Lap.
X Press a to reset the lap time to "0”.
Deleting all laps If you switch off the engine, the RACETIMER
is reset to "0" after 30 seconds. All laps are
deleted.
You cannot delete individual stored laps. If
you have stopped 16 laps, the current lap
does not have to be reset.
X
Reset the current lap.
X Press a to confirm Reset.
Reset Race Timer? appears in the
multifunction display.
X Press the : button to select Yes and
press the a button to confirm.
All laps are deleted.
Overall statistics :
RACETIMER overall evaluation
; Total time driven
= Average speed
? Distance covered
A Maximum speed Menus and submenus
221
On-board computer and displays Z
Page 290 of 572
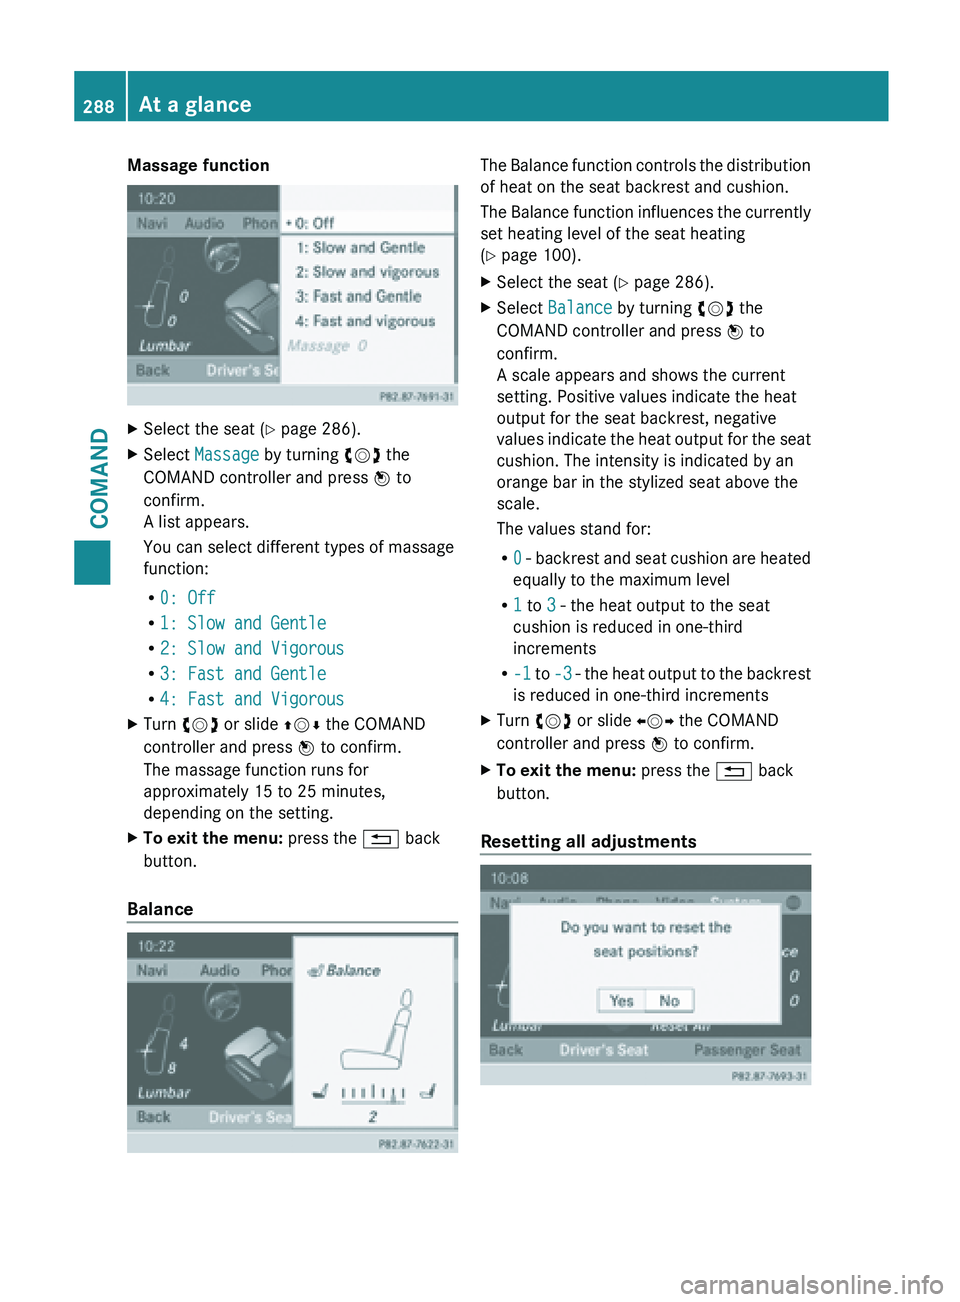
Massage function
X
Select the seat ( Y page 286).
X Select Massage by turning cVd the
COMAND controller and press W to
confirm.
A list appears.
You can select different types of massage
function:
R 0: Off
R 1: Slow and Gentle
R 2: Slow and Vigorous
R 3: Fast and Gentle
R 4: Fast and Vigorous
X Turn cVd or slide ZVÆ the COMAND
controller and press W to confirm.
The massage function runs for
approximately 15 to 25 minutes,
depending on the setting.
X To exit the menu: press the % back
button.
Balance The Balance function controls the distribution
of heat on the seat backrest and cushion.
The
Balance
function influences the currently
set heating level of the seat heating
(Y page 100).
X Select the seat ( Y page 286).
X Select Balance by turning cVd the
COMAND controller and press W to
confirm.
A scale appears and shows the current
setting. Positive values indicate the heat
output for the seat backrest, negative
values indicate
the heat output for the seat
cushion. The intensity is indicated by an
orange bar in the stylized seat above the
scale.
The values stand for:
R 0 - backrest and seat cushion are heated
equally to the maximum level
R 1 to 3 - the heat output to the seat
cushion is reduced in one-third
increments
R -1 to -3 - the heat output to the backrest
is reduced in one-third increments
X Turn cVd or slide XVY the COMAND
controller and press W to confirm.
X To exit the menu: press the % back
button.
Resetting all adjustments 288
At a glance
COMAND
Page 291 of 572

X
Select the seat ( Y page 286).
X Select Reset All by turning cVd the
COMAND controller and press W to
confirm.
A query appears.
X Select Yes or No and press W to confirm.
If you select No, the process will be
canceled.
After you select Yes, all seat adjustments
are reset to the default values (factory
setting). System settings
Display settings
Setting the brightness The brightness detected by the display light
sensor affects the setting options for this
function.
X
Press W.
X Select Settings by turning cVd the
COMAND controller and press W to
confirm.
X Select Display and press W to confirm.
X Select Brightness and press W to
confirm.
X Adjust the brightness by turning cVd the
COMAND controller and press W to
confirm. Display design Your COMAND display features optimized
designs for operation during daytime and
night-time hours. You can set the design by
manually
selecting
day or night design or opt
for an automatic setting.
X Press W.
X Select Settings by turning cVd the
COMAND controller and press W to
confirm.
X Select Display and press W to confirm.
X Select Day Mode, Night Mode or
Automatic by turning cVd the COMAND
controller and press W to confirm.
A dot indicates the current setting. Design Explanation
Day Mode The display is set
permanently to day
design.
Night Mode The display is set
permanently to night
design.
Automatic If the
Automatic setting
is selected, COMAND
evaluates the readings
from the automatic
vehicle light sensor and
automatically switches
between the display
designs. Time settings
General information If COMAND is equipped with a navigation
system and has GPS reception, COMAND
automatically sets
the time and date. You can
also adjust the time yourself in 30-minute
increments, but the date cannot be changed.
i If you set the time in 30-minute
increments, any time zone settings and
settings for changing between summer and System settings
289
COMAND Z
Page 296 of 572
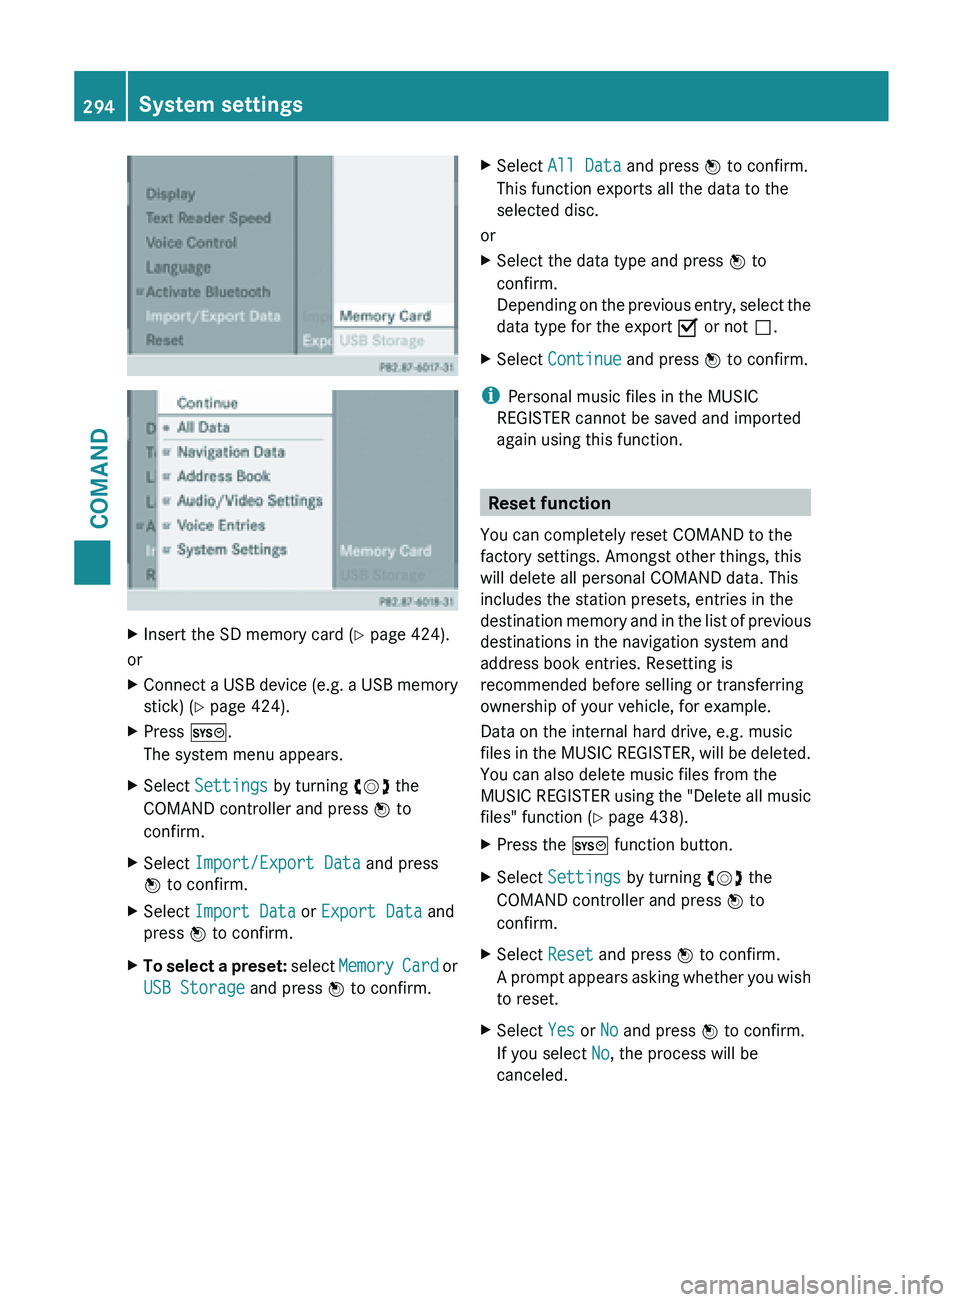
X
Insert the SD memory card (Y page 424).
or
X Connect a USB device (e.g. a USB memory
stick) ( Y page 424).
X Press W.
The system menu appears.
X Select Settings by turning cVd the
COMAND controller and press W to
confirm.
X Select Import/Export Data and press
W to confirm.
X Select Import Data or Export Data and
press W to confirm.
X To select a preset: select
Memory Card or
USB Storage and press W to confirm. X
Select All Data and press W to confirm.
This function exports all the data to the
selected disc.
or
X Select the data type and press W to
confirm.
Depending on
the previous entry, select the
data type for the export O or not ª.
X Select Continue and press W to confirm.
i Personal music files in the MUSIC
REGISTER cannot be saved and imported
again using this function. Reset function
You can completely reset COMAND to the
factory settings. Amongst other things, this
will delete all personal COMAND data. This
includes the station presets, entries in the
destination memory
and in the list of previous
destinations in the navigation system and
address book entries. Resetting is
recommended before selling or transferring
ownership of your vehicle, for example.
Data on the internal hard drive, e.g. music
files in the MUSIC REGISTER, will be deleted.
You can also delete music files from the
MUSIC REGISTER using the "Delete all music
files" function (Y page 438).
X Press the W function button.
X Select Settings by turning cVd the
COMAND controller and press W to
confirm.
X Select Reset and press W to confirm.
A prompt
appears asking whether you wish
to reset.
X Select Yes or No and press W to confirm.
If you select No, the process will be
canceled. 294
System settings
COMAND