2013 MERCEDES-BENZ SL-CLASS ROADSTER key
[x] Cancel search: keyPage 286 of 572
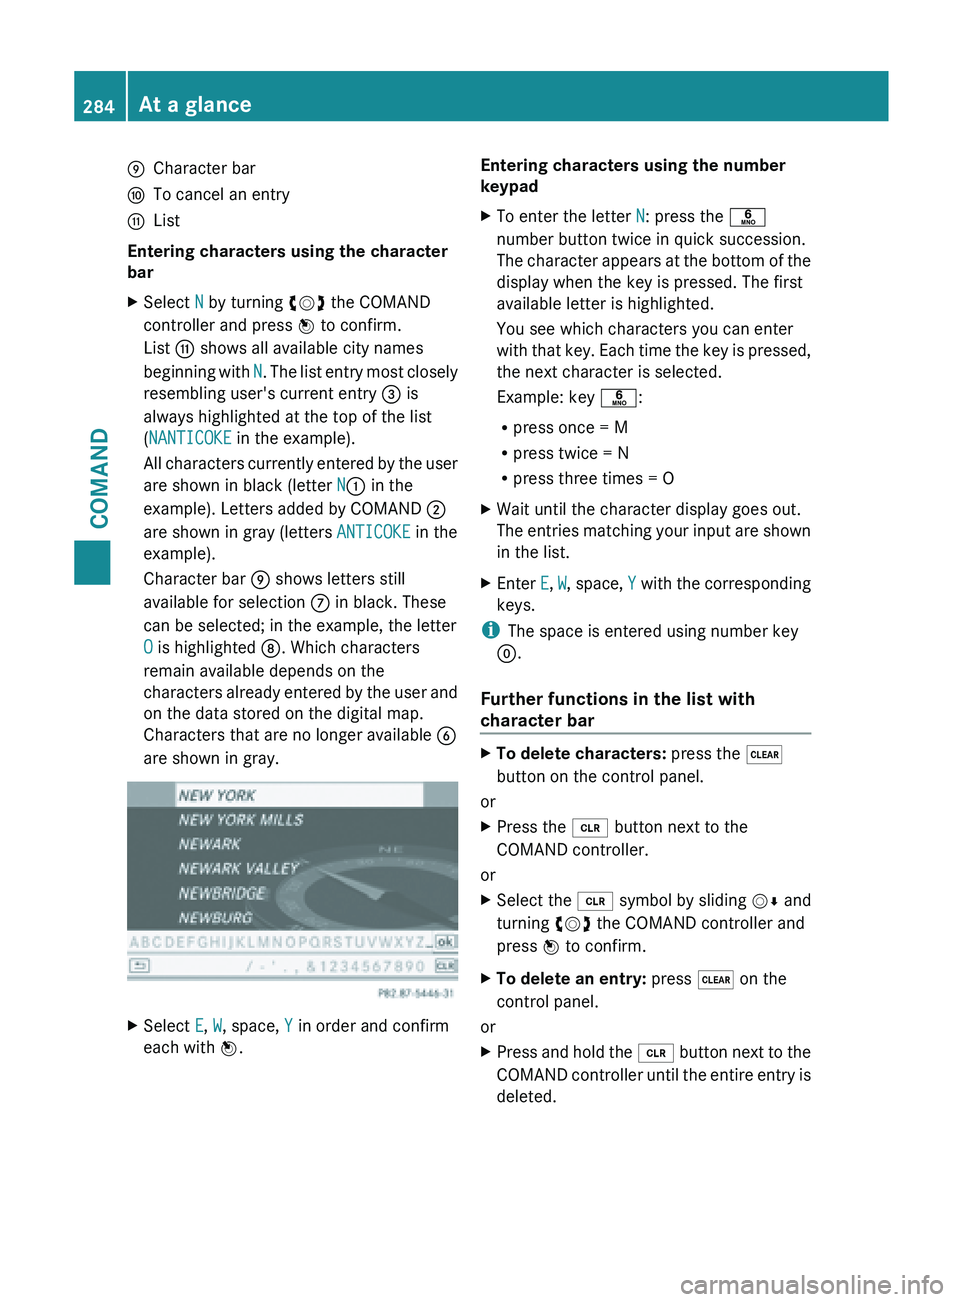
E
Character bar
F To cancel an entry
G List
Entering characters using the character
bar
X Select N by turning cVd the COMAND
controller and press W to confirm.
List G shows all available city names
beginning with
N
. The list entry most closely
resembling user's current entry = is
always highlighted at the top of the list
(NANTICOKE in the example).
All characters currently entered by the user
are shown in black (letter N: in the
example). Letters added by COMAND ;
are shown in gray (letters ANTICOKE in the
example).
Character bar E shows letters still
available for selection C in black. These
can be selected; in the example, the letter
O is highlighted D. Which characters
remain available depends on the
characters already entered by the user and
on the data stored on the digital map.
Characters that are no longer available B
are shown in gray. X
Select E, W, space, Y in order and confirm
each with W. Entering characters using the number
keypad
X
To enter the letter N: press the p
number button twice in quick succession.
The character
appears at the bottom of the
display when the key is pressed. The first
available letter is highlighted.
You see which characters you can enter
with that key. Each time the key is pressed,
the next character is selected.
Example: key p:
R press once = M
R press twice = N
R press three times = O
X Wait until the character display goes out.
The entries
matching your input are shown
in the list.
X Enter E, W, space, Y
with the corresponding
keys.
i The space is entered using number key
9.
Further functions in the list with
character bar X
To delete characters: press the $
button on the control panel.
or
X Press the 2 button next to the
COMAND controller.
or
X Select the 2 symbol
by sliding VÆ and
turning cVd the COMAND controller and
press W to confirm.
X To delete an entry: press $ on the
control panel.
or
X Press and hold the 2 button
next to the
COMAND controller until the entire entry is
deleted. 284
At a glance
COMAND
Page 298 of 572
2 mph (3 km/h), the restriction becomes
inactive.
When
the
restriction is active, certain entries
cannot be made. This will be indicated by the
fact that certain menu items are grayed out
and cannot be selected.
The following entries are not possible, for
example:
R entering the destination city and street
R entering a destination via the map
R entering POIs in the vicinity of a city or via
a name search
R editing entries
R using the number keypad for direct entry
Other entries are possible, such as entering
points of interest in the vicinity of the
destination or current position.
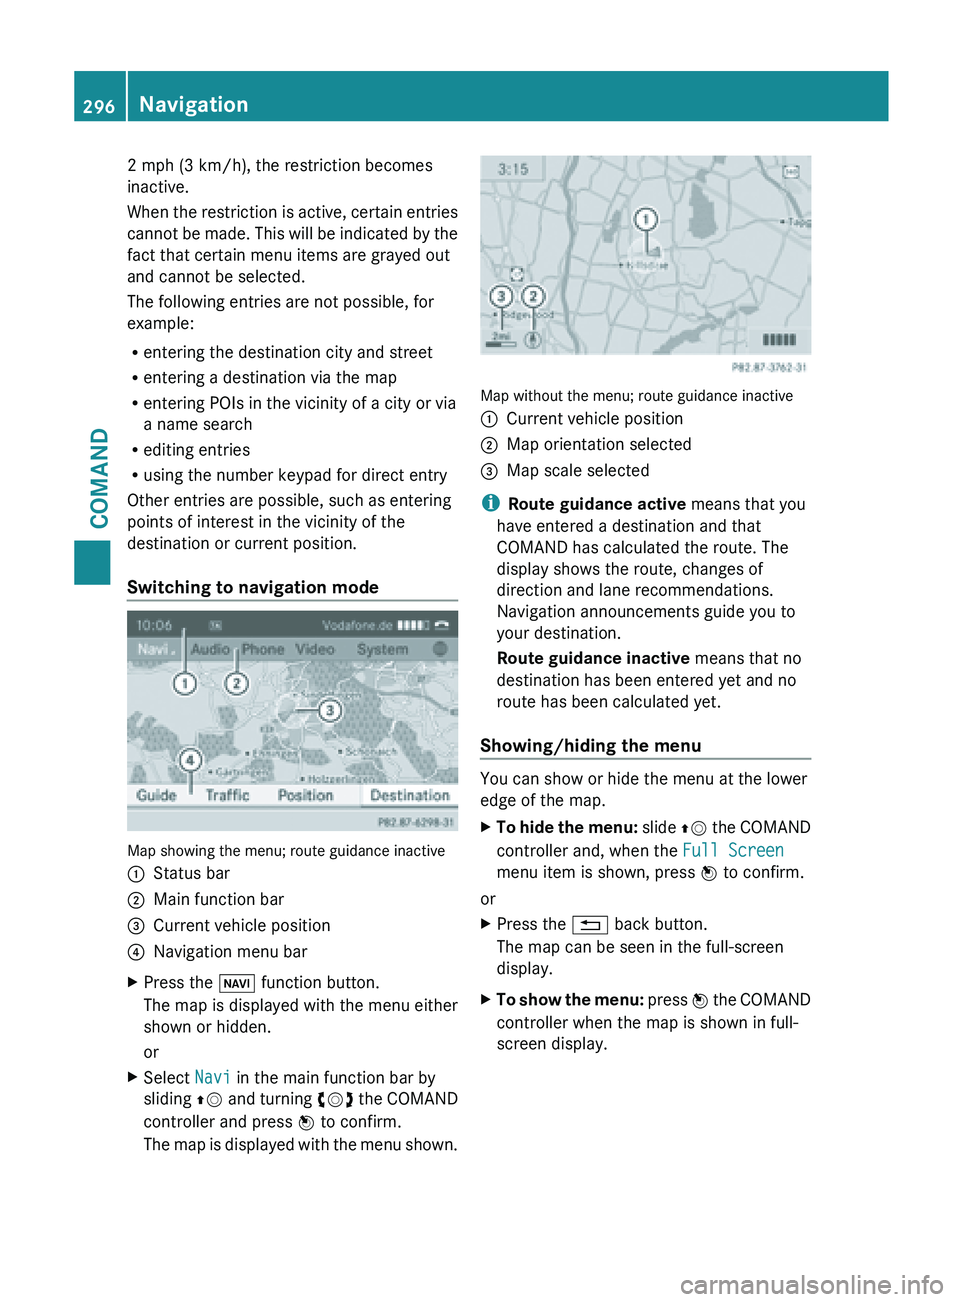
Switching to navigation mode Map showing the menu; route guidance inactive
:
Status bar
; Main function bar
= Current vehicle position
? Navigation menu bar
X Press the Ø function button.
The map is displayed with the menu either
shown or hidden.
or
X Select Navi in the main function bar by
sliding ZV and
turning cVd the COMAND
controller and press W to confirm.
The map is displayed with the menu shown. Map without the menu; route guidance inactive
:
Current vehicle position
; Map orientation selected
= Map scale selected
i Route guidance active means that you
have entered a destination and that
COMAND has calculated the route. The
display shows the route, changes of
direction and lane recommendations.
Navigation announcements guide you to
your destination.
Route guidance inactive means that no
destination has been entered yet and no
route has been calculated yet.
Showing/hiding the menu You can show or hide the menu at the lower
edge of the map.
X
To hide the menu: slide ZV
the COMAND
controller and, when the Full Screen
menu item is shown, press W to confirm.
or
X Press the % back button.
The map can be seen in the full-screen
display.
X To show the menu: press
W
the COMAND
controller when the map is shown in full-
screen display. 296
Navigation
COMAND
Page 349 of 572
X
Select Never, When Off-Road or When
Route Guidance Inactive and press W
to confirm.
The selected setting is accepted.
Switching additional information on/off
Switching the topographical map on/off
X To show the menu: press
W the COMAND
controller.
X Select Navi in the main function bar by
sliding ZV and
turning cVd the COMAND
controller and press W to confirm.
X Select Map Settings and press W to
confirm.
The map settings menu appears.
X Select Topographic Map and press W to
confirm.
Depending on the previous status, switch
the option on O or off ª.
The topographical map uses different colors
to depict elevation. The color key generally
reflects the topography's dominant
vegetation or the ground's perceived color
when seen from the air, for example:
R green (grass) for lowland
R yellow, brown (woodland) for hills
R gray (stone) and white (snow) for
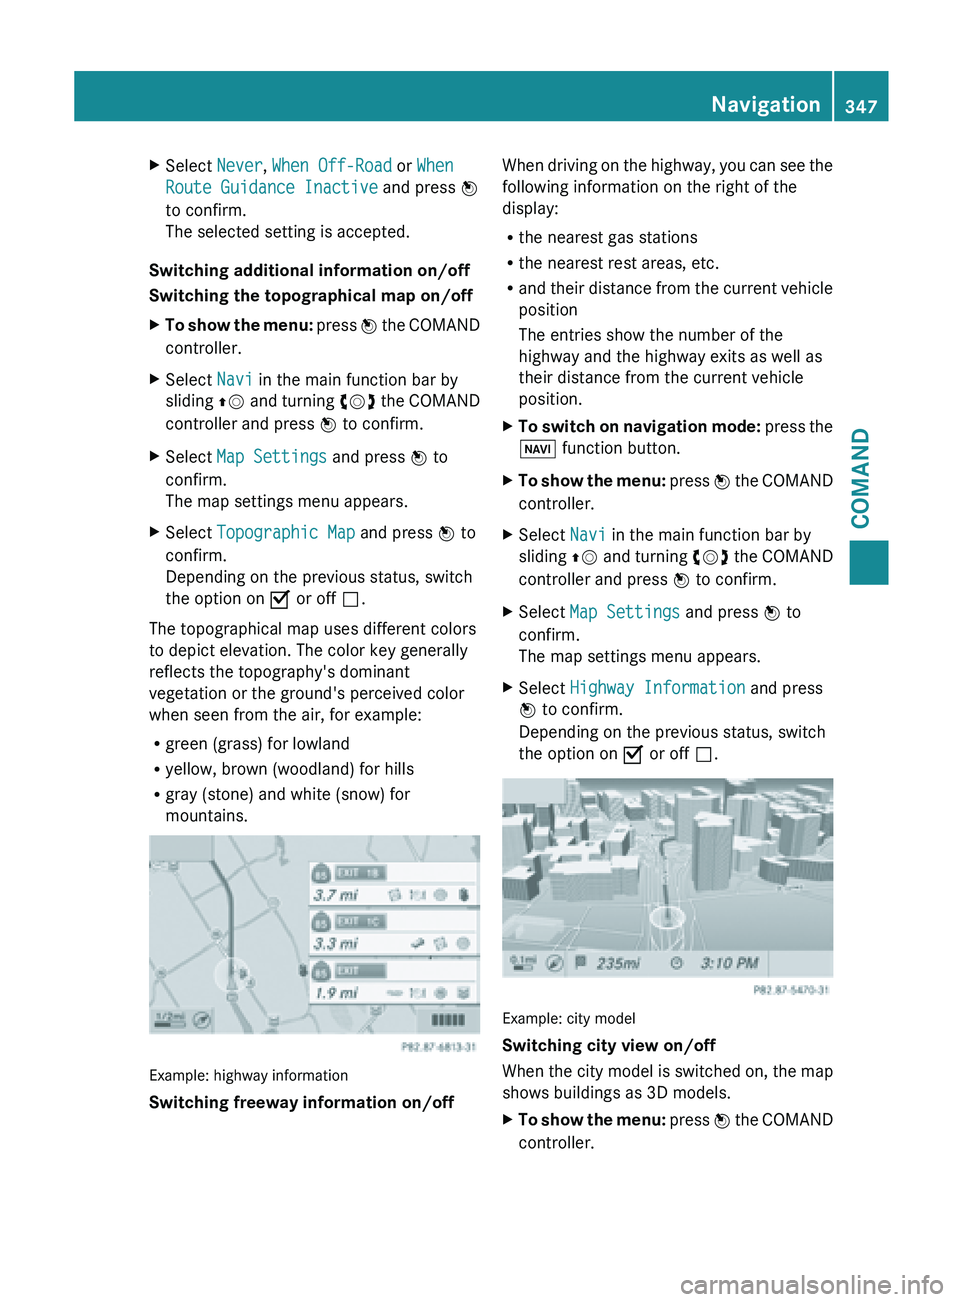
mountains. Example: highway information
Switching freeway information on/off When driving on the highway, you can see the
following information on the right of the
display:
R
the nearest gas stations
R the nearest rest areas, etc.
R and their
distance from the current vehicle
position
The entries show the number of the
highway and the highway exits as well as
their distance from the current vehicle
position.
X To switch on navigation mode: press
the
Ø function button.
X To show the menu:
press W
the COMAND
controller.
X Select Navi in the main function bar by
sliding ZV and
turning cVd the COMAND
controller and press W to confirm.
X Select Map Settings and press W to
confirm.
The map settings menu appears.
X Select Highway Information and press
W to confirm.
Depending on the previous status, switch
the option on O or off ª. Example: city model
Switching city view on/off
When
the
city model is switched on, the map
shows buildings as 3D models.
X To show the menu: press W
the COMAND
controller. Navigation
347
COMAND Z
Page 360 of 572
Slide
XVY or ZVÆ
Press W
R using the 6 or ~ button and using
the telephone keypad on COMAND
R using the 6 or ~ button on the
multifunction steering wheel
R using the Voice Control System (see the
separate Voice Control System operating
instructions)
Unless stated
otherwise, the descriptions and
illustrations in this section refer to COMAND.
Function restrictions The telephone is not ready for use in the
following situations:
R
the telephone automatically tries to log on
to a
network. If no network is available, you
may not be able to make a " 911"
emergency call. If you attempt to make an
outgoing call, the No Service message will
appear for a short while.
911 emergency call G
WARNING
The 911 emergency call system is a public
service. Using it without due cause is a
criminal offense.
The following requirements must be fulfilled
for a 911 emergency call:
R the mobile phone must be switched on.
R a network must be available.
R a valid and operational SIM card must be
inserted in the mobile phone.
R the mobile
phone is connected to COMAND
via Bluetooth ®
.
If you cannot make an emergency call, you
must arrange rescue measures yourself. X
Enter the number on COMAND
(Y page 365).
X Press 6.
The telephone makes the connection.
X Wait until the emergency call center
answers and describe the emergency
situation. Telephony via the Bluetooth
®
interface
Conditions For telephony via COMAND's Bluetooth
®
interface, a Bluetooth ®
-capable mobile
phone is required.
On COMAND
X Activate the Bluetooth ®
function in
COMAND (Y page 292).
On the mobile phone
X Switch on the mobile phone and enter the
PIN when prompted to do so (see the
mobile phone operating instructions).
X Activate Bluetooth ®
functions and, where
necessary, Bluetooth ®
visibility on the
mobile phone (see the mobile phone
operating instructions).
The battery of the mobile phone should
always be kept sufficiently charged in order
to prevent malfunctions.
In preparation for telephoning via the
Bluetooth ®
interface, you should check the
following items
on your mobile phone (see the
mobile phone operating instructions):
R Hands-Free Profile
The mobile phone must support Hands-
Free Profile 1.0 or above.
R Bluetooth ®
visibility
On certain mobile phones, the device itself
must be made "visible" to other devices, as
well as activating the Bluetooth ®
function
(see the mobile phone operating
instructions). 358
Telephone
COMAND
Page 362 of 572
X
Select Search for Phone from
Vehicle and press the W button to
confirm.
A message appears.
X Select Start Search and press the W
button to confirm.
The message Searching for
Bluetooth Phones... appears.
COMAND looks for Bluetooth ®
telephones
within range and adds them to the
Bluetooth ®
telephones list.
If a new phone is found, it appears in the
list with the Ï symbol.
The duration
of the search depends on the
number of Bluetooth ®
telephones within
range and their characteristics.
Symbols in the Bluetooth ®
phone list Symbo
l Explanation
Ï
New mobile phone in range, but
not yet authorized
Y
Authorized mobile phone
#
Currently connected mobile
phone
Ñ
Mobile phone in range and
authorized
Ñ
(gray)
Mobile phone not in range, but
already authorized
The Bluetooth
®
telephone list shows all
mobile phones
within range and all previously
authorized mobile phones, whether or not
they are in range.
i If the Bluetooth ®
telephones list is already
full, you will be requested to de-authorize a
mobile phone ( Y page 362). If COMAND
does not find your mobile phone, external
authorization may be necessary
(Y page 361).
i If you call up the telephone list again, the
unauthorized devices are removed from the list. In this case, start a new search to
update the Bluetooth
®
telephone list.
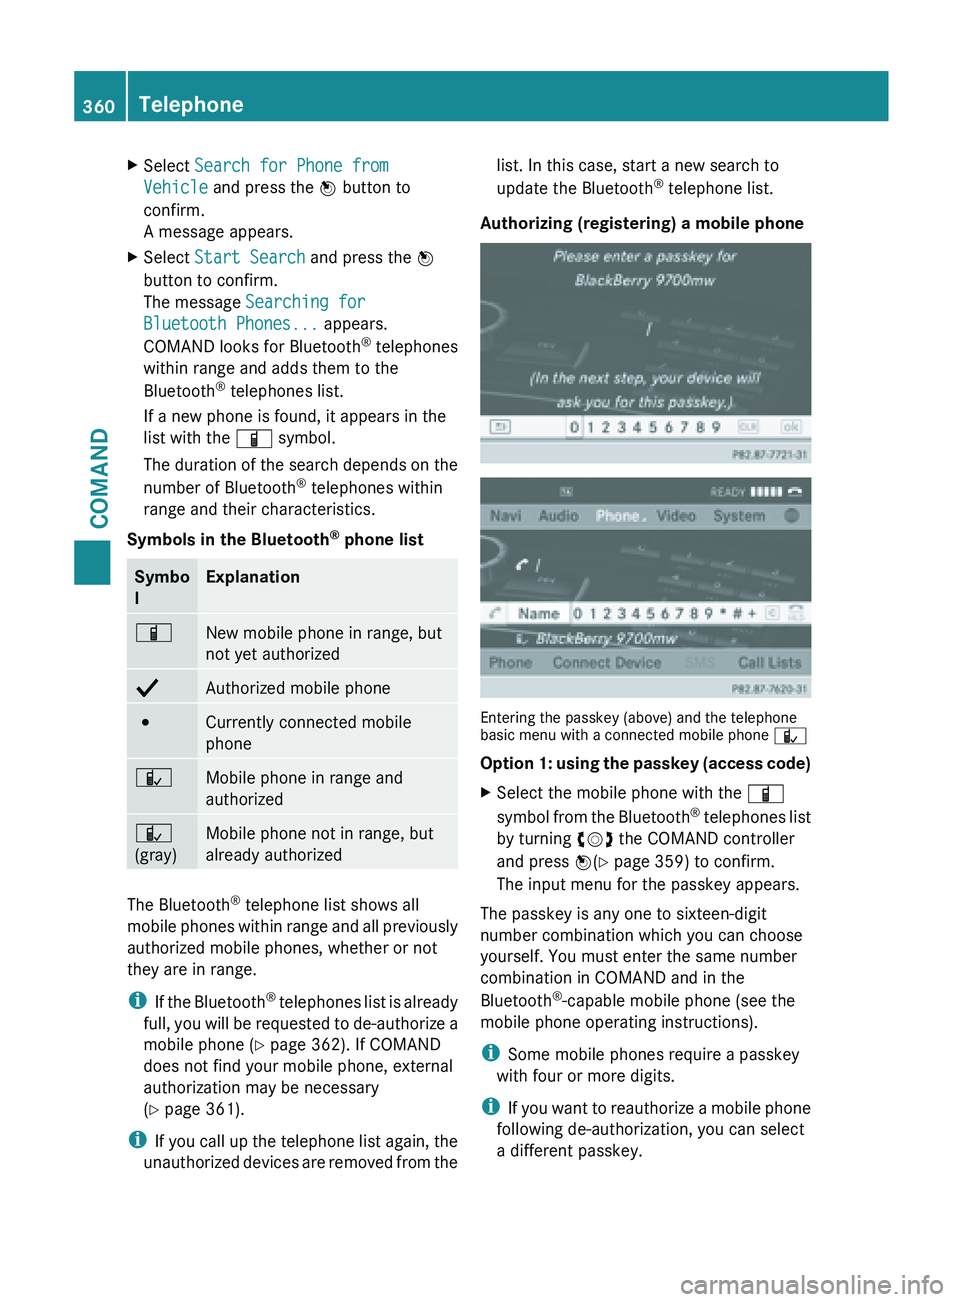
Authorizing (registering) a mobile phone Entering the passkey (above) and the telephone
basic menu with a connected mobile phone
Ñ
Option 1:
using the passkey (access code)
X Select the mobile phone with the Ï
symbol from
the Bluetooth ®
telephones list
by turning cVd the COMAND controller
and press W(Y page 359) to confirm.
The input menu for the passkey appears.
The passkey is any one to sixteen-digit
number combination which you can choose
yourself. You must enter the same number
combination in COMAND and in the
Bluetooth ®
-capable mobile phone (see the
mobile phone operating instructions).
i Some mobile phones require a passkey
with four or more digits.
i If you
want to reauthorize a mobile phone
following de-authorization, you can select
a different passkey. 360
Telephone
COMAND
Page 363 of 572
i
Mercedes-Benz recommends de-
authorization in COMAND and on the
mobile phone ( Y page 362). Subsequent
authorization may otherwise fail.
X To enter a passkey in COMAND: press
the number keys in turn.
or
X Select the digits in the digit bar one by one
by turning cVd the COMAND controller
and pressing W to confirm.
¬ is highlighted after the first number
has been entered.
X In both cases, select ¬ and press W to
confirm.
X To enter the passkey on the mobile
phone: if the Bluetooth ®
connection is
successful, you will be requested to enter
the passkey
(access code, passkey; see the
mobile phone operating instructions).
X Enter the same passkey in the mobile
phone as the one already entered in
COMAND.
The message Connecting Bluetooth
Profiles... appears.
The Authorization successful
message appears once authorization is
completed.
The mobile phone is authorized and
connected to COMAND. You can now make
phone calls using the COMAND hands-free
system.
i After entering the passkey, you may also
need to
enter a confirmation in your mobile
phone to connect calls. Please check your
mobile phone display. On some mobile
phones, this confirmation can be saved. In
this case, you do not need to enter it again.
If the COMAND display shows the
Authorization failed message, you
may have exceeded the prescribed time
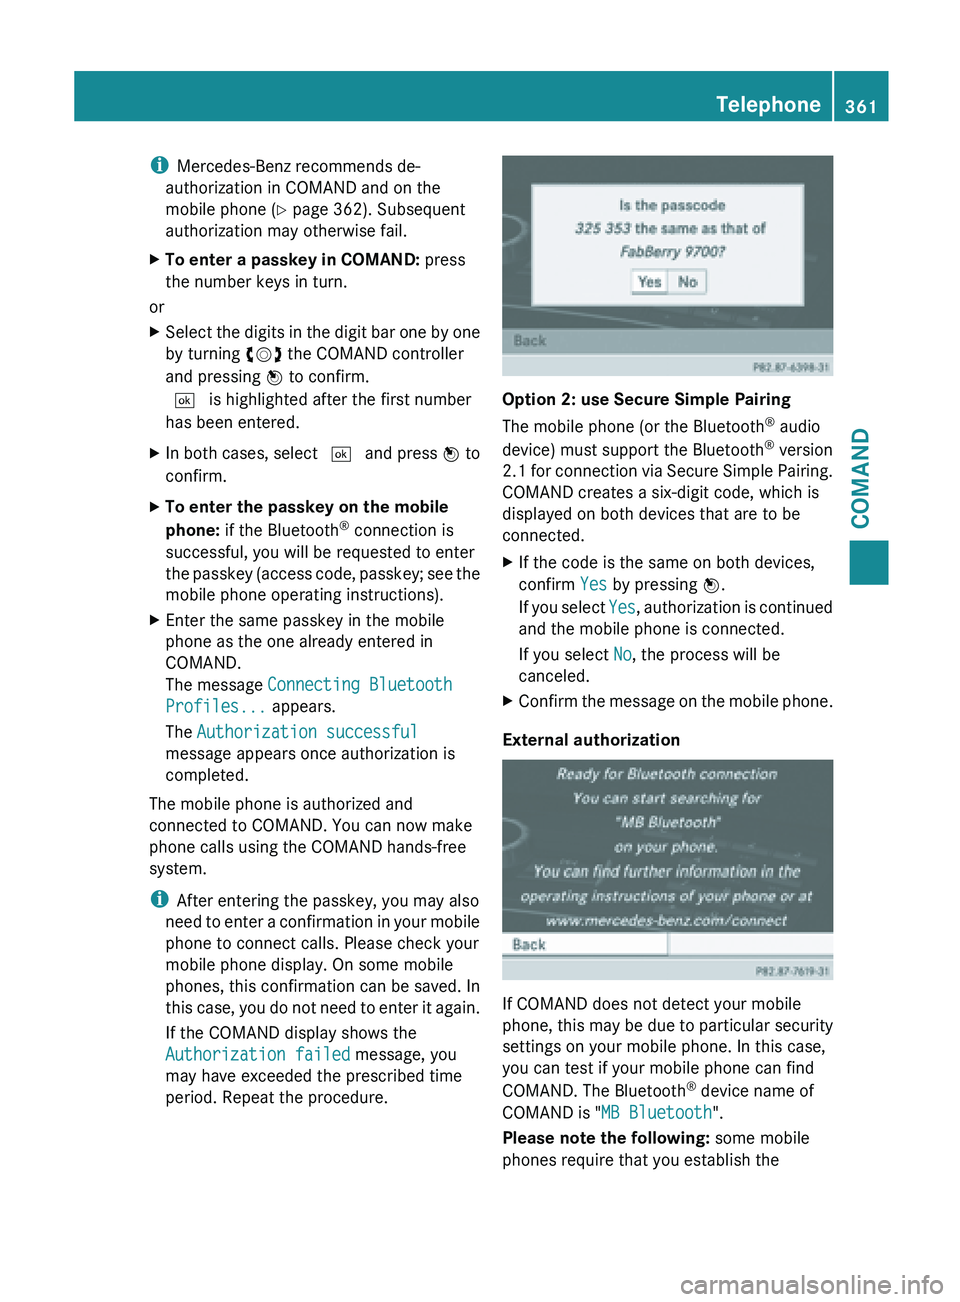
period. Repeat the procedure. Option 2: use Secure Simple Pairing
The mobile phone (or the Bluetooth
®
audio
device) must support the Bluetooth ®
version
2.1 for
connection via Secure Simple Pairing.
COMAND creates a six-digit code, which is
displayed on both devices that are to be
connected.
X If the code is the same on both devices,
confirm Yes by pressing W.
If you
select Yes, authorization is continued
and the mobile phone is connected.
If you select No, the process will be
canceled.
X Confirm the message on the mobile phone.
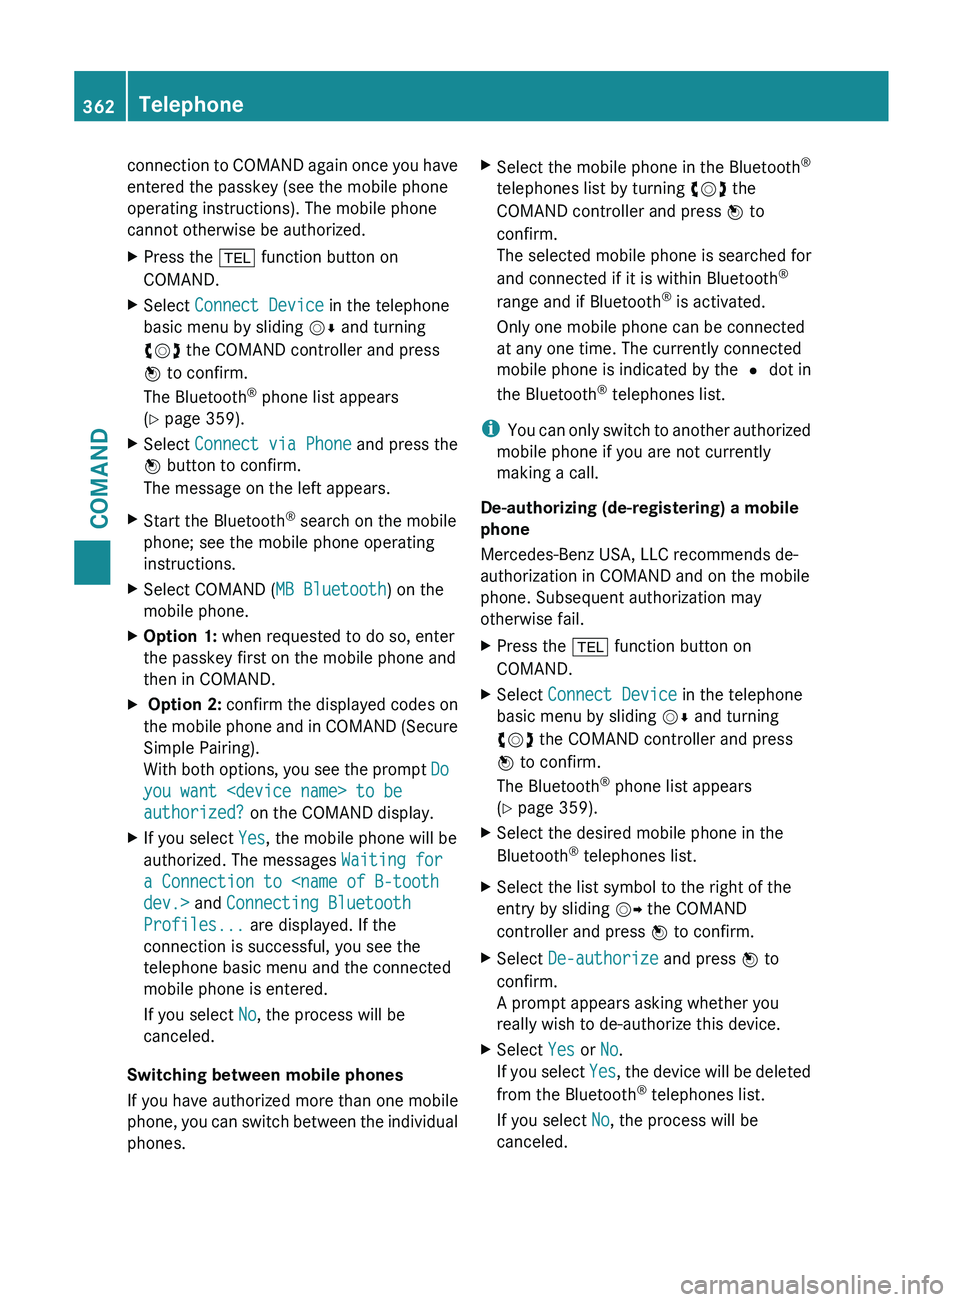
External authorization If COMAND does not detect your mobile
phone,
this
may be due to particular security
settings on your mobile phone. In this case,
you can test if your mobile phone can find
COMAND. The Bluetooth ®
device name of
COMAND is "MB Bluetooth".
Please note the following: some mobile
phones require that you establish the Telephone
361
COMAND Z
Page 364 of 572
connection to COMAND again once you have
entered the passkey (see the mobile phone
operating instructions). The mobile phone
cannot otherwise be authorized.
X
Press the % function button on
COMAND.
X Select Connect Device in the telephone
basic menu by sliding VÆ and turning
cVd the COMAND controller and press
W to confirm.
The Bluetooth ®
phone list appears
(Y page 359).
X Select Connect via Phone and press the
W button to confirm.
The message on the left appears.
X Start the Bluetooth ®
search on the mobile
phone; see the mobile phone operating
instructions.
X Select COMAND ( MB Bluetooth) on the
mobile phone.
X Option 1: when requested to do so, enter
the passkey first on the mobile phone and
then in COMAND.
X Option 2: confirm the displayed codes on
the mobile phone and in COMAND (Secure
Simple Pairing).
With both options, you see the prompt Do
you want
authorized? on the COMAND display.
X If you select Yes, the mobile phone will be
authorized. The messages Waiting for
a Connection to
Profiles... are displayed. If the
connection is successful, you see the
telephone basic menu and the connected
mobile phone is entered.
If you select No, the process will be
canceled.
Switching between mobile phones
If you have authorized more than one mobile
phone, you
can switch between the individual
phones. X
Select the mobile phone in the Bluetooth ®
telephones list by turning cVd the
COMAND controller and press W to
confirm.
The selected mobile phone is searched for
and connected if it is within Bluetooth ®
range and if Bluetooth ®
is activated.
Only one mobile phone can be connected
at any one time. The currently connected
mobile phone is indicated by the # dot in
the Bluetooth ®
telephones list.
i You can
only switch to another authorized
mobile phone if you are not currently
making a call.
De-authorizing (de-registering) a mobile
phone
Mercedes-Benz USA, LLC recommends de-
authorization in COMAND and on the mobile
phone. Subsequent authorization may
otherwise fail.
X Press the % function button on
COMAND.
X Select Connect Device in the telephone
basic menu by sliding VÆ and turning
cVd the COMAND controller and press
W to confirm.
The Bluetooth ®
phone list appears
(Y page 359).
X Select the desired mobile phone in the
Bluetooth ®
telephones list.
X Select the list symbol to the right of the
entry by sliding VY the COMAND
controller and press W to confirm.
X Select De-authorize and press W to
confirm.
A prompt appears asking whether you
really wish to de-authorize this device.
X Select Yes or No.
If you
select Yes, the device will be deleted
from the Bluetooth ®
telephones list.
If you select No, the process will be
canceled. 362
Telephone
COMAND
Page 367 of 572
If the phone number of the caller is
transferred,
it
appears in the display. If there
is an entry for the caller in the phone book,
you will also see the name. If the phone
number is not transferred, Unknown appears
in the display.
i You can also accept a call as described
above when another main function is
switched on in COMAND. Once you have
accepted the call, the display switches to
telephone mode. After the call is finished,
you see the display of the previous main
application again.
The display does not switch to telephone
mode if you:
R press the % back button next to the
COMAND controller and then
R accept the call using the 6 button on
the multifunction steering wheel
Rejecting a call
X To reject: select Reject by turning cVd
the COMAND controller and press W to
confirm.
or
X Press the ~ button on COMAND or on
the multifunction steering wheel.
Making a call With the number keypad
X
Call up the telephone basic menu
(Y page 363).
X Enter the digits using the number keypad.
X To connect the call: press the 6
button on
COMAND or on the multifunction
steering wheel.
Using the telephone basic menu
X Call up the telephone basic menu
(Y page 363).
X Select the digits one by one by turning
cVd and sliding ZVÆ the COMAND
controller and press W to confirm. X
To make a call: select ° in
the character
bar and press W to confirm.
or
X Press the 6 button on COMAND or on
the multifunction steering wheel.
Redialing
X Call up the telephone basic menu
(Y page 363).
X Select ° in the character bar and press
W to confirm.
or
X If the telephone basic menu is displayed,
press the 6 button on COMAND.
In both
cases, the calls dialed list appears.
The most recently dialed number is at the
top.
X To select a call: turn cVd the COMAND
controller.
X To connect the call: press W the
COMAND controller.
Using the call list or COMAND phone book
X Open a call list and select an entry
(Y page 372).
or
X Call up the COMAND phone book and
select an entry (Y page 369).
X To make a call: press W the COMAND
controller or the 6 button.
Making a call via speed dial
The speed dial list contains stored entries
from the phone book ( Y page 374).
Option 1:
X Hold down one of the number keys for
longer than two seconds.
The basic telephone menu displays the
selected entry. This initiates dialing. Telephone
365
COMAND Z